Why You Should Stream Console Games Through a PC

Ever had the urge to stream your console games? Sure, you could stream them from your console directly to Twitch or Mixer, but what if you wanted to stream an older game from a PS3, Xbox 360 or Wii-U? Or maybe you wanted to personalize your stream? By streaming your console through a PC, you’ll be able to do all that. There are distinct advantages to hooking your console up to a PC.

In a previous blog post, we talked about the how. Today, we’ll attempt to talk about the why. Here are some benefits to streaming PlayStation or Xbox games via a PC.
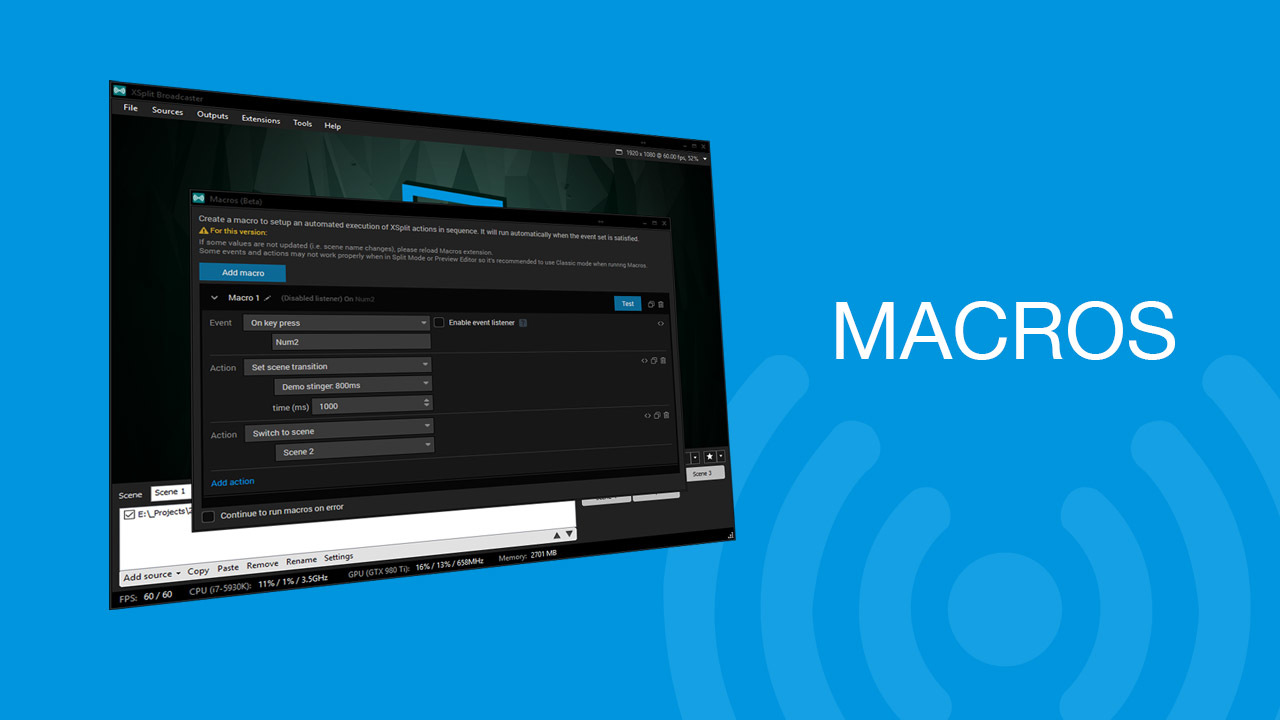
Overlays

When putting your console stream through XSplit, you’ll be able to add a lot of your style and personality into it by adding a custom overlay. Putting an overlay on your stream can really make it stand out from others streaming the same games.

Player.me stream overlay

You could get free pre-made overlays or customize your own over at Player.me.
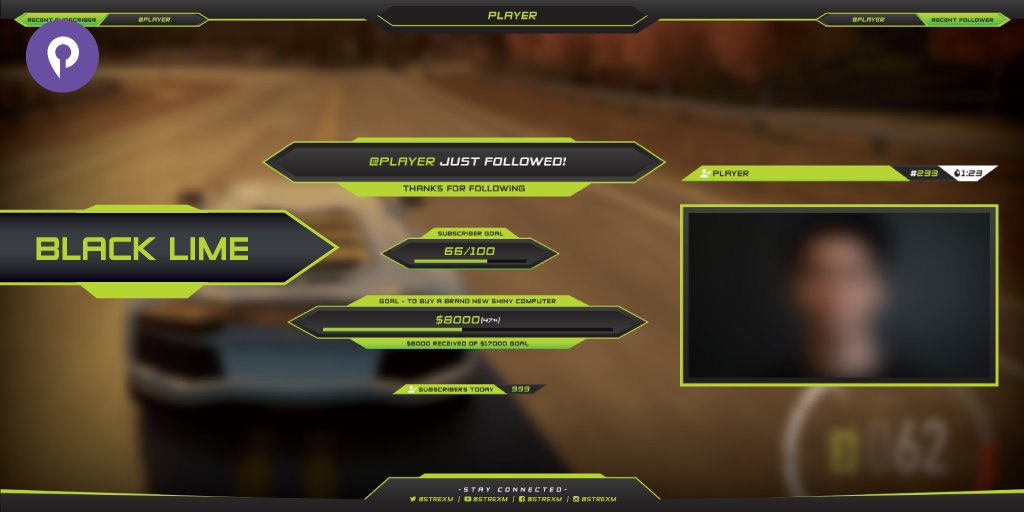
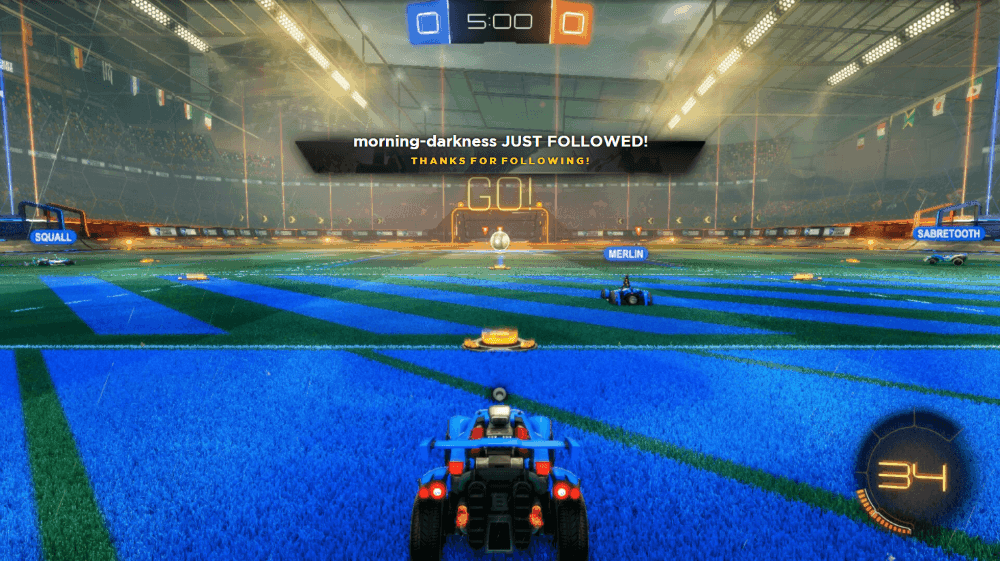
Alerts and Widgets

Whether it’s a donation or a new follower or a new subscriber, alerts are great for everyone involved. It’s a quick notification for you, so you can respond appropriately, and it’s really fun for your audience to be able to interact with you and influence your broadcast in some way. It just gives your stream that much more interactivity.

Twitch Follower Alert

Just being able to add all manner of widgets and apps is a great way of adding that extra layer of fun for your viewers and fans. Whether it’s a chatbot or the ability to customize your chat interface, it makes your stream that much more interactive and enjoyable.

Choice of Gear

With consoles, you’re pretty much stuck using the proprietary equipment these platforms provide and support. On a PC, though, there’s a wider range of choices for microphones, cameras, or other peripherals you might want to use.

Logitech Webcam

Check out some of our hardware partners here.

It might take some work and some extra hardware to do, but you’ll find that there are distinct advantages to capturing your console gameplay and streaming from a PC.

Got any more questions? Let us know in the comments below!

How to Stream with Elgato Stream Deck

Elgato released Stream Deck just recently (2017) but it didn’t take long before it gained popularity for content creators. While not a must-have, It has become an integral tool for people who want to be able to do more with their stream. This post is a step-by-step guide on how to use the Elgato Stream Deck with XSplit Broadcaster.

How to stream using Elgato Stream Deck

First of all, make sure you have the latest version of both XSplit and the Stream Deck software from Elgato.

XSplit Broadcaster and Elgato Stream Deck software

Once you have both installed and have XSplit opened, you will have an extension called the “Elgato Stream Deck” which will allow XSplit to interface with the hardware. Open the Elgato software as this is where you will set things up for controlling various elements of your stream in XSplit Broadcaster.

Elgato Stream Deck

The procedure is very similar with every function that you want to set up. It mostly involves assigning the function to a button, labeling and adding a thumbnail to each, and then setting up the specific options for each functions. Here’s how to set them up.

Scene switching

This is a pretty handy option if you want to do scene switching via your Stream Deck.  To start, drag the scene function to a button in your Stream Deck. In the bottom menu, you can name it and select which scene it goes to when pressed.

Toggling sources

If you want to enable or disable your scene sources, then this is the option for that. Drag the source function to the layout then at the bottom, select the source that you want to toggle. There is a ‘toggle linked sources’ option too for sources that are linked between scenes. This allows you to toggle sources regardless if the scene is active or not.

Record/Output

This option allows you set up recording and streaming on your Stream Deck. The procedures are pretty much the same and the only difference is with Outputs where you will select where you want to output your stream if you have more than 1 channel to output it to.

Microphone/Speakers

You can also assign a function to your Stream Deck that can toggle microphone or speaker audio and they work pretty much the same. For microphones, there is an added option for push to talk should you wish to set it up like that.

Hope this guide helps you with setting up Elgato Stream Deck with XSplit Broadcaster. If you’re already using it, we’d love to know how you’re utilizing it. Share it in the comments section below.

Help us Build the Future of Streaming

We’ve been in the streaming space for a long time now as I’m sure some of you are aware. It really has been an enjoyable ride for us, learning and figuring out a lot of things, seeing how the market evolves and generally just being amazed with its continuous growth.

Looking back, a lot has changed in the market since XSplit (or the company SplitmediaLabs) started. When we began, there was no Twitch.tv yet, YouTube didn’t have live streaming capabilities and there wasn’t really any product anyone can say specializes in live streaming. Most people at the time were doing stuff mostly with their webcam and nothing else.

The present? You guys need no introduction with what’s possible right now. We’re all aware of how much things have changed and improved. And we know it’s just the start and there’s still so much potential to fulfill.

As a pioneering force in the market, we’ve always been proactive in trying to find and bring cutting edge technologies that can help content creators better their craft. Our newest project, CrowdLabs is all about bringing endless possibilities while involving you as part of the family. Watch the video below to learn more:

All you need to do is send us your gamer face footage through the CrowdLabs page and we’ll do the rest. And yes as you saw, we are giving away daily prizes amounting to a total of $3,000. Whether you’re in for the thrill of the project or you just want to win the prizes, or both, this project is for you.

XSplit 3.3 – Macros, Multitrack Audio and more!

If XSplit 3.2 was the fastest XSplit ever, version 3.3 is more about flexibility, adding important new features and options to a streamers toolbox. This update for both XSplit Broadcaster and XSplit Gamecaster will pave the way for more exciting features and improvements down the line. Here’s a quick video summary about XSplit 3.3

A quick shout out to those who have been providing us feedback with our PTR releases. Your efforts help us ensure that our final releases are of the highest quality, and we couldn’t have done it without you.

The biggest feature of this release by far is Macros, which allows you to setup a variety of automated actions that can be triggered in variety of ways.There’s a lot that can be done with this feature and we have actually already demonstrated some in our Macros blog post. We highly suggest you to check this out in case you haven’t yet

Another highly requested feature is the ability to separate microphone and system audio in recordings which is also now possible in this version. This provides more flexibility for post processing your recordings using third-party applications. This feature is also available in XSplit Gamecaster along with some other nice additions such as Mixer chat, follower and subscriber alert, and Twitch Cheers support.

For the full list of new features and bug fixes in this update, refer to the release notes for XSplit Broadcaster and XSplit Gamecaster. We’re excited to hear your feedback and as always, happy streaming!

How to Stream to Mixer With XSplit Broadcaster

Mixer has grown since its days as Beam and the underlying technology behind it is still as exciting as the first time we saw it. FTL allows streamers to have next to no latency between them saying something and their audience hearing it, and with XSplit it couldn’t be easier to take advantage of this. So, friend, let’s take a look at how you can stream to Mixer with XSplit Broadcaster.

How to Stream to Mixer with XSplit Broadcaster

To get started with Mixer you’re going to need to set up an account, which is easily done on https://mixer.com. Next, open XSplit Broadcaster and select the Outputs tab at the top of the window.

XSplit Broadcaster Outputs Tab

Select “Set Up New Output” and then Mixer. From here you’ll be asked to enter your Mixer credentials which will have you sign in to the account you just created. From here XSplit will work everything out for you and let you know your recommended stream settings.

XSplit Broadcaster Channel Setup Wizard

The next window that opens up will have all your settings filled out, if you have a good enough connection you can also check the “Use FTL (Beta)” button which will allow you to take advantage of Mixer’s low-latency FTL streaming protocol.

XSplit Broadcaster Mixer Properties

Once you click okay, your account will be added and you can now stream directly to Mixer from XSplit Broadcaster which will have your Mixer account ready to go in the Outputs menu!

Now you’re all set up, enjoy streaming and let us know how you get on!

How to Record Gameplay with XSplit

XSplit applications can do more than just stream. Did you know that both XSplit Broadcaster and Gamecaster can record gameplay? Here’s how to do it:

Recording Gameplay with Gamecaster

1. Settings

Click the “Settings” tab on the top menu, and from there you’ll find “Record Settings” on the right. By default, the settings are set to automatic. This means that all your settings are optimized based on your hardware. And, if you want to customize your settings, select Custom.

Gamecaster record settings
Gamecaster custom record settings

Resolution – This allows you to set the resolution you record your gameplay at. The higher the resolution you pick, the more upload bandwidth and CPU usage are required.

Codec – The available codecs will be dependent on your PC’s hardware. x264 is the recommended codec, provided that your CPU can handle it.

Framerate – Choose between 30 and 60 FPS. Higher FPS uses more resources.

Quality – Choose among Standard, High, Very High, and Ultra High. The higher the quality, the better your recording will look but the file size will also be bigger.

Split – You can split your recording files by either time or size.

For more information on the specifics of these settings, check this video out.

2. Starting Your Recording

To begin recording your gameplay, start up your game and then press ‘CTRL+Tab’ to launch the XSplit Gamecaster overlay.

XSplit Gamecaster record overlay

Click on Record to start recording. You’ll see a small notification on the upper left side of your screen to let you know you’re recording.

small recording icon notification

3. Finding Your Files

On XSplit Gamecaster, find your recordings by clicking on, aptly enough, “Recordings.”

XSplit Gamecaster recordings

In there, you’ll find all your clips, and see details like the date recorded, the format, the video length, and the file size.

From there, you’ll be able to rename or delete your clips or share them directly on YouTube, Facebook, Twitter, or Player.me .

Recording Gameplay with XSplit Broadcaster

Make sure you’re using the latest version of XSplit Broadcaster to get the best performance possible.

1. Settings

For the resolution and framerate, those settings can be adjusted from the upper right-hand corner of XSplit Broadcaster.

XSplit Broadcaster resolution settings

With XSplit Broadcaster, you can fully customize your resolutions and framerates. Again, you have to keep in mind that the larger the resolution and the higher the framerate, the larger your file size will become.

To adjust more properties, click on Outputs from the top menu. Then click on the setting icon that is next to “Local Recording.”

XSplit Broadcaster outputs menu
XSplit Broadcaster local recording properties

From there, you’ll be able to change the video codec, the quality of the video, the audio bitrate, the audio format, the output file type, and file splitting. For more information, check out this video.

2. Add a Game Source

XSplit Broadcaster adding video source

To specify what game you’re recording, you have to add a video source. If your game runs on OpenGL or DirectX 9 – 12, add a video source by clicking “Sources” on the top menu and select “Game capture,” then either select your game or pick “Auto Detect.”

Alternatively, if your game doesn’t run on OpenGL or DirectX 9 – 12, you can select Screen Capture instead.

For more details on this, check out the XSplit Broadcaster Manual.

3. Start Recording

To begin your recording of the game, go to “Outputs” from the top menu, and click on Local Recording.

XSplit Broadcaster local recording menu

To stop recording, click on that again.

4. Finding Your Files

To find your recordings, click on “Tools” from the top menu. In the dropdown, select “Recordings.”

XSplit Broadcaster recordings

That will open a window where you’ll be able to delete, rename, or upload your file.

And there you go! That’s how you record your games via XSplit Gamecaster and XSplit Broadcaster. Simple, right? Now, go out there,  play some games and record them using XSplit.

Questions? Write us in the comments section below and we’ll be sure to respond.

How to Use Macros in XSplit Broadcaster

Macros are a powerful new feature in XSplit Broadcaster 3.3. Macros allow you to set up a variety of automated actions that can be triggered in a variety of ways. In the guide, we’ll show you some examples of how you can use Macros to expand your production capabilities.

Using Macros to Set Per Scene Transitions

If you’re a  fan of using various transitions and stingers between your scenes, you can streamline this process using macros. Select “On key press” as your event and select your hotkey. For the first action select “set scene transition”  and choose your transition or stinger for the scene. Next, add the “Switch to scene” transition and pick the scene you wish to apply the transition to. Now when you use the hotkey, you’ll switch to the scene with your preferred transition.

Automating a broadcast

If you’re looking to set up an automated broadcast, say running a greatest hits show with pre-recorded clips, macros make this easy to set up. This setup will require setting up various macros that will work in conjunction with each other. For the first macro, set “on scheduled time” as the event and select the time you wish for your stream to start. Next, add an action to “start/stop broadcast” and select the channel you will stream to, and select start. Now add an action to “switch to scene” that will play the first recorded clip in your broadcast.

Now you will create another macro where the event is “when a media source stops” and select the video file from the scene you select in the first macro. Add another action to switch to the scene for the next video in the broadcast. You can duplicate this macro over and over for however many files you have in your broadcast. For the ending of the broadcast, create a macro with “when a media source stops” as the event and select the scene with the last video in your broadcast. Add an action to stop your broadcast and congratulations you’ve set up your own automatic broadcast!

IRL Broadcasting

The production quality of IRL streams has grown by leaps and bounds over the last year. Many people have built custom backpacks that stream to RTMP servers that can be used in conjunction with streaming software to add their favorite streaming widgets. The problem that arises is that it can be hard to access a PC while streaming to shut off streaming software. Macros can be used to alleviate this pain point. First, create a macro with “when a stream source goes online/offline”  as the event. Next, select the scene and RTMP or RTSP source and select online. For the action, select start broadcast and choose the channel you will be streaming to.

Since IRL streaming depends on cellular signals, you will have temporary interruptions of service which will affect the stream feed. To prevent your stream from constantly going offline, setup up your going offline macro the same way as the online macro, but add a wait action before the stop broadcast action. The stream will only end if the stream is offline longer than the wait period. That’s all there is to automating IRL Broadcasting with macros

Toggling Sources Via Hotkey

One of the most requested features by users is the ability to toggle their sources via hotkey, but this is now possible with macros. Start by setting the event action to “on key press” and selecting your hotkey. For action pick “set source visibility”, select the source you wish to toggle, and set the action to toggle visibility. Make sure to enable the event listener and you’re ready to go.

Streamlining Advanced XSplit Presentations

Macros allow you to group a variety of actions in a production so that operations can be as easy as one click. For example, when running video ads, it is very easy to miss the cue of when to switch scenes at the end of the ad or muting microphone audio so that casters don’t speak over the video. To automate this add a macro and select “When a media source stops” and select the scene and your video ad. Then add an action “switch to scene” to choose the scene you’d like to switch to when the ad finishes. You can use this in conjunction with the per scene audio extension to ensure the microphone input from casters is muted.

This was just a small sample of the possibilities with Macros. We encourage experimentation and if you’ve created some cool macros make sure to share them with us on social media! Happy streaming #XSplitFamily!

XSplit Features You May Not Know About

XSplit is a pretty robust tool. It’s easy to use from the get-go, but if you dig a little deeper, you’re going to find that it has way more to offer than what may be immediately obvious.


Stingers

One of the most effective ways of improving the overall production quality of your broadcast is to add stinger transitions. Even if you don’t know how to make one yourself, you could always use the stinger creator in XSplit with GIFs.

To make a stinger with a GIF, you first have to change the file extension of your GIF from .gif to .mov. You may need to adjust folder settings on Windows to make it file extension names visible and editable. Once you have a .mov file, add it to the XSplit stinger creator. You’ll have to set the transition point or length of the stinger based on how long the .gif is. Click convert and then test it out until you’re happy with it.


Favorite Transitions

One of the most overlooked features is the “favorite transitions system.” If you’re running an eSports production or just have a ton of transitions, favoriting various transitions lets you access them by right clicking scenes rather than picking them out of a dropdown menu. It just makes everything faster.


Presentation Packager

The XSplit Presentation Packager makes it easy to transport your streaming configurations from one PC to another. Super handy for when you stream when you travel or your streaming venue changes from event to event.

The presentation package extensions packages all your image and video files along with your presentation into a .zip file.

Save it on a thumb drive and you’re good to go. Use this in junction XSplit streaming settings cloud saves and you’ll be able to broadcast from practically anywhere.


Elgato Stream Deck

If you’re an Elgato Stream Deck user, then you’ll be happy to know that it works very well with XSplit. We’ve worked closely with Elgato to offer a wide variety of controls for the stream deck. In addition to standard scene switching and streaming controls, you can also toggle sources and mute/unmute audio sources.


Adaptive Bitrates

Everyone experiences bandwidth fluctuations while streaming, and it can be quite the challenge to adjust bitrate settings on the fly while gaming and having to restart your stream can lead to viewer loss.

Instead, you should just enable adaptive bitrate. Enabling it removes the frustration as the bitrate will automatically adjust to your available bandwidth and keep your stream live and lag-free.

To enable adaptive bitrate, simply go into your extra encoding settings for video.


24/7 Support

Being an XSplit user means you get access to our support team, on hand to answer your questions 24/7. If you need help with anything, just drop them a line.

How to Stream to YouTube Live Using XSplit

YouTube Live is blowing up and is becoming quite a popular live streaming platform. People have been carving out their core audience on YouTube Live, just like they would on Mixer or Twitch.

Streaming to YouTube Live using XSplit is crazy easy. Here’s how to do it.

First, you would need to set up your scenes and settings on XSplit Broadcaster or Gamecaster to your liking. If this is your first time setting them up, there are tutorials over here.

Once you’ve got all your scenes, settings, and alerts set up the way you like it, you want to connect XSplit to YouTube Live.

  1. Click on Outputs, scroll down to “Start a new output” and select YouTube Live.

XSplit Broadcaster YouTube Live Set-up

2. This screen will pop up. Go ahead and click “Authorize”

XSplit Broadcaster YouTube Live Properties

3. That will pop open a Google log-in interface. Sign in with your YouTube email and password. If you’ve enabled two factor authentication, Google will ask for that second confirmation.

XSplit Broadcaster YouTubeLive Authentication and Permissions

4. After signing in, you will need to allow XSplit to access certain things on your YouTube account. Don’t worry, it’s completely safe and secure.

XSplit Access to YouTube Account Permissions

5. All your channel details will automatically get filled in by YouTube Live based on your settings but you could just go ahead and change them right on the interface below.

YouTube Live Properties Change Settings

6. At this point, you’re pretty much all set. But there are a couple things you need to check.

You have to make sure that streaming to YouTube Live is enabled on your channel. To do that, simply go to YouTube, click on your user icon, and click on Creator Studio.

YouTube Creator Studio

Click on Channel Settings and make sure Live Streaming is enabled. Before you can go start your broadcast on YouTube Live though, you’ll need to go over a few more options like DVR and changing latency settings.

YouTube Channel Settings

YouTube Broadcast Event

And that’s it! You’re good to go!

There are a ton of other options you can play around with like the video below. Make sure to check us out on YouTube because we’ve got a ton of other tutorials there that might help you out.

Good luck and have fun streaming!


XSplit Tutorial Videos 2018

Do you know the ins and outs of the XSplit apps? Whether you’re an expert or someone who’s just starting out, there’s always something new to learn.

XSplit Broadcaster and Gamecaster, on the surface, are designed to be intuitive. If you dig deeper into it, you’ll quickly find that there are capabilities and features that you should really be taking advantage of.

Check out all of our tutorials and step up your XSplit game.

The tutorial playlist covers everything from how setting up and getting started all the way to advanced production techniques.

Got any questions? Let us know in the comments below. And if you’re still having trouble, get in touch with our support team. They’re available to help you out 24/7.