Chris is the Communications & Content Editor here at XSplit. You may find him voicing tutorials, on stage at events around the world, or right here on xsplit.com. Find him at chrisslight.net
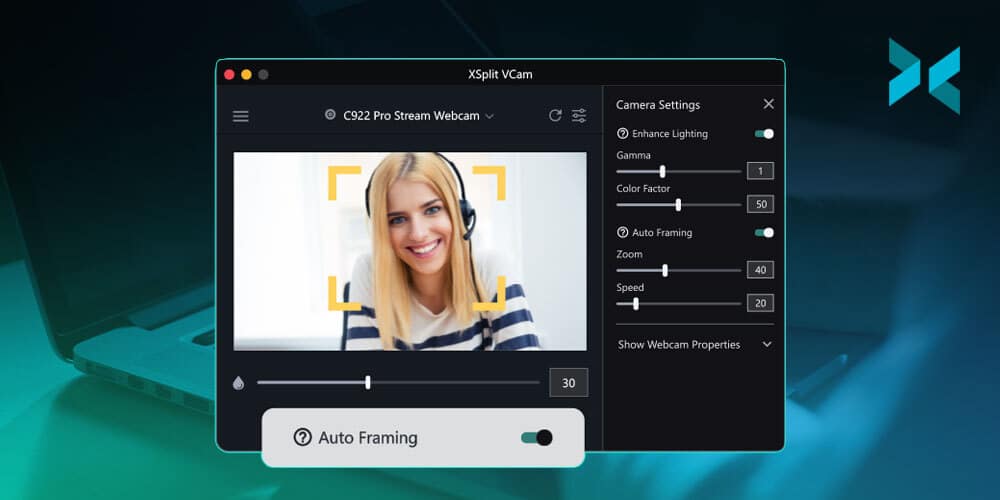
The latest version of our industry-leading, AI-powered background removal software, XSplit VCam, is available now! VCam 4.0 brings an overhauled design and some new features to help with your remote work, video conferencing, or anything where virtual backgrounds might be helpful!
XSplit VCam 4.0
The new design helps you do everything faster by making all the features you need easily accessible. We’ve expanded the settings menu so you can easily customize your experience and introduces some new features!
First up, we now have multiple custom watermarks which expands on our custom watermark feature. Custom watermarks can also now easily be anchored to a point on the screen with various anchor points, making it easier to position your lower third or company branding.
We’ve also added an enhanced lighting feature, which will automatically adjust how your camera looks based on the lighting conditions. Again, you can fully customize and control how this all works in the settings.
These new features are on top of the usual improvements, bug fixes, and more that you’d expect from a new release!
A lot of developers and publishers have taken advantage of being able to stream directly to their game or sale page. Streaming on Steam allows you to show off your game in a live, or pre-recorded, manner directly on the buy page. While the steam client will enable you to stream raw, live gameplay directly, you’ll need software if you want to add some post-production or live elements like your camera. This is where XSplit Broadcaster can help!
How to stream to Steam
As we mentioned, we will be using XSplit Broadcaster as our software of choice. But before we get set up there, you’ll need some information from Steam. First, check your Steam page here where you can get your Upload Server address. You’ll need this later in XSplit Broadcaster. You will also need your RTMP Token, which can also be found on this page.
On this page, you will also need to enter your appID. Your appID can be found by heading to your games page. The appID is the series of numbers in the page’s URL. You will also want to check your Broadcast Permissions. This will be set to Friends Only by default, so you must set this to Public when you stream live to Steam.
The next step is setting up XSplit Broadcaster, so you’re ready to stream. Straight out of the box, XSplit Broadcaster will easily set you up for a stream with your gameplay and a camera source. You can, from here, easily customize everything to be exactly how you want it—easily importing alerts and anything else you might want from a live stream. We’ve detailed how easy getting started can be in the video below.
Next, you’ll want to set up your Steam broadcast using the info we gained above. For this, you’ll want to set up a Custom RTMP stream. So, first up, navigate to the Broadcast menu > Setup New Output > Custom RTMP. From here, you’ll want the bits of information we gathered above, so your Upload Server address will go in the RTMP URL box, and the Upload Token will go in the Stream Key link.
You can choose to change the settings for your broadcast, but XSplit Broadcaster will run checks before your first stream and set these for you based on your system and internet speeds. We recommend setting your bitrate to around 3500kbps for a 1080p stream, but the maximum you can use on Steam is 7000kbps, so it depends on your upload speeds.
You just need to click “Ok,” and you’re ready! It is that simple to stream your game to your steam page!
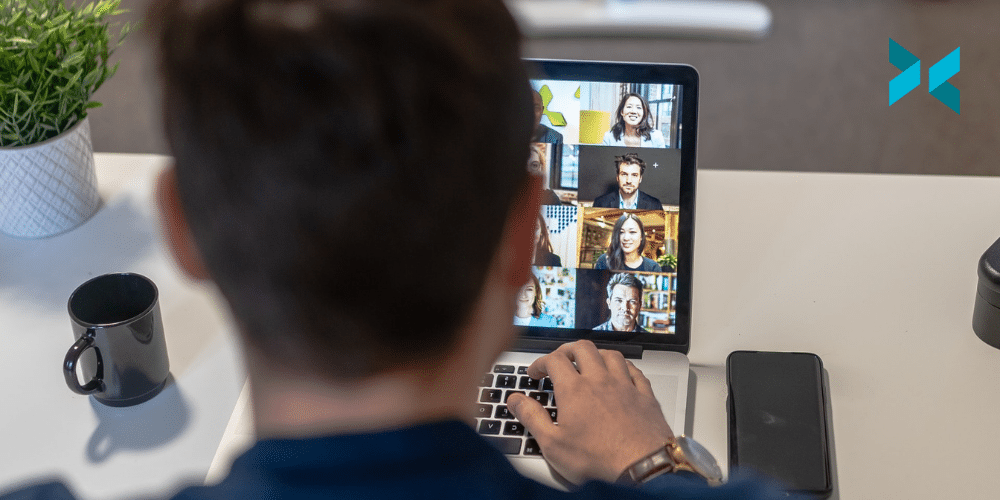
Virtual meetings have become more and more common over the years. With hybrid work becoming more regular and some people fully transitioning to working from home, they have become essential. Hopping on a Zoom call or into a Slack space has become essential to staying connected and coordinated with your team. It’s still easy, however, to fall into some of the same problems that made meetings something people would dread. So, let’s discuss how to run an effective virtual meeting!
Prepare for your virtual meeting
“This could have been an email” is one of the familiar cries you’ll hear after many virtual meetings. A lot of this is down to a lack of preparation. People will tend to have a vague idea about what the meeting should be about “we need to discuss this project,” which will be all the prep they do. This will only lead to a vague chat with some people not even sure why the meeting is happening.
The best remedy is to write out a full agenda for your meeting beforehand. In bullet points, type up everything you want to discuss. This will help guide the discussion, and it can help everyone prepare for it. Also, it can tell you if this indeed needs to be a meeting. Only have one thing you need to let people know? Maybe that is an email after all!
We mentioned helping others prepare; using something like the Google suite for your virtual meeting will really help with this. You can type up your meeting notes and add them to a calendar event you create. This calendar event can also be the link to the call, meaning everything is linked. Now, everyone can see a few days in advance what is going to be discussed in the meeting. This is also great for setting expectations, as people will know what they are meant to bring to the virtual meeting.
Also, be sure to set how long the meeting will be. Don’t block off an hour thinking you’ll only need half an hour. Respect people’s time and your own! Try to use the exact amount of time you need. However, one thing you should prepare for is allowing time for conversation.
It’s not a bad idea to consider having a set amount of time, 10 minutes or so, for people to catch up. With remote teams or even hybrid ones, these meetings can be the time when people get to connect. It will more than likely happen anyway, and not having it scheduled can lead to it running into the time you had planned to discuss things.
Another option would be if you really don’t have the time to set aside, plan to make that time available to people. Make sure it’s during work hours, but having a weekly catch-up can be great for team morale. This could even take the form of a virtual water cooler or break room. Slack will let you set up drop-in audio channels where anyone can come in and say hello. These can provide these spaces for people working remotely!
During and after the meeting
Designate someone to take notes! It’s important that notes are taken for a few reasons. Thanks to things like XSplit Broadcaster, a meeting can be easily recorded. However, it is still essential to take notes. The main reason is to designate responsibilities agreed upon during the meeting. So, for example, you’ve agreed that it will be your job to file a report? Note it down.
You can then take these notes and, in a Google Document, tag the relevant people. They will then receive an email letting them know they are tagged. From there, they can see a reminder of the area of responsibility they agreed to take on. This makes life easier for everyone as nobody has to remember everything, it’s all there and easily accessible.
Make sure you keep track of the time. Whoever is leading the meeting should watch how time is moving along. Be sure to move points along as needed and keep the discussion on track. The chances are everyone else has somewhere else they need to be after the meeting. For this to happen, the meeting now needs to stay on time. If something feels like it needs further discussion, you can always take time at a different point to discuss this. Or it could be something to discuss separately or even in an email!
Virtual meetings don’t have to be tough or feel like a waste of time. Using some of these tips, you’ll get a successful meeting running in no time. The point of a virtual meeting, after all, is for everyone to leave more informed than when they joined the meeting. Decisions have been made, and discussions have been had. Nobody wants to think “this could have been an email” again!
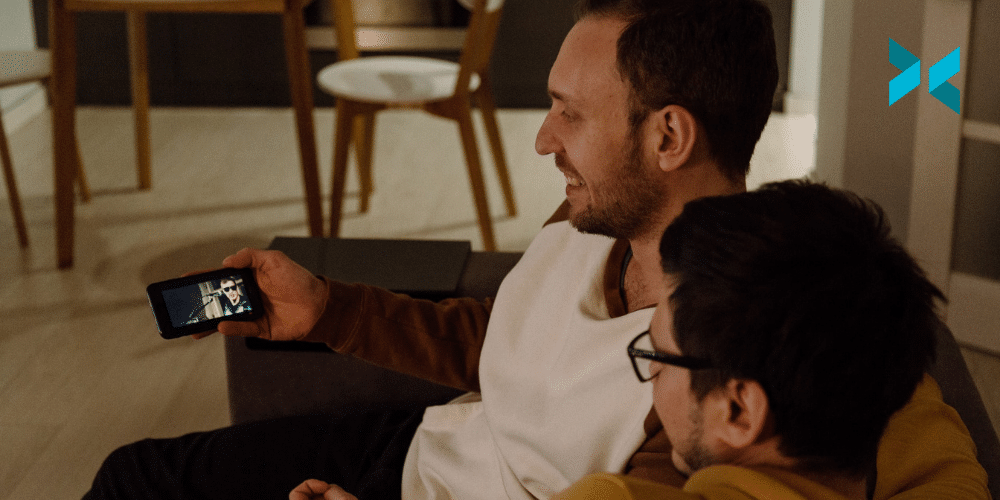
Since more and more meetings have been remote and online, we’ve become familiar with Zoom backgrounds. For those who don’t know, many people opt to remove and replace their zoom background. This means you’re now using a virtual background for your webcam shot rather than whatever happens to be behind you. This can be useful for a number of reasons. Maybe you are sharing the space you’re in with others? Perhaps you just don’t fancy cleaning up your spare room before the weekly check-in?
Best video Zoom Backgrounds for calls
We’ve got a nice list detailing some great still image backgrounds you can use for your next call, but what about video? Well, it just so happens that you can use YouTube videos in XSplit VCam as your background. XSplit VCam uses AI to remove and replace your background, keeping things consistent across all call platforms beyond just Zoom. It will, in fact, work with anything that accepts a camera feed!
All you have to do to use these videos is once you’ve downloaded VCam, click “Add Background” and select YouTube Video. From there, you can just paste the link in! You can also use videos from your computer if you have some you’ve made yourself!
The videos we’ve selected here are mostly animated soundscapes but don’t worry. The sounds won’t come through in VCam, just the video! The advantage we found was that these videos are pretty long, so whatever length of call you are in, these should do the job! Also, as a bonus, these videos are pretty great for relaxing or studying, so they work outside of being a video background for Zoom! Be sure to give these videos a like if you end up using them as Zoom backgrounds!
Video Backgrounds for Meetings
https://youtu.be/sZdgGAlp_A0
Sci-Fi and Fantasy Backgrounds for Zoom Calls
These backgrounds may not be perfect for every meeting, but they are still pretty fun nonetheless as virtual backgrounds for a zoom call.
Hopefully, these add a bit more to your calls without being too distracting as Zoom backgrounds! Using them with XSplit VCam, as we noted, is easy! You can check out XSplit VCam for free by heading over here and downloading the app today!
For a lot of people, a webcam is second only to a microphone when it comes to streaming gear upgrades. While the built-in camera on your laptop might work for a while, when you start getting more viewers you might want to level up. So, let’s discuss the best webcam for streaming that you can buy right now!
What makes the best webcam for streaming?
So what are the things we’re looking for in the best webcam for streaming? Ideally, we’re looking for a 1080p image, a microphone built-in, and a fairly wide angle on the lens. Why do we want these things? Well, while we’re going to see some cameras that can go above 1080p that’s about the minimum you want to go if you’re looking for an upgrade. This will give you a relatively sharp image that you can go full screen with for a just chatting screen.
Having a half-decent microphone isn’t a bad thing to have as that can be useful if you’ve yet to upgrade your audio. It’s also useful if you’re running a virtual talk show, something we discussed before, or just having guests. This is now a second mic source you can use in sources like Discord or Zoom that doesn’t have to go out to the stream but can communicate to guests with. Not essential, but useful to have.
Finally, a fairly wide lens will let you zoom in on shots as you like with a bit more ease. It can also be great to just get that nice wide-looking shot some streamers have showing off more of their background. With all that said, let’s take a look at some of the best webcams for streaming!
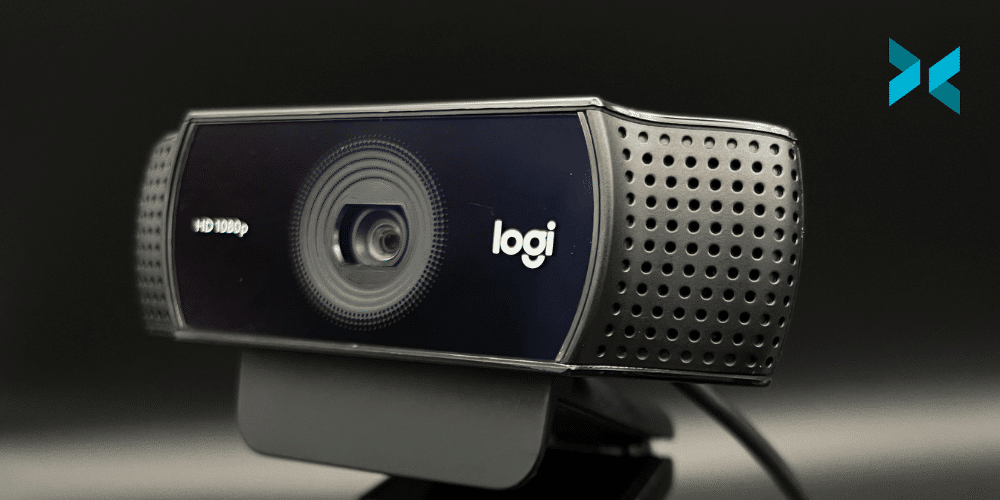
You won’t be surprised to see the Logitech C922 here, it’s become one of the streaming go to’s, and for good reason! With a 1080p 30fps camera (which can go to 60fps if you drop down to 720p) this tends to be the shot you see a lot of streamers with. Not only that, but it has a 78-degree viewing angle and a pretty decent built-in mic. This webcam ticks a lot of boxes and the C922 even comes with a three-month XSplit Premium license included giving you access to XSplit Broadcaster and VCams’ full suite of features!
Elgato Facecam
Elgato is fairly new to the world of webcams but they’ve come out the gate with a solid camera in the Facecam. Coming in with 1080p and 60fps it presents a crisp image out of the box which can then be tweaked and adjusted with their software. It also has a neat feature where you can save these settings directly to the camera, meaning you can move between machines and have the exact same look. One downside is the lack of a built-in microphone, but as Elgato points out, they’re aiming to make the best camera for the price point. Consequently, they chose to remove that feature, so it’s worth keeping in mind.
Logitech Brio
The Logitech Brio is on the expensive end of our list of the best webcam for streaming but it does make a pretty solid case for its inclusion. Featuring a bunch of resolution options, 4K at 30fps, 1080p at 60fps all the way down to 720p at 90fps! On top of that, it features a very wide lens up to 90 degrees and a dual microphone system. Now, this mic isn’t as good as a standalone microphone but it does do a pretty solid job!
Your Smartphone could be the best webcam for streaming!
I don’t know if you’ve noticed, but smartphones have some pretty amazing cameras in them! Using XSplit Connect: Webcam you can wirelessly connect your Android or iOS smartphone to your PC easily! From there, it can be added to software like XSplit Broadcaster and streamed! All you have to do is download the Connect: Webcam app then download XSplit VCam, connect to your camera either wired or wirelessly, and add XSplit VCam to your streaming software!
So we’ve listed some pretty solid webcams and one you might already own, your smartphone! What camera do you use? What do you think is the best webcam for streaming? Be sure to let us know in the comments!
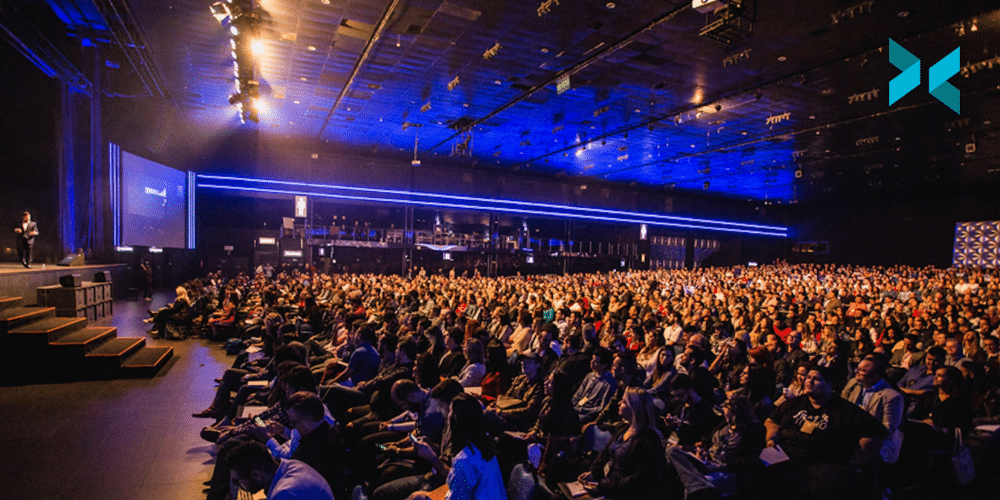
We’ve discussed all-digital events before but one of the big trends we’re seeing lately is the hybrid event. A hybrid conference is something that combines the advantages of an in-person event with the accessibility of an online event. For example, a big gaming convention like PAX will have all its vendors and exhibitors in a physical hall while panels and tournaments can also be watched online. So, how do you conduct hybrid events and why would you want to? Let’s discuss!
What is a hybrid conference?
So as we touched on above, a hybrid event is a combination of both physical and online events. We have some experience with those here at XSplit having run some gaming stages from conventions in the past. These catered not only to the people on the show floor but were also streamed online for people to watch on Twitch.
These indie[dot]XSplit stages were a big collaborative effort to pull off but ultimately a great tool to connect with people at the event and online. Now, this was just one part of the larger show as a whole, as we mentioned above PAX itself is very much a hybrid conference.
On an even larger scale, keynotes like Apple Events are traditionally hybrid of both physical and online. The press is bought in to be in the room for the stage presentation and to get a hands-on look at the products. This is also streamed online giving the viewing public the chance to see Apple’s message while also opening it up to the press to give their own impressions.
Why run a hybrid conference?
There are a number of good reasons, as we mentioned above it gives everyone a chance to be involved. Inclusivity is important, and not everyone can attend an in-person event due to a multitude of reasons. By running some, or all, of your pillar content online you’re allowing a much wider audience to experience it.
Not only that, but a hybrid conference can showcase a wider variety of guests for panels that wouldn’t be possible in an offline-only event. Your panel could not only include guests in the room, and guests calling in over Zoom. All of this can in turn be broadcast online easily using software like XSplit Broadcaster.
There are also examples, like New York Comic Con, where you can purchase a digital ticket. This enables guests from across the globe to watch all the panels live as they happen. Also, it means you can open a new revenue stream for your event for everyone who would love to watch but can’t make it to the venue in New York.
So, the most obvious online element that we have mentioned already is streaming panels and keynote speakers. We’ve actually put together a thorough course online! The video below shows you exactly how you can produce an event that can be done in person and online.
Beyond that though, there are ways you can have an online and an offline audience interacting! You can incorporate live chat for questions for panelists and speakers. Or, you could really go next level and play games together! WiFi Wars is a show that uses proprietary tech to beam games through your browser. Allowing people in the room to compete as one team against people online. This is some creative thinking and it could only be the start of a melding of online and offline hybrid conferences!
We really see the future belonging to hybrid conferences and events and we can’t wait to see what people come up with! As technology intersects with in-person gatherings more and more, the future is bright! More people get to see the shows and presentations you’re putting together with hybrid conferences!
Facebook has become one of the bigger destinations for streaming games. It’s no surprise that the big Meta company would be able to find a foothold with such a large userbase. The company hasn’t relied on this alone, however, they’ve been putting in the time to make Facebook Gaming an attractive site for streamers. So let’s take a look at how to stream games on Facebook!
Getting Started
So the very first thing you’ll want to do is make a profile page on Facebook Gaming. This is pretty simple to do but it’s an important step as this will be the place your live stream is going to go through too!
Next up you’ll want to download some software to stream with. XSplit Broadcaster will not only allow you to easily stream to Facebook but will make your stream run smoother and look better!
Once you’ve downloaded XSplit Broadcaster you’ll be prompted to make an account and sign in. From there, you’re ready to create your scenes by adding sources to them. XSplit Broadcaster comes with a number of templates to make this process easier for you! The source you add can be anything from your webcam, graphics, alerts, and gameplay from a capture card or direct from your PC.
How to Stream Games on Facebook
Next up you’ll want to set up your Facebook output. This is a straightforward process, head to the Broadcast menu and select Facebook Live! From here, you will be prompted to log in and now you’ll be asked where you want to stream. There will be some options, the first is Timeline. This will stream your video directly to your personal timeline. In this instance, we’re looking to go to Facebook Gaming and the page you just created so you’ll want to select the public page.
You’ll also see some encoding settings which should be automatically selected for you based on the best settings for your computer but you can change these later if you need to. It’s worth keeping in mind that unless you’re part of the Facebook Level Up program you’ll only be able to stream as high as 720p and 30FPS.
From here, you’re basically ready to go live once you click Continue! Select the output you just made again from the Broadcast menu to go live. Next, you will be asked to input your stream details. From here you can either select a pre-made post you’ve already created on Facebook or create a new one directly in Broadcaster.
You can also use a similar method to stream to scheduled streams that you may have set up for your page, which you can find more information about here!
So now you know how to stream games to Facebook, how about we look at leveling up your content a little? With XSplit Broadcaster it’s easy with some of our downloadable widgets! Want your comments to appear live on screen? Some new alerts? Want to see the reactions from viewers come up live on the screen? We’ve got you covered!
All you have to do is head to the Plugin Store which is available by going to the Extensions menu, selecting Add Extention, and selecting Find More Extensions. From here just search Facebook and you’ll find all of the things mentioned above and more!
Once they are installed you can find them in the Sources menu under Facebook widgets. You can find out more about our Facebook widgets here!
During the pandemic, a lot of in-person events went online. From meetings, conventions to concerts, people found ways to keep gatherings happening. Online events, we found out, actually have a number of advantages that in-person events can’t replicate! So, why are virtual events important? Let’s take a look at some of the successes and why we may want to continue this trend in the future!
What is an Online Event?
While Mark Zuckerberg may see us wearing headsets in his metaverse, as it stands right now most virtual events take place over a live stream. This can range from a private Zoom call, a YouTube live event anyone can watch, to a ticketed experience that is using a custom service.
One of the bigger events I’ve seen was the DC Fandome event. This was an almost four-hour event held to tease new films, tv-series, and comics from DC. One of the most successful elements of the show was the production levels. They clearly invested in making the event feel special to the audience. They had virtual sets and had hosts and some guests fully green-screened into the virtual arena they had created. Some of the guests were on a Zoom call but even then they had mostly made sure everyone had good cameras, microphones, and lighting. This event went out for free on their site but also over YouTube making it very easy for anyone to watch.
An example of a musician on a smaller scale would be the quarantine concerts by Devin Townsend. Playing a backing track he created in his home studio this ticketed event was inventive with its production (a camera on a rotating fan!) and fun to watch. As the years went on the production quality of these events grew. Examples like the Ocean Machine concert which included a drone for live footage or the Devolution series which was full green screened.
PAX, the gaming convention, also held great virtual events with many people handling their own production with PAX Online. This included panels of multiple guests discussing topics and putting on shows to esport events all under the same banner as the in-person events.
Why are Virtual Events Important?
A virtual event has a number of big advantages over an in-person event. First of all, and it’s probably the biggest, is inclusivity. Far more people are potentially able to attend an event they could watch in their living room than they could having to go somewhere. There is no maximum capacity, there isn’t a barrier to entry and anyone with an internet connection and a device to take part can join in the fun!
Secondly, you not only get a wider, more global audience but you also can attract more speakers as well! You can have people from different sides of the world discussing topics with each other! Many people have been held back from attending large events for distance and financial reasons, with a virtual event the barrier to entry is much lower.
So, why are virtual events important? Well, a bigger audience with a bigger reach can watch events put on by a more global cast of people. Ticketed virtual events are much more accepted now if you’re looking for a return on investment but when it comes to potential opportunities for engagement it doesn’t get much bigger than a virtual event! With the right equipment and software like XSplit Broadcaster, it’s easier than ever to produce these events. Even green-screen levels of production like we saw above have become more accessible for more and more people.
Now, this isn’t to say that a hybrid event isn’t something you should also consider, where you still have an in-person hub for your event. But, you should also consider running an online event beside it, broadcasting things like panels and such to a global audience.
With the latest release for our AI-based background removal and replacement app, XSplit VCam, we’ve bought auto-framing to the feature list! With auto-framing enabled, so long as you’re in the camera frame, VCam will make sure you’re in the center of the shot.
All you need to do is head to the settings, enable auto-framing and you’re ready! To download XSplit VCam simply sign up for an account, head to your dashboard, and download the program. VCam is available for both Windows and macOS and when combined with XSplit Connect: Webcam you can even use your Android or iOS smartphone as your webcam!
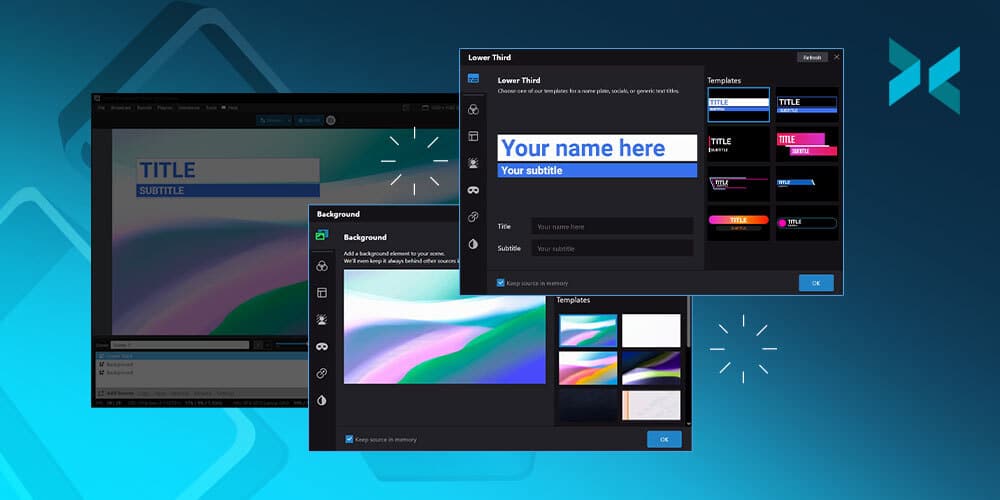
XSplit Broadcaster 4.3 is available to download now and it comes with some big updates to how you can get started and run your content!
Here are some of the key features in this update!
A new layout wizard
An overhauled sources menu
Customizable lower thirds
A new customizable background source
We have completely overhauled setting up your first stream in XSplit Broadcaster 4.3, making it easier than ever to open the program and get streaming! You can now easily add your camera, a source, and a background in moments!
We’ve also updated the sources menu, meaning you can find everything you need even faster. We’ve also added the ability to easily add lower thirds with templates that you can customize with just a few clicks!
The new background source comes with some images you can use, or you can add your own. Using a background source now means you never have to worry about any other sources going behind your background!
XSplit Broadcaster 4.3 also has a number of bug fixes and improvements to current features.
This will be a big year for XSplit Broadcaster as our team works on improvements to the program! We can’t wait to keep developing and refining along with our community so we are always looking for your feedback! Reach out to us on our community forum, our Discord, or on social media!