Work From Home Hacks to Make Your Life Easier with XSplit

Working from home, particularly in a creative industry, can mean that you end up with a lot of skills you need to develop fast! I know for me, one of the most glaring skills I’m missing is that I am not really savvy when it comes to Adobe Photoshop. However, I have been able to find tricks and work from home hacks to fill this gap using the products we have here at XSplit. So if you’ve taken on a new role in a creative industry or you’re feeling some imposter syndrome in your current job, here are some hacks I’ve come up with that may just help you with your job.

Work From Home Hacks for Screenshots

It may seem weird, but it always seems like screenshots are so inconvenient to take at times, right? One work from home hack I used to use involved XSplit Broadcaster. I’d simply capture the desktop and use the big Screenshot button at the top to capture anything we were trying to send a picture of.

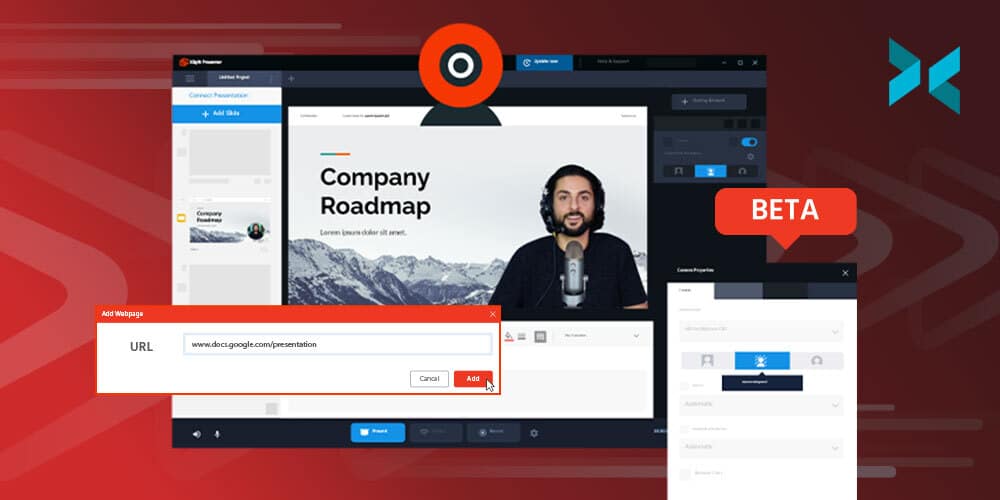
We thought, however, that this could be even easier, which is why we’re developing XSplit Capture. It’s in closed beta at the moment but once it releases you’ll be able to easily select the area of your screen you want to capture, add annotations, highlights and then have that image upload directly to the cloud giving you an address you can share right away! This also works with video, and if you want to you can download these for later use or adding as an attachment. As The Economist noted, working from home continues to rise so making these sorts of tasks easier was a must for us!

A person sat at their desk using a laptop computer with a notepad, phone and glasses next to them looking for work from home hacks.
Photo by Corinne Kutz on Unsplash

Creating Mood Boards

If you need to put together some inspiration for yourself or a graphic designer on your team like a mood board or even mock up a graphic, XSplit Broadcaster is a great tool! I do a lot of freelance work broadcasting esports events, so I need to be able to give designers briefs on the assets I need to be produced and this work from home hack has been invaluable!

So what I do is lay out my various scenes using the color matte and text sources (easily added by clicking Add Source, General Widgets for Colour Matte and Add Source, Text for the Text Source) to show the designers different elements I’ll need in the broadcast and what they will do! I can even use the presets and source transitions to record how I’d like an animation to look! All of this I can then record in XSplit Broadcaster and send over as a video right away!

Work From Home Graphic Design Hacks

If you need something like a thumbnail or simple design in a pinch, you can always lay out your graphic in XSplit Broadcaster. You can use layering, color key (simply right-click on your image and head to the Color tab and selecting Color Key), and the source menu controls to hack together a graphic.

Broadcaster lets you set your resolution and then just use the screenshot tool to make the final asset. It’s a great way to make YouTube Thumbnails as we mentioned in a previous video. It’s honestly something I do all the time when it comes to creating a quick social graphic I can put together and export quickly just using assets I’ve been provided and the tools Broadcaster already has!

Timers, Clocks, and Countdowns

If you need a timer for a task, or just a countdown till your lunch break, you can the custom scripts feature in XSplit Broadcasters text source. Just enable custom scripts by right-clicking on the Text Source you’ve added and select the clock script, then select whichever function you like to use.

I personally like to use the standard clock feature when I’m running a show and need to give a timer to the host so they know to keep on schedule. But, there really are tons of work from home hacks you can achieve with XSplit software!

But I want to know from you! Which tools do you use to help your creative process? What was the last piece of software you learned to help you at your place of work? Let us know in the comment section below and if there’s anything else you feel we should discuss here, let us know there as well!

XSplit Presenter 의 공개 베타 테스트 버전이 출시 되었습니다!

약 1년 동안, 전 세계의 생활과 업무 환경이 급격하게 뒤바뀌게 되었습니다. 저희 XSplit 에서는, 약 10년간의 노하우를 가지고 동료들 끼리 원격으로도 생산적인 업무와 프로젝트를 진행할 수 있지 않을까 고민하여 새로운 프로그램의 개발을 도입하기 시작했습니다. 대부분의 온라인 회의 및 생업 활동은 프레젠테이션 및 발표 자료를 가지고 카메라 앞에 앉아서 설명을 해주는 형식이 대부분인 것으로 파악하여, 파워포인트, 구글 슬라이드 등을 그대로 활용하고, 거기에 이미지, 동영상, 웹페이지, 유튜브 영상과 웹캠을 모두 연동시키는 종합 프레젠테이션 프로그램을 개발하게 되었습니다.

게다가 슬라이드를 페이지를 변경하여도, 웹캠 화면을 항상 보이게 하여, 슬라이드 내의 어떤 구간이든간에 시청자들과의 소통의 흐름을 이어나갈 수 있도록 제작하였습니다.

XSplit Presenter를 소개합니다.

위의 여러가지 이유를 통합하여, XSplit Presenter를 개발하게 되었습니다. 나만의 스타일과 유형, 상호작용 요소들과 화려함을 모두 프레젠테이션 안에 담을 수 있고 회의나 발표, 제품 설명회 등에 활용하실 수 있습니다. 여러 프로그램을 강제적으로 사용하거나 한가지 프로그램에서 경험했던 제한적인 요소들을 해소하기 위해 다양한 미디어 자료를 호환하며 실시간 캠 화면까지 연동할 수 있도록 구현해냈습니다.

이미 사용하고 있는 프레젠테이션 프로그램의 활용법을 그대로 유지할 수 있습니다.

XSplit Presenter 개발 중 가장 중요시 여기던 부분은, 이미 여러분들이 사용하고 있는 프로그램들과 동일한 유형으로 사용할 수 있다는 점 이었습니다. Google Slides, Microsoft Powerpoint, PDF 문서 등, 해당 프로젝트에 캠 화면을 연동시켜서 Zoom, Teams, and Skype, 디스코드 등에 가상 카메라로 적용시킬 수 있습니다.

시청자들과의 원활한 소통이 가능해집니다.

또 다른 요점 중 하나는 실시간으로 주석이나 하이라이트를 표시하여 질의응답시, 또는 중요한 강의시 화면상 원하는 부분에 그리거나 밑줄을 치는 행위가 가능해집니다. 게다가 실시간으로 프레젠테이션 페이지를 편집할 수 있기에 이미지나 동영상을 끌어 담거나 유튜브 영상을 열어볼 수 있습니다. 더 이상 ‘잠시만 기다려주세요’ 등의 이유로 발표의 흐름을 끊을 필요가 없습니다.

동시 다수 발표자를 지원합니다.

조별 과제등을 발표할 때, 발표자들이 여러명일 경우, 스카이프의 NDI 소스 연동으로 다수의 발표자들이 캠과 마이크를 켜고, 하나의 문서 자료를 온라인을 발표할 수 있습니다.

이 외에도 추가 기능들을 많이 업데이트 할 예정이며 원격 업무 및 학업에 도움이 되는 요소들에 집중하려고 합니다. 지금 바로 XSplit Presenter를 무료로 다운로드 하여 직접 경험해보시길 바랍니다.

궁금한 점이나 질문이 있으실 경우, 트위터 @xsplitkr, 또는 공식 XSplit 디스코드 서버에서 문의해주시기 바랍니다.

재택 근무시 활용할 수 있는 시간표 만들기

재택근무를 처음 시작해본 사람들에겐 한 가지 고민이 생기기 마련입니다. 과연 어떻게 시간을 관리해야 잘 관리했다고 할 수 있을지, 막상 시작해보려고 하면 어디서 부터 시작해야 할지 막막하게만 느껴집니다. 공통점으로 겪는 어려움은, 주변에 직장 동료들이 없어서 간단한 업무와 관련된 도움을 받지 못한다는 것이며, 컴퓨터에 유능하지 않는 분들은, 기계가 고장나거나 하면 해결책을 제시할 수 없다는 점이었습니다. 이렇게 어려운 환경에서도 어느정도 형식을 정해놓고 습관을 들인다면, 대부분의 고민을 덜어줄 수 있게 될 것입니다.

생업이란, 가끔은 정해진 시간대로 진행되지 않기 마련입니다. 하지만 유연한 시간 관리를 하지 못하는 것 역시 고통받는 경험이 될 수도 있습니다. 아침에 일어나 간단한 루틴을 정해놓거나 하루에 반드시 무엇을 해야한다는 정도만 지켜준다면, 다른 중요한 시간들도 소중하게, 알뜰하게 사용할 수 있는 발판이 될 것이라 생각합니다.

업무 시간 관리하기

뭘 해야할지 모르는 상황이 들이닥치기 전에 정리해야하는 부분들을 먼저 집중해보도록 합시다. 사소한 것도 잊어버리지 않도록 메모를 하는 습관을 들이거나 무엇이든 어딘가에 기록을 남긴다면 반드시 추후에 확인해본 후 ‘다행이다’라는 생각을 하게 될 것입니다. 하루 24시간 내에 정해진 시간만큼만 업무에 집중하고, 나머지 시간들은 본인에게 보상을 주는것 처럼 반드시 휴식을 할 수 있는 시간도 주어야 합니다. 조금만 더 라는 생각으로 업무 시간을 늘리게 되면 추후엔 휴식시간조차 없게되고 식사 시간마저 뺏기게 되니 주의해야 합니다. 온라인 도구를 활용하려면 구글 캘린더 같은 달력 애플리케이션을 통해 가까운 미래에 다가올 일정들을 기록하거나 개인 시간을 마련하는 연습이 필요합니다.

긴 시간의 회의나 업무 직후에 10분가량 휴식하는 것도 좋지만 미리 업무 시간을 직접 배치할 수 있는 권한을 가지고 거래처에게 보고하여 특정 시간대에 업무를 진행하겠다고 통보한다면 더욱 여유로운 업무 및 개인 휴식시간을 활용할 수 있습니다. 1인 자영업을 한다면 어느정도 현실성 있는 부분이기도 하며 만약 직장생활중 이라면 팀장과 회의를 통해 알맞는 업무 시간대를 고려해볼 수 있습니다.

A person sat at a desk using a PC and employing time management to create a work schedule.
Photo by Firos nv on Unsplash

시간 관리 애플리케이션

온라인 도구를 활용하고 싶다면 다양한 서비스들이 존재합니다. 가장 인기있는 애플리케이션 중 하나는 포모도로 테크닉 Pomodoro Technique)이며, 짧은 휴식시간들을 적절히 조절하여 급격히 발산되는 집중력을 활용하도록 도와주는 시간 관리 서비스입니다. 포커스 키퍼 (Focus Keeper app)도 비슷한 개념이며 간편한 인터페이스를 통해 쉽게 활용할 수 있는 애플리케이션 입니다. 생각의 정리가 잘 정돈되지 않는다면 마인드노드 (Mindnode)를 사용하여 조금 더 정리정돈된 일정들을 관리할 수 있습니다. 목록 형식으로 할 일을 정리하고 싶다면 투두이스트 (Todoist)를 사용해 보시기 바랍니다.

BBC에서 최근 연구한 재택근무와 관련된 자료에는 백만명 이상의 영국 근로자들이 출퇴근 형식을 버리고 재택근무로 남겠다는 설문조사 결과가 있었습니다. 이런 방향으로 진행된다면 다양한 시간 관리 애플리케이션들도 제작될 것이라는 전망입니다.

Someone sat at a desk in front of a laptop pouring coffee in to a mug while they use their phone and employing time management to create a work schedule.
Photo by Nubelson Fernandes on Unsplash

반드시 적절한 선을 그어라

시간관리라는 것은 말은 쉽지만 지키기 어려운 행위입니다. 한 공간에 거주하면서 개인적인 일, 직장 업무, 휴식, 취미, 가족과의 시간을 골고루 이행하는 것은 정말 어려운 일입니다. 재택 환경에 다른 사람이 살고 있다면, 심지어 가족일지라도, 반드시 그들에게 본인이 재택근무를 한다는 사실을 알리고 업무 시간대와 자유 시간대를 통보하는 것이 중요합니다. 방해를 최소화 하며 인간관계도 보정이 될 것입니다. 휴식시간이 다가오면 반드시 자리에서 일어나 잠시 스트레칭을 하거나 업무와 관련된 시선을 최대한 차단하여 충분한 휴식을 가지는 것이 바람직합니다. 충분한 휴식은 반드시 다시 집중력을 키워주기에, 이러한 변환점을 잘 활용하여 효율적인 업무 진행과 동시에 건강도 유지할 수 있습니다.

재택근무 환경에 혼자만 살고 있다면 일 하는 공간과 휴식을 하는 공간을 따로 배치하는것도 방법입니다. 공간의 크기와 상관없이방향만 바꿔 앉아도 새로운 자세로 집중하는 마인드가 달라질 수 있습니다. 그리고 명심해야 할 것은, 업무 환경이 달라졌다 하더라도 반드시 특정 업무의 데드라인은 어느때와 다름없이 존재하는 부분이어서, 효율적인 업무 환경과 시간관리를 통해 이를 유지시키기 위한 시간표를 항상 체크하는 습관을 들여야 합니다. 물론 재택근무를 한다면 출퇴근에 소요된 시간을 더 생산적인 곳에 활용하거나 휴식에 필요한 시간으로 활용할 수 있습니다.

항상 시계를 머리맡에 두거나 방대한 엑셀 스프레드시트를 제작하라고 강요하지는 않습니다. 하지만 내가 원하는 모습과 방식으로 기본적인 시간관리를 해준다면 본인 뿐만 아니라, 가족, 직장 동료, 중요한 인맥들에게도 모두 도움이되는 일의 발판이 된다는 것을 명심하고 또 이에대한 중요성 역시 다른 비슷한 처지에 있는 친구들에게 전파될 수 있을거라고 생각합니다.

How to Stream Dungeons & Dragons live on Twitch

When you think of streaming games, your mind turns immediately to video games, but streaming services like Twitch have a healthy Tabletop RPG community that will let you stream Dungeons & Dragons as well as other classic tabletop titles. This quick guide covers how you can organize a tabletop stream, which software you might want to use, and some great examples from the genre for you to watch on Twitch.

Organizing a tabletop stream

Unlike traditional game streaming where you’re streaming your own gameplay in a single or multiplayer game, tabletop streaming involves a certain amount of pre-planning to organize multiple guests and participants. If you’re looking for a quick and easy way to stream a video game version of D&D to Twitch, check out D&D Online, an MMO based on the original tabletop game.

However, for that traditional tabletop experience, you’ll need other people either gathered physically together or, perhaps more practically, in a video chat. If you want to organize a game and need more people, why not advertise your event on social media, or check out conversations on Reddit and Discord?

Which software should you use to stream Dungeons & Dragons?

Assuming your game is organized as an online video call, you need a way to arrange those different calls and stream them too. One of the easiest solutions is to use XSplit Broadcaster and Skype along with NewTek’s Network Device Interface (NDI). This allows you to bring each person in the Skype call into XSplit Broadcaster as an individual source which you can then easily place and resize. This saves having to capture parts of a call window as you would with something like Zoom.

With XSplit Broadcaster, you can easily organize and customize your layout and theme to give it an epic D&D makeover. You can even add your own overlays for further customization, helping to bring your game to life and capture your audience’s attention. If you browse through some channels on Twitch, for instance, you’ll see it’s common for the Dungeon Master to appear in a larger window than the players as an easy visual reference for someone joining the stream.

A close up of some miniature figures and a monster on a tabletop, things you might need to stream Dungeons and Dragons
Photo by Robert Coelho on Unsplash

Put yourself in the action as you stream Dungeons and Dragons

Another tool that can improve the look of your tabletop stream is XSplit VCam. It allows you to remove and replace your background, or simply blur it so the focus is on the person – and it’s all possible without a green screen. This can provide an extra layer of fun to D&D gameplay, by changing backgrounds to suit the action of the game as you go along streaming Dungeons and Dragons.

For example, if players were to find themselves wandering through the Forgotten Realms or trapped in Castle Darkhold, their background could change to represent that location. Check out royalty-free image sites such as Pixabay for inspiration.

The team at Rivals of Waterdeep playing with their on screen set up which shows a way you could stream dungeons and dragons

How to visually represent the game

People watching the stream will be focused on the players and their choices. However, they’ll also want to keep up with where the players are, so you want to visualize it somehow as you stream dungeons and dragons.

Perhaps the simplest way to represent a tabletop game is to film it. You can set up an additional camera as a source over the board and move the pieces yourselves. However, this approach can be slow and not very clear on a stream. One alternative is to create custom maps to help your audience visualize your gameplay. If you’re not an artist, there are many map tools listed on D&D Compendium to explore.

Some tabletop streams to watch

Before creating your own stream, you may find it helpful to watch some others to get a good idea of how game masters have perfected their multi-cam tabletop streams to stream dungeons and dragons. Helpfully, Twitch has its own dedicated Dungeons & Dragons area, and, with over 450,000 followers, there are usually lots of games to view. One of the more popular D&D streams is High Rollers DND, showcasing a smart and engaging layout for D&D games. There’s also Rivals of Waterdeep, a D&D actual play stream brought to you by the official D&D Twitch channel.

Beyond D&D, there are a few other areas of Twitch you might like to explore to get more ideas and inspiration. These include Tabletop RPGs and Board Games.

For a more in-depth look at how XSplit Broadcaster can help your stream, check out this interview with tabletop gaming aficionado and member of Rivals of Waterdeep, Tanya De Pass.

The Ultimate Macros Guide: Live Streaming Automation!

Automation makes life easier, so why not make your streaming life easier as well with macros! Live stream automation with macros means you can do all sorts of things! From your camera zooming in when you scream playing a horror game to triggering a timed scene change. So let’s discuss how macros and automation can make your streams easier and more powerful!

What are Macros?

Macros are an extension built into XSplit Broadcaster, if you don’t have macros installed, you can go into the plugins store (which can be found by going to the Tools menu and selecting Plugin Store), search for macros, and install it easily. The first time running macros you will need to give permissions so be sure to click OK. This is the first step to full live streaming automation!

Macros are basically scripts or a series of commands that are run when a basic condition is met. So the condition is when something happens, it can be on pressing a key when the audio is at a certain level, when a video stops playing at a specific time, there are really tons of possible event types and you can write your own custom scripts.

The Macro menus open in XSplit Broadcaster which makes live streaming automation possible.
An example of the Macros Plugin (remember to enable event listener!)

So when you set an event type, you can then select an action to happen. This could be switching to a scene, starting a stream, opening a projector, or event running another macro. You can have multiple actions happen after an event. You can even have multiple macros running simultaneously, which really means if you timed everything right you could add automation to almost all of your stream!

You can test your macros and they will only be active when the event listener is enabled. Now the possibilities are endless with macros, but I’d like to talk through some cool examples of how you can use them. For all the samples I show here, I’ll leave a link below each section to download the macros so you can import them into your own presentation and try them out.

A close up of a phone next to a gaming mouse and keyboard on a desk watching a live stream, adding live streaming automation could help you!
Photo by Caspar Camille Rubin on Unsplash

Automate Live Stream Commercial Breaks

So if you’re producing a live show, timing is everything, and live stream automation can help! You don’t want to miss a cue and cut back to talent too early or too late, so why not set a macro to automate your ad break? As Forbes said, streaming is presenting more opportunities for brands so getting this right could be important! If your ad break is running a series of videos in a playlist, it’s simple to automate this.

First set up your ad break scene. If you have a series of video and image ads, I recommend using your video editing software to stitch these together into a single file. Then in macros set up a macro for on key down. Then just set the key. Then set the action to switch to a scene, and select the scene with the ad break video. Enable the event listener and then set up another macro. This time the event is when a media source stops. Select your ad break video file then set the action to switch the scene to whichever scene you go to after an ad break.

You can add more macros to make this more complex like cutting to the ads intro video after a break or implementing custom stinger transitions.

Download this macro here

Making your camera zoom in on a loud noise is another great macro!

Starting a stream on time

If you need to start a stream at an exact time, regardless if you’re ready or not for a client, then this is a useful macro!

For the event, set the scheduled time and select the time your stream needs to start. Then set the switch to the scene and select a scene with a standby graphic that’s safe to start the stream with. Then set an action to start the stream. Make sure the event listener is on and you’re ready to go!

Download this macro here.

A person wearing an RGB gaming headset streaming on their gaming PC, adding live streaming automation could make their life easier.
Photo by Fredrick Tendong on Unsplash

Always stream and record

So one of the mistakes I always make when doing an event is not starting the recording when I start the stream. Depending on the format of your show, this can be an absolutely devastating error if you promised your client a high-quality archive or if your internet goes out and you want to keep capturing a live event for later upload.

So, you use macros to set a hotkey that will activate your stream and recording. This is especially useful if you’re planning to stream to many different platforms or record multiple scenes.

Download this macro here.

IRL Live Streaming Automation

A lot of IRL streamers actually relay the stream from their IRL backpack to a cloud PC running broadcasting software. This is to keep their stream live when they go into an area where their cell reception is cut off. This can also be managed by macros.

Set an event for when a stream source is online, this is the RTMP feed source you’ve added to your IRL backpack. Set the action to switch to the scene with the RTMP feed. Then set up a macro for when an RTMP source goes offline. Have it switch to a standby screen for whenever your stream feed re-connects.

This solution can also be used as a backup system for always keeping a stream online if you’re doing a project for a client, you would just need to set up an RTMP server to output an RTMP to this relay system.

Download these macros here.

There are really endless ways you can use macros for live stream automation, this is only a small sample of use cases. The possibilities are endless so play around with the extension and see what you come up with! What’s the most inventive use you’ve found for our macro system? Or if you’ve never used it before, what do you think this might be helpful for? Let us know in the comments below!

Start earning money by joining the NEW XSplit Affiliate Program!

The new XSplit Affiliate Program is here! We’ve taken the previous affiliate program and supercharged it, based on our current member’s feedback, with more opportunities to earn money with us and best of all, it’s open to absolutely everyone!

Benefits include:

  • You will get a personalized code of your choosing giving your audience 10% off any XSplit Premium subscription
  • For every purchase made using your code you will receive a 10% commission
  • You will get that 10% for each recurring purchase someone makes

All you need to do is head to https://xspl.it/affiliate and sign up! Once you’re accepted you will be able to set up your code and start earning with XSplit right away! You don’t need to have a big following, just sign up and you’re ready to go!

We look forward to welcoming you to the brand new XSplit Affiliate program! If you have any feedback or have any questions, you can reach out to us on our social channels!

Where should you stream?

Back in the day streaming sites were their own niche, sites like justin.tv, livestream.com and ustream all specializing in different types of streaming content. Now every social media site has to have some form of live streaming functionality, but which site is the best place to stream your content? Also, quick disclaimer, we’re not going to say what is the best streaming site, because there isn’t one. It all depends on where your audience is, for you or for your client if you’re doing some corporate streaming work. This is also going to be focused on sites for western audiences, as viewers in Southeast Asia, or China have other sites where the viewership is centralized like Douyu TV or Bigo Live.

Where should you stream gaming content?

For gaming, Twitch still theoretically sits on top, as it was at the forefront of the gaming revolution when it comes to streaming. However, it still lags behind its competition in terms of discoverability. For brands, in terms of digital marketing, Twitch does have its own advertising sales team, but you need to contact them directly to get started.

If discoverability and digital marketing opportunities are important, traditional social media marketing sites like YouTube, Facebook, and Twitter have the advantage. The best options, in this case, are YouTube and Facebook, both of which have cultivated a large gaming audience and allow broadcasters to promote live streams to their existing fanbase created on their pages.

YouTube allows display ads to be run to promote live streams, Facebook does not allow direct boosting of live streams, but you can boost a post promoting the live stream and cross-post your live stream on pages that have given you permission.

Finally, there’s reporting to consider, and in this case, lord Google wins with absurdly detailed analytics reporting on all your content. Trust me, when it comes to growth knowing who your audience is and how they found you can be key!

A person sat looking in to a ring light in front of a microphone with a gaming headset on wondering where you should stream
Photo by Higor Hanschen on Unsplash

IRL/LifeCasting

Now if you’re lifecasting or streaming IRL content, it will really depend on where your audience is. The aforementioned sites like Facebook, YouTube, and Twitch all support just chatting content including things like talk shows and travel/vlogging which they have categories for. However, if your fans are on Instagram or Tiktok, things are a bit more limited.

In the video below we discussed how you can get set up to stream on Instagram, though it’s not quite as straightforward as you might hope. For now, TikTok only offers live streaming access to some accounts, however, it likely will soon roll out access to more accounts, and all you have to do is pull a stream key from the app and use XSplit’s custom RTMP to broadcast.

Influencer or Affiliate Sales content?

If you’re looking to be your own home shopping network, the traditional live streaming site of choice was Facebook, however, their pivot towards gaming means your content will be hard to find on the site outside your usual fans. One platform you may want to consider, depending on your region, is Amazon live.

Yes, Amazon.com has its own streaming service outside of Twitch and it’s purely focused on e-commerce. All you need to be is an Amazon store or affiliate and you can download their Amazon Live App which will allow you to generate a stream key to go live on their site via a custom RTMP.

The great thing about Amazon is you can set up a carousel of products on your live page that people can purchase from your store or you earn a commission via affiliate sales! You can even create promo codes for your products to share on stream to further influence sales. Now if you’re in other regions, such as Southeast Asia, many of the e-commerce platforms like Shopee have integrated live streaming in a similar manner on their site.

Someone using their phone to takle a selfie sat in front of a laptop wondering where they should stream.
Photo by Mateus Campos Felipe on Unsplash

Corporate Live Streaming

Now perhaps the audience is your client, be it a wedding, corporate event, or amateur sporting event. Usually, the client’s major concerns are reliability, ease of use, and security, and in this case, I believe YouTube is the best solution.

In terms of reliability, well you can’t beat YouTube, it works well everywhere and if your client anticipates viewers in areas with spotty internet connections, every stream is transcoded and you can even stream up to 4k while people watch you as low as 140p! For ease of use, well it’s YouTube, everyone should know how to watch a YouTube video and have an account. Finally, in terms of security, you can make your YouTube streams private and invite people via email.

If your YouTube account is a company account you can actually create events and enable them to be visible to only those within the organization, which saves time on adding potentially hundreds of emails. Now, of course, there are options like dacast and wowza which will give you white label solutions, password-protected streams, and embeddable players, but these get expensive. If you’d like to know about these solutions though, do leave a comment below.

Should I stream to everywhere at once?

If you’re still not quite sure where you want to stream, then stream to as many places as you want! XSplit Broadcaster supports multi-streaming, which means you can broadcast to as many platforms as you’d like, but you will need a license. You can find out how to set that up right here! The big advantage to this is you can pull from multiple places you have audiences at once and find where your best platform for live streaming is, catering your content more to one place over time. You may also find that you do well streaming in multiple places as is!

But I want to know from you! What sites do you use? And Where have you had to most success? What are some key features you need from a streaming site? Let me know in the comments and if there’s anything else you would like us to discuss, that’s the place to let us know as well!

What Is a Hybrid Office and Why Would I Want One?

These days, with internet connections getting faster and the pandemic having shown us that working from home is not only possible but often desirable, there’s a growing tendency for companies to embrace people varying their place of work between the office and their home — this is known as the hybrid office. It’s a bit of a change of pace from the traditional office, but we’re on hand to help you adjust!

What are the advantages of a hybrid office?

Some tasks are easier from a home office as there are fewer disruptions, whereas others are accomplished more effectively face to face. For a software developer, a brief interruption whilst writing code can set them back half an hour or more, so being able to set messenger software to “do not disturb” and get into the zone for a couple of hours is a wonderful opportunity. Planning work, however, is much more easily done in person where body language and whiteboards are a great aid to discussions.

For employees, being able to eliminate the commute is an enormous time-saver, allowing more time outside work for hobbies and socializing, as well as reducing stress. Flexible work schedules free time for school runs or mowing the lawn at lunchtime, reducing childcare costs, and, again lowering stress. For the company, only having part of the workforce in the office allows for hot-desk setups and reduced office space, slashing overheads.

A person sat at a desk using a laptop could be a good setup for a hybrid office.
Photo by Daniel Thomas on Unsplash

How to run a hybrid office

Employees need to be able to work with ease in either location without disruption. Laptops are ideal as they can be transported between the two workplaces, ideally, with docking stations (external monitor, mouse, and keyboard) that can connect easily at either end. A VPN is essential to allow employees to use the office network as if they were onsite, and effective communication with colleagues, perhaps using XSplit Presenter for meetings or presentations, helps smooth any difficulties working with people who aren’t in the same location.

This is achieved by letting you include yourself in your slides, easily adding media sources, and having a virtual pointer. All of this allows for a professional and personal presentation during a meeting using the slides you already have in Google Slides or Microsoft Powerpoint. Another added benefit of XSplit Presenter is that it’s easy to use both from home and in the office.

Working conditions are very important – employees must have a suitable office space in their home. A laptop and a sofa definitely won’t work, and even working at a dining table is a temporary solution at best. An appropriate desk chair is a must, as is having sufficient space for screens, keyboard, and mouse, whilst still sitting comfortably. They will be spending a lot of time sat there, so ergonomics need to be taken seriously, or the employee risks injury.

A meeting room setting with seven people sat arouynd a table discussing their work as part of a hybrid office.
Photo by Redd on Unsplash

The risks of this kind of office

The hybrid office presents an exciting opportunity for a new way of working, both for employees and employers. There are a few things to be wary of, however:

  • Employees may become isolated going for long periods of time without seeing anyone. It’s worth making sure that you offer some online watercooler moments between colleagues, as they won’t be seeing each other as much.
  • A hybrid office makes it easier to miss out on the sort of news that gets passed around through workplace chatter — whether this concerns an event in the company or tasks to be done, it’s important everyone’s kept well informed and up to date, perhaps by email or in a Slack or Teams chat.
  • Some people struggle to switch between work mode and home, especially if they spend their personal time in the same place as they work. If you’re adapting to a hybrid office model, remember you’ll do yourself some good by getting a change of scenery and not spending all your time in the same chair.
  • Children or pets in the household often don’t understand that someone is “at work”, as they’re still in the house. This means setting boundaries is important.

A hybrid office is a flexible and often very fruitful opportunity that’s worth looking into for many businesses. We’ve touched on this before in remote work and working from home and covered the hardware side in home setup upgrades you need, but there’s always more to learn!

How to Record Gameplay for TikTok to Promote Your Streams

Hello fellow TikTokkers! So you’ve decided to expand your social media empire to the realm of TikTok. It’s a great place for putting out day-to-day moments of your life, but what if you want to put out TikToks of your gameplay or short interviews, this isn’t so simple. So right here we’re going to take a look at how to record gameplay for TikTok and how you can quickly produce gaming-focused content!

Setup Your Gameplay for TikTok

We’ll be using XSplit Broadcaster for recording gameplay for TikTok so first let’s do some quick setup.

Tiktok videos are in a 9:16 resolution, so basically set your resolution in XSplit to 1080×1920 and frame rate to 29.97. This is easily done by clicking the dropdown menu in the top left of Broadcaster.

Next, let’s set up the recording settings. Click on the Record drop-down menu and click the cog next to it to open the recording settings. Set standard as the quality setting as with TikTok there is a file size limit on recordings. If you will be editing this gameplay recording for TikTok in a program like Adobe Premiere Pro make sure to enable multi-track audio and force constant frame rate.

An image for XSplit Broadcaster Recording settings showing you how to record gameplay for TikTok

Capturing Gameplay for TikTok

If you want to record your PC games for TikTok it’s easy, just add the game source to your scene and position it accordingly. You can do this by clicking Add Source > Game Capture if you’re capturing a PC game natively, or if you’re getting a second PC/Console through a capture card you can click Add Source > Devices > Video > [the name of your capture card]. You can also add your webcam and position it in the same menu!

Now if you want to fill up the video of the gameplay you recorded for TikTok, you can use a color matte to add a background and add text using the text source. This is easily done by clicking Add Source > General Widgets > Colour Matte and Add Source > Text.

Recording Interviews

If you’re planning to collaborate with other creators or do some short interviews, it’s easy to set this up as well. Just add your webcam, then use your video chat app of choice, and screen capture the call window. We’ve detailed how you can easily set this up before on the blog.

You can hold alt to crop the video so you can position it nicely to fit the video area. This is a really useful feature on any source in XSplit Broadcaster, the alt key on your keyboard will enable you to do this! You can even add filters to your face as well by right-clicking on the camera source > Effects > Filters!

Make sure to select your microphone in the audio settings menu (Tools > Settings > Audio) and use the audio mixer to set the levels for you and your guest properly. You can get to the Audio Mixer in the Tools menu as well! If you enabled multitrack audio, you can also adjust these levels in your video editor. This can be very helpful when you’re going to record gameplay for TikTok.

Someone holding a phone with the TikTok app opening, you can record gameplay for TikTok
Photo by Solen Feyissa on Unsplash

When your file is ready you can just upload it directly to your TikTok account via the web. I would say that you don’t need masterful editing, the important part is getting the content out there and keep improving as you go! As Forbes mentioned, TikTok is constantly seeing massive growth with one in six people in the US actively using the app in September 2020 so it’s a good time to get involved! With that being said, what’s your favorite gaming content on Tiktok? What social media sites do you feel have helped build your audience?

We’re interested in what you have to say in the comments about this one, be sure to let us know if this guide was useful and if you want more content like this about TikTok or anything we should be discussing here for that matter!

Time Management Tips for Creating A Work From Home Schedule

What are the trickiest things about working from home? If you ask most WFH newbies, they’ll probably say lack of colleagues, no on-site IT support – and time management. Even if our workplaces felt laid-back, there were always timeframes and calendars in the background, with many deadlines mutually managed.

For the worker out in the wild, schedules seem like a distant memory, and this can leave us feeling a little lost. By reclaiming a routine, we can manage our working hours more effectively, and be both more productive and content.

Managing your work schedule

Lose that lost feeling by taking control of your diary, since the best way to avoid feral time management is to act as your own PA. Start by deciding which hours you will work, and stick to them. Then, dedicate a time-slot each week to plan the main tasks and appointments for the following week. One of the easiest and most effective tools you can use is something like Google Calendar that will keep track of your tasks, deadlines, and appointments.

Beware of what Forbes terms “fragmented time”. These are those gaps of about 15, 20, 30 minutes in between scheduled meetings and calls, which seem too quick to achieve anything productive. If you are self-employed, this can be easier as you largely control your own diary. However, if you’re WFH away from an employer, discuss working hours with your manager and team. Establish which hours can be used for a focused time, and when team meetings can be scheduled. This ensures that you always have dedicated time for getting the job done without those annoying dead spaces.

A person sat at a desk using a PC and employing time management to create a work schedule.
Photo by Firos nv on Unsplash

Time management apps

If you feel a digital assistant would help you, there are plenty of time management apps out there. Probably the most famous recent method is the Pomodoro Technique, which balances bursts of focussed energy with short breaks. The Focus Keeper app (iOS, Android, desktop) uses these principles and has a nice simple interface. If you’re struggling to order your thoughts, use a mind mapping app like Mindnode to help you feel more organized (iOS and desktop). Like a list? Download Todoist
for fab digital time-management (iOS, Android, desktop).

Recent research into remote working by the BBC found that over a million UK workers will not be returning to the office full-time. We think this will lead to a whole new batch of time management apps and software, and we’re looking forward to trying them out…

Someone sat at a desk in front of a laptop pouring coffee in to a mug while they use their phone and employing time management to create a work schedule.
Photo by Nubelson Fernandes on Unsplash

Setting some boundaries

Time management also depends on firm boundary setting. This is about establishing working hours, working spaces, and balancing roles. If you’re sharing your home workspace with housemates, a partner, and/or kids, you need to set boundaries. Allotted working hours let everyone know when you’re on and off-duty, and related to this, having dedicated hours also help define your role. While you don’t just stop being mum or dad, having a work/family rota with your WFH partner allows one of you to focus on work while the other takes care of the kids.

If it’s just you, creating a dedicated workspace and set working hours helps you be more productive. A decent workspace doesn’t take much effort or expense to set up (take a look at our blog for workstation tips), and a permanent space is ready to go whenever you are. Deadlines don’t go away just because your location has changed, so setting a work schedule helps you stay on top of the workload. Also, having set working hours makes sure that your work-life balance doesn’t end up a little too blurry.

We’re not advocating stopwatches and spreadsheets (although frankly, that does sound appealing to some of us). However, establishing a work schedule will help you get the job done, and leave plenty of time for play. Read our article on work-life balance to find out more about effective WFH juggling.