How to Hold Successful Virtual Events

Virtual events are here to stay, even as the world returns to normal. The ability to keep costs low while hosting a more comprehensive range of speakers and guests from around the world is something that event organizers will want to take advantage of in the years to come. However, if you’re looking to make your event stand out from others, we have a few tips on how you can improve virtual events.

Rehearsing your virtual events

Nothing is worse for the viewer or producer than hearing “we’re having technical difficulties.” No matter how technically savvy your guests may be, it’s always essential to have a tech rehearsal before the event. Test that your guest knows how to use their camera and un-mute their microphone. With your virtual event, this will save you a lot of hassle in the long run.

Make sure everyone has a call time at least 15 minutes before they are live so you can do final checks. If they are displaying any materials like videos or slides, ask that they send these to you in advance so you can verify they are working correctly. They can always view these items in a preview window you can send them. Something you can learn more about here.

Virtual events taking place on a laptop with a mug next to it on a table.
Photo by Chris Montgomery on Unsplash

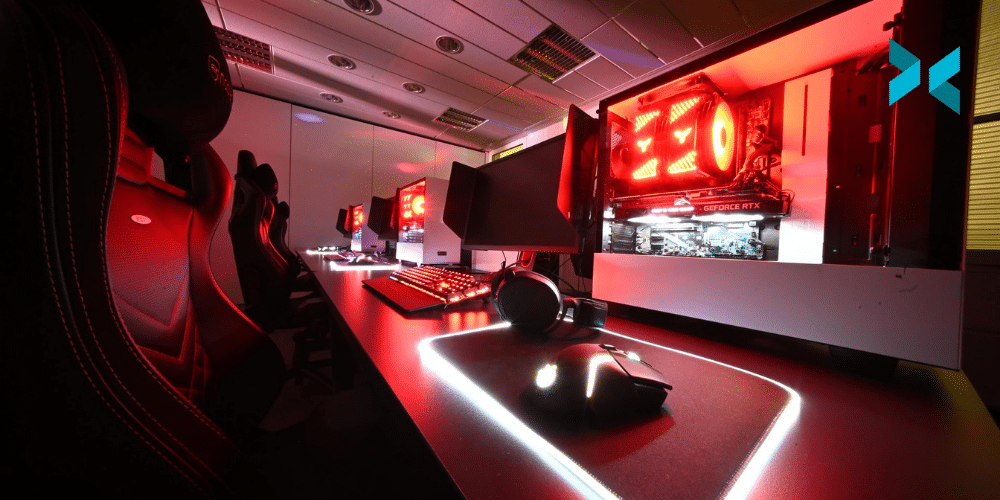
Controlling the scene

While your speakers might be the experts in their field, they may not know the basics of live stream production. This, after all, isn’t what they are there for. They are taking part in your virtual event to share their expertise.

I’m sure you’ve seen many events with chaos in the background or guests not centered in the frame. XSplit VCam solves both these problems. You can blur, remove or replace a guest’s background, and auto-framing will keep them perfectly centered in the frame.

Best of all, this doesn’t even require much setup. Using the team license manager, you can send your guests a license and standard backgrounds for all members you’ve invited to your team account. They just need to look out for the email. This will give everyone a unified look at your event.

Audience interaction

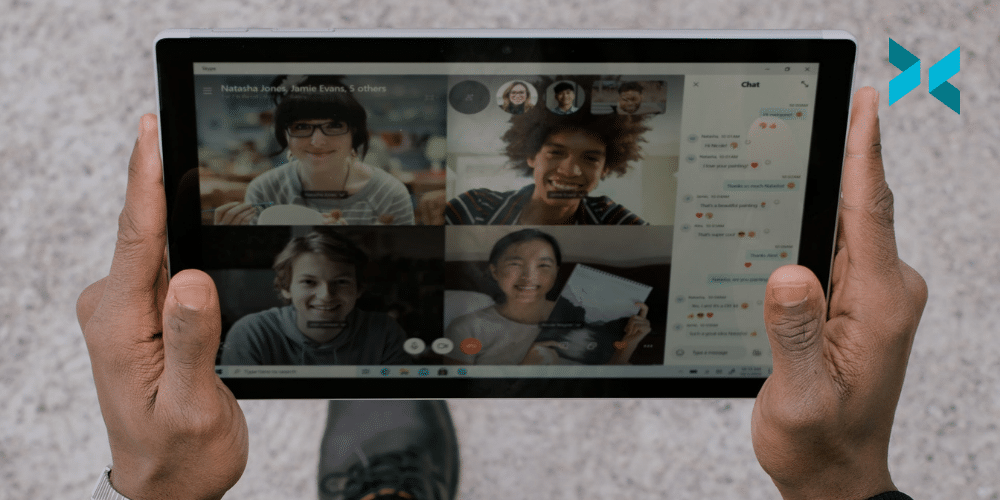
The beauty of virtual events is it is easier to moderate and incorporate the audience into the event. Now, of course, there is a live chat, but depending on the platform you are using, you will have access to tools like polls or be able to incorporate a chatbot for more interactive activities for the audience.

Polls can be done in a couple of different ways. Usually, there are integrated into the platform, or you can polls like the Facebook Polls source in XSplit Broadcaster to automatically count reactions from the audience. It’s good to encourage your speakers to incorporate multiple choice questions in their presentations to interact with the audience.

Depending on the type of show and audience, you can also encourage your speakers to watch the chat. Just remind them not to get too distracted by it. If you have an audience that may get a bit unruly or you are talking about a controversial topic, be sure to have proper moderation.

A person taking part in virtual events on their laptop talking to another person on the screen.
Photo by LinkedIn Sales Solutions on Unsplash

Bonus Virtual Events Tips

Here we have three smaller tips that should help run your virtual event successfully. First up, make sure your schedule is accessible to the audience. Put it up on the screen as a graphic, have a chatbot post a link to the schedule, and have it on your page of whatever platform you are broadcasting to. Trust me, your viewers will appreciate it.

Next, simplify your recoding process. If you are planning to upload VODs of your event, you can make your life easier if you automate your VOD recordings to split based on time so that you’ll have smaller files to upload, or you can upload while the event is still ongoing. This is easy to set in the local recording settings of XSplit Broadcaster. You can even split by file size as well.

Finally, make sure you get a good host! Something that is perhaps overlooked way too often in corporate events is not setting aside a budget for a good host. A good host can carry a bad show and vice versa. So if you are working with a client and they say one of their staff who has never been on camera will be a host, if the budget allows, do recommend bringing on a professional host. A good host will help keep the show moving and save you when technical issues crop up.

So those are the top tips I have for you today to help your virtual events run smoothly. What tips have you found? What challenges have you not found a solution for? Let us know in the comments section below!

Using VSTs for Live Streaming

VSTs are a great tool for improving the overall production quality of your stream. I mean, the people need to hear you! So today we’re going to discuss how you can use VSTs for live streaming! VST stands for Virtual Studio Technology and enables you to create a digital studio with various options. We’re going to take a look at EQ, a compressor, and a limiter which can all be used in XSplit Broadcaster to make your microphone sound better.

How to Set Up VSTs for Live Streaming

Using VSTs with XSplit Broadcaster is easy. Go into your audio mixer, and click on the settings for your microphone to open the audio DSP effects. You’ll need to set the location where your VSTs are located. Usually, they’re in program files, common files, and then in the VST3 folder.

Refresh the list then add your VSTs. The settings icon will open the interface for each VST. From there you can start diving deeper and making some tweaks so let’s have a look at each in turn!

A digital mix desk showing you the sort of interface you can expect using VSTs for live streaming
Photo by Denisse Leon on Unsplash

EQ

The first VST you should use is an Equalizer or EQ. Basically, the EQ will be used to add or subtract certain frequencies that will improve the overall sound of your voice. This is of course, very subjective as everyone’s voice is different. However, here are some general suggestions that should get you started and you can change things from there.

First, apply a high pass filter around 70hz to remove any unwanted low frequencies like air conditioning. Then do the same for a low pass filter around 15khz. Then you’ll want to find the frequencies to remove. This differs from person to person, but you can start around the 1khz range and use a boosted bell curve until you find the frequency you want to remove.

Then you want to boost the frequencies you like, such as the 100-200 range to add more bass to your voice or the 4000-5000 and 9-10k range to add more clarity to your voice.

I’m using the Fabfilter Pro-Q3 eq which is paid but has a free trial. There are a ton of free EQ plugins that you can find. They really do make a bunch of great VSTs for live streaming that we’re going to be checking out.

A person using VSTs for live streaming at a large Digital audio computer with two screens, a mic and a large musical keyboard.
Photo by Denisse Leon on Unsplash

Compressor

Compressors are always a tricky one to explain, but if you like to shout or whisper, they essentially help your viewers hear you clearly. Basically, any compressor will have you set a threshold, this is the level your audio will need to hit to trigger the compressor. This will be the highs lower and the lows higher.

You then set a compression ratio, safe ratios to start with are 2:1 or 3:1 for vocals. Then you’ll set an attack and release. You’ll want a fast attack and slightly slow release to start, you can adjust these over time. Finally, you’ll need to set the makeup gain. This is to make up for the overall loudness you’ve lost from compressing your audio. I wouldn’t set this too high, as this is something you can adjust with the next tool we’ll discuss.

That’ll get you started, but tweet the settings to your liking over time. There is a great compressor built into XSplit Broadcaster which should cover everything you need but you can, again, add different ones. There really are a lot of great VSTs for live streaming!

Limiter VSTs for Live Streaming

We all have hype moments when gaming, I mean that’s the whole fun of streaming right? However, nothing ruins the moment more than distorted, clipped audio. You can minimize this with a limiter. Unlike a compressor, a limiter is specifically focused on the higher audio levels.

So you basically set a threshold, something right before the audio will clip, like -2 or -3 DB. The limiter will then reduce the level anytime the audio hits that threshold, saving you from clipping.

More advanced limiters will also allow you to raise your overall audio level, so you make sure you’re hitting levels where you are just barely triggering the limiter from time to time. This really can be an essential VST for live streaming as you’ll have clear audio without worrying about clipping.

So those are the main VSTs you’ll want to get started with for live streaming.  They’ll greatly enhance your audio and if you look around you can find high-quality free versions. If you have any questions about how to use these VSTs be sure to let us know in the comments.

How to Run a Low Latency Co-Stream with Friends

Have you ever wanted to stream with your friends? And I don’t mean streaming with them coming in on a Discord call. I mean actually pulling in your friend’s face cam and gameplay feed in as separate sources and with low latency. This is the kind of thing that can make running an online tournament viable or having live head to heads between your friends streamed. Well, we’re here to talk about co-streaming so let’s get into it!

Co-Streaming with VDO.Ninja

We will be using VDO.Ninja, which is a free open source tool that uses webRTC to send low latency video and audio via your web browser. We created a guide on how to get started with VDO.Ninja, check out the video below to watch it. You’ll want to share it with your friends as well as they’ll need to understand the basics.

You’ll want to set up a room as you’ll need to manage multiple VDO.Ninja feeds. I recommend enabling pro-audio mode and up to 1080/60 video. This will require a lot of bandwidth, so make sure both you and your friends have good internet connections. 

After that is done copy the guest link and make sure to let your friends know they will be using this URL twice. One for their face cam and one for their gameplay.

Getting your guests set up

We will be using XSplit Broadcaster as a sort of video mixer and splitter to get everything to work. First, your guests will need to set up two scenes, one with their Facecam and one with their gameplay capture. This can be console via a capture card or game source captured directly on PC. Then they’ll want to set a virtual camera output to a face cam scene.

Then they’ll want to use the invite link and when asked set their camera to the XSplit Virtual Camera and set the microphone input as whatever microphone they’re using. Now for the gameplay, they’ll need to make sure the microphone source is muted and the system sound is set to the default device so that the gameplay audio is captured.

Next, they’ll need to create a projector output as a window. Then, go to another VDO.Ninja window, but this time instead of a video source they’ll be sharing a window. They can then share that projector window with you. Then in the audio input set XSplit Broadcaster as the microphone. Now your guest will be sending gameplay video and audio!

A person playing on a gaming PC co-streaming with RGB enabled headphones on.
Photo by Sean Do on Unsplash

Setting up the host

So as the host, you’ll have an easier time. You’ll see the feeds coming in from the director video feed in VDO.Ninja. Simply copy those links and add them as browser sources in XSplit Broadcaster. Arrange the sources however you like and adjust the audio levels.

You may want to set the audio to stream only, so you don’t hear your friend’s microphone and gameplay audio over your own. You can add as many of your friends as your internet connection can support as these are basically streams feeding into your PC.

If you have any questions on how this co-streaming setup works, be sure to leave them in the comments!

Five Common Ways to Fix Your Gaming Stream

We’ve been working in the streaming industry for over ten years now here at XSplit. Consequently, we’ve seen and helped solve a lot of problems over the years. Here, we run down common issues streamers run into and the solutions for them to help you fix your gaming stream!

How to fix your gaming stream with laggy video

If you or your viewers are seeing a choppy or laggy stream, check your encoding stats. If you see dropped frames, it means you may have set your bitrate too high for your internet connection. You can adjust your bitrate while you are live, but it’s good to do an internet bandwidth test beforehand, especially if your connection is throttled from time to time. This is always a sure-fire way to fix your gaming stream.

Now if your stream is pixelated, this means the bitrate is too low. If you have the bandwidth you can increase the bitrate, but if you don’t you will have to reduce your streaming resolution and frame rate. Changing your bitrate in XSplit Broadcaster is simple, just click the gear next to your output in the Broadcast menu and move the bitrate higher. There are limits, for example, you can’t go higher than 6000 kbps on Twitch so it’s best to check with wherever you’re streaming.

A person sat at a PC with a light on them wearing a gaming headset looking for ways to fix your gaming stream.
Photo by Tarikul Raana on Unsplash

Gameplay feeling sluggish?

When many start streaming, their gameplay can begin to feel sluggish or laggy. Streaming in full HD/60fps does require a fair bit of resources. This can affect the performance of your games if you’re playing them on the same PC you’re streaming from. There’s a variety of solutions to this depending on your priorities that can help fix your gaming stream.

If you don’t want to sacrifice your gaming experience, you will need to reduce the resources required for encoding. One way is to lower the resolution and frame rate of your stream. 1280×720 30fps is generally a safe setting for most modern systems. In XSplit Broadcaster you can do this but clicking the resolution drop-down menu in the top right-hand corner. Remember, however, that you’ll need to do this offline.

Next is using hardware encoders like AMD VCE, NVIDIA NVENC, or Intel Quicksync. These are generally present on all the latest devices, but NVIDIA NVENC will give you good stream quality if you have an NVIDIA graphics card that supports it. Intel also recently introduced Intel Arc AV1 encoding which shows some very exciting results! If you don’t want to sacrifice stream quality or gameplay quality, you’ll likely need to get an additional PC that is dedicated to streaming.

Noisy Microphone?

The first thing to check on your microphone is if you’ve set the gain too high. I know we all want to tune it to 11, but setting the gain higher raises the noise floor. Basically, it makes the mic more sensitive to sounds besides your voice. Changing this can really help fix your gaming stream. Target around -18 to -12 DB for your voice when setting your microphone input level. You’ll be able to use plugins to raise this level, which we’ve covered in the video below.

If you’re still getting noise it could be environmental noises like from an air conditioner, or your PC. You can remove this noise with noise removal and/or a noise gate. These are both available in XSplit Broadcaster‘s DSP settings. You can use Broadcaster’s built-in noise removal, or NVIDIA’s if you have an RTX GPU.

A noise gate lets you set the threshold that needs to be passed to activate your microphone. This is useful for consistent low noises like keyboard clicks, but once the gate is open, these noises will come through. Finally, if you’re still having issues, I highly recommend getting a dynamic microphone, we have a guide on picking the right microphone for streaming here.

How to fix your gaming stream alert sounds

We all like our donation, follower, subscriber alerts right? Nothing like the sound of progress, until you’ve heard it a million times. Sending your alert sounds to only your viewers is easy in XSplit Broadcaster! Right-click on the browser source and set the audio to stream only. You can adjust the level as well and see it in the audio mixer. Now you’re all set, you’ll still see the on-screen graphics you just won’t hear the sound yourself!

A person is sat in a gaming chair with a headset on playing a game and streaming while trying to find out how to fix your gaming stream
Photo by ELLA DON on Unsplash

My camera looks grainy

So you’ve just picked up a Facecam, but oh no, it’s super grainy! Cranking up the ISO or gain just makes it worse! What your camera needs is light! Any lighting will help, even a room light, but it’s best to get a dedicated light for your streaming area.

Now if you can try to diffuse the light a bit, this will help with harsh shadows. Many lights come with their own modifiers for diffusion, but if you’re going with the DIY method, you can use things like wax paper. Though make sure it isn’t a bulb that produces heat if you’re going to put something over it because fire is a real factor!

These are some common things we’ve found that can help fix your gaming stream. We hope you’ve found these useful! What common issues have your encountered? Or maybe just something you hear a lot from your streaming friends? Let us know in the comments!

Why Virtual Events are Still Important in 2022

During the pandemic, a lot of in-person events went online. From meetings, conventions to concerts, people found ways to keep gatherings happening. Online events, we found out, actually have a number of advantages that in-person events can’t replicate! So, why are virtual events important? Let’s take a look at some of the successes and why we may want to continue this trend in the future!

What is an Online Event?

While Mark Zuckerberg may see us wearing headsets in his metaverse, as it stands right now most virtual events take place over a live stream. This can range from a private Zoom call, a YouTube live event anyone can watch, to a ticketed experience that is using a custom service.

One of the bigger events I’ve seen was the DC Fandome event. This was an almost four-hour event held to tease new films, tv-series, and comics from DC. One of the most successful elements of the show was the production levels. They clearly invested in making the event feel special to the audience. They had virtual sets and had hosts and some guests fully green-screened into the virtual arena they had created. Some of the guests were on a Zoom call but even then they had mostly made sure everyone had good cameras, microphones, and lighting. This event went out for free on their site but also over YouTube making it very easy for anyone to watch.

An example of a musician on a smaller scale would be the quarantine concerts by Devin Townsend. Playing a backing track he created in his home studio this ticketed event was inventive with its production (a camera on a rotating fan!) and fun to watch. As the years went on the production quality of these events grew. Examples like the Ocean Machine concert which included a drone for live footage or the Devolution series which was full green screened.

PAX, the gaming convention, also held great virtual events with many people handling their own production with PAX Online. This included panels of multiple guests discussing topics and putting on shows to esport events all under the same banner as the in-person events.

Why are Virtual Events Important?

A virtual event has a number of big advantages over an in-person event. First of all, and it’s probably the biggest, is inclusivity. Far more people are potentially able to attend an event they could watch in their living room than they could having to go somewhere. There is no maximum capacity, there isn’t a barrier to entry and anyone with an internet connection and a device to take part can join in the fun!

Secondly, you not only get a wider, more global audience but you also can attract more speakers as well! You can have people from different sides of the world discussing topics with each other! Many people have been held back from attending large events for distance and financial reasons, with a virtual event the barrier to entry is much lower.

Why are virtual events important? Giving people the ability to connect from home, as seen via this laptop displaying a multi person Zoom call with a coffee cup next to it on a table in a home setting demonstrates.
Photo by Chris Montgomery on Unsplash

So, why are virtual events important? Well, a bigger audience with a bigger reach can watch events put on by a more global cast of people. Ticketed virtual events are much more accepted now if you’re looking for a return on investment but when it comes to potential opportunities for engagement it doesn’t get much bigger than a virtual event! With the right equipment and software like XSplit Broadcaster, it’s easier than ever to produce these events. Even green-screen levels of production like we saw above have become more accessible for more and more people.

Now, this isn’t to say that a hybrid event isn’t something you should also consider, where you still have an in-person hub for your event. But, you should also consider running an online event beside it, broadcasting things like panels and such to a global audience.

How To Stream To Telegram From Your Desktop

Telegram is an encrypted, multi-platform messaging service that boasts enhanced security features. Recently, they have introduced live streaming which can not only be done from their mobile app but also from your desktop using programs like XSplit Broadcaster. Here, we’re going to discuss how to stream to Telegram easily from your desktop!

Telegram Desktop Streaming Setup

The first thing you’ll need to do is make sure you either have a group chat or channel set up as this will be where you’re streaming to. Also, it’s good to remember that you can only start a live stream using the Telegram app so make sure you have it to hand! Click on your group icon, click live stream then select live stream with. Finally, you just need to copy-paste the RTMP and Stream Key over to your PC.

To stream from your desktop you’re going to need a live streaming program, and you may be surprised to learn we recommend XSplit Broadcaster. Setting up your scenes, your camera and other sources is easier than ever with our streamlined setup process. We discussed that a little more in the video below.

Once you’re set up you’ll need to add a custom RTMP broadcast output. This is easily done by heading to the Broadcast menu, selecting the Custom RTMP output, and hitting the cog next to it. We discuss this in more detail here. This is the place you’ll need to enter the custom RTMP URL and Stream Key that we for from the app earlier.

For streaming settings, we recommend a bitrate of 4000 and 192kbps audio bitrate. You might also want to set your resolution to 1280×720 and 30fps as a good starting point. You can adjust these later if your internet connection and processor can handle it but these settings should get you live at a reasonable quality.

Start Streaming

Once you’ve set everything up head to the Broadcast menu and select your custom RTMP output. This is where things get a little different from a normal desktop stream. You’ll need to hit start streaming in the Telegram app as well for everything to go live. From here, you’re live, pal! Once you have finished your stream make sure you not only stop streaming in XSplit Broadcaster but in the Telegram app as well.

The stream itself is coming from the app and your desktop input is just a part of the stream. This means you can have multiple telegram streams live at once! Something to keep in mind when you’re planning future content!

An iPhone with various messaging apps including Telegram which you could stream to from telegram desktop streaming solutions like XSplit Broadcaster.
Photo by Adem AY on Unsplash

Troubleshooting

If you are having problems going live or your streams are disconnecting you may need to add an exe parameter in XSplit Broadcaster. To do this, right-click on the shortcut for XSplit Broadcaster and click Properties. In the target section outside the quotation marks paste this:

Skippoststartstreamportcheckoncustomrtmp

Then click ok, launch XSplit Broadcaster and start streaming as normal! If you have any questions, please don’t hesitate to leave them in the comments. Our support team is available 24/7 in live chat for any tech support here on the site!

How To Livestream Your Local Sports Event

The last few years have seen a rise in the number of real-world teams using live video platforms such as Twitch and YouTube to bring local sports to their fans without the need for traditional TV deals. Streaming your local team’s matches live has all kinds of advantages from having highlights to share on social media and attracting new fans, to potential sponsorship deals. And the best news: getting started isn’t hard, and the XSplit team is here to walk you through how to livestream your local sports event.

Getting online from the field

It’s very unlikely you’ll be able to connect to a wired ethernet connection to livestream your local sports event. (the general recommendation you will find). Most recreational fields don’t come with built-in WiFi coverage. Even if you do have access, publicly available networks typically don’t provide the speed or stability required to stream successfully. It’s always worth testing though – connect your laptop to the network and run a basic network diagnostic such as Speedtest by Ookla to check it out. You’ll want to have between 4 and 6 Mbps (megabits per second) available on the upload side in order to successfully stream at 720p. This is a resolution we believe is a good trade-off in terms of quality and compression.

If you don’t have that, don’t worry, it’s not game over yet! 4G LTE connection speeds can run between 7 and 16 Mbps on the upload side, so using your phone or a personal hotspot to stream is a viable option.

Two people playing football on a green field in sunlight running for the ball which you could watch online if you learn how to livestream your local sports event.
Photo by Omar Ram on Unsplash

Your phone and laptop are a powerful pair

While it’s possible to stream directly to most live video platforms straight from your phone, this generally prevents you from adding valuable visual pieces to your sports team’s broadcast like a scoreboard, clock, or team names. It’s much better to connect your phone’s camera to your computer and use it as an input source within your live streaming software of choice. Connecting this way allows you to capture the action with your phone, but also add additional elements to your stream through XSplit Broadcaster like the ones mentioned earlier. XSplit actually has an app for seamlessly integrating your phone’s camera into your XSplit Broadcaster stream – XSplit Connect: Webcam.

Audio and commentary for your local sports event

Another great thing about running a stream through your computer is having high-quality, live commentary. You can plug a headset or microphone into the laptop from which you’re streaming and manage it as a separate audio input. If you’re looking to have more than one person on commentary, you could also use a small USB soundboard or audio interface. Something like the Scarlett 2i2 from Focusrite would work well, but make sure the headsets or mics you have can connect to it!

Whichever option you choose, remember that keeping that audio signal crisp and clear is important to your viewers. Test your levels beforehand – in XSplit Broadcaster, the meters are in the middle of the main screen just to the left of the microphone icon and right next to the scene title. Then, if you do need to adjust your levels up or down, this can be done easily by going to Tools on the menu bar and using the audio mixer.

Best camera to livestream local sports?

If you’ve outgrown your phone and laptop team-up, there are a number of options to upgrade your camera. But we’ve got you covered: before you buy an upgrade, check out the XSplit team’s Ultimate Camera Buying Guide for Content Creators.

Also, don’t forget that your new camera may not have the ability to connect wirelessly to your laptop and that your laptop likely doesn’t have a video input of its own either. You’ll need to return to a more traditional camera-to-streaming computer setup, likely using a micro HDMI cable to connect the camera to a video input adapter such as the Elgato HD60 S+. One last pro-tip on your live sports streaming setup: you’ll likely need longer cables than you would with a typical video gaming setup in order to give yourself more options for camera placement and movement.

What’s the Best Kind of Lighting for Conference Calls?

Even cheap cameras can produce surprisingly good images these days, although most models are very dependent on lighting. Low light can lead to noisy or blurry images. Badly positioned lights can leave you in shadow, while very harsh lighting can highlight your face in the wrong ways. Let’s touch on each of these in more detail so can look your best with the best kind of lighting for a webcam.

Do you have the best kind of lighting for a webcam?

Cameras work by catching the light and turning it into electrical signals. If lighting is insufficient, the camera will compensate, at the expense of image quality. Here’s what might happen if there isn’t enough light:

  • Exposures can be made longer, which can lead to blurring
  • The signal can be amplified, which causes noise
  • Pixels can be combined and smoothing algorithms used, which will make the image look blurry and blocky

Your studio or office may already have enough light in it, but if it doesn’t, you can mount additional lights behind the camera. Higher-quality cameras will often work better in lower light conditions. However, for webcam lighting, you’ll want to ensure you’re giving it as much help as you can.

A person sat in front of a ring light with headphones on is one of the best lighting for a webcam.
Photo by Karolina Grabowska from Pexels

Are your lights in the right place?

It’s very important for lighting to be situated behind the camera. This is because webcam lighting needs to illuminate your face without shining into the camera itself. This applies to sunny windows, too – the camera will automatically adjust to the brightest part of the image. If there’s a window behind you, it will darken the whole image leaving your face in shadow. Ideally, you want to have the light source no more than 45° from the camera, and definitely higher than your face.

Different angles will give different effects, so try experimenting to see which one you like most. If you’re using software like XSplit’s VCam to replace the background, getting good lighting can instantly improve it’s effetiveness. But it’s still a good idea to make sure that you’re well-lit generally for your conference calls. If you’re in low-light settings or don’t get access to lots of natural sunlight, you could try a daylight bulb. They are designed to imitate the natural light of the sun.

A person, well lit, is sat in front of a laptop on a call with someone, knowing the best lighting for a webcam. A notebook is on the table as well as a water bottle and some files.
Photo by LinkedIn Sales Solutions on Unsplash

What shape is your light?

Small lights, such as phone torches, give very harsh shadows. It’s a technique sometimes used in art, but best avoided in a video conference or streams since you don’t want the lighting to distract your audience. There are two main options for adding light:

  • The best lighting for webcams is probably a softbox or key light. These have a larger light-emitting surface, which results in softer shadows and a more natural feel. You can also place them at a slight angle (no more than 45°) from the camera to give your face a bit of depth from the soft shadows. If you’re looking at softbox lighting, you can easily get your hands on an entire kit from Amazon. Check out ESDDI for a durable light with smaller dimensions or Neewer for a high-quality dual light that’s also good for a budget. For key lights, Elgato is a popular choice as it’s ultra-bright, adjustable and fully dimmable. It also keeps the heat low in comparison to softbox lights so you won’t be sweating on camera!
  • Then there are ring lights. These are compact and versatile, so you can use them whether you’re on a conference call from your phone or computer. The Cyezcor Video Conference Lighting Kit is an ideal USB light. It can be attached to your laptop and delivers an adjustable colour temperature.

You can also produce the softbox effect cheaply and easily by shining a bright light onto a wall behind the camera. This effectively uses the entire wall as the lighting surface, though make sure that you use a white wall –⁠ you don’t want to change the color of the light.

This isn’t the first time we’ve touched on lighting –⁠ if you’d like to find out more, check out our recommendations on tips for improving webcam quality. And the next time you’re setting up for a video conference, remember to make sure your lights are in front of you and not behind.

How to Live Stream a DJ Set

On my daily browse of Twitch I stumbled across a DJ set that basically played all the dance hits from the 1990s through to the 2000s. It had special effects, background dancers, everything! Now, in the world of DMCA takedowns, streaming copyrighted music, something we have discussed before, isn’t really a good idea but if it’s DMCA safe? It can be a great way to connect with a new audience! Let’s take a look at how you can live stream DJ sets with a bit of production flair!

Setting up to stream a DJ set

At a very basic level, streaming a DJ set can be very simple. It’s likely you’re DJing old school with turntables and a mixer, or via software like Traktor or Serato DJ Pro. If it’s the former all you need to do is send an output from your mixer to an input on your PC. This can be your line input or a dedicated audio interface like the EVO4.

If you’re using software and the audio is coming from your PC, all you need to do is capture your system sound. XSplit Broadcaster does this automatically so out of the box you won’t need to change anything. However, if it’s not, just head to Settings, and Audio and select the correct audio. If you’re using software with a DJ controller, like a Pioneer DDJ, then all you need to do is see if it has an audio output you can capture like a traditional DJ system.

A digital set of DJ decks hooked up to a laptop is a good start with learning how to stream a DJ set
Photo by Gabriel Barletta on Unsplash

Visuals

Now you have your audio set up correctly to stream a DJ set, let’s take a look at setting up some visuals. A good start is for people to see your lovely face, so why not add a webcam? Or, if you’re not interested in having yourself on the screen you could point the camera at your mixing decks. No matter what, the best entry-level camera for streaming is the Logitech c920 series. They can mount on a monitor or you can use the ¼ threading mounting point to add it to a tripod.

If you’re using software, you could capture the software in XSplit Broadcaster as well as your webcam by adding it from either the Game Capture menu or, if it’s not showing up there, by using Smart Capture. You could even take a cue from lo-fi hip-hop beats to chill, max and relax to and put a looping video image or gif. These can be put directly into XSplit Broadcaster, for a video simply right click and set it to loop forever. With a gif, it will just run automatically. Simply resize it to fit the way you’d like and you’re good to go!

Taking streaming a DJ set to the next level

What is a DJ broadcast without some special effects? We need some air horns! With XSplit Broadcaster you can create a variety of special effects to help you stream a DJ set! We’ve actually made a hand video that I’ll link below which shows off some of the power effects systems that are built into Broadcaster.

It’s best to use effects in conjunction with macros so you can easily trigger them with a hotkey press or even automatically depending on the conditions you set. You can learn more about Macros here but basically, you can install the Macros plugin and set “if this, then Broadcaster should do that”. The “this” could be a button press and the “that” could be changed to a different camera, for example. We’d highly recommend checking out the Elgato Streamdeck as well. It works perfectly with Broadcaster and can trigger a whole bunch of things with a physical touchpad. This makes it much easier for you to hit production buttons while you’re DJing.

Broadcasting your DJ set

Now that you have your production setup, it’s time to stream! Broadcaster supports all the popular platforms like Twitch, YouTube, Facebook, all you need to do is login to your account. Some sites that don’t support direct login through Broadcaster will require that you use the Custom RTMP option. What you’ll need from the site is the RTMP URL and your stream key.

For your streaming settings, this will depend on your PC. For minimum requirements for a 720p 30fps stream, I recommend either a 4 core 7 series processor either AMD or Intel OR an NVIDIA RTX GPU. 
The most important setting though is your audio bitrate. Make sure to set this as high as possible to give your viewers the best audio quality possible. After you’ve configured your settings, just hit the stream button and go live!

As with all things, remember consistency is key, and make sure to let your community know when you are live! Let us know in the comments how you’ve got your DJ setup ready for streaming. What DJs do you watch already and what do they do that inspires you? Be sure to let us know! If you’ve enjoyed this guide, let us know as well so we can make more things like this for you!

How To Record Any Video Conference, No Matter The Platform

In the new age of hybrid office working, the ability to record video conference content and share it with your workforce can be crucial. However, the quality of your recording may vary wildly depending on the platform you’re using. There are also questions surrounding data protection and permissions to take into consideration when recording a conference. Let’s look at these points in more detail and see what software is best suited to your specific needs.

Why do you need to record a conference?

In some instances, you might not strictly need a recording, but here are a few reasons why it’s a good idea. First of all, it means that if any colleagues are absent, they can easily catch up. By offering a recording, it means that no one feels excluded in your company.

Depending on the type of conference in question, it might also be something that you can reuse at a later date, without having to go to the trouble of setting up a new live stream. It also allows you to watch the footage back with a critical eye so that you can refine your next presentation and make it even better.

Four people are sat around a table with someone on a video call on a large screen at the end of the room they have the ability to record video conference with XSplit Broadcaster
Photo by Surface on Unsplash

Video conferences as reference points

Along with the immediate benefits of recording your video conference, there are also some potential long-term bonuses for your company. Video conferences can be used as an audit log for details, allowing external collaborators to quickly get up to speed on a specific project’s timeline by watching the relevant meetings.

It also means that you can compile a video library of all of your conferences, which can prove to be a valuable compendium if set up correctly. This databank will give interested parties access to knowledge and history about the company that may be lost once those who are speaking during the video conference have left the company.

Things to do before recording

The most important thing to do is to make sure that all the people who will be appearing and speaking on the conference call are aware that they are being recorded, and have given their permission to do so. You should make this explicit in the invitation.

The other thing to do is to check the quality of the audio and video. The best way to do this is to do a test run of the conference and then play the footage back. Just because it says it’s recording, it doesn’t mean you’ll be getting exactly the output you expect.

A laptop computer is on a desk with a mug next to it, on the screen is a Zoom call which you could easily record video conference with XSplit Broadcaster.
Photo by Chris Montgomery on Unsplash

Which video conference software should you use?

Most video conferencing software will have the ability to record, so if you want to know how to record a Zoom meeting, one option is to simply hit ‘Record’ on the video call itself. However, this will only track the conference as it appears on the screen.

There are better software options that work across multiple platforms, such as XSplit Broadcaster, which will easily capture your screen from Zoom, Teams, or even Discord. Not only does it allow you to record from multiple outlets including websites and videos, but also features multiple audio tracks and noise suppression filters to make your video conference crystal clear.

Using Broadcaster gives you a lot more flexibility, allowing you to live mix the recording people will get. You could add a “starting soon” screen so it skips the chatter at the beginning of a call, leaving out the audio and video people don’t need to hear. You could put any links or media up in Broadcaster so the viewer gets it in a much clearer vision. There are a lot of options when you can run your recording like a live TV show!

As already mentioned, recording your video conferences can save duplication if you have to give the same information to several groups. If you want to save even more time at work, you could also pre-record your presentations so they’re ready to go, rather than having to battle through a live broadcast.