How to Stream with Elgato Stream Deck

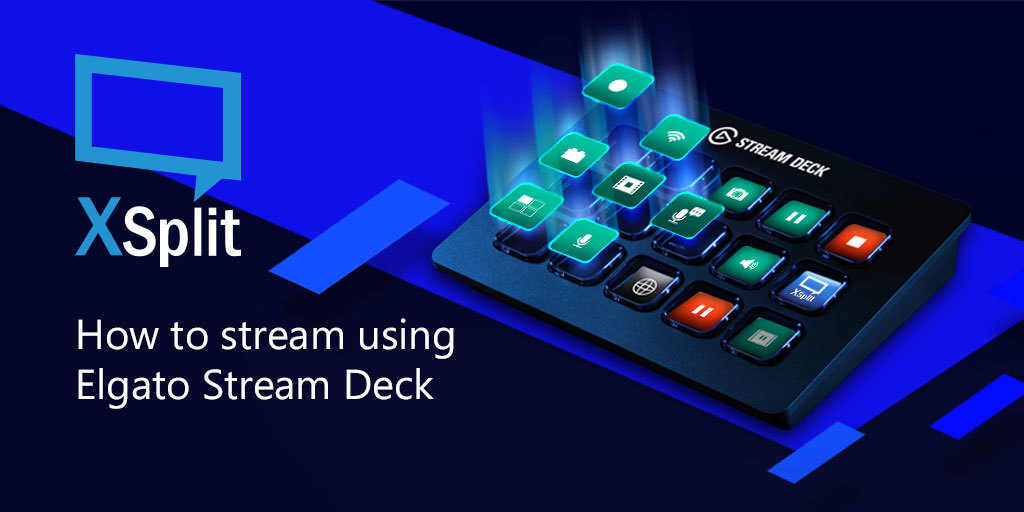
Elgato released Stream Deck just recently (2017) but it didn’t take long before it gained popularity for content creators. While not a must-have, It has become an integral tool for people who want to be able to do more with their stream. This post is a step-by-step guide on how to use the Elgato Stream Deck with XSplit Broadcaster.

How to stream using Elgato Stream Deck

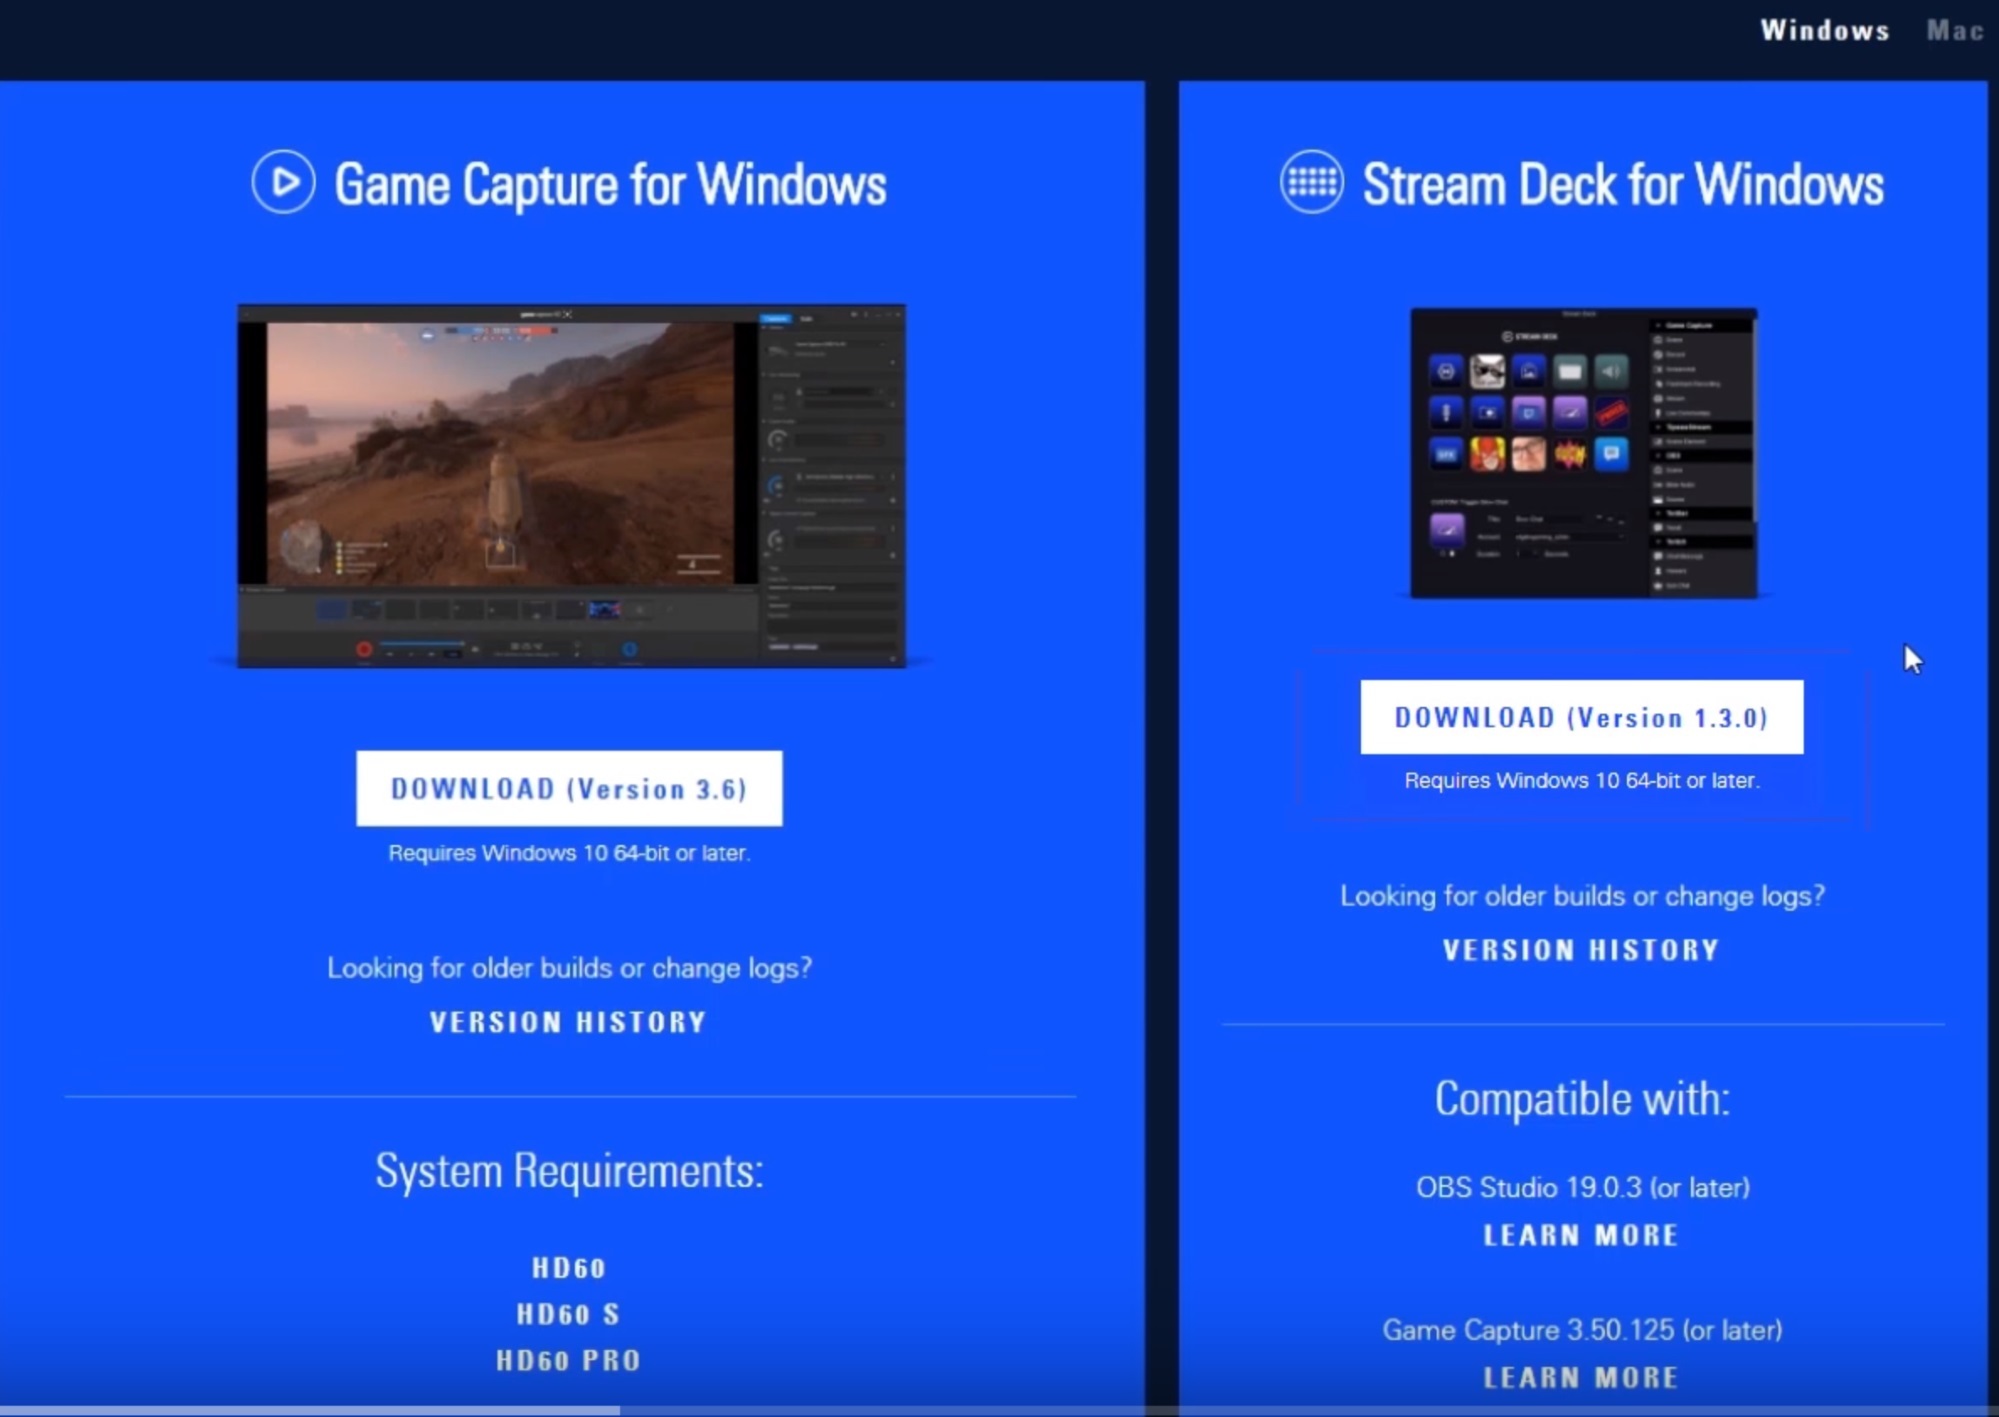
First of all, make sure you have the latest version of both XSplit and the Stream Deck software from Elgato.

XSplit Broadcaster and Elgato Stream Deck software

Once you have both installed and have XSplit opened, you will have an extension called the “Elgato Stream Deck” which will allow XSplit to interface with the hardware. Open the Elgato software as this is where you will set things up for controlling various elements of your stream in XSplit Broadcaster.

Elgato Stream Deck

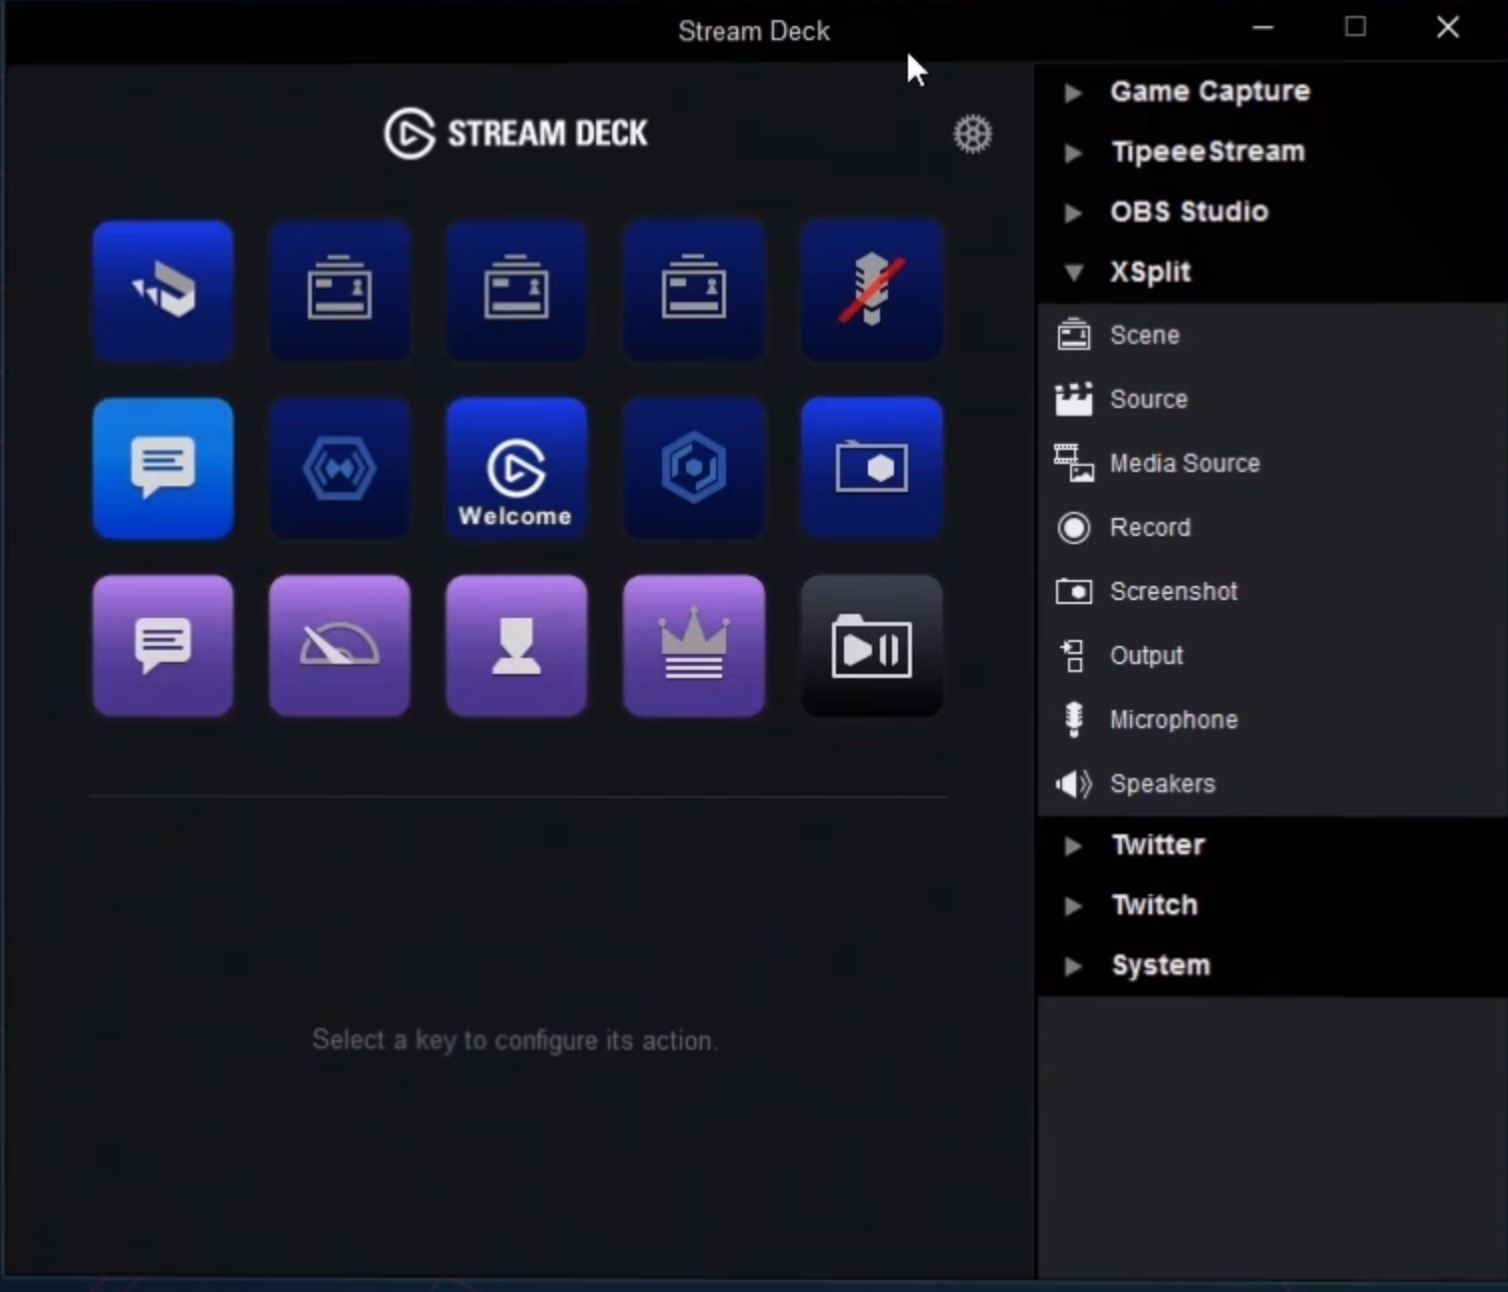
The procedure is very similar with every function that you want to set up. It mostly involves assigning the function to a button, labeling and adding a thumbnail to each, and then setting up the specific options for each functions. Here’s how to set them up.

Scene switching

This is a pretty handy option if you want to do scene switching via your Stream Deck.  To start, drag the scene function to a button in your Stream Deck. In the bottom menu, you can name it and select which scene it goes to when pressed.

Toggling sources

If you want to enable or disable your scene sources, then this is the option for that. Drag the source function to the layout then at the bottom, select the source that you want to toggle. There is a ‘toggle linked sources’ option too for sources that are linked between scenes. This allows you to toggle sources regardless if the scene is active or not.

Record/Output

This option allows you set up recording and streaming on your Stream Deck. The procedures are pretty much the same and the only difference is with Outputs where you will select where you want to output your stream if you have more than 1 channel to output it to.

Microphone/Speakers

You can also assign a function to your Stream Deck that can toggle microphone or speaker audio and they work pretty much the same. For microphones, there is an added option for push to talk should you wish to set it up like that.

Hope this guide helps you with setting up Elgato Stream Deck with XSplit Broadcaster. If you’re already using it, we’d love to know how you’re utilizing it. Share it in the comments section below.

Help us Build the Future of Streaming

We’ve been in the streaming space for a long time now as I’m sure some of you are aware. It really has been an enjoyable ride for us, learning and figuring out a lot of things, seeing how the market evolves and generally just being amazed with its continuous growth.

Looking back, a lot has changed in the market since XSplit (or the company SplitmediaLabs) started. When we began, there was no Twitch.tv yet, YouTube didn’t have live streaming capabilities and there wasn’t really any product anyone can say specializes in live streaming. Most people at the time were doing stuff mostly with their webcam and nothing else.

The present? You guys need no introduction with what’s possible right now. We’re all aware of how much things have changed and improved. And we know it’s just the start and there’s still so much potential to fulfill.

As a pioneering force in the market, we’ve always been proactive in trying to find and bring cutting edge technologies that can help content creators better their craft. Our newest project, CrowdLabs is all about bringing endless possibilities while involving you as part of the family. Watch the video below to learn more:

All you need to do is send us your gamer face footage through the CrowdLabs page and we’ll do the rest. And yes as you saw, we are giving away daily prizes amounting to a total of $3,000. Whether you’re in for the thrill of the project or you just want to win the prizes, or both, this project is for you.

XSplit 3.3 – Macros, Multitrack Audio and more!

If XSplit 3.2 was the fastest XSplit ever, version 3.3 is more about flexibility, adding important new features and options to a streamers toolbox. This update for both XSplit Broadcaster and XSplit Gamecaster will pave the way for more exciting features and improvements down the line. Here’s a quick video summary about XSplit 3.3

A quick shout out to those who have been providing us feedback with our PTR releases. Your efforts help us ensure that our final releases are of the highest quality, and we couldn’t have done it without you.

The biggest feature of this release by far is Macros, which allows you to setup a variety of automated actions that can be triggered in variety of ways.There’s a lot that can be done with this feature and we have actually already demonstrated some in our Macros blog post. We highly suggest you to check this out in case you haven’t yet

Another highly requested feature is the ability to separate microphone and system audio in recordings which is also now possible in this version. This provides more flexibility for post processing your recordings using third-party applications. This feature is also available in XSplit Gamecaster along with some other nice additions such as Mixer chat, follower and subscriber alert, and Twitch Cheers support.

For the full list of new features and bug fixes in this update, refer to the release notes for XSplit Broadcaster and XSplit Gamecaster. We’re excited to hear your feedback and as always, happy streaming!

How to Stream to Mixer With XSplit Broadcaster

Mixer has grown since its days as Beam and the underlying technology behind it is still as exciting as the first time we saw it. FTL allows streamers to have next to no latency between them saying something and their audience hearing it, and with XSplit it couldn’t be easier to take advantage of this. So, friend, let’s take a look at how you can stream to Mixer with XSplit Broadcaster.

How to Stream to Mixer with XSplit Broadcaster

To get started with Mixer you’re going to need to set up an account, which is easily done on https://mixer.com. Next, open XSplit Broadcaster and select the Outputs tab at the top of the window.

XSplit Broadcaster Outputs Tab

Select “Set Up New Output” and then Mixer. From here you’ll be asked to enter your Mixer credentials which will have you sign in to the account you just created. From here XSplit will work everything out for you and let you know your recommended stream settings.

XSplit Broadcaster Channel Setup Wizard

The next window that opens up will have all your settings filled out, if you have a good enough connection you can also check the “Use FTL (Beta)” button which will allow you to take advantage of Mixer’s low-latency FTL streaming protocol.

XSplit Broadcaster Mixer Properties

Once you click okay, your account will be added and you can now stream directly to Mixer from XSplit Broadcaster which will have your Mixer account ready to go in the Outputs menu!

Now you’re all set up, enjoy streaming and let us know how you get on!