Should You Put Your Content On Multiple Services?

It’s very tempting to reuse content by uploading the same footage to multiple sites, but is this actually a good idea? It feels sensible –⁠ after all, you’ve put all that effort into making your video or your stream. Why not try to show as many people as possible? There are definitely a few things to consider when it comes to multiplatform streaming, so let us take you through the options.

Different sites have different feels

The sort of content that viewers are looking for on different sites can vary. The greatest advantage of sites like Twitch is that it’s live and being able to interact with the streamer. People can then upload their VODs to places like YouTube. These polished videos are edited to show off the best bits, often with effects and overlays added. A live-stream viewer can sometimes treat a stream as background entertainment. Something that’s running on a secondary screen whilst they’re working on something else. But if someone is seeking out videos, they’re more likely to be concentrating on the show. They’re wanting a well-crafted story to follow –⁠ something which can hold their interest. So the content you upload to each site has to differ.

Then you have to consider social media channels, whether that’s Reddit, Facebook, Twitter, or TikTok. All of these require the audience’s attention to be grabbed very quickly and typically expect very short videos that don’t need much setup or explanation. A brief pause in their scrolling, rather than a real-time investment.

A person with a gaming headset on stood in front of a row of gaming PCs in a large room with two other people next to them, they are shrugging but smiling thinking about reusing content.
Photo by RODNAE Productions from Pexels

Is there a way to reuse content?

A number of very successful Youtube producers take footage from their Twitch streams and produce highlight videos. Turning anything from an evening to a month’s worth of streaming into a ten or twenty-minute best-of video. Twitch itself has the Clips feature, allowing short chunks of a stream to be saved as a highlight to show on your channel. Editing your footage to a fraction of its length by pulling out the best bits is a lot of work, but it’s very rewarding. It also shows your stream at its best, skipping over the mistakes and the grind and focussing on the highlights, the hilarity, and the moments of pure skill or luck.

Depending on the content of your stream or videos, it may be possible to pull out a short chunk for social media. However, you need something that grabs attention quickly and doesn’t require time to set the scene. A perfect sniper shot in Warzone or a big jump or crash in a racing game could work. But, showing off a machine in Minecraft or Factorio is might be less likely to grab people’s attention. But this can really depend, it’s best to use your judgment here. We’ve seen some amazing Minecraft machines blow up on Twitter!

How do I change my content to suit a different service?

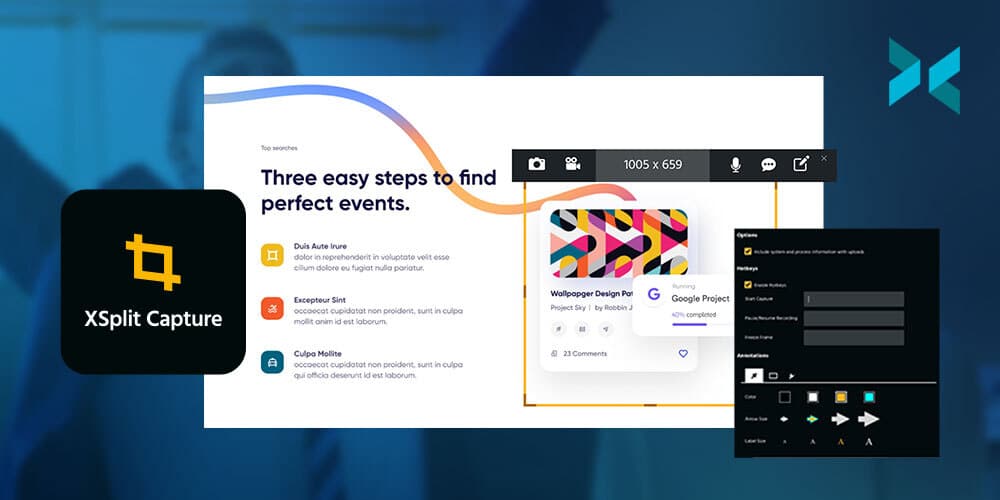
There are many pieces of video editing software available with a variety of features –⁠ some come preinstalled on smartphones, but only allow you to trim the start and end of a clip. Others are very expensive but allow movie-quality effects to be created. Personally, I use Kdenlive which is free and reasonably powerful, allowing clips to be cut up, rearranged, and layered. It doesn’t touch actual image processing that might be used, for example, to remove a mustache from a character.

Some streams may be suitable for multiplatform streaming, allowing you to broadcast on more than one service with the same feed. A tool such as XSplit Broadcaster makes this very easy, streaming to wherever you want and allowing for eye-catching effects and transitions so you can switch between different sources, play pre-recorded clips, and more!

There are definitely ways to reuse content on different platforms, however, it does take some thought. You can’t just upload the same video to multiple platforms. But, with some careful editing and targetting your content to specific platforms, you can certainly make it fit.

The Best Graphics Cards For Your Streaming Setup

Crypto miners and pandemic-related disruptions to supply chains have led to a noticeable shortage in the number of chips and graphics cards available. This is a real nuisance for streamers looking to upgrade their setups in 2021. Unfortunately, there’s nothing you can do about what’s currently on the market. So, let’s run through the best of what you can actually get right now.

In some cases, these might not be the very first cards we’d recommend for the best streaming setup. They do, however, have one massive advantage over others in each category: you can actually get your hands on them!

The best graphics card for getting started

The effects of a decreased supply and increased demand have trickled down even into the entry-level tier of graphics cards. This has created scarcity and driven up prices. However, there is one card that’s actually both available from retailers and delivers a pretty good value for your money: the Nvidia GeForce GTX 1650 Super.

Overlooked perhaps because the original 1650 was something of a flop for Nvidia. The Super constitutes a slight upgrade on the architecture of the original card but makes a massive leap forward in the memory speed. Replacing the GDDR5 (Graphics Double Data Rate memory – the RAM of a graphics card) of the 1650 with ultra-fast GDDR6. This makes it a worthwhile investment for streamers looking to get started. As with any of the cards on this list, you’ll probably need to hunt around a bit to track them down. But, we’ve had the best luck with the ASUS version released under their ‘TUF Gaming’ line.

The best card to upgrade your rig

If you’re looking to make the jump to 4K gaming or higher-resolution streaming, the Nvidia RTX 2060 gives you all that, plus real-time ray-tracing (a high-tech method for rendering light and shadow within games) of the RTX series of cards. It also features the latest-gen GDDR6 in its onboard memory. Even if the markets were wide open, the RTX 2060 would be a good mid-level card, but it’s become even better value thanks to a drop in the retail price following the release of Nvidia’s RTX 3000 line in late 2020. The ASUS and Gigabyte versions are fairly easy to locate without much digging, but, as always, just consider the markups – it’s always worth checking the retail price of any of these cards before buying.

A Geforce RTX in a PC is one of the best graphics cards for streaming.
Photo by Christian Wiediger on Unsplash

The best high-end card

Demand for top-tier cards is crashing hard against that chip shortage mentioned earlier, creating historic scarcity. If you’re planning to go all-in here, your best bet is to pick up the AMD 6900 XT. It’s one of the most powerful cards on the market and there’s a window of availability right now if this is your time to upgrade. Although, it’s likely to be at a significant markup. It’s worth noting that AMD cards do seem to be lagging behind in the high-end GPU arms race, at the moment at least. They lack Nvidia’s Deep Learning Super Sampling (DLSS) technology that uses AI and machine learning to enhance performance. So, if you can hold out until the much cheaper RTX 3080 returns to retailers, we’d recommend you do so. 

Realistically, building and upgrading your streaming PC in 2022 will require patience and careful searching. Fortunately, hardware isn’t the only way to improve your stream! Check out our guide to improving your viewership for more ways to grow as a creator.

How to Pitch Your Non-Profit

Pitching and fundraising are probably the most important parts of operating a non-profit. They’re also the most challenging aspects. There is a lot of competition for grants and investments, and it’s more important than ever to try and distinguish yourself from others. Here’s how you can use XSplit Presenter to give yourself an advantage when pitching to non-profit investors.

Keep it professional to pitch a non-profit

We’ve all been in presentations where someone’s desktop or messaging notifications have popped up on the screen and interrupted or distracted them. At best, this comes across as a bit unprofessional, at worst this could cause potential investors to lose interest altogether. 

This is a danger specific to presenting by sharing your screen directly on pretty much all video meeting platforms. Fortunately, there’s a way to erase the worry about unwanted messages popping when trying to pitch your non-profit’s cause to interested parties. Because XSplit Presenter functions as a virtual camera pointed at your pitch deck, not your desktop. It shares your presentation, and only your presentation, with your audience. No need to worry about an errant Slack message disrupting your flow or distracting your audience.

Integrate your existing web and social presence

A common story for non-profits is limited bandwidth to generate creative and promotional assets. XSplit Presenter allows you to show off the hard work you’ve put into building your online presence. You can show this directly in your presentation by integrating your existing web pages and social media accounts with your pitch deck.

And this is not just a static screenshot: you can seamlessly add web pages with full functionality to your pitch. Within Presenter they act the same way as a slide in a conventional presentation. This allows you to show off things like apps, client portals, or even just media and promotional material in their native environment. You can also easily add videos from YouTube or files directly.

Multiple people sat around a large meeting room table with their laptops open, looking towards the far end of the table where someone is pitching a non-profit.
Photo by Christina @ wocintechchat.com on Unsplash

Stay in the picture

We’re sure we’ve all also experienced that moment of disconnect that happens when an online presenter in a meeting switches from their webcam to sharing their screen, visually pops out of existence to become just a disembodied voice speaking over their slides. So much of compelling non-profit investors to join your cause while pitching a non-profit is forming connections. In these online meetings, losing the connection to your face unquestionably makes that harder.

XSplit Presenter allows you to add your webcam as an overlay to your presentations. This lets you stay a visible part of your pitch. Not only that, but it has a number of attractive formatting options to help integrate your cam into the overall style of your deck. Want to bring in a co-presenter or specialist on a specific slide? You can do that, too, adding additional NDI sources such as Skype calls as overlays. This allows you to bring in additional voices easily and in an attractive manner.

While this guide may feel directed mainly toward remote presentations, you can actually use all these features in your in-person presentations as well. Looking for more ways to improve your online presentations? Check out XSplit’s video guide to leveling up your presentations with Presenter for more tips and tricks.

Easy Communication Tools to Make Your Life Easier at Work

Collaboration is the new normal in the workplace, with employees encouraged to work together to share ideas, increase productivity and accomplish common goals. However, there is more to collaboration than meetings and messaging. For far-flung teams, especially, it may make sense to use easy communication tools to organize work, share documents, give feedback and collaborate. Here are a few of the best apps available on the market today.

The original easy communication tools

Microsoft Office is the most-used office suite around and is likely already at the center of many workplaces. Using Microsoft 365 gives teams the ability to collaborate directly on the same set of documents. Workers can share and edit documents together, speeding up the workflow. What makes Microsoft 365 more attractive is that it’s cloud-hosted, meaning it can be used not just with Windows, but also Mac, Android, and iOS.

Asana is another veteran in the collaboration arena and has been used since 2008 by companies like Uber and Intel. It’s designed to make tracking and organizing projects easy, using Kanban-like project boards or lists. Asana allows users to create to-do lists, set reminders for upcoming deadlines, send requests and facilitate conversations and comments on work.

Communications and collaboration tool Trello is another app that’s easy to use. Similar to Asana, it lets users set up project boards, set up to-do lists, and delegate work. Trello also has the advantage of integrating a number of apps, such as Evernote, GitHub, Google Drive, and Slack, to make collaborating with your coworkers even easier.

A desk with a laptop connected to a monitor with a well organised set of tools that could be helped by easy communication tools.

Communication tools focused on collaboration

With more and more people working on mobile platforms, it makes sense to use easy communication tools that are optimized for mobile. Collaboration platform Podio is equipped with mobile apps that make it easy to use on the go. In common with many other business collaboration apps, Podio comes equipped with tools for sharing files, checking the status of ongoing projects, and sharing feedback, along with third-party services and apps, such as Dropbox, Google Drive, Evernote, and Zendesk.

Flock offers a communication focus, somewhat similar to Slack. The app offers channels for group communications or one-to-one, as well as audio and video calls and screen sharing. In addition, it offers collaboration tools such as polls, note sharing, and the ability for users to assign tasks. There’s also integration with third-party apps like Google Drive and Twitter, with notifications appearing directly in channels.

You can also use XSplit Capture to record or screenshot your desktop and share it instantly during meetings. It even lets you add voiceover and annotations quickly and efficiently. You can then generate a unique link to share with the necessary people and find these captures again from your account, as they’re stored in the cloud!

Ones to watch

Basecamp has positioned itself as an all-in-one collaboration and communications platform. It offers a wide variety of standard features, like chat, message boards, to-do lists, and scheduling, and automated check-in. However, it also acts as a single place to store all documents, files, and folders, making it a useful all-in-one collaboration platform.

Drag-and-drop functionality and ease of use make Monday a very good workflow management and collaboration platform. It also integrates with Slack, Trello, Google Drive, Dropbox, and other apps, which means it can be used as a central nexus for collaboration on a range of projects.

There is a huge variety of online collaboration tools out there. No matter which one you chose, they’re all designed to make sharing ideas easier and to work faster and more efficiently – whether you are working remotely, hybrid or in-office.

How To Create The Perfect Pitch For Potential Streaming Sponsors

One of the simplest ways to get sponsors for Twitch or YouTube is to use a connection service to introduce you to companies that match your brand or level of influence. However, if you want to target specific companies to work with, then you’ll need to impress them with an attractive, informative pitch deck. Let’s have a look at what you should include when you pitch streaming sponsors to your channel and brand.

What key points should you include to get sponsors on Twitch?

It’s likely that these companies receive many pitches and proposals, so it’s a good idea to keep the introduction short and sweet. Tell them about yourself, the content of your stream, and why you have approached them. Also, detail how the proposal will benefit them.

Next, give them the important figures from your channel, including subscribers, average viewer numbers, and social media channel followers. Include your broadcast schedule, as it will give the company an idea of how often you stream and roughly how long each session is. If you have any positive reviews or comments from other companies, you could look into adding these as well.

Two people sat on a stage environment streaming looking to find out how to get sponsors on Twitch.
Photo by Alena Darmel from Pexels

What should you leave out?

While you want to show your channel figures to get sponsors for Twitch, try to avoid referring to Twitch’s own statistics as a company. These include general overviews of Twitch’s audience, including age, and how often viewers are watching Twitch streams. These apply to all channels, and, if the company you are reaching out to is aware of Twitch, they’re likely already aware of the growing influence it has.

It’s worth considering the tone you use as well. Over on your channel, you’ll be used to adopting a particular tone, language, and humor to attract viewers. With this pitch document, leave the jokes at the door and keep it formal. After all, when you pitch streaming sponsors, you’re entering into a business negotiation. However, keeping some of your own flavor is important so don’t go too dry, just maybe skip the memes.

How should you present your brand to get sponsors on Twitch?

Ideally, try to convey that your brand reflects the company you’re pitching to. Take time to do research and find out what the company’s mission is, what qualities it embodies and what type of culture it promotes.

Use this to create links between their brand and yours, in order to illustrate that there’s already an existing level of synergy. If you’ve used their products or services, include this and say why you liked them, but equally, don’t be dishonest. Rather than rely on third-party reviews, consider trialing at least one of the company’s products before approaching them. This will give your pitch authenticity.

Creating a live pitch deck

Instead of a simple letter, consider transforming your pitch into a live pitch deck using XSplit Presenter. This can make your proposal more engaging and more visually appealing by allowing you to include logos, screenshots, and graphs of your statistics. Rather than crash someone’s inbox with a graphics-heavy PDF pack, Presenter lets you record your presentation as you give it, you could also just record it, then upload it to YouTube and send the link over for even less hassle. You can appear in the video so they get an immediate sense of who you are and what you’re about. It’s also a good idea to add video and any web links in the video as well, again, you can appear in the video on top of them!

Before you consider sending out your proposal, complete a check on your channel to see what further improvements you could make to increase its appeal to both viewers and sponsors. Think about ways you could improve your viewership in order to increase your chances of landing a sponsorship deal.

How to Run a Charity Stream: Using Your Channel for Good

Whether it happens to be around the holidays, a significant event, or just because you feel inspired, using your channel can be a great way to raise money for causes you care about. Charity streaming has been a mainstay of fundraising efforts for a while now with some great results. Aside from the benefit of raising money it can also be a great way to inspire your community in general. Here are our top tips on how to set up a charity stream and how to run a charity stream!

How to run a charity stream, getting set up right!

You want your charity stream to feel special to your viewers, it is important to prepare well. If it’s your first time, we recommend you check out some more seasoned streamers to see if they do anything that inspires you. Before you start moving your own plans forward, make sure you’ve got all the details locked down. Deciding on the charity you’ll support, setting your financial goal, and figuring out how you’ll take donations are all things that need to be settled. On that last point, it’s highly recommended if you’re relatively new to the streaming game that you use an established donation platform like JustGiving, Extra Life, or Tiltify. Partnering up with one of these will help people donate with confidence.

Another important consideration is the length of the stream. Most charity streams are significantly longer than a creator’s normal stream, but it’s important to know your limits. Don’t commit to a 16-hour stream if you’re not going to be able to manage it or fill the time. 8-10 hours is more typical. 24 hour streams might seem like a good idea but can be bad for your health. They’re best avoided unless you’re very prepared.

Two people sat a desk streaming a video game on a stage knowing how to run a charity stream.
Photo by RODNAE Productions from Pexels

Create visual elements to engage and inform

Adding visual elements is next in finding out how to run a charity stream! Just as you acknowledge your viewers when they donate and subscribe to your stream, so you should when they donate to your charity. The best way to do this is to set up notifications for donations, and a fundraising ‘thermometer’ to track your progress. Many of the platforms mentioned have features you can use, but they can lack customization. XSplit Broadcaster has built-in widgets for JustGiving and Extra Life. You can tweak size, colour, and other aspects to match your own channel’s design. To access them, just head to the Plugin Store which is found under the ‘Tools’ menu on the main Broadcaster screen.

Bring some friends

Because it is likely that your charity stream is going to be longer than your normal streams, you’ll probably need to mix up the content a little bit to keep viewers engaged and entertained. A great way to help with this is to invite some of your friends to join you to help break things up. This could be in-game, to chat between sessions, or perhaps by allowing them to demonstrate a unique talent. Whatever you decide, remember to test how you’re going to bring them in before you start. This saves you time trying to troubleshoot while you’re live. 

Charity streams are a great way to reach new viewers and try something new, all for a good cause. We hope this helped you find out how to run a charity stream! Need some help figuring out how to schedule a stream that’s a little different from the usual? Check out our guide on deciding when to stream for some useful tips.

Virtual Onboarding: How To Run a Remote Induction

It’s so important to make new team members feel welcome – but how should you onboard remote employees? With hybrid and remote working now so common, virtual onboarding is an essential tool in management’s kit.

A good induction aims to immerse a new employee in the company and their role as effectively as possible, while also making them feel happy to be part of the team. In the days of the physical workplace, inductions followed a pretty standard pattern: introductions, presentations, tours, a slightly awkward lunch, and shedloads of paperwork. But how can digital onboarding replicate – and even improve upon – the onsite onboarding process?

Preparing for virtual onboarding

Onboarding starts with that initial job confirmation communication and carries on well after the new employee has started in the role. So, the first stage of the virtual induction is really the pre-onboarding period between the offer being accepted and the induction day.

This can be a good time to complete paperwork, carry out any outstanding checks, and get any other necessary admin completed. If you’re providing your remote colleague with hardware and software, getting that organized before they actually start will help them hit the ground running. Finally, make sure the joining instructions and agenda for their first day are clear and sent well in advance.

A remote induction day takes a bit more planning, but it can be a very effective way to focus on the essentials of the company and the job. Don’t assume everyone is virtual meeting-savvy though. Not everyone spent 2020 on Zoom, so check everyone’s understanding and think about a pre-induction training session if necessary.

Five people in an office around a large table while on person is on a screen at the end of the room on a zoom call taking part in virtual onboarding.
Photo by Christina @ wocintechchat.com on Unsplash

Welcome and induction day

This will look slightly different depending on whether you’re onboarding a single new person or a few employees. Either way, start with an informal online meeting so everyone can introduce themselves.

It’s tempting to simply send all the necessary health and safety information across as documents and ask them to read it. You can definitely do this; however, you have to make sure that all the essential and legal aspects of onboarding are properly covered. You could either pre-record short presentations using XSplit Presenter or run through them in real-time – whichever way you choose, it’s a handy tool to help you flag the main points succinctly. You can easily add videos and slides using Presenter too, which helps to keep people engaged. 

While it is harder to get company culture across remotely, again, a presentation can help. You might find it useful to make a short film about the company, perhaps giving more info on the area where their department is based. Make sure there are opportunities for questions, and why not try a virtual coffee break where you simply chat?

Role-specific digital onboarding

After the induction day, you can focus on individual onboarding. What will this look like? Your new team members need to feel confident with their role and supported by the company, so schedule regular check-ins. Daily is best at first, followed by two or three times per week for the first six weeks.

Don’t let these become a substitute for regular, informal communication, but make sure the channels are open and clear. Comms platforms like Slack help to keep the whole team in constant contact.

For individual job training, a mix of meetings, presentations, and webinars will help to keep things lively. Again, schedule and plan these so you know that everything is covered. Lastly, with the potential for information overload, try to keep things light and sociable for your remote team with events like virtual coffee breaks and Zoom quizzes.

Remember – onboarding and working with remote staff is all about flexible approaches, so don’t feel like there’s a one-size-fits-all approach. At some stage during this initial period, it might even be feasible to invite your new employee to visit the physical workspace. For more tips, take a look at our blog on managing your remote team.

How to Pitch to Clients Online

Your company has been invited to pitch to a new client, and you’ve agreed to deliver it. Firstly, congratulations: you and your company have clearly done the right things so far. Secondly: how do you make the right first impression? That first presentation online can feel daunting, especially if you’re used to building client rapport in person. However, there are plenty of techniques and tech that you can use to nail that all-important pitch.

You’ve already made a first impression…

Let’s start by reducing those “first impression” nerves: this is not their first impression of you. You’ve got as far as the pitch stage, so they are clearly familiar with your company and its work, and like what they have seen so far. This applies whether you’re part of a larger company or looking for freelance work.

To get to the next stage, you need to keep impressing. There are lots of advantages to online presentations when it comes to pitching. You’re not at the mercy of someone else’s tech for a start, and it’s easier to manage any signs of nerves. Your main focus is to create and rehearse a best-selling presentation – and that’s definitely something we can help with.

A person in a blue shirt talks to someone on a laptop while learning how to pitch to clients.
Photo by LinkedIn Sales Solutions on Unsplash

Creating that first presentation

When you’re preparing a virtual pitch, put content before the presentation. Work out what you need to say, then work out the best way to say it. You may be super-efficient and already have a company pitch deck in place. Don’t use it. A potential client will be more impressed by a tailored presentation that shows how exactly you can help them (you can still reuse bits of it, of course).

Make sure you read the brief. What information has the client asked for? Be sure you answer all their points, then add the extra wows that you’d like them to know. When this is all gathered, think about how to present it. Moodboard, animation, mostly talking, portfolio, PowerPoint (don’t knock it), YouTube video? There are a lot of options. Pick something you feel at home with so your confidence shines through. When it’s time to pull it all together, download XSplit Presenter. This versatile software helps you balance your images or film with your webcam and a virtual green screen.

How to pitch to clients: planning tips

With your presentation written, it’s time to do a bit of extra work to make sure it all works smoothly.

  • Plan your presentation to make sure you know your cues for screen sharing, any demonstrations, time for questions, and so on (XSplit Presenter will help you organize your timings and transitions).
  • Test your tech. So many meetings live or die on whether the technology is set up.
  • Clear your screen. Check what you’re sharing and what you don’t want to share. If you have notes, they can appear on screen with you in XSplit Presenter but only be seen by you.
  • What’s behind you? Download our VCam software to blur out your background or use the built-in background removal in Presenter.
  • Practice, practice, practice – just like a live pitch. You can pre-record your pitch to clients and watch it back!
  • Follow up with an email thanking the potential clients and sending them any relevant information. This helps to keep you in their minds.

All set? Your professional presentation is sure to impress your new clients. Find out more about how to create an online presentation in our blog.

How to Find the Next Big Thing in Streaming

Even if you’re not planning on changing up your content any time soon, it can be good to know where to look for the new trends and metas as you try to grow on Twitch. It may seem like these movements come out of nowhere (and sometimes they genuinely do!), but if you want to avoid FOMO, here are a few places to keep an eye on for the next big thing.

Grow on Twitch using top game lists?

You can access a huge amount of data about Twitch from places like Twitchmetrics, Twitchtracker and Sullygnome. It’s a little intimidating at first, but here are two tips to help you get started figuring out what might be ready to pop off. 

Firstly, when looking at ‘trending games’ on any of those platforms, toggle between 90 days, 30 days, and 7 days for the search ranges. This lets you start with a list that has a lot of data attached to it (90 days), and then get narrower and narrower with your view. Keep an eye on what games pop on and off the list. If something jumps up in the rankings when you switch to ’30 days’ and it’s still there when you switch to ‘7 days, you’ve found something that people are getting interested in, and it’s probably worth taking a closer look.

Secondly, don’t forget to look at the change in the number of channels streaming the game as well as the hours watched. If you see a massive jump in the number of people streaming something over the last thirty days or week, you might have found a game that’s ready to see explosive growth. And this can be a key to helping you grow on Twitch!

A person streaming using a PC with headphones on a microphone in front of them at a PC desk looking to grow on Twitch.
Photo by ConvertKit on Unsplash

Following the leader

It seems strange to pull one name out of a platform that has eight million active channels as of writing, but the influence that Félix ‘xQc’ Lengyel has on Twitch is undeniable. He’s the person most responsible for GTA V’s ascension to one of the most-watched games on Twitch, and he had a notable effect on the rise of both Among Us and Fall Guys as well. The choices he makes with content ripple through the rest of the platform.

This advice also applies to many of the top creators on Twitch. It can even apply to the circles you’re in of other streamers. If someone who frequently raids you is playing a certain game and you think you might enjoy it, it wouldn’t hurt to try it out! This is because the audience coming over already knows or likes seeing that game. When it comes to growing on Twitch, keeping an eye on what is being played is important!

Become a master of the release calendar

Our last tip probably sounds the most boring, but knowing the release calendar like the back of your hand can give you a leg up on understanding what the next meta could be. What games are coming out that could refresh a genre the way Valorant juiced the team-based shooter and became a top-10 watched game overnight? Maybe an older title is getting an update, DLC, or even a re-master that could pull it back into the mainstream. Knowing what’s on the horizon is a good way to see the next wave coming, and be ready to catch a ride.

Games and metas rise and fall: if you keep your eyes open, you’ll be ready to take advantage of opportunities when they arise. If you’re having trouble figuring out what to stream, check out our guide to streaming things that aren’t games to help get your creative juices flowing! Learning how to grow on twitch isn’t easy, but it can be rewarding!

XSplit Capture is now available in open beta!

XSplit Capture, our latest addition to the XSplit Suite of apps is available now in open beta! Designed to be the ultimate application for sharing screenshots and videos quickly, XSplit Capture saves you time by making use of powerful and intuitive features!

Share Your Ideas Quickly

XSplit Capture is the ultimate screen capture program letting you grab the exact part of the screen you need to share and add annotations, arrows, and highlights! Video is just as simple, with the ability to add voice-over to whatever you’re recording.

Everything, In The Cloud

All of this is uploaded directly to the cloud, and a link is added to your clipboard for instant sharing in an email, social media, or anywhere! If you, or the person you send it to, need to download the file, that’s just one click away! Your team members can easily add comments to this page on XSplit Cloud, where all your captures will be stored for easy access privately by you.

To try XSplit Capture, currently only available on Windows but coming soon to macOS, simply sign up and download the program from your dashboard! If you have any questions, thoughts, or feedback, let us know here in the comments or reach out to us on socials!