What to do for your first stream

Customize your streaming checklist

Starting a stream session can be daunting, frustrating even when you forget to check your audio prior to going live or if your presentation/scenes are all set – or if you suddenly deleted your chats!

Phew! Hold on, stop for a moment and take a breather. Don’t fret, here’s a customizable checklist that you can use prior to going live. Note that this is a sample and you can tweak the list according to your needs.

Here it goes…

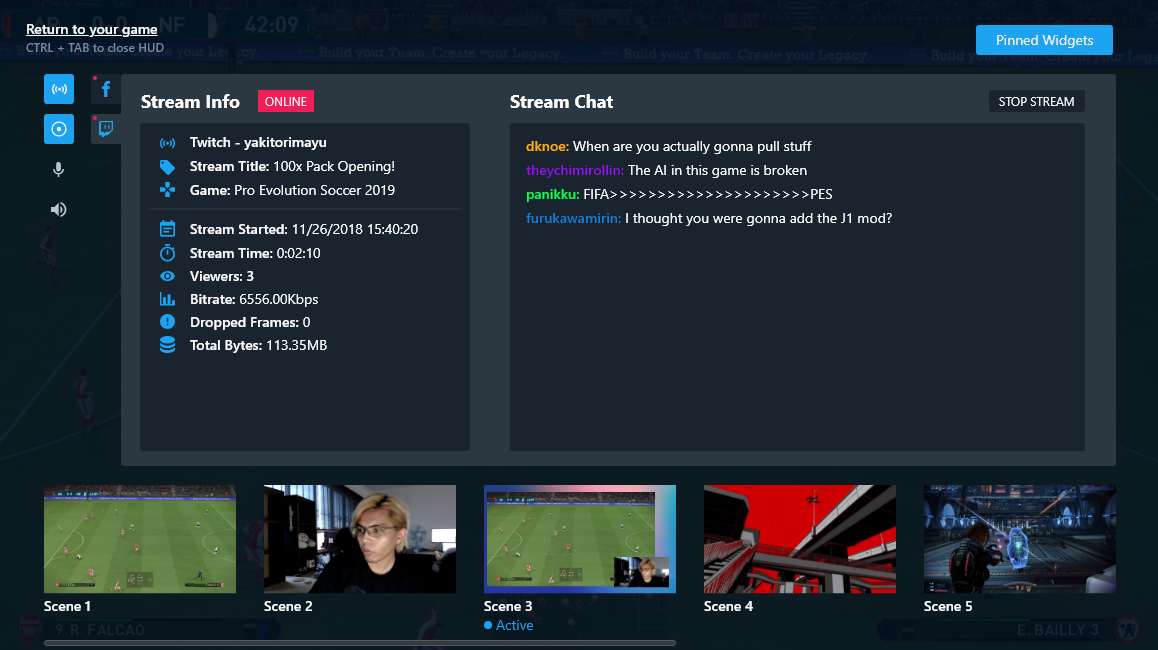
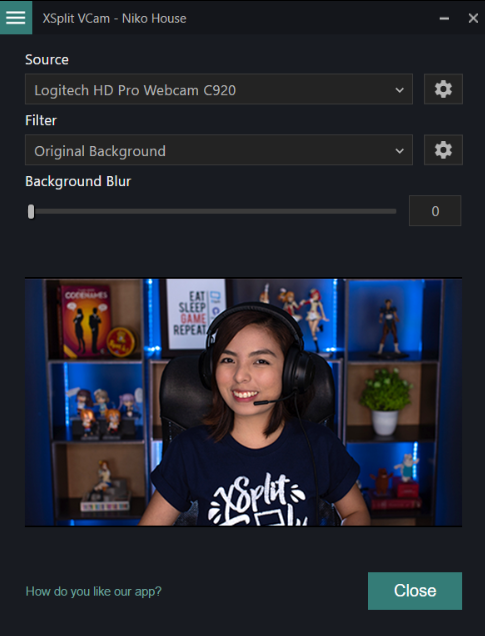
Check your presentation

Are the scenes set up according to your liking?
Is your chat/comments section added on the scene?
Is the game being captured nicely on screen?
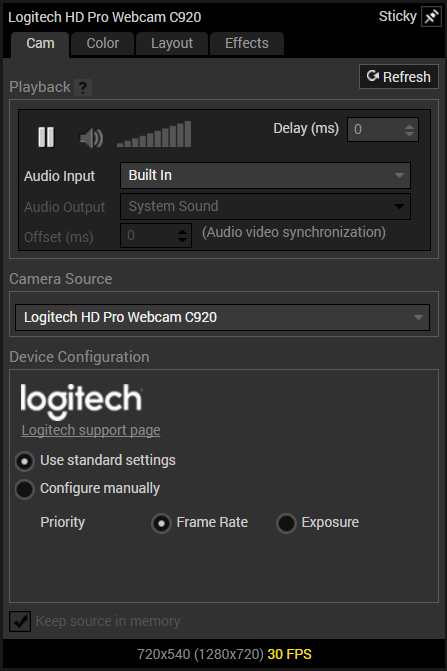
Check your audio

Is your system sound audio loud enough for the stream?
Is your microphone connected properly?
Is there an audio feedback loop?
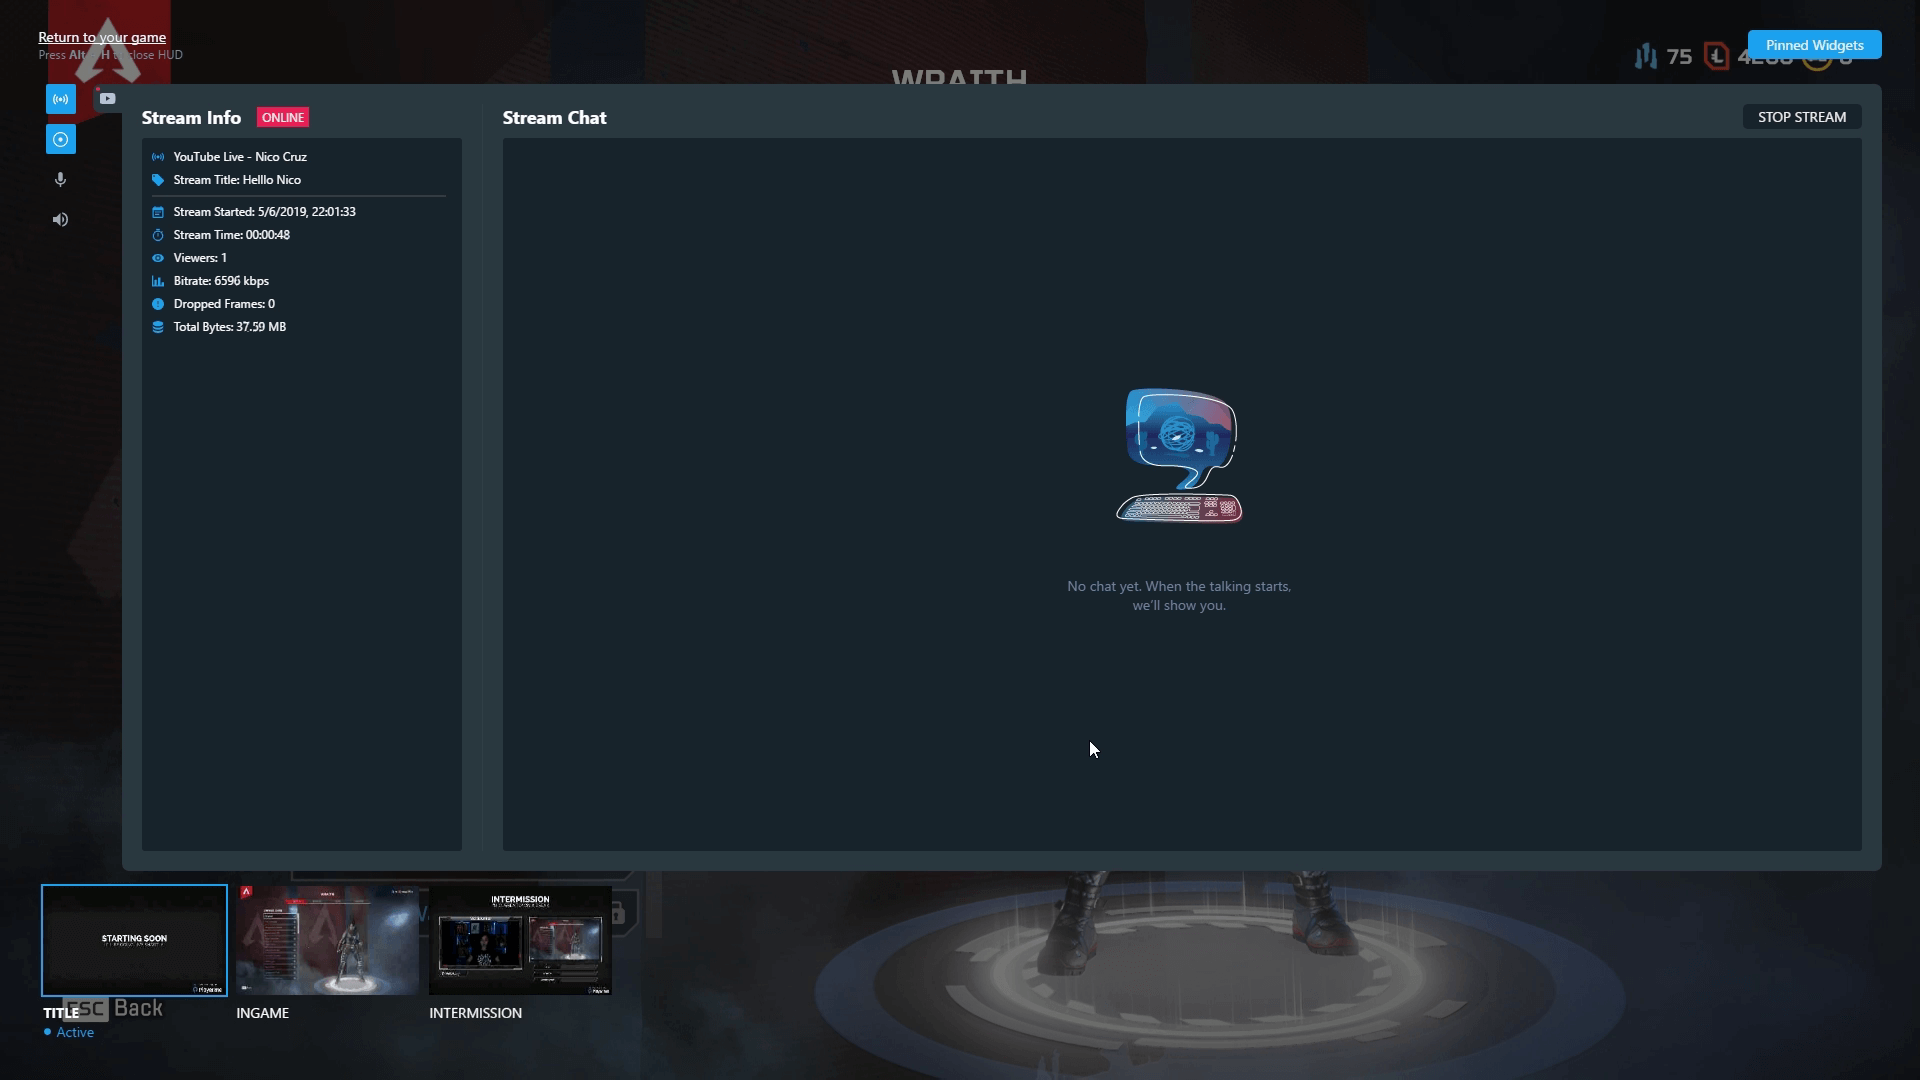
Do a stream test

Check your bandwidth health

Update your dashboard

Make sure to update your stream title with something catchy or clickbait-y to catch the attention of your loyal and potential audiences or make them curious enough to click on your stream and watch it, don’t forget to include the name of the game that you’re playing to entice other similar players into watching your stream.

If your platforms enable you to customize your stream page or post, create consistent imagery that can attract current and potential viewers into staying and watch your stream. Make it interesting!

Use your socials

Surely, you’d have your social platforms – and it pays to have the same alias/nickname/game handle or username across social media so that people can easily search for you and your content. Your online name/alias can also serve as your branding and will help in the future if you decide to go pro. Make sure that your streamer name can be easily spelled and memorable, it adds to the branding that we’ll talk about in another blog.

Stick to a schedule

Your biggest fans aka friends and family – aren’t always online to watch your streams. It helps to have a schedule so that people will know when they can expect you to stream your content. It also creates commitment on your part to stick with a time and day to go live.

Don’t forget to share your schedule on your socials not limited to Facebook, Instagram and Twitter – share it on Reddit, post it in gaming forums and/or your Discord server.

Enjoy!

In case if you’re streaming for an extended session, make sure to schedule bio-breaks and have some snacks and drinks in between. The purpose of streaming is to have fun and not restrict you from the things that you need to do to take care of yourself too.

If you’re still new to the world of streaming, we suggest you check out our XSplit Academy for some useful streaming tips!

Top 5 Mistakes New Streamers Make

So, you’re streaming on insert your platform here with insert awesome, highly anticipated trending game of the year here but you just can’t get the setup right. Here are the top 5 things that you should check to avoid streaming oopsies.

Here is a short and sweet list on what to check out before starting your stream.

Windows updates and drivers

Don’t you just hate it when a Windows prompt pops up and instructs you to update? Or worse, updates and requests for a restart. Exactly. Before anything else, check if the drivers and Windows are up-to-date to avoid untimely disruption to your streaming session.

Go to Start > Settings > Windows Settings > Update and Security > Windows Update.

If there are pending updates available, take your time in installing these prior to setting up your stream. And to avoid disruption due to update prompts, you can also change your laptop or PCs update active hours so that the device won’t automatically restart during the set active hours. Plus, the device won’t restart without checking if you’re still using it. Great trick, yeah?

Another thing, aside from making sure that Windows is updated, make sure that your drivers’ update (capture card and/or streaming software) does not have any compatibility issues with the latest Windows. You know that this can happen sometimes.

Optimizing scenes

Do you notice a slight delay when switching scenes? This usually happens when you have large videos or image files on the scene and it takes a bit of time loading the asset. So, what do you do to avoid this? The simplest way to solve this is to right-click the file source menu and click on ‘keep source on memory’. This helps the scene avoid loading and re-loading the video or image files every time you switch scenes. If you have time to convert the files, it is also recommended to compress sources file sizes by encoding them as mp4s or webms instead of avi or mov.

PC games capture

Most of the time, capturing PC games for streaming can easily be achieved with automatic game source detection, but sometimes this feature can also fail. If the auto game source fails to capture your game, what do you do?

The next step is to check if there are other running programs interfering with XSplit’s game capture, some of these programs may include NVIDIA ShadowPlay and AMD’s Radeon ReLive; if this type of program is running, close the program and see if the game is now detected in XSplit’s game capture.

Audio Echo

Audio is one of the most common technical issues encountered during a stream. Whether you experience – looping audio, no audio or audio echo; troubleshooting is easy when you use this guide:

If you opened your stream on a browser with the intention of monitoring it, check if you’re able to mute the audio. If an echo can still be heard, check your microphone settings – make sure that the ‘listen to device’ is turned off.

Go to Start -> Settings -> Windows Setting -> System -> Sound -> Input (Microphone) -> Device Properties -> Related Settings -> Additional device settings -> Listen -> Uncheck ‘listen to device’.

Dropped frames or stream lag

Now, dropped frames and a laggy stream is not fun to watch – at all. This can happen due to a multitude of things, one can be that you’re uploading a large file online and it’s messing with your stream bandwidth. So, make sure that you’re not uploading or downloading files during a streaming session; you can do that on a later time. If you’re not uploading nor downloading files through your connection and still experience dropped frames, check with your internet service provider if you have (at least) a minimum bandwidth capacity for decent streaming (usually between 1-5mbps, depends on what you’re streaming).

Okay, if the issue is indeed your internet connection and you’re aware that the bandwidth can fluctuate at times; the best thing to do is set ‘adaptive bitrate’. You can find this in the additional encoding options menu in the broadcast settings window. If you still see dropped frames after all these, then it’s best to lower the bitrate into a workable value for the stream to run smoothly (you can also do the adjustment even when your stream is live) – this one can be a trial and error so do have patience until you get the optimum combo for your set up.

Hope these help you out on your stream! If you have other questions, you can check out our blogs, search for FAQs or chat with our 24/7 customer support.

Promote Brands Using Live Streaming Video

Why You Should Care About Live Streaming in 2019: Gaming

We surely aren’t the first ones to tell you that Live Streaming has become the newest trend in Audience Engagement and Marketing on social platforms. You’ve seen Marketing Gurus try to sell you on their book before to maximize your digital presence and leverage Influencer Marketing like a boss. Well.. we aren’t that different, to be honest.

As a business, you may wonder why we are better suited than anyone to help you grow through captivating narratives achieved with live streaming. Well, it’s true that our background roots are anchored in gaming, not in business. And this is precisely the reason we are the best suited to help your business start live streaming to gain brand exposure!

Streaming is big. But you knew that.

The number of growing communities we’ve seen stem from a single gamer has truly been a spectacle to witness. Here we are, in 2019, where the popularity of #1 global game Fortnite has mainly been driven by notable Twitch Influencers, like that popular Samurai guy (love your content btw!).

Brand Exposure

But it goes deeper than that, the streamed content itself has become a marketing platform of its own! Whether in the form of traditional logos and branding exposure on stream, as well as event venues being sponsored by the likes of Coca-Cola, Taco Bell, and the whole gamut, brands seem to have found a new avenue for reaching key demographics and target audiences with somewhat of a guarantee on time exposure compared to traditional media. Game launches now even plan close to no Marketing Strategy pre-launch and instead, spend a hefty amount on launch day for influencers to promote the game.

Brand Collaboration: Uniting Pop Culture

But there’s more! You may have heard of the collaboration between Marvel Studios and Epic Games to bring an Avengers time-limited game mode to Fortnite. It’s a win-win for both: the game studio gets viral content, while Marvel gains exposure (not that they need it) and more importantly, capture a fan base that is of a young age. The brand association to a game builds a rapport with your audience through emotions, end-users also believe in a sense of belonging to a community, not simply looking up to influencers, but feeling like one of their own. Brands and businesses have all realized this by now, and if they haven’t, they’re missing out.

Beyond the Entertainment Industry

Most recently, and in my eyes, potentially one of the most interesting from a marketing standpoint, is the Nike Jordan collaboration with Epic Games. Now, I don’t have the sales figures and they probably will never be released, but I am willing to bet that they will sell more virtual pairs of Jordan sneakers through Fortnite than their last retail drop. In addition to creating brand affinity, they are also capturing a potentially younger audience who may not have the means to afford their own physical pair of shoes, but that will undoubtedly rep the brand in a digital form, and will most likely start looking up physical pairs when they can. Mark my words, if three years from now, we see 16-18 year olds have no idea who adidas or puma is, it will be because of Nike Jordan’s foresight and bold tactic to reach new audiences through unconventional means.

What does this mean outside of Gaming?

Now, what is the main takeaway from all this? You might not be a game developer, so why should you care? Because Live Streaming isn’t exclusive to gamers and it should be part of your Marketing Channels, and incorporate your brand strategy. Sure, live streaming can be used as a one-off type campaign to create exposure and hype (eg. Apex Legends) and it can be quite successful at that. But looking at how Epic Games have built a vision for the long-haul, and how other brands can then leverage the platform for their own marketing, is truly a revolution in the industry of marketing and communicating with your audiences. Don’t look at live streaming as a banner advertorial, or a way to get your logo on there, but think of ways in which you can reinforce a sense of community, through advocates and influencers to boost social media brand exposure.

Have you been able to successfully leverage live-streaming in more than just an ROI capacity on advertorial? Do let us know what you have achieved, or even failed to achieve. and how you improved from there.

We’d love to discuss more topics about the industry, so please let us know if you’d like us to cover a story and we’ll do our best to shed some light and bust some myths.

If you’re looking for a solution fro simple screen recording or professional broadcast streams, check out XSplit Broadcaster.

If you’re a gamer that simply wants to test the water for game streaming, do give XSplit Gamecaster a try, it’s super easy to test out in a few minutes.

XSplit is Better for Single-PC Streamers: The HUD

In this news series of blog posts, we’ll attempt to shed some light on new or unknown features that can help improve your live streaming, whether it be audio/video quality, or simply the management of your stream and more efficient processes.

To kick things off, I want to tell you about our latest and most innovative feature yet: the In-Game HUD for streaming. As gamers, you are all probably familiar with what a HUD is, but what does it mean in the context of XSplit Broadcaster? In short, it’s the ultimate stream management solution. It makes things so much easier, especially for single-monitor streamers and might even prevent some neck pain (we are not doctors and cannot guarantee this statement, please consult a real doctor if you encounter physical or mental pain from streaming).

In Game HUD for streaming

If you’ve used XSplit Gamecaster before, you might be familiar with the concept of our HUD streaming technology. How it works is by setting up a hotkey, you are able to trigger an overlay of widgets and stream info that will allow you to manage various settings of your live stream without leaving your game screen. Please note though that our HUD is to be used with Game Source.

Here is a list of all the neat features you can access from the HUD:

  • Start/Stop Streaming on the go (Currently under renovation, our designers are making it look fresh)
  • Recording options to get those sweet YouTube VODs
  • Adjusting audio levels when chat is blasting those TTS donations or that pesky Apex Lobby screen
  • Preview scenes and switch seamlessly (check your browser display beforehand…)
  • Pin and manage widgets such as Stream Status and FPS, Chat, stream info such as frames dropped, bitrate, viewers, etc.

XSplit HUD Pin and Manage Widgets

It goes without saying that all this information will be laid on top of your game screen and it will only be visible to yourself. You can drag your widgets wherever you like depending on what game you’re playing and set opacity and fade timers so you get an occasional pop-up to make sure you don’t miss any vital info.

XSplit Stream HUD

The inspiration behind our stream HUD was really to give single-monitor streamers a fast and easy solution to start streaming simple gameplay without a complex setup. And I can say that as a non-PC gamer myself and not your techiest guy out there, I got told off for streaming a bit too much when “testing” the product… I mean, I want to chase the dream too! But I digress.

For more seasoned streamers that may not see the benefit in the HUD, well, let me just say there are various reasons why you should use it, even if you have 4 ultra-wide monitors with 8K resolution. Other than your simple Start/Stop functions available at hand, pinned widgets are always helpful when you’re not in the midst of a heavy gunfight and just wanna take a quick look at chat without risking a stiff neck. Scene transitions are super easy to execute and can help you visualize your scene before switching, much like our Preview Editor that already exists. This will be even better when coupled with the other improvements we made with sources and scenes in general.

All in all, it’s true that none of these are new breaking features. But the way we’ve built the HUD to consolidate all of them is. This is the first step towards building a new gen of XSplit tools we envision, and we’ve only just begun.

XSplit teams up with Devolver Digital at E3 2019

With news of brands skipping on the E3 2019 press conferences and the event is a few days away, we thought to confirm that XSplit will be back and has partnered with Devolver Digital once again to produce their live stage content straight from the Devolver Digital’s lot across the Los Angeles Convention Center from June 11 to 13.

Watch our E3 adventure last year with our Community Manager Arthur Arends.

We had much fun helping out on the stream production over at the DD lot, and we surely had a blast meeting fellow creators around the convention center. Here are some photos of our adventure from last year.

For real-time E3 2019 updates fresh and live from the LA Convention Center, follow us on Twitter, Facebook, and
Instagram.

We’re also running an #XSplitxDevolverDigital giveaway during E3 so stay tuned for the mechanics.

If you’re at the event venue, come and say hi! We’ll be at the Devolver Digital booth for most of the day. See you there!

PS.
Don’t forget to tag us in your photos to get a chance to be featured on our socials. 😉

Picking Your First Facecam

One of the cornerstones of streaming is seeing the player’s reactions. Viewers love to see people react to jump scares, thrilling victories and even crushing defeats. Thankfully you don’t have to break the bank to get an amazing looking facecam. This article will cover the variety of options available for selecting a facecam for YouTube or Twitch depending on your budget.

Budget/Entry Level

If you have a very limited budget, you can actually turn your cell phone into a facecam. Purchase the NDI camera app for iOS or Android and make sure your phone is connected to the same router as your streaming PC. Start output from the NDI Camera app on your phone. In XSplit Broadcaster go to add source > streams > NewTek NDI streams and select the stream coming from your phone.

If you have a small budget for a facecam, then the Logitech C922 is a great option. The Logitech C922 is small enough to be placed on top of your computer monitor or mounted on a tripod. You can output 1080p 30fps video or 720p 60fps if you plan to pair your webcam with gameplay. XSplit Broadcaster has worked with Logitech to optimize the performance of Logitech cameras. Once you have added a Logitech camera to XSplit Broadcaster, right click on the camera to see the profiles to optimize the camera for frame rate or exposure.

Logitech HD Pro Webcam C920

If you wish to add blur effect to your Logitech camera to look like an expensive DSLR camera, you can use XSplit VCam! It is included with an XSplit premium license. Simply launch XSplit VCam and select the Logitech camera as the source. Set the blur settings to your liking and add XSplit VCam as the camera source in XSplit Broadcaster.

XSplit VCam Logitech Camera

The next big leap requires a capture card. The general requirements for a capture card are minimal input latency and the ability to capture at least 1080p60fps via HDMI. USB 3.0 and PCIE capture cards tend to fit these requirements.

Once you have selected a capture card, it is time to decide what type of cameras you want to use. If you’re looking for a depth of field effect, it is recommended to use a DSLR or Mirrorless camera along with a lens that has a minimum aperture of 3.5.

There are some important features you need to check for when purchasing a DSLR or Mirrorless camera. Most importantly you need to check if the camera has a clean HDMI output. This setting will prevent the settings on your camera from displaying on your capture card feed. It is also important to check if there is an AC adaptor available for your camera or you will need to constantly charge batteries. You will also need a tripod to mount your camera on.

Another option is buying a camcorder instead of a camera. Consumer camcorders can be budget friendly and give amazing image quality. Regardless of which type of camera you use, people will only be able to see your face clearly if you are well lit. While dedicated lights work best, if you don’t have the budget use whatever you can to light your face, like desk lamps or room lights.

Be sure to always remember when your facecam is on to avoid any embarrassing moments ending up on the internet. A tip is to always remember to have a webcam cover or lens cap around for whenever you are going offline.

Once you have selected your camera, you can use it with XSplit Broadcaster. This will allow you to create a screen recorder with your facecam. XSplit Broadcaster allows you to add a variety of sources like a capture card for console gameplay, or recording your PC gameplay with game source.

What kind of facecam will you use for your content? Let us know in the comments!

XSplit is part of Streaming 2019 Bundle

Humble Bundle is once again hosting a content creator focused bundle and we’re thrilled to have all our XSplit products as part of the amazing pool of items available to everyone for an insanely affordable price!
XSplit in Streaming Bundle 2019
Streaming 2019 Bundle runs from June 4 to June 25, 2019, and also includes other amazing software for streamers such as Action! FaceRigPro, Restream and more! But don’t take our word for it. Below you’ll find various tiers offered in this bundle.

Tier 1 ($1 or more)

  • XSplit VCam Lifetime Subscription
  • Monstercat Gold 1 Month
  • Pretzel Rocks Premium 1 Month
  • Getting Over It with Bennett Foddy
  • Darwin Project

Tier 2 ($13 or more)

  • 3 Months XSplit Premium License
  • 3 Months Restream.io
  • Pretzel Rocks Premium 3 Months
  • Monstercat Gold 3 Months
  • Aaero
  • FaceRig

Tier 3 ($25 or more)

  • 12 Months XSplit Premium License
  • 12 Months Restream.io Subscription
  • 12 Months Pretzel Rocks Premium
  • Action!
  • 12 Months Monstercat Gold
  • FaceRig Pro

If you’ve been on the fence about getting a Premium or VCam license, you know what to do. 🙂 Not only are you getting XSplit at a heavily discounted price, but you’re also getting other cool products in the process as well.

Don’t wait! Go check out the bundle at Streaming Software Bundle 2019 today!