The Best Audio Interface For Live Streaming

Upgrading your audio gear is always one of the first things we recommend you spend some money on if you want to level up your hardware. Maybe you’ve already used some brilliant USB mics on offer, and now you’re looking to get that broadcast sound. The Shure SM7B seems to be the one used by everyone, right? It won’t just plug into your PC microphone port!? What you need is an audio interface! We’re here to discuss some budget and mid-tier audio interfaces that will do the job!

The Budget Audio Interface

Most people will never need to go beyond this tier. These interfaces will connect to your PC easily and, in most cases, power your new expensive microphone. The recommendations for this level are the Focusrite Scarlett series, starting with the Solo.

The Motu M2 are also great devices, mainly since they include audio meter displays for setting levels and a decent DAC chip if you’re hooking up your headphones.

But probably the best choice for beginners is the Evo 4 by Audient. It has a feature called smart gain which will automatically set the input audio level for your microphone. This is extremely useful for beginners as it’ll ensure your audio isn’t clipping and give you enough headroom to apply effects for more advanced users.

An audio interface with many sliders and lights.
Photo by Sven Brandsma on Unsplash

Mid-Tier Audio Interfaces

So like I said, you don’t really need to go beyond budget audio interfaces unless your audio setup is a bit more complicated. For example, having a dual PC streaming setup, or you’ll need a variety of inputs for things like podcasts.

Now everyone is going to need different solutions, but in this case, I like to recommend devices like the RME Babyface Pro or the Audient id14. These are still relatively small interfaces with digital mixers allowing you to route audio between their inputs and outputs. So, if you want to split your gameplay audio and microphone audio to different outputs, you can apply different audio effects to each.

If you are producing things like a podcast, you may consider buying a mixer with USB functionality. These can vary in complexity, but generally, they have single audio mics that will output via USB. These are great for having physical controls to manage your broadcast, which will always be faster than apps with touch controls. 

A close up image of an audio interface.
Photo by Alexey Ruban on Unsplash

Tips and Tricks

There are some essential things to know about audio interfaces before you use them. First, you need to know how to enable phantom power, as microphones that require it won’t work otherwise. Usually, it’s a button, but sometimes you must dig through a menu to get it working. 

Audio interfaces act as playback devices in Windows, so if you’re going to be using them to monitor audio, make sure they are set as the default device, and if you still aren’t getting audio, check the monitoring settings on your device.

Some devices have a monitoring mode that only outputs audio from physical inputs like a microphone, not digital like your PC. So be sure to check these and adjust accordingly. Finally, when using your audio interface as a microphone device in XSplit Broadcaster, usually it’s a mono signal being received as a stereo source, so you may only hear the microphone on the left side. You can quickly fix this by having Broadcaster duplicate your audio to the other channel.

What audio interface do you use? If you have any questions, drop them in the comment section below!

The Best Work From Home Products

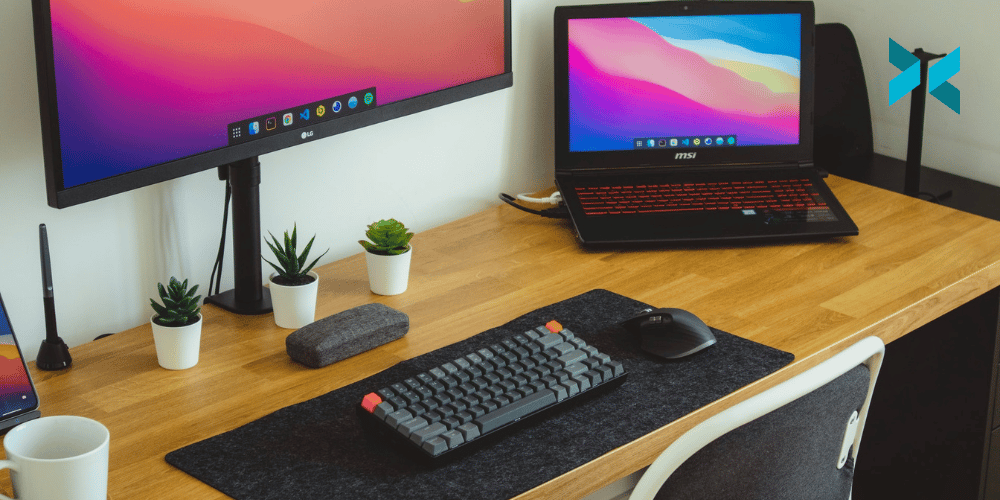
It’s year 2, 3, 4, or who knows how long of working from home. For some of us, it’s been even longer. We would say it’s about time to toss aside the folding chair, upgrade the shakey table and toss out that mouse with the broken right click. Today, we’re talking about the best work from home products with a view to improvements and upgrades!

The Best Work From Home Chairs

I’ve been working from home for a couple of years now, and the most important and best purchase I’ve made has been a proper ergonomic chair. A good chair, I feel, has good lumbar support for your back to help you sit with proper posture.

It also should have breathable material, so you don’t get warm and uncomfortable or keep the warmth locked in if you get cold quickly. It definitely should have adjustable height and adjustable arms again for ergonomic support.

I chose the Herman Miller Aeron chair, but I acknowledge these are expensive. While there are a variety of cheaper chairs, I do think this is the one thing you should put money towards to buy something that either lasts or has a good warranty, as the Herman Miller chair has. So whichever route you go, make sure it lasts and if you have the chance, try to take a test sitting.

A person sat in front of a computer with a webcam on it on their desk using the best work from home microphone.
Photo by Hillary Black on Unsplash

Computer Storage

A fast hard drive is essential if you work with multiple PCs, like a work PC and a personal PC at home. Unless you’re playing it fast and loose with your time, nothing is worse than waiting for a slow hard drive to transfer files. This also helps if you need to leave the home office and take your files on the go.

Generally, you will want to go for NVME drives like the Samsung T7 or Sandisk Extreme Pro. These drives are fast enough to edit 4k footage off of. Now they aren’t the cheapest, but if you wait long enough, you can usually get these drives on sale.

One last note is the Samsung T7 drives do have biometrics if your security is a concern, while the SanDisk drives can be hung on a keychain and are a bit more durable than the average hard drive.

The Best Work From Home Background Removal

I’d be remiss not to mention our technology for the work from home or work from anywhere crew. XSplit VCam allows you to remove, replace or blur your background. You can try it for free, and we’ve recently added some new features like auto-framing, the ability to take screenshots, and adding watermarks.

A Good Audio Setup

You’re going to be on a lot of calls on your computer. You want to be able to properly hear your co-workers and talk to them. So I recommend getting a good pair of headphones, and no, I don’t mean the 7.1 surround heavy gamer headphones. Getting a solid pair of comfortable headphones is a good investment.

Depending on your situation, you may want noise-canceling wireless headphones like the Sony XM series or Bose QC35 headphones. These are comfy and will block any background noise so you can focus on your call. If you’re doing multimedia work or don’t need noise canceling, you may opt for studio headphones like the Audio-Technica M50s or the Beyerdynamic DT770s. Now people need to hear you!

Microphones get expensive, so I recommend a solid dynamic USB microphone like a Shure MV7 or a Rode Podcaster. These will help reject background noise, save on the cost of needing an audio interface, and sound pretty lovely.

Person looking at their phone using the best work from home wireless headphones with their laptop on their desk next to some coffee.
Photo by Nubelson Fernandes on Unsplash

Lighting

This one may sound weird or obvious, but try to get some lighting if you’re doing video calls.  If you’re working with clients or freelancing, some lighting with your camera will make you look much better and more professional. It can be a room light, opening a window, or buying a lighting magnetic light like this Aputure MC. Whatever you can get your hands on to brighten yourself up.

So these are some of the work from home products we’d recommend getting an upgrade or a first-time purchase. Let us know in the comments what has been your best upgrade since working from home!

How to Maintain Online Privacy

Online privacy as a concept has evolved and changed as time has gone on. While it still includes things like never giving out your personal information, new ways we communicate can impact your online privacy. Anything could leak information online, from screen sharing to what’s behind you in a video call, so maintaining online privacy is paramount! So no matter if you’re a content creator, entrepreneur, or even an educator, we’ll discuss some tools and tips to help!

Online Privacy While Screen Sharing

Always be aware when sharing or recording your screen. If you’re hosting a webinar on eCommerce or recording a video about online deals, check if you’re logged into your accounts in your browser or not. A lot of the time, your zip code will be stored, revealing your location. There are, however, a couple of ways to remedy this.

If you are screen recording with XSplit Broadcaster, queue up the sites you will be sharing, then use the color matte tool to block the areas that can reveal your location. You can also use a VPN to spoof your location, so if you accidentally allow a website to detect your location, it won’t reveal where you actually are.

A person sitting on the floor using a laptop that is a part of online security.
Photo by Thought Catalog on Unsplash

Hide Your Background

Working by a window can be pretty nice for your mental health. However, sometimes your window can reveal your location. You can easily circumvent this by removing, replacing, or blurring your background with XSplit VCam. XSplit VCam uses AI to remove and replace your background in any video application. Not only can you use images, but you can also use a YouTube video or a gif as your background! You can use any webcam or even your cell phone.

So people can think you’re in Italy, while you’re safe in Romania! Or are you? They’ll never know!

Password Management

It’s been a rule of the internet since the beginning, but many people still don’t follow it. Never use the same password more than once. The second there is a data leak, or just one of your accounts is hacked, now all of them are. However, strong passwords are almost impossible to remember, especially as you increase the number of websites you use.

This is where password managers come into play. Now I use LastPass, but basically, all managers work in the same manner. You install a plugin to auto-fill your passwords and generate unique passwords for each site.

The password manager has a single login, which creates a point of failure, so make sure to do something special for that password, as long as you can remember it. Set a recurring date on your calendar for digital spring cleaning, where you clear out all your cookies and change your passwords.

A person using a laptop in a public space is a place to consider your online privacy.
Photo by Brooke Cagle on Unsplash

Private Search Engines

Speaking of cookies, aren’t you tired of spending all your hard-earned money because targeted ads are just too good these days? So you can reduce some of that endless harvesting of your data through search results by using a private search engine.

A page like Startpage will block cookies from being generated from your searches and when visiting various pages. You can install this as a plugin to Chrome, but generally, having a different web browser for your work is good, especially if you’re using a work PC. You don’t want any risky searches popping up in auto-fill. There are alternate tools as well, such as duckduckgo and hidemysearches.

Secure Messaging for Online Privacy

Having messaging services open while streaming or sharing your screen in a meeting is risky. Whatsapp will reveal phone numbers, and Facebook Messenger will reveal, well, I mean, Facebook just wants everyone to know your business, right?

So if you’re doing any type of screen capture while broadcasting, it’s probably best to keep your messaging services closed. Discord does offer a streamer mode for just these circumstances. Discord’s streamer mode will hide personal information like user IDs, hides server invite links, and disable any pop-up notifications.

Best of all, it is automatically activated when it detects that software like XSplit Broadcaster is open, so there is no need to panic if you’re live and notice that Discord is open.

One final tip would be, don’t log in on your browsers or use a different browser when you’re live anywhere. Use incognito modes and stay aware of what you’re doing!

How to Hold Successful Virtual Events

Virtual events are here to stay, even as the world returns to normal. The ability to keep costs low while hosting a more comprehensive range of speakers and guests from around the world is something that event organizers will want to take advantage of in the years to come. However, if you’re looking to make your event stand out from others, we have a few tips on how you can improve virtual events.

Rehearsing your virtual events

Nothing is worse for the viewer or producer than hearing “we’re having technical difficulties.” No matter how technically savvy your guests may be, it’s always essential to have a tech rehearsal before the event. Test that your guest knows how to use their camera and un-mute their microphone. With your virtual event, this will save you a lot of hassle in the long run.

Make sure everyone has a call time at least 15 minutes before they are live so you can do final checks. If they are displaying any materials like videos or slides, ask that they send these to you in advance so you can verify they are working correctly. They can always view these items in a preview window you can send them. Something you can learn more about here.

Virtual events taking place on a laptop with a mug next to it on a table.
Photo by Chris Montgomery on Unsplash

Controlling the scene

While your speakers might be the experts in their field, they may not know the basics of live stream production. This, after all, isn’t what they are there for. They are taking part in your virtual event to share their expertise.

I’m sure you’ve seen many events with chaos in the background or guests not centered in the frame. XSplit VCam solves both these problems. You can blur, remove or replace a guest’s background, and auto-framing will keep them perfectly centered in the frame.

Best of all, this doesn’t even require much setup. Using the team license manager, you can send your guests a license and standard backgrounds for all members you’ve invited to your team account. They just need to look out for the email. This will give everyone a unified look at your event.

Audience interaction

The beauty of virtual events is it is easier to moderate and incorporate the audience into the event. Now, of course, there is a live chat, but depending on the platform you are using, you will have access to tools like polls or be able to incorporate a chatbot for more interactive activities for the audience.

Polls can be done in a couple of different ways. Usually, there are integrated into the platform, or you can polls like the Facebook Polls source in XSplit Broadcaster to automatically count reactions from the audience. It’s good to encourage your speakers to incorporate multiple choice questions in their presentations to interact with the audience.

Depending on the type of show and audience, you can also encourage your speakers to watch the chat. Just remind them not to get too distracted by it. If you have an audience that may get a bit unruly or you are talking about a controversial topic, be sure to have proper moderation.

A person taking part in virtual events on their laptop talking to another person on the screen.
Photo by LinkedIn Sales Solutions on Unsplash

Bonus Virtual Events Tips

Here we have three smaller tips that should help run your virtual event successfully. First up, make sure your schedule is accessible to the audience. Put it up on the screen as a graphic, have a chatbot post a link to the schedule, and have it on your page of whatever platform you are broadcasting to. Trust me, your viewers will appreciate it.

Next, simplify your recoding process. If you are planning to upload VODs of your event, you can make your life easier if you automate your VOD recordings to split based on time so that you’ll have smaller files to upload, or you can upload while the event is still ongoing. This is easy to set in the local recording settings of XSplit Broadcaster. You can even split by file size as well.

Finally, make sure you get a good host! Something that is perhaps overlooked way too often in corporate events is not setting aside a budget for a good host. A good host can carry a bad show and vice versa. So if you are working with a client and they say one of their staff who has never been on camera will be a host, if the budget allows, do recommend bringing on a professional host. A good host will help keep the show moving and save you when technical issues crop up.

So those are the top tips I have for you today to help your virtual events run smoothly. What tips have you found? What challenges have you not found a solution for? Let us know in the comments section below!

Why is NVENC so Important for Live Streaming

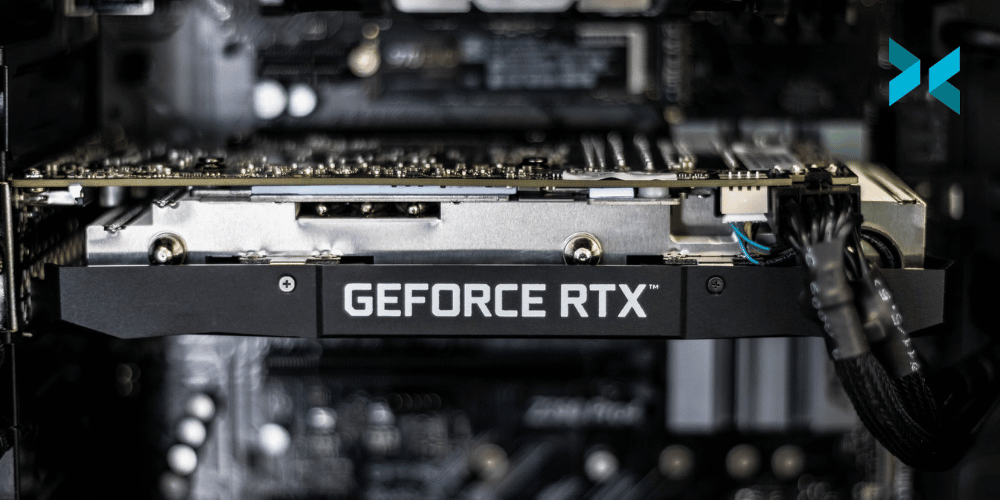
You may have noticed in pretty much every article I’ve written about streaming, that at some point I mention NVENC or tell you to buy an NVIDIA GPU. There’s a very good reason for that, NVENC is amazing for live streaming! Now that the GPU market is starting to heal, I thought it would be good to talk about what NVENC is and why I think it’s so important for live streaming!

What is NVENC?

NVENC stands for NVIDIA Encoder, which is a part of the GPUs, your graphics card, dedicated to video encoding. This has been present on NVIDIA GPUs since the GeForce 600 series in 2012, but has gone through many revisions, with the latest becoming available in the Turing GPUs, or basically the 20 series and beyond. 

For the video nerds, NVENC can encode up to 4k 8bit video using h.264. You are able to encode up to 3 streams of video on official drivers.

Photo by Nana Dua on Unsplash

What does NVENC mean for live streaming?

So up until the last couple of years, a GPU with the latest version of NVENC was the most cost-effective way of improving the quality of your stream. Previously encoding was dependent on X.264, which uses a lot of CPU resources.  That is why a lot of 2 PC streaming setups have CPUs with tons of cores in their streaming PC.

The more cores you can toss at X.264, the slower presets you can use, and the better your video quality looks since platforms like Twitch started limiting the bitrate for streams.

For a long time hardware encoders like NVENC were great for recordings, but not so good for streaming since they require more bitrate than X.264 for high-quality video. But with the latest NVENC, you can now get video quality comparable to X.264 even at the slowest presets. So, when GPU prices, hopefully, drop, you won’t need to buy a new CPU and Motherboard, basically a whole new PC, you can just get a new GPU.

Best NVENC Streaming Settings

The best thing about NVENC is that the settings are simple. Set to max quality, enable look ahead and psycho visual tuning. Now if you’re really going to be maxing out your GPU while streaming, trying to squeeze those frames out of Elden Ring, then set it to quality and disable the look-ahead function. That’s it! It’s easily changed in XSplit Broadcaster!

No need to learn lines of code as you would with X.264.  Just set your bitrate as high as you can and start streaming. Since you are allowed up to 3 NVENC instances per GPU, you can stream and record at the same time using NVENC.  And with XSplit Broadcaster that means you can record specific scenes, so you can record scenes that don’t have overlays or record your game or facecam independently, it’s up to you.

So I hope that covers the reasons why NVENC for streaming is so awesome and why I constantly recommend it! Let me know in the comments if you have any questions about NVENC!

Using VSTs for Live Streaming

VSTs are a great tool for improving the overall production quality of your stream. I mean, the people need to hear you! So today we’re going to discuss how you can use VSTs for live streaming! VST stands for Virtual Studio Technology and enables you to create a digital studio with various options. We’re going to take a look at EQ, a compressor, and a limiter which can all be used in XSplit Broadcaster to make your microphone sound better.

How to Set Up VSTs for Live Streaming

Using VSTs with XSplit Broadcaster is easy. Go into your audio mixer, and click on the settings for your microphone to open the audio DSP effects. You’ll need to set the location where your VSTs are located. Usually, they’re in program files, common files, and then in the VST3 folder.

Refresh the list then add your VSTs. The settings icon will open the interface for each VST. From there you can start diving deeper and making some tweaks so let’s have a look at each in turn!

A digital mix desk showing you the sort of interface you can expect using VSTs for live streaming
Photo by Denisse Leon on Unsplash

EQ

The first VST you should use is an Equalizer or EQ. Basically, the EQ will be used to add or subtract certain frequencies that will improve the overall sound of your voice. This is of course, very subjective as everyone’s voice is different. However, here are some general suggestions that should get you started and you can change things from there.

First, apply a high pass filter around 70hz to remove any unwanted low frequencies like air conditioning. Then do the same for a low pass filter around 15khz. Then you’ll want to find the frequencies to remove. This differs from person to person, but you can start around the 1khz range and use a boosted bell curve until you find the frequency you want to remove.

Then you want to boost the frequencies you like, such as the 100-200 range to add more bass to your voice or the 4000-5000 and 9-10k range to add more clarity to your voice.

I’m using the Fabfilter Pro-Q3 eq which is paid but has a free trial. There are a ton of free EQ plugins that you can find. They really do make a bunch of great VSTs for live streaming that we’re going to be checking out.

A person using VSTs for live streaming at a large Digital audio computer with two screens, a mic and a large musical keyboard.
Photo by Denisse Leon on Unsplash

Compressor

Compressors are always a tricky one to explain, but if you like to shout or whisper, they essentially help your viewers hear you clearly. Basically, any compressor will have you set a threshold, this is the level your audio will need to hit to trigger the compressor. This will be the highs lower and the lows higher.

You then set a compression ratio, safe ratios to start with are 2:1 or 3:1 for vocals. Then you’ll set an attack and release. You’ll want a fast attack and slightly slow release to start, you can adjust these over time. Finally, you’ll need to set the makeup gain. This is to make up for the overall loudness you’ve lost from compressing your audio. I wouldn’t set this too high, as this is something you can adjust with the next tool we’ll discuss.

That’ll get you started, but tweet the settings to your liking over time. There is a great compressor built into XSplit Broadcaster which should cover everything you need but you can, again, add different ones. There really are a lot of great VSTs for live streaming!

Limiter VSTs for Live Streaming

We all have hype moments when gaming, I mean that’s the whole fun of streaming right? However, nothing ruins the moment more than distorted, clipped audio. You can minimize this with a limiter. Unlike a compressor, a limiter is specifically focused on the higher audio levels.

So you basically set a threshold, something right before the audio will clip, like -2 or -3 DB. The limiter will then reduce the level anytime the audio hits that threshold, saving you from clipping.

More advanced limiters will also allow you to raise your overall audio level, so you make sure you’re hitting levels where you are just barely triggering the limiter from time to time. This really can be an essential VST for live streaming as you’ll have clear audio without worrying about clipping.

So those are the main VSTs you’ll want to get started with for live streaming.  They’ll greatly enhance your audio and if you look around you can find high-quality free versions. If you have any questions about how to use these VSTs be sure to let us know in the comments.

How to Run a Low Latency Co-Stream with Friends

Have you ever wanted to stream with your friends? And I don’t mean streaming with them coming in on a Discord call. I mean actually pulling in your friend’s face cam and gameplay feed in as separate sources and with low latency. This is the kind of thing that can make running an online tournament viable or having live head to heads between your friends streamed. Well, we’re here to talk about co-streaming so let’s get into it!

Co-Streaming with VDO.Ninja

We will be using VDO.Ninja, which is a free open source tool that uses webRTC to send low latency video and audio via your web browser. We created a guide on how to get started with VDO.Ninja, check out the video below to watch it. You’ll want to share it with your friends as well as they’ll need to understand the basics.

You’ll want to set up a room as you’ll need to manage multiple VDO.Ninja feeds. I recommend enabling pro-audio mode and up to 1080/60 video. This will require a lot of bandwidth, so make sure both you and your friends have good internet connections. 

After that is done copy the guest link and make sure to let your friends know they will be using this URL twice. One for their face cam and one for their gameplay.

Getting your guests set up

We will be using XSplit Broadcaster as a sort of video mixer and splitter to get everything to work. First, your guests will need to set up two scenes, one with their Facecam and one with their gameplay capture. This can be console via a capture card or game source captured directly on PC. Then they’ll want to set a virtual camera output to a face cam scene.

Then they’ll want to use the invite link and when asked set their camera to the XSplit Virtual Camera and set the microphone input as whatever microphone they’re using. Now for the gameplay, they’ll need to make sure the microphone source is muted and the system sound is set to the default device so that the gameplay audio is captured.

Next, they’ll need to create a projector output as a window. Then, go to another VDO.Ninja window, but this time instead of a video source they’ll be sharing a window. They can then share that projector window with you. Then in the audio input set XSplit Broadcaster as the microphone. Now your guest will be sending gameplay video and audio!

A person playing on a gaming PC co-streaming with RGB enabled headphones on.
Photo by Sean Do on Unsplash

Setting up the host

So as the host, you’ll have an easier time. You’ll see the feeds coming in from the director video feed in VDO.Ninja. Simply copy those links and add them as browser sources in XSplit Broadcaster. Arrange the sources however you like and adjust the audio levels.

You may want to set the audio to stream only, so you don’t hear your friend’s microphone and gameplay audio over your own. You can add as many of your friends as your internet connection can support as these are basically streams feeding into your PC.

If you have any questions on how this co-streaming setup works, be sure to leave them in the comments!

Five Common Ways to Fix Your Gaming Stream

We’ve been working in the streaming industry for over ten years now here at XSplit. Consequently, we’ve seen and helped solve a lot of problems over the years. Here, we run down common issues streamers run into and the solutions for them to help you fix your gaming stream!

How to fix your gaming stream with laggy video

If you or your viewers are seeing a choppy or laggy stream, check your encoding stats. If you see dropped frames, it means you may have set your bitrate too high for your internet connection. You can adjust your bitrate while you are live, but it’s good to do an internet bandwidth test beforehand, especially if your connection is throttled from time to time. This is always a sure-fire way to fix your gaming stream.

Now if your stream is pixelated, this means the bitrate is too low. If you have the bandwidth you can increase the bitrate, but if you don’t you will have to reduce your streaming resolution and frame rate. Changing your bitrate in XSplit Broadcaster is simple, just click the gear next to your output in the Broadcast menu and move the bitrate higher. There are limits, for example, you can’t go higher than 6000 kbps on Twitch so it’s best to check with wherever you’re streaming.

A person sat at a PC with a light on them wearing a gaming headset looking for ways to fix your gaming stream.
Photo by Tarikul Raana on Unsplash

Gameplay feeling sluggish?

When many start streaming, their gameplay can begin to feel sluggish or laggy. Streaming in full HD/60fps does require a fair bit of resources. This can affect the performance of your games if you’re playing them on the same PC you’re streaming from. There’s a variety of solutions to this depending on your priorities that can help fix your gaming stream.

If you don’t want to sacrifice your gaming experience, you will need to reduce the resources required for encoding. One way is to lower the resolution and frame rate of your stream. 1280×720 30fps is generally a safe setting for most modern systems. In XSplit Broadcaster you can do this but clicking the resolution drop-down menu in the top right-hand corner. Remember, however, that you’ll need to do this offline.

Next is using hardware encoders like AMD VCE, NVIDIA NVENC, or Intel Quicksync. These are generally present on all the latest devices, but NVIDIA NVENC will give you good stream quality if you have an NVIDIA graphics card that supports it. Intel also recently introduced Intel Arc AV1 encoding which shows some very exciting results! If you don’t want to sacrifice stream quality or gameplay quality, you’ll likely need to get an additional PC that is dedicated to streaming.

Noisy Microphone?

The first thing to check on your microphone is if you’ve set the gain too high. I know we all want to tune it to 11, but setting the gain higher raises the noise floor. Basically, it makes the mic more sensitive to sounds besides your voice. Changing this can really help fix your gaming stream. Target around -18 to -12 DB for your voice when setting your microphone input level. You’ll be able to use plugins to raise this level, which we’ve covered in the video below.

If you’re still getting noise it could be environmental noises like from an air conditioner, or your PC. You can remove this noise with noise removal and/or a noise gate. These are both available in XSplit Broadcaster‘s DSP settings. You can use Broadcaster’s built-in noise removal, or NVIDIA’s if you have an RTX GPU.

A noise gate lets you set the threshold that needs to be passed to activate your microphone. This is useful for consistent low noises like keyboard clicks, but once the gate is open, these noises will come through. Finally, if you’re still having issues, I highly recommend getting a dynamic microphone, we have a guide on picking the right microphone for streaming here.

How to fix your gaming stream alert sounds

We all like our donation, follower, subscriber alerts right? Nothing like the sound of progress, until you’ve heard it a million times. Sending your alert sounds to only your viewers is easy in XSplit Broadcaster! Right-click on the browser source and set the audio to stream only. You can adjust the level as well and see it in the audio mixer. Now you’re all set, you’ll still see the on-screen graphics you just won’t hear the sound yourself!

A person is sat in a gaming chair with a headset on playing a game and streaming while trying to find out how to fix your gaming stream
Photo by ELLA DON on Unsplash

My camera looks grainy

So you’ve just picked up a Facecam, but oh no, it’s super grainy! Cranking up the ISO or gain just makes it worse! What your camera needs is light! Any lighting will help, even a room light, but it’s best to get a dedicated light for your streaming area.

Now if you can try to diffuse the light a bit, this will help with harsh shadows. Many lights come with their own modifiers for diffusion, but if you’re going with the DIY method, you can use things like wax paper. Though make sure it isn’t a bulb that produces heat if you’re going to put something over it because fire is a real factor!

These are some common things we’ve found that can help fix your gaming stream. We hope you’ve found these useful! What common issues have your encountered? Or maybe just something you hear a lot from your streaming friends? Let us know in the comments!

How to Live Stream to TikTok from your PC

TikTok, the social media giant, is no doubt interested in live streaming. In fact, some accounts are able already able to go live but it’s still a limited feature.  While the content is currently still mostly focused on the short form TikTok is known for you will find more and more live streams among it. So, let’s discuss how and why you should be streaming to TikTok.

Why would you want to stream there?

TikTok is one of the fastest-growing social media sites around at the moment. The growth TikTok has seen has been huge! As noted by Hootsuite, “Eight new users join TikTok every second, with an average of 650,000 new users joining daily.” They also noted that user retention is far higher than many of its competitors, meaning people are using the app for longer.

It has also been noted that organic audience growth is currently much more open than on many other platforms. Some have likened it to the early days of YouTube when there was a much higher chance your content would get served to people. This could be down to a huge demand with fewer content creators out there to serve these needs. So, at the time of writing, it really would be a great time to get on board and start not only creating content but streaming!

Two phones sit next to a potted plant, both showing TikTok, you can stream to TikTok from your desktop PC with XSplit Broadcaster.
Photo by Collabstr on Unsplash

How can you stream to TikTok?

While going live from the app can be easy, going live from your desktop requires a few more steps. Firstly, you’ll need your custom RTMP info. There are no clear guidelines yet on how TikTok distributes access, but hopefully, it opens up to more users in the future.

If you have access, go into the TikTok app, either on your phone or the desktop app. Click go live and enter details like Title, Topic, Cover Image/Thumbnail. If you want to enable sub-only mode and if you want your video to end when the stream stops. If you have a shaky internet connection I wouldn’t enable the last item. You’ll then be taken to a screen where you can see your server URL and stream key.

Next, you’ll need some live stream software for your PC, like XSplit Broadcaster. In Broadcaster, open up the Custom RTMP broadcast plugin. Title your output, then put in your RTMP URL and stream key.

In terms of stream settings, I’d recommend going with 1280×720 resolution, 30 fps, and a bitrate of 3000 to start. TikTok live streams are in landscape mode, so you don’t have to orient your content vertically like you would with pre-recorded content.

From there, you’re ready to stream to TikTok from your PC! This platform is only going to continue to grow and we will be sure to keep an eye on it here on our blog!

Top Tools for your Remote Staff

Some of us are slowly, perhaps begrudgingly, coming back from WFH. The remote work industry, however, has been growing for years and will continue to grow. In this age, if you’re a business owner, you may have to look towards being WFH first and therefore you need to offer the proper tools for your remote staff.

Webcams

It’s really easy for your staff to feel isolated in a remote work environment, so it’s good for team building and overall morale for people to see the face behind the Slack messages and ClickUp tasks.

Webcams are fairly cheap these days, and we would recommend something like the Logitech C922. You may not have considered that your staff may have great webcams already on devices they own! Try using XSplit Connect: Webcam and XSplit VCam to turn their phones into webcams. If you’d like more details on how this works you can check the video below, but generally, all you need to do is have the devices on the same wifi network.

Unified Calendar Tools for Remote Staff

Having staff in different parts of the world can make things tricky when trying to coordinate a meeting. That’s why it’s good to have a unified calendar for your organization as a tool for your remote staff. GSuite from Google offers these tools, basically, it gives everyone in the team a personal calendar they can opt to share. You can also set up a company-wide calendar for important events like team meetings or for people to post their vacation schedules.

A person sat on a sofa talking to someone on a call using a laptop computer which would contain tools for remote work.
Photo by Surface on Unsplash

Team Building

It’s good to find time for the team to bond and unwind together, while it would be nice for everyone to go out to eat, in the meantime, you can play games together online. Some great games are Jackbox Games, which you can play in a browser or on your phone with other people. You can also play games like Pictionary or host a trivia night using something like XSplit Broadcaster.

Task Management Tools For Your Remote Staff

Now if you’re a small business, it might not seem like you need task management software, but without people interacting in a single space, it can be easy to lose track and progress of what’s going on in each project. 

Something as simple as notion, monday.com, or ClickUp, whatever let’s you assign tasks and keep track of what is going on will really help your team stay organized and help you track how your projects are going. This blog is organized via ClickUp as you can not only schedule your events in a list but export a viewable calendar that can be seen by the wider company.

A person using a smartphone next to their laptop which is on the table in front of them next to a cup of coffee they could be using tools for remote workers on both!
Photo by Christina @ wocintechchat.com on Unsplash

Headsets or Microphones

Circling back to start of this blog post, as nice as it is to see your staff, it’s probably even more important to hear them. Your remote staff could be working anywhere, from home, from a cafe, maybe even on the beach. So it’s important that external noise doesn’t interfere during meetings, which is why you should look to give your staff a decent headset for calls.

If you’re in an indoor, home office environment and they have headphones they like, a simple USB microphone like the Blue Snowball or one built into their webcam would work fine.

Headsets do, however, have the versatility we mentioned of being able to plug into a laptop and be taken anywhere. They will also offer that noise isolation. They don’t have to be expensive fancy ones, just something with a mic built-in.

Communication Tools For Your Remote Staff

So having a messaging app is a given, but keep your sanity and keep all communication to one app. It can be a nightmare to sort through PMs from various apps. Now you don’t need a paid service like Slack, but it can be extremely useful to have any app with a solid search function, the ability to make channels and threads.

Discord does most of this for free, but it is tailored to gamers rather than the working crowd, so it does have a bit of a learning curve.

What tools for remote staff have you found useful for getting your staff collaborating from different parts of the world? Let us know in the comments below!