Promote Brands Using Live Streaming Video

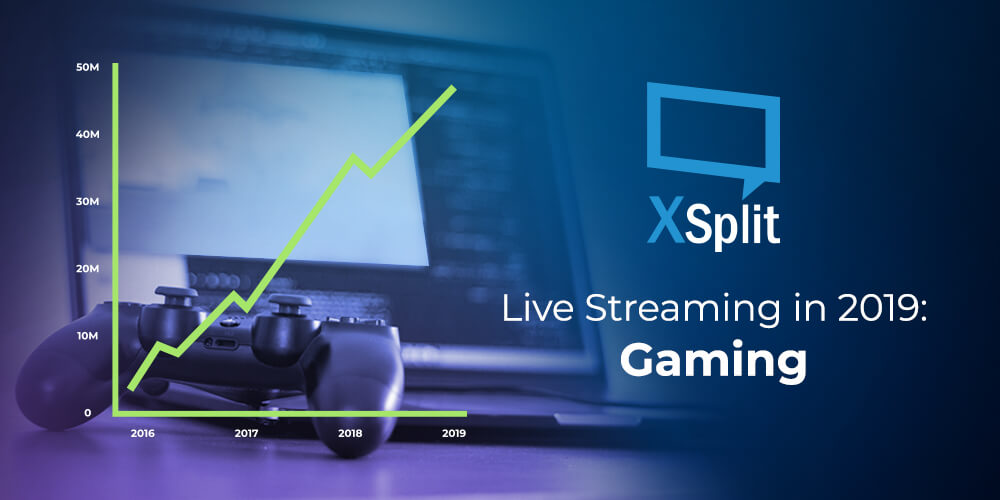
Why You Should Care About Live Streaming in 2019: Gaming

We surely aren’t the first ones to tell you that Live Streaming has become the newest trend in Audience Engagement and Marketing on social platforms. You’ve seen Marketing Gurus try to sell you on their book before to maximize your digital presence and leverage Influencer Marketing like a boss. Well.. we aren’t that different, to be honest.

As a business, you may wonder why we are better suited than anyone to help you grow through captivating narratives achieved with live streaming. Well, it’s true that our background roots are anchored in gaming, not in business. And this is precisely the reason we are the best suited to help your business start live streaming to gain brand exposure!

Streaming is big. But you knew that.

The number of growing communities we’ve seen stem from a single gamer has truly been a spectacle to witness. Here we are, in 2019, where the popularity of #1 global game Fortnite has mainly been driven by notable Twitch Influencers, like that popular Samurai guy (love your content btw!).

Brand Exposure

But it goes deeper than that, the streamed content itself has become a marketing platform of its own! Whether in the form of traditional logos and branding exposure on stream, as well as event venues being sponsored by the likes of Coca-Cola, Taco Bell, and the whole gamut, brands seem to have found a new avenue for reaching key demographics and target audiences with somewhat of a guarantee on time exposure compared to traditional media. Game launches now even plan close to no Marketing Strategy pre-launch and instead, spend a hefty amount on launch day for influencers to promote the game.

Brand Collaboration: Uniting Pop Culture

But there’s more! You may have heard of the collaboration between Marvel Studios and Epic Games to bring an Avengers time-limited game mode to Fortnite. It’s a win-win for both: the game studio gets viral content, while Marvel gains exposure (not that they need it) and more importantly, capture a fan base that is of a young age. The brand association to a game builds a rapport with your audience through emotions, end-users also believe in a sense of belonging to a community, not simply looking up to influencers, but feeling like one of their own. Brands and businesses have all realized this by now, and if they haven’t, they’re missing out.

Beyond the Entertainment Industry

Most recently, and in my eyes, potentially one of the most interesting from a marketing standpoint, is the Nike Jordan collaboration with Epic Games. Now, I don’t have the sales figures and they probably will never be released, but I am willing to bet that they will sell more virtual pairs of Jordan sneakers through Fortnite than their last retail drop. In addition to creating brand affinity, they are also capturing a potentially younger audience who may not have the means to afford their own physical pair of shoes, but that will undoubtedly rep the brand in a digital form, and will most likely start looking up physical pairs when they can. Mark my words, if three years from now, we see 16-18 year olds have no idea who adidas or puma is, it will be because of Nike Jordan’s foresight and bold tactic to reach new audiences through unconventional means.

What does this mean outside of Gaming?

Now, what is the main takeaway from all this? You might not be a game developer, so why should you care? Because Live Streaming isn’t exclusive to gamers and it should be part of your Marketing Channels, and incorporate your brand strategy. Sure, live streaming can be used as a one-off type campaign to create exposure and hype (eg. Apex Legends) and it can be quite successful at that. But looking at how Epic Games have built a vision for the long-haul, and how other brands can then leverage the platform for their own marketing, is truly a revolution in the industry of marketing and communicating with your audiences. Don’t look at live streaming as a banner advertorial, or a way to get your logo on there, but think of ways in which you can reinforce a sense of community, through advocates and influencers to boost social media brand exposure.

Have you been able to successfully leverage live-streaming in more than just an ROI capacity on advertorial? Do let us know what you have achieved, or even failed to achieve. and how you improved from there.

We’d love to discuss more topics about the industry, so please let us know if you’d like us to cover a story and we’ll do our best to shed some light and bust some myths.

If you’re looking for a solution fro simple screen recording or professional broadcast streams, check out XSplit Broadcaster.

If you’re a gamer that simply wants to test the water for game streaming, do give XSplit Gamecaster a try, it’s super easy to test out in a few minutes.

XSplit is Better for Single-PC Streamers: The HUD

In this news series of blog posts, we’ll attempt to shed some light on new or unknown features that can help improve your live streaming, whether it be audio/video quality, or simply the management of your stream and more efficient processes.

To kick things off, I want to tell you about our latest and most innovative feature yet: the In-Game HUD for streaming. As gamers, you are all probably familiar with what a HUD is, but what does it mean in the context of XSplit Broadcaster? In short, it’s the ultimate stream management solution. It makes things so much easier, especially for single-monitor streamers and might even prevent some neck pain (we are not doctors and cannot guarantee this statement, please consult a real doctor if you encounter physical or mental pain from streaming).

In Game HUD for streaming

If you’ve used XSplit Gamecaster before, you might be familiar with the concept of our HUD streaming technology. How it works is by setting up a hotkey, you are able to trigger an overlay of widgets and stream info that will allow you to manage various settings of your live stream without leaving your game screen. Please note though that our HUD is to be used with Game Source.

Here is a list of all the neat features you can access from the HUD:

  • Start/Stop Streaming on the go (Currently under renovation, our designers are making it look fresh)
  • Recording options to get those sweet YouTube VODs
  • Adjusting audio levels when chat is blasting those TTS donations or that pesky Apex Lobby screen
  • Preview scenes and switch seamlessly (check your browser display beforehand…)
  • Pin and manage widgets such as Stream Status and FPS, Chat, stream info such as frames dropped, bitrate, viewers, etc.

XSplit HUD Pin and Manage Widgets

It goes without saying that all this information will be laid on top of your game screen and it will only be visible to yourself. You can drag your widgets wherever you like depending on what game you’re playing and set opacity and fade timers so you get an occasional pop-up to make sure you don’t miss any vital info.

XSplit Stream HUD

The inspiration behind our stream HUD was really to give single-monitor streamers a fast and easy solution to start streaming simple gameplay without a complex setup. And I can say that as a non-PC gamer myself and not your techiest guy out there, I got told off for streaming a bit too much when “testing” the product… I mean, I want to chase the dream too! But I digress.

For more seasoned streamers that may not see the benefit in the HUD, well, let me just say there are various reasons why you should use it, even if you have 4 ultra-wide monitors with 8K resolution. Other than your simple Start/Stop functions available at hand, pinned widgets are always helpful when you’re not in the midst of a heavy gunfight and just wanna take a quick look at chat without risking a stiff neck. Scene transitions are super easy to execute and can help you visualize your scene before switching, much like our Preview Editor that already exists. This will be even better when coupled with the other improvements we made with sources and scenes in general.

All in all, it’s true that none of these are new breaking features. But the way we’ve built the HUD to consolidate all of them is. This is the first step towards building a new gen of XSplit tools we envision, and we’ve only just begun.

XSplit teams up with Devolver Digital at E3 2019

With news of brands skipping on the E3 2019 press conferences and the event is a few days away, we thought to confirm that XSplit will be back and has partnered with Devolver Digital once again to produce their live stage content straight from the Devolver Digital’s lot across the Los Angeles Convention Center from June 11 to 13.

Watch our E3 adventure last year with our Community Manager Arthur Arends.

We had much fun helping out on the stream production over at the DD lot, and we surely had a blast meeting fellow creators around the convention center. Here are some photos of our adventure from last year.

For real-time E3 2019 updates fresh and live from the LA Convention Center, follow us on Twitter, Facebook, and
Instagram.

We’re also running an #XSplitxDevolverDigital giveaway during E3 so stay tuned for the mechanics.

If you’re at the event venue, come and say hi! We’ll be at the Devolver Digital booth for most of the day. See you there!

PS.
Don’t forget to tag us in your photos to get a chance to be featured on our socials. 😉

Picking Your First Facecam

One of the cornerstones of streaming is seeing the player’s reactions. Viewers love to see people react to jump scares, thrilling victories and even crushing defeats. Thankfully you don’t have to break the bank to get an amazing looking facecam. This article will cover the variety of options available for selecting a facecam for YouTube or Twitch depending on your budget.

Budget/Entry Level

If you have a very limited budget, you can actually turn your cell phone into a facecam. Purchase the NDI camera app for iOS or Android and make sure your phone is connected to the same router as your streaming PC. Start output from the NDI Camera app on your phone. In XSplit Broadcaster go to add source > streams > NewTek NDI streams and select the stream coming from your phone.

If you have a small budget for a facecam, then the Logitech C922 is a great option. The Logitech C922 is small enough to be placed on top of your computer monitor or mounted on a tripod. You can output 1080p 30fps video or 720p 60fps if you plan to pair your webcam with gameplay. XSplit Broadcaster has worked with Logitech to optimize the performance of Logitech cameras. Once you have added a Logitech camera to XSplit Broadcaster, right click on the camera to see the profiles to optimize the camera for frame rate or exposure.

Logitech HD Pro Webcam C920

If you wish to add blur effect to your Logitech camera to look like an expensive DSLR camera, you can use XSplit VCam! It is included with an XSplit premium license. Simply launch XSplit VCam and select the Logitech camera as the source. Set the blur settings to your liking and add XSplit VCam as the camera source in XSplit Broadcaster.

XSplit VCam Logitech Camera

The next big leap requires a capture card. The general requirements for a capture card are minimal input latency and the ability to capture at least 1080p60fps via HDMI. USB 3.0 and PCIE capture cards tend to fit these requirements.

Once you have selected a capture card, it is time to decide what type of cameras you want to use. If you’re looking for a depth of field effect, it is recommended to use a DSLR or Mirrorless camera along with a lens that has a minimum aperture of 3.5.

There are some important features you need to check for when purchasing a DSLR or Mirrorless camera. Most importantly you need to check if the camera has a clean HDMI output. This setting will prevent the settings on your camera from displaying on your capture card feed. It is also important to check if there is an AC adaptor available for your camera or you will need to constantly charge batteries. You will also need a tripod to mount your camera on.

Another option is buying a camcorder instead of a camera. Consumer camcorders can be budget friendly and give amazing image quality. Regardless of which type of camera you use, people will only be able to see your face clearly if you are well lit. While dedicated lights work best, if you don’t have the budget use whatever you can to light your face, like desk lamps or room lights.

Be sure to always remember when your facecam is on to avoid any embarrassing moments ending up on the internet. A tip is to always remember to have a webcam cover or lens cap around for whenever you are going offline.

Once you have selected your camera, you can use it with XSplit Broadcaster. This will allow you to create a screen recorder with your facecam. XSplit Broadcaster allows you to add a variety of sources like a capture card for console gameplay, or recording your PC gameplay with game source.

What kind of facecam will you use for your content? Let us know in the comments!

XSplit is part of Streaming 2019 Bundle

Humble Bundle is once again hosting a content creator focused bundle and we’re thrilled to have all our XSplit products as part of the amazing pool of items available to everyone for an insanely affordable price!
XSplit in Streaming Bundle 2019
Streaming 2019 Bundle runs from June 4 to June 25, 2019, and also includes other amazing software for streamers such as Action! FaceRigPro, Restream and more! But don’t take our word for it. Below you’ll find various tiers offered in this bundle.

Tier 1 ($1 or more)

  • XSplit VCam Lifetime Subscription
  • Monstercat Gold 1 Month
  • Pretzel Rocks Premium 1 Month
  • Getting Over It with Bennett Foddy
  • Darwin Project

Tier 2 ($13 or more)

  • 3 Months XSplit Premium License
  • 3 Months Restream.io
  • Pretzel Rocks Premium 3 Months
  • Monstercat Gold 3 Months
  • Aaero
  • FaceRig

Tier 3 ($25 or more)

  • 12 Months XSplit Premium License
  • 12 Months Restream.io Subscription
  • 12 Months Pretzel Rocks Premium
  • Action!
  • 12 Months Monstercat Gold
  • FaceRig Pro

If you’ve been on the fence about getting a Premium or VCam license, you know what to do. 🙂 Not only are you getting XSplit at a heavily discounted price, but you’re also getting other cool products in the process as well.

Don’t wait! Go check out the bundle at Streaming Software Bundle 2019 today!

XSplit Broadcaster 3.8 Features

So far we’ve managed to keep up with our release schedule of a major release every two months with PTR releases in between. We’ve just released 3.8 into the wild where everyone now has access to the brand new in-game HUD amongst other features. The purpose of 3.8 was to bring something new to the table whilst also adding additional features that have been asked for. Oh and did I mention? Resize source hotkeys are back!

The in-game HUD allows you to both control XSplit Broadcaster from inside your game (similar to XSplit Gamecaster) but also allows you to manage your stream. You’re able to see chat and stream events whilst you play in the form of pinned widgets without the need for a second monitor. Widgets that you pin will only be visible to you and won’t be visible on your stream or recording when using Game Capture. That means you have complete freedom on how you position them without affecting viewer experience. We hope to expand on the HUD functionality overtime and provide even more functionality.

Whilst the HUD takes most of the limelight, we’ve added additional features such as the Scene source which allows you to add one scene to another. At first you might not necessarily see the point but if you think of a scene like a block that you can build and then add across as many scenes as you want, you create a really easy way to add repeatable elements to a scene and only have to edit it in one place. That’s not the only use case for this feature and I’ve seen many creative uses of it so give it a try and see how it can make your life easier or increase creativity.

Not sure what just happened? Replay Source allows you to play back what just happened on stream for a short period of time. We created the replay source to allow flexibility in how you use it. You can use it on an already existing scene as picture in picture and then use a hotkey to trigger it. Alternatively you can dedicate an entire scene to it and then have it automatically play when you switch to that scene. Once again, this is just the initial implementation and I think there’s a lot more we can do such as storing the replays to playback at a later point or even just saving them to disk in general.

Noise Suppression is another highly requested feature and is great for those who have microphones that have more background noise than they should. Right now it’s a very generic and aggressive implementation which means while it’s supposed to serve as a one size fits all, it might not get you the results you desire, more so for those with higher end microphones. With that being said, it’s a great way to clean up unwanted noise.

So, those are the bulk of the updates in 3.8 not including the vast amount of bug fixes and improvements. What about 3.9? Our focus for the next upcoming version is primarily on putting in the ground work to better improve our audio. This means actual decibel (dB) values that you can use to balance out your audio properly. We’ll be shipping a simple audio mixer extension that will allow you to monitor audio much more easily and make adjustments as you see fit. On top of that, we’ll also be adding some monitoring in to the audio settings themselves which means you can make sure the right device is selected before closing the settings.

For those that pride themselves on organisation, we’ll be implementing source grouping in to the mix. This means that on a given scene, you’ll be able to select multiple sources, group them and then move them together. On top of that, you can also rename groups and collapse them which means being able to have some separation of concerns. This is great for things like webcam with frames and some text. Now you’ll be able to place them in a group and move them together without needing to move each individual item one by one.

A brand new feature called Scene Presets will be making its way in to the next version too. By name it doesn’t mean too much but the general idea is that you can make variations of the same scene without needing to dedicate an entirely new scene to it. An example of this could be having the webcam in a different position, having chroma key on or off or using 3D transforms in one preset and not in another. However, the most powerful part of this is that you can set a transition time between these presets which means when you switch between them, we’ll automatically animate based on the properties changed. This means if you have the opacity of an item set to 0 on one preset and 100 on another, it will look like a fading effect when you switch presets with a transition time set.

We’ll also be making a bunch of under the hood changes that you might not necessarily notice immediately but will improve the experience as a whole when using our plugins for the various streaming services. We’re tying it all together so that if you’ve ever linked your Twitch account to XSplit, adding Twitch plugins will just work out of the box. We’re aiming to apply this philosophy across the board meaning minimal setup from your end and hopefully an easier experience.

So these are the main items on the board for the next major release but that isn’t to say they’re the only features we’re working on. There are tonnes of things in the pipeline that are being worked on by the team and we’ll be sure to let you know what they are when we’re ready. In the meantime, remember you can suggest and vote for ideas you like by using our feature vote page. On top of that you can get involved in the conversation by joining our discord server or follow us on Twitter.

How to Stream Fortnite Like a Pro

Do you want to have a stream like Myth, Ninja or Pokimane, but just don’t have thousands to sink into a streaming setup? Never fear! Your friends at XSplit are here to show you how to put together an amazing looking stream on a budget!

First let’s get some pesky prerequisites out of the way. You will need a PC with at least a quad core i7 processor or a NVIDIA 700 series or equivalent GPU. You will also need at least 10mbps upload if you wish to stream in HD. You’ll also need a microphone and a webcam. If you’re just starting out, use whatever is available such as built in webcams and microphones in gaming headsets and webcams.

Next let’s look at in-game settings for Fortnite. While the obvious choice would be to go for the highest graphic settings, you actually want settings that will open up CPU or GPU resources to encode your stream. Many pros have their settings the lowest level except for view distance and textures. Make sure the game is set to fullscreen and keep the resolution the same as your monitor’s recommend resolution. Be sure to also turn on the streamer mode setting to prevent stream sniping. Enabling push to talk is also useful if you don’t want your squad to hear you talking to your viewers.

Now let’s set up your stream. You can use XSplit Broadcaster to stream in HD for free, just click on the link in the description to download! In XSplit, set your resolution and frame rate to 720p and 30fps, as this will give you a good baseline stream. You can capture Fortnite in XSplit by using the auto detect source. If you have a webcam connected you can add it as a video device. You can access the audio settings here to make sure you’ve select the correct microphone device.

In the broadcast menu, add the output for whichever streaming platform you use and login to your account. You may be prompted to run a wizard, but skip this for now. The first setting is codec, while x264 is recommended to get the best streaming quality, if you are using an older or limited CPU it is recommended to use GPU hardware codecs. AMD and NVIDIA have their respective hardware codecs VCE and NVENC.

The next setting is bitrate and is probably the most important. The higher you can set the bitrate, the better quality your video and audio will be. Your bitrate is only limited by your upload bandwidth and by the platform you are broadcasting to, so set it as high as possible. Make sure to set a stream delay if you’d like to limit stream sniping, especially if you’re playing in an online tournament.

Not that you’ve configured your stream setting, start your first broadcast and play a game of Fortnite. Take note of your CPU and GPU usage in XSplit. If your usage is low you can start raising your resolution and frame rate. In time you’ll find the sweet spot that gives you the highest quality stream, without sacrificing game performance.

Next you’ll want to add some overlays and alerts to your stream. Our good friends at Player.me offer free overlays and have designed a variety of overlays specifically for Fortnite. Adding Player.me overlays to XSplit is simple, just copy and paste the overlay URL into XSplit. If you enable the XSplit integration in Player.me, your gamesource and webcam will automatically be positioned.

Now you should have a pretty sleek looking stream and well be equipped to start your journey to become a professional Fortnite broadcaster. If you’re just starting out it is important create and keep a streaming schedule. You can use XSplit’s Express Video editor to make clips to promote your stream on social media. Finally it is recommended to use one of the many free chat bots to help moderate your chat.

We’ll have a video coming in the near future with even more tips to improve your Fortnite streams! Please leave any questions in the comments and we’ll answer ASAP! Be sure to follow us on social media for advice and tips!

Restream FTL in XSplit Broadcaster 3.7

FTL is now fully supported in XSplit Broadcaster 3.7 with the Restream.io plugin! We’ve been working closely with Restream since PTR 3.7 was released, and it’s finally here.

FTL stands for ‘faster than light’ and this protocol developed by Mixer, enables a low video latency for streaming. This is especially helpful if you’re engaging a lot with you viewers and giving them interactive controls through the platform. FTL support was first implemented on Mixer plugin itself and it’s now available for the Restream plugin as well.

Restream created a step-by-step guide on how to get started and we highly recommend you to check it out if you’re new to this thing!

XSplit Bundle with Restream!

There’s no better way to celebrate this than introducing the Restream-XSplit Bundle!

Get the ultimate multi platform streaming combo for a discounted price of $37/month! Restream allows you to broadcast to over 30 platforms simultaneously with minimal impact on your bandwidth and hardware, and XSplit Broadcaster is the perfect streaming application for that! Take advantage of the offer here.

This bundle is available for a limited-time period only and will expire on April 30 2019. Avail it while it lasts!

XSplit Powers the RPS Sessions at EGX 2019

RPS Sessions Powered by XSplit
We’re excited to work with RPS Sessions, powering their production at EGX Rezzed this year! The event is taking place April 4th – 6th 2019 at the Tobacco Dock in London. You can find out more about the event here.

The RPS Sessions, curated and hosted by Rock, Paper, Shotgun will be a showcase for the many games on the showfloor of EGX Rezzed. You will be able to find out more from the developers themselves live on their YouTube channel at youtube.com/rockpapershot.

We will be giving away 1-year Premium licenses along with some cool swag from RPS so make sure to drop by the booth if you’re attending. If not, our team will be posting some live updates on our social media channels so make sure you’re following us so you don’t miss any.

Improving your Live Stream Audio Quality

Do you want to know how to improve your live stream audio quality? A lot of streamers struggle to get this right at the start of their streaming journey. Audio can be the easiest and most complicated part of your streaming setup.

In the above video, we’re going to give you some general tips to improve your stream audio and highlight some XSplit Broadcaster specific features that can help with creating amazing audio. We’ll also go through equipment guidelines to help you pick out the best microphone for streaming.

If you’re too lazy to read on, watch the video above and remember the following pointers:

  1. To improve audio quality, you must choose the best streaming microphone for your setup, if you can afford it. Definitely Cardioid. Dynamic if noise surrounds you (eg. Shure SMB7), Condenser if you have a quiet room (eg. Blue Yeti).
  2. Reduce background noise through mic placement and group loop isolators for the electrical buzz
  3. Use XSplit Broadcaster Audio Preview to check audio mix level. Go to Tools > Settings > Audio and check all your devices output volume
  4. If you have repeated sounds such as alerts, you can right-click the source and select “stream only” as stream output so that only your viewers hear it
  5. XSplit Broadcaster’s Per Scene Audio Extension allows you to manage audio across scenes as well as crossfading for smooth transitions
  6. Bump up that Audio Bitrate in Stream Settings

The first and crucial choice you have to make is to choose your microphone. For a limited budget, you’ll have to use any microphone available. It can be the built-in microphones in your PC, gaming headset, or webcam.

If you have a budget, the first to improve the quality of your live stream audio is purchasing a cardioid microphone. We recommend choosing cardioid microphones, these have a polar pattern that is best suited for picking up your voice. Cardioid Microphones can be either condenser or dynamic microphones. For simplicity’s sake, if you wish to limit background noise, use a dynamic cardioid microphone like a Shure SMB7, but if you have a quiet streaming space, you can use a condenser microphone like a Blue Yeti.

Cardioid microphones are available as traditional microphones. These can be used with a mixer and as USB devices. Some cardioid microphones require phantom power to output audio to a mixer. These are best used with a stable stand or mount.

Even with the best streaming microphone, you’ll still have to make sure to reduce background and electrical noise. To lessen background noise, place your microphone where the polar pattern is directed to your voice. Try to avoid noise entering this area. Electrical noise tends to come from ground loops which can result in a buzzing or humming type sound in your stream audio. The most cost-efficient method is to use group loop isolator devices. While it is good to put isolators on any incoming signals to your mixer, the most important place to use these are from your mixer to whatever input you have on your PC.

Now that you have a clean audio signal, let’s make sure all of your audio levels are set correctly. During a stream, the beginning is used to adjust the audio levels. You can take out the guesswork by using the audio preview function inside XSplit Broadcaster. Go to tools, then settings, and click on the audio tab. You can set any available playback devices as your audio preview. The audio preview will give you the final mix of all your audio sources. This is also useful if you add any elements to your streams like another microphone or a new alert with audio.

Speaking of alerts, any sources that generate audio can take advantage of the stream the only option for audio. When you right-click on a source with audio, you’ll see an option for stream output. If you select stream only, the audio from the source will only be output to the stream. This is useful if you don’t want to repeatedly hear the sounds of web-based alerts.

XSplit Broadcaster also has the per scene audio extension, for managing audio levels between scenes. To use the per scene audio extension, you will need to install it from the plugin store found in the extensions menu. Once the extension is open, add your scenes and adjust the audio levels for each scene as you’d like. You can even enable crossfading for smoother transitions between scenes.

One last tip is to be sure to increase the audio bitrate in your streaming settings.

We hope we’ve helped you improve your stream’s audio. If you have any additional audio tips, be sure to leave them in the comments or share them with us on social media.