The Best Games To Stream on Twitch Right Now

Figuring out what to stream can be one of the hardest parts of planning your content as a creator. It’s not always easy to determine what the best games to stream are. Once you start thinking about what you like, what’s coming out soon, what’s popular right now, it’s easy to get overwhelmed by choice. So let’s take a look at some of the top games on Twitch right now and consider if they’re right for you and your audience!

The golden rule of content creation

Perhaps it’s not officially the golden rule of live-streaming, but we must stress that the best game for you to stream is one you love to play. It doesn’t matter if you’re streaming one of the top games on Twitch if you don’t actually enjoy it. Audiences respond to authenticity and will notice if it’s not there. This doesn’t mean you shouldn’t try new games or formats as you develop your channel, but you’re going to be spending a lot of time on your games as a live-streamer so make sure they’re ones you like. And of course, if you’re not into video games, check out our fantastic guide to streaming things that aren’t games!

A persons sitting in a gaming chair playing on the PC looking to find the best games to stream.
Photo by Florian Olivo on Unsplash

The heavyweights in the best games to stream category

It’s hard to ignore what Grand Theft Auto V has achieved on Twitch. This is a relatively old game that has grabbed interest from streamers over the last year thanks to the explosive popularity of its role-playing (RP) servers. Though the game is still very popular, it is important to note that its viewership is now on a downward trend (at the time of writing) according to places like sullygnome. That said, GTA V remains one of the biggest games on the platform in terms of viewership by a wide margin, so it’s not too late to try and get into the world yourself, especially if you have a passion for online role-playing. We also saw a similar trend at the beginning of the year with Among Us, a game that completely blew up, and has now fallen off the charts. 

If you are looking to jump in and stream some of the most popular games, here’s a list of just a few to try.

The Top Games to stream on Twitch Currently (by Viewership):

Updated 10/29/2021

  • League of Legends
  • Grand Theft Auto 5
  • New World
  • DOTA 2
  • Minecraft
  • CS:GO
A Nintendo Switch on a desk playing Animal Crossing with plushies around which could be one of the best games to stream.
Photo by Branden Skeli on Unsplash

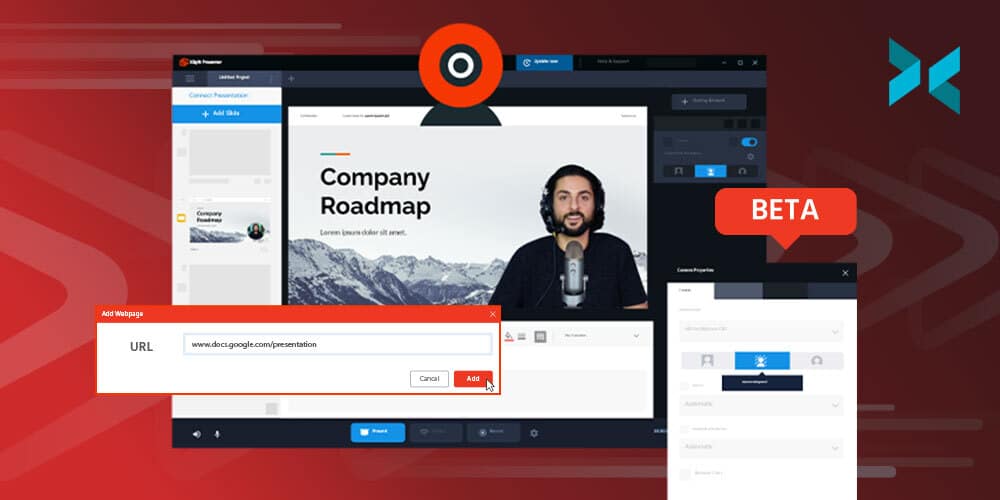
Don’t overlook the draw of alphas and betas

You love new games, right? Then it will not come as a surprise to you that other gamers really like new games as well. A quick ticket to getting views on Twitch is streaming a game that’s in alpha or beta, as it’s one of the first places for people to see the game in action. There is also the added bonus that the game’s community is in its infancy at this point, so it can be easier to connect with others who are interested and make a name for yourself while the pool of creators is still relatively small. So if you grab an alpha or beta key, get online and don’t keep it to yourself.

One title that’s in exactly this phase is New World, a brand new Massively Multiplayer Online game (MMO) published by Amazon Game Studios. Currently, in beta, it racked up nearly 5.2 million hours viewed in its first few days on Twitch. Another one to watch out for is Back 4 Blood with the chance to earn a beta key actually available by watching other streamers play the game.

Once you’ve picked your game, remember that you’re not locked into it for life. Tyler ‘Ninja’ Blevins started as a Halo player but became famous for Fortnite. Balancing meeting your audience’s needs while still playing games you love is ultimately the key to success.

Five Times a using a Smarphone Camera as a Webcam Saves the Day!

Getting a new webcam, or hooking up a mirrorless camera to your streaming setup is always exciting! But you know, you might already have the best camera upgrade you’ll need in your pocket already! Let’s discuss five times using your smartphone as your webcam can be more useful than a normal camera.

If you’re wondering how you can use your smartphone as your webcam, this is all powered by XSplit Connect: Webcam. It’s a free app on iOS or Android in the App Store, just install, open, and use XSplit VCam to connect to your cellphone’s camera. Just make sure you’re either connected to the same wifi network or via a USB cable.

Use Your Smartphone as a Webcam when you’re out of the office.

Let’s be honest, most laptops come with a pretty bad webcam. Even a Macbook Pro is still using a 720p camera, (ever wonder why so many celebrities calling in to talk shows look like they’re using an ancient camera? Now you know.). You can add a bit more of a pro look by using the far superior camera built into your phone.

Oh and, if you’re supposed to be in the office? We’re using XSplit VCam anyway so let’s just change that background, nobody will be any the wiser! Unless you forget to mute and they call out your coffee order!

Someone taking a picture of their child at the beach using a smartphone as a webcam
Photo by Derek Thomson on Unsplash

When you need to make sure you’re in-frame.

Most mirrorless cameras, the choice for a lot of big camera upgrades from a webcam, don’t have a built-in, flip-around monitor, and those that do tend to have very small, low-resolution ones. Also, if you’re checking that screen all the time, you’re going to be looking off-camera and not at the audience of people you’re talking to.

This is why using the selfie camera on your smartphone is perfect as not only do you get a bigger, higher resolution image you are always looking right back at your camera!

When you need to go underwater without wires.

Most flagship smartphones are IPX Water rated meaning that, if you wanted to you could use your phone underwater for certain shots. Or, you could just take a call poolside knowing that you don’t have to worry about wires or the camera getting destroyed the second a splash of water hits it. Do check what your IPX water rating is, though, not all ratings mean they can go underwater! – Ed

Going wireless is also honestly a big win for when you’re using a smartphone camera, using XSplit Connect: Webcam now means as long as you’re in Wi-Fi range your camera can connect to your computer!

An iPhone 12 Pro with multiple cameras would make a great smartphone as a webcam.
Photo by TheRegisti on Unsplash

You get multiple lenses in one.

Many modern cellphones have 3, 4, even 5 different cameras you can switch between. For normal videos you have your main camera, if you have a guest you can use your ultra-wide and for product videos, you can use the telephoto lens. You can switch between these lenses on the fly in the app, something that’s either impossible or not easy to do with a webcam!

Multiple Cameras with a smartphone webcam!

Are you going to be leading this month’s all-hands meeting? Are you a content creator who needs a second camera for your streams or videos? Use your smartphone! You can add your facecam and your smartphone via XSplit VCam into programs like XSplit Broadcaster with ease saving you buying a whole new camera to get that second shot. Really, just use your smartphone as a webcam!

Basically, with a smartphone, you’re always ready to work, whether it’s to create content or do a presentation. But we want to hear from you, how do you use your smartphone for productivity? Let us know in the comments and if there is anything else you’d like us to discuss, that’s the place to do it!

How to Give a Great Presentation: Follow These Best Practices!

Working from home has changed how meetings work and presentations are given. Instead of just having a quick discussion around a table, you may be expected to run a demonstration or slideshow online for your colleagues. This article will run through how to give a presentation and how to make it as slick as possible by following best practices for presentations.

Include media in your presentation to keep interest up

One of the biggest advantages of online presentations is that it’s very easy to add slideshows, videos, and pictures, and be sure that everyone can see them. Make sure that the text on your slides is nice and big – you can’t be sure what resolution your colleagues’ computers are using and this should help discourage you from putting too much text on the slides. Remember, the slide should give you bullet points to work from, rather than being a teleprompter! You should also avoid reading from an off-screen script too – show that you know your topic inside out by talking off the cuff, whilst using your notes to ensure you don’t forget any points.

XSplit Presenter allows you to add slides, videos, and even a feed from your webcam to your presentations and lets you annotate in real-time when you need to highlight parts of your slides for a question. If you’re demonstrating a piece of software, you can also share part of your screen, without risking showing your desktop.

Someone with lots of notes, an iPhone, pens and pencils everywhere as the prepare how to give a presentation.
Photo by Firmbee.com on Unsplash

Make sure you’re organized

Few things are worse when giving a presentation than being part-way through an important pitch and realizing there’s a piece of information that you need to access or show that you don’t have ready and available. Trying to stall while you search for that important document can throw off a well-timed presentation, ruining your concentration and flow as a presenter. This is why XSplit Presenter allows you to add all your media as slides, whether that’s pictures, videos, screen shares – it’s all in one place so you can run through without needing to find the next file.

Of course, the software isn’t everything – while it definitely helps, it’s no substitute for running through the presentation first out loud and by yourself. This is something you can record in XSplit Presenter and watch back so you can see where any problems show up and make edits beforehand! This means you can make sure everything is in the right place, you’re not overshooting your time budget and you know what you’re going to say.

An audience watching a presentation being given in a gallery setting, you'll want to know how to give a presentation in any setting!
Photo by Antenna on Unsplash

How to give a presentation? Keep it fun and engaging!

This advice does depend somewhat on the topic you’re discussing, however, in the modern workplace, a casual and friendly tone is more appropriate than lecturing your audience. It’s absolutely fine to use a light-hearted tone and have some cartoonish art on your slides as long as it doesn’t take away from the information they show.

Making your audience laugh will get their attention and improve their feeling towards you and your presentation, both making them pay more attention to what you’re saying and to be more likely to come to any future presentations you give. Remember to smile – this will subconsciously lighten your tone and make your audience feel more welcome. Try to involve the audience as well instead of just talking to them by including questions or opportunities for feedback, such as raised hands or polls. It’s also important you engage with and respond to the feedback!

Giving a presentation online shouldn’t be frightening – remember your audience is there because they want to hear what you have to say. That said, being well prepared will make for a more comfortable experience for everyone. We’ve given advice on this before, but there’s always more to learn!

간편한 틱톡 영상을 제작하여 인터넷 방송 홍보하기

틱톡 크리에이터 여러분 안녕하세요! 비록 이전에 틱톡을 사용하지 않으셨더라도 간편한 틱톡 제작법을 배워보고 모두가 쉽고 간편하게 틱톡 영상을 제작할 수 있다는 것을 알려드리려고 합니다. 인터넷 방송이나 유튜브 활동을 이미 하고 있다면, 이들을 홍보하기에도 좋은 기회입니다. 특히 PC로 게임을 하는 게임 컨텐츠 크리에이터분들 역시 이제부턴 간편한 게임 영상 틱톡을 만드실 수 있습니다.

틱톡용 게임 플레이 영상 제작하기

이번 가이드에서는 엑스플릿 브로드캐스터를 사용하도록 하겠습니다.

틱톡의 기본 해상도는 9:16 비율입니다. 엑스플릿 브로드캐스터에서는 다양한 커스텀 해상도를 지원하기에, 엑스플릿 브로드캐스터 우측 상단의 메뉴에서 1080 x 1920 (portrait) 해상도로 지정하신 뒤, 프레임률은 29.97로 변경하시면 됩니다.

이제 녹화 설정을 조절하겠습니다. 상단 메뉴에서 녹화 (Record) 메뉴를 선택한 뒤 메뉴 내 우측에 있는 톱니바퀴 아이콘을 선택하세요. 틱톡에 알맞은 녹화 설정은 일반 (Standard)로 맞추시면 됩니다. 만약 여기서 기본적인 구조만 녹화하고 Adobe Premiere Pro 같은 편집 프로그램에서 추가 작업을 하시려면 멀티 트랙 오디오 (Multi Track Audio)를 활성화 하는것을 추천합니다.

An image for XSplit Broadcaster Recording settings showing you how to record gameplay for TikTok

틱톡용 게임 화면 캡처하기

PC 게임 화면을 틱톡 전용으로 녹화하는 것은 어렵지 않습니다. 일반 녹화나 인터넷 방송에 사용하듯이, 엑스플릿 브로드캐스터 내에서 게임 캡처 소스를 추가해주세요. 좌측 하단 메뉴에서 소스 추가 > 게임 캡처 를 선택하면 됩니다. 만약 게이밍 콘솔이나, 현재 PC가 방송용이고 게임 PC가 따로 있다면 소스 추가 > 장치 > 비디오 > 캡처보드 를 선택하면 됩니다. 원한다면 웹캠 화면까지 추가하실 수도 있고 창의력이 허락하는 만큼 소스를 추가하셔도 좋습니다.

이제 영상이나 미디어 소스 외에 다른 비어있는 구간을 원하는 소스로 채워 놓으면 됩니다. 만약 특정 구간을 일반 색깔로 채워놓고 싶다면 컬러 소스를 활용하시면 됩니다. 좌측 하단 메뉴에서 소스 추가 > 일반 위젯 > 컬러 (Color Matte) 를 선택하시면 되고, 문구를 입력하려면 소스 추가 > 텍스트 (Text) 를 선택하면 됩니다.

인터뷰 녹화하기

다른 인물이나 동료 컨텐츠 크리에이터와 콜라보레이션을 하면서 짧은 인터뷰를 하는 영상도 담아낼 수 있습니다. 웹캠 소스를 추가하여 내 모습을 적용시킨 뒤, 타인이 접속해 있는 화상 연결 프로그램을 실행하여 해당 인물의 캠 화면을 소스로 캡처하여 추가하면 됩니다. 이러한 컨셉트의 인터뷰 영상 녹화법은 다른 가이드에서 자세히 설명되어 있으니 참고하시기 바랍니다.

알트 [Alt]키를 누른채로 마우스 커서를 소스 테두리에 놓고 클릭 후 드래그 하면 해당 테두리면을 자유롭게 조절할 수 있습니다. 그 후 원하는 위치에 소스를 배치하였다면, 해당 소스를 마우스 우 클릭하여 구성요소 메뉴를 불러온 뒤 효과 (Effect) 탭에서 필터 (Filter) 메뉴를 선택하여 다양한 필터를 적용할 수도 있습니다.

마이크가 확실하게 설정되었는지 확인하기 위해 상단 메뉴의 도구 > 설정 > 오디오 메뉴를 확인해보세요. 오디오 믹서 조절을 통해 내 볼륨과 게스트의 음성 볼륨도 조절할 수 있습니다. 이 설정 역시, 녹화 설정에서 멀티 트랙 오디오 (Multi Track Audio)를 활성화 했다면, 녹화 후 영상 편집 프로그램에서 각자의 목소리를 따로 편집할 수 있어서 편리합니다.

Someone holding a phone with the TikTok app opening, you can record gameplay for TikTok
Photo by Solen Feyissa on Unsplash

최종 녹화본이 준비 되었다면, 곧바로 틱톡에 업로드 할 수 있습니다. 최고의 편집자가 아니라도 누구나 재미있는 틱톡용 게임 영상을 제작할 수 있습니다. 틱톡은 여러 동영상 플랫폼 경쟁자들 사이에서 급격히 성장하고 있으며 차세대 SNS 영상 플랫폼으로 등극하고 있습니다. 미국에서는 이미 2020년 9월 당시 설문조사에 의하면 6명당 1명은 틱톡을 하고 있으며 점점 더 성장하고 있습니다. 현재 여러분들께서 재미있게 하고있는 게임을 틱톡 영상으로 제작할 수 있다면 여러분들도 틱톡 사용자로서 성장할 수 있으리라 믿습니다. 틱톡 외에도 비슷한 성격의 영상을 제작하여 다양한 플랫폼에 맞는 게임 영상을 제작해보도록 하세요!

Work From Home Hacks to Make Your Life Easier with XSplit

Working from home, particularly in a creative industry, can mean that you end up with a lot of skills you need to develop fast! I know for me, one of the most glaring skills I’m missing is that I am not really savvy when it comes to Adobe Photoshop. However, I have been able to find tricks and work from home hacks to fill this gap using the products we have here at XSplit. So if you’ve taken on a new role in a creative industry or you’re feeling some imposter syndrome in your current job, here are some hacks I’ve come up with that may just help you with your job.

Work From Home Hacks for Screenshots

It may seem weird, but it always seems like screenshots are so inconvenient to take at times, right? One work from home hack I used to use involved XSplit Broadcaster. I’d simply capture the desktop and use the big Screenshot button at the top to capture anything we were trying to send a picture of.

We thought, however, that this could be even easier, which is why we’re developing XSplit Capture. It’s in closed beta at the moment but once it releases you’ll be able to easily select the area of your screen you want to capture, add annotations, highlights and then have that image upload directly to the cloud giving you an address you can share right away! This also works with video, and if you want to you can download these for later use or adding as an attachment. As The Economist noted, working from home continues to rise so making these sorts of tasks easier was a must for us!

A person sat at their desk using a laptop computer with a notepad, phone and glasses next to them looking for work from home hacks.
Photo by Corinne Kutz on Unsplash

Creating Mood Boards

If you need to put together some inspiration for yourself or a graphic designer on your team like a mood board or even mock up a graphic, XSplit Broadcaster is a great tool! I do a lot of freelance work broadcasting esports events, so I need to be able to give designers briefs on the assets I need to be produced and this work from home hack has been invaluable!

So what I do is lay out my various scenes using the color matte and text sources (easily added by clicking Add Source, General Widgets for Colour Matte and Add Source, Text for the Text Source) to show the designers different elements I’ll need in the broadcast and what they will do! I can even use the presets and source transitions to record how I’d like an animation to look! All of this I can then record in XSplit Broadcaster and send over as a video right away!

Work From Home Graphic Design Hacks

If you need something like a thumbnail or simple design in a pinch, you can always lay out your graphic in XSplit Broadcaster. You can use layering, color key (simply right-click on your image and head to the Color tab and selecting Color Key), and the source menu controls to hack together a graphic.

Broadcaster lets you set your resolution and then just use the screenshot tool to make the final asset. It’s a great way to make YouTube Thumbnails as we mentioned in a previous video. It’s honestly something I do all the time when it comes to creating a quick social graphic I can put together and export quickly just using assets I’ve been provided and the tools Broadcaster already has!

Timers, Clocks, and Countdowns

If you need a timer for a task, or just a countdown till your lunch break, you can the custom scripts feature in XSplit Broadcasters text source. Just enable custom scripts by right-clicking on the Text Source you’ve added and select the clock script, then select whichever function you like to use.

I personally like to use the standard clock feature when I’m running a show and need to give a timer to the host so they know to keep on schedule. But, there really are tons of work from home hacks you can achieve with XSplit software!

But I want to know from you! Which tools do you use to help your creative process? What was the last piece of software you learned to help you at your place of work? Let us know in the comment section below and if there’s anything else you feel we should discuss here, let us know there as well!

XSplit Presenter 의 공개 베타 테스트 버전이 출시 되었습니다!

약 1년 동안, 전 세계의 생활과 업무 환경이 급격하게 뒤바뀌게 되었습니다. 저희 XSplit 에서는, 약 10년간의 노하우를 가지고 동료들 끼리 원격으로도 생산적인 업무와 프로젝트를 진행할 수 있지 않을까 고민하여 새로운 프로그램의 개발을 도입하기 시작했습니다. 대부분의 온라인 회의 및 생업 활동은 프레젠테이션 및 발표 자료를 가지고 카메라 앞에 앉아서 설명을 해주는 형식이 대부분인 것으로 파악하여, 파워포인트, 구글 슬라이드 등을 그대로 활용하고, 거기에 이미지, 동영상, 웹페이지, 유튜브 영상과 웹캠을 모두 연동시키는 종합 프레젠테이션 프로그램을 개발하게 되었습니다.

게다가 슬라이드를 페이지를 변경하여도, 웹캠 화면을 항상 보이게 하여, 슬라이드 내의 어떤 구간이든간에 시청자들과의 소통의 흐름을 이어나갈 수 있도록 제작하였습니다.

XSplit Presenter를 소개합니다.

위의 여러가지 이유를 통합하여, XSplit Presenter를 개발하게 되었습니다. 나만의 스타일과 유형, 상호작용 요소들과 화려함을 모두 프레젠테이션 안에 담을 수 있고 회의나 발표, 제품 설명회 등에 활용하실 수 있습니다. 여러 프로그램을 강제적으로 사용하거나 한가지 프로그램에서 경험했던 제한적인 요소들을 해소하기 위해 다양한 미디어 자료를 호환하며 실시간 캠 화면까지 연동할 수 있도록 구현해냈습니다.

이미 사용하고 있는 프레젠테이션 프로그램의 활용법을 그대로 유지할 수 있습니다.

XSplit Presenter 개발 중 가장 중요시 여기던 부분은, 이미 여러분들이 사용하고 있는 프로그램들과 동일한 유형으로 사용할 수 있다는 점 이었습니다. Google Slides, Microsoft Powerpoint, PDF 문서 등, 해당 프로젝트에 캠 화면을 연동시켜서 Zoom, Teams, and Skype, 디스코드 등에 가상 카메라로 적용시킬 수 있습니다.

시청자들과의 원활한 소통이 가능해집니다.

또 다른 요점 중 하나는 실시간으로 주석이나 하이라이트를 표시하여 질의응답시, 또는 중요한 강의시 화면상 원하는 부분에 그리거나 밑줄을 치는 행위가 가능해집니다. 게다가 실시간으로 프레젠테이션 페이지를 편집할 수 있기에 이미지나 동영상을 끌어 담거나 유튜브 영상을 열어볼 수 있습니다. 더 이상 ‘잠시만 기다려주세요’ 등의 이유로 발표의 흐름을 끊을 필요가 없습니다.

동시 다수 발표자를 지원합니다.

조별 과제등을 발표할 때, 발표자들이 여러명일 경우, 스카이프의 NDI 소스 연동으로 다수의 발표자들이 캠과 마이크를 켜고, 하나의 문서 자료를 온라인을 발표할 수 있습니다.

이 외에도 추가 기능들을 많이 업데이트 할 예정이며 원격 업무 및 학업에 도움이 되는 요소들에 집중하려고 합니다. 지금 바로 XSplit Presenter를 무료로 다운로드 하여 직접 경험해보시길 바랍니다.

궁금한 점이나 질문이 있으실 경우, 트위터 @xsplitkr, 또는 공식 XSplit 디스코드 서버에서 문의해주시기 바랍니다.

재택 근무시 활용할 수 있는 시간표 만들기

재택근무를 처음 시작해본 사람들에겐 한 가지 고민이 생기기 마련입니다. 과연 어떻게 시간을 관리해야 잘 관리했다고 할 수 있을지, 막상 시작해보려고 하면 어디서 부터 시작해야 할지 막막하게만 느껴집니다. 공통점으로 겪는 어려움은, 주변에 직장 동료들이 없어서 간단한 업무와 관련된 도움을 받지 못한다는 것이며, 컴퓨터에 유능하지 않는 분들은, 기계가 고장나거나 하면 해결책을 제시할 수 없다는 점이었습니다. 이렇게 어려운 환경에서도 어느정도 형식을 정해놓고 습관을 들인다면, 대부분의 고민을 덜어줄 수 있게 될 것입니다.

생업이란, 가끔은 정해진 시간대로 진행되지 않기 마련입니다. 하지만 유연한 시간 관리를 하지 못하는 것 역시 고통받는 경험이 될 수도 있습니다. 아침에 일어나 간단한 루틴을 정해놓거나 하루에 반드시 무엇을 해야한다는 정도만 지켜준다면, 다른 중요한 시간들도 소중하게, 알뜰하게 사용할 수 있는 발판이 될 것이라 생각합니다.

업무 시간 관리하기

뭘 해야할지 모르는 상황이 들이닥치기 전에 정리해야하는 부분들을 먼저 집중해보도록 합시다. 사소한 것도 잊어버리지 않도록 메모를 하는 습관을 들이거나 무엇이든 어딘가에 기록을 남긴다면 반드시 추후에 확인해본 후 ‘다행이다’라는 생각을 하게 될 것입니다. 하루 24시간 내에 정해진 시간만큼만 업무에 집중하고, 나머지 시간들은 본인에게 보상을 주는것 처럼 반드시 휴식을 할 수 있는 시간도 주어야 합니다. 조금만 더 라는 생각으로 업무 시간을 늘리게 되면 추후엔 휴식시간조차 없게되고 식사 시간마저 뺏기게 되니 주의해야 합니다. 온라인 도구를 활용하려면 구글 캘린더 같은 달력 애플리케이션을 통해 가까운 미래에 다가올 일정들을 기록하거나 개인 시간을 마련하는 연습이 필요합니다.

긴 시간의 회의나 업무 직후에 10분가량 휴식하는 것도 좋지만 미리 업무 시간을 직접 배치할 수 있는 권한을 가지고 거래처에게 보고하여 특정 시간대에 업무를 진행하겠다고 통보한다면 더욱 여유로운 업무 및 개인 휴식시간을 활용할 수 있습니다. 1인 자영업을 한다면 어느정도 현실성 있는 부분이기도 하며 만약 직장생활중 이라면 팀장과 회의를 통해 알맞는 업무 시간대를 고려해볼 수 있습니다.

A person sat at a desk using a PC and employing time management to create a work schedule.
Photo by Firos nv on Unsplash

시간 관리 애플리케이션

온라인 도구를 활용하고 싶다면 다양한 서비스들이 존재합니다. 가장 인기있는 애플리케이션 중 하나는 포모도로 테크닉 Pomodoro Technique)이며, 짧은 휴식시간들을 적절히 조절하여 급격히 발산되는 집중력을 활용하도록 도와주는 시간 관리 서비스입니다. 포커스 키퍼 (Focus Keeper app)도 비슷한 개념이며 간편한 인터페이스를 통해 쉽게 활용할 수 있는 애플리케이션 입니다. 생각의 정리가 잘 정돈되지 않는다면 마인드노드 (Mindnode)를 사용하여 조금 더 정리정돈된 일정들을 관리할 수 있습니다. 목록 형식으로 할 일을 정리하고 싶다면 투두이스트 (Todoist)를 사용해 보시기 바랍니다.

BBC에서 최근 연구한 재택근무와 관련된 자료에는 백만명 이상의 영국 근로자들이 출퇴근 형식을 버리고 재택근무로 남겠다는 설문조사 결과가 있었습니다. 이런 방향으로 진행된다면 다양한 시간 관리 애플리케이션들도 제작될 것이라는 전망입니다.

Someone sat at a desk in front of a laptop pouring coffee in to a mug while they use their phone and employing time management to create a work schedule.
Photo by Nubelson Fernandes on Unsplash

반드시 적절한 선을 그어라

시간관리라는 것은 말은 쉽지만 지키기 어려운 행위입니다. 한 공간에 거주하면서 개인적인 일, 직장 업무, 휴식, 취미, 가족과의 시간을 골고루 이행하는 것은 정말 어려운 일입니다. 재택 환경에 다른 사람이 살고 있다면, 심지어 가족일지라도, 반드시 그들에게 본인이 재택근무를 한다는 사실을 알리고 업무 시간대와 자유 시간대를 통보하는 것이 중요합니다. 방해를 최소화 하며 인간관계도 보정이 될 것입니다. 휴식시간이 다가오면 반드시 자리에서 일어나 잠시 스트레칭을 하거나 업무와 관련된 시선을 최대한 차단하여 충분한 휴식을 가지는 것이 바람직합니다. 충분한 휴식은 반드시 다시 집중력을 키워주기에, 이러한 변환점을 잘 활용하여 효율적인 업무 진행과 동시에 건강도 유지할 수 있습니다.

재택근무 환경에 혼자만 살고 있다면 일 하는 공간과 휴식을 하는 공간을 따로 배치하는것도 방법입니다. 공간의 크기와 상관없이방향만 바꿔 앉아도 새로운 자세로 집중하는 마인드가 달라질 수 있습니다. 그리고 명심해야 할 것은, 업무 환경이 달라졌다 하더라도 반드시 특정 업무의 데드라인은 어느때와 다름없이 존재하는 부분이어서, 효율적인 업무 환경과 시간관리를 통해 이를 유지시키기 위한 시간표를 항상 체크하는 습관을 들여야 합니다. 물론 재택근무를 한다면 출퇴근에 소요된 시간을 더 생산적인 곳에 활용하거나 휴식에 필요한 시간으로 활용할 수 있습니다.

항상 시계를 머리맡에 두거나 방대한 엑셀 스프레드시트를 제작하라고 강요하지는 않습니다. 하지만 내가 원하는 모습과 방식으로 기본적인 시간관리를 해준다면 본인 뿐만 아니라, 가족, 직장 동료, 중요한 인맥들에게도 모두 도움이되는 일의 발판이 된다는 것을 명심하고 또 이에대한 중요성 역시 다른 비슷한 처지에 있는 친구들에게 전파될 수 있을거라고 생각합니다.

How to Stream Dungeons & Dragons live on Twitch

When you think of streaming games, your mind turns immediately to video games, but streaming services like Twitch have a healthy Tabletop RPG community that will let you stream Dungeons & Dragons as well as other classic tabletop titles. This quick guide covers how you can organize a tabletop stream, which software you might want to use, and some great examples from the genre for you to watch on Twitch.

Organizing a tabletop stream

Unlike traditional game streaming where you’re streaming your own gameplay in a single or multiplayer game, tabletop streaming involves a certain amount of pre-planning to organize multiple guests and participants. If you’re looking for a quick and easy way to stream a video game version of D&D to Twitch, check out D&D Online, an MMO based on the original tabletop game.

However, for that traditional tabletop experience, you’ll need other people either gathered physically together or, perhaps more practically, in a video chat. If you want to organize a game and need more people, why not advertise your event on social media, or check out conversations on Reddit and Discord?

Which software should you use to stream Dungeons & Dragons?

Assuming your game is organized as an online video call, you need a way to arrange those different calls and stream them too. One of the easiest solutions is to use XSplit Broadcaster and Skype along with NewTek’s Network Device Interface (NDI). This allows you to bring each person in the Skype call into XSplit Broadcaster as an individual source which you can then easily place and resize. This saves having to capture parts of a call window as you would with something like Zoom.

With XSplit Broadcaster, you can easily organize and customize your layout and theme to give it an epic D&D makeover. You can even add your own overlays for further customization, helping to bring your game to life and capture your audience’s attention. If you browse through some channels on Twitch, for instance, you’ll see it’s common for the Dungeon Master to appear in a larger window than the players as an easy visual reference for someone joining the stream.

A close up of some miniature figures and a monster on a tabletop, things you might need to stream Dungeons and Dragons
Photo by Robert Coelho on Unsplash

Put yourself in the action as you stream Dungeons and Dragons

Another tool that can improve the look of your tabletop stream is XSplit VCam. It allows you to remove and replace your background, or simply blur it so the focus is on the person – and it’s all possible without a green screen. This can provide an extra layer of fun to D&D gameplay, by changing backgrounds to suit the action of the game as you go along streaming Dungeons and Dragons.

For example, if players were to find themselves wandering through the Forgotten Realms or trapped in Castle Darkhold, their background could change to represent that location. Check out royalty-free image sites such as Pixabay for inspiration.

The team at Rivals of Waterdeep playing with their on screen set up which shows a way you could stream dungeons and dragons

How to visually represent the game

People watching the stream will be focused on the players and their choices. However, they’ll also want to keep up with where the players are, so you want to visualize it somehow as you stream dungeons and dragons.

Perhaps the simplest way to represent a tabletop game is to film it. You can set up an additional camera as a source over the board and move the pieces yourselves. However, this approach can be slow and not very clear on a stream. One alternative is to create custom maps to help your audience visualize your gameplay. If you’re not an artist, there are many map tools listed on D&D Compendium to explore.

Some tabletop streams to watch

Before creating your own stream, you may find it helpful to watch some others to get a good idea of how game masters have perfected their multi-cam tabletop streams to stream dungeons and dragons. Helpfully, Twitch has its own dedicated Dungeons & Dragons area, and, with over 450,000 followers, there are usually lots of games to view. One of the more popular D&D streams is High Rollers DND, showcasing a smart and engaging layout for D&D games. There’s also Rivals of Waterdeep, a D&D actual play stream brought to you by the official D&D Twitch channel.

Beyond D&D, there are a few other areas of Twitch you might like to explore to get more ideas and inspiration. These include Tabletop RPGs and Board Games.

For a more in-depth look at how XSplit Broadcaster can help your stream, check out this interview with tabletop gaming aficionado and member of Rivals of Waterdeep, Tanya De Pass.

The Ultimate Macros Guide: Live Streaming Automation!

Automation makes life easier, so why not make your streaming life easier as well with macros! Live stream automation with macros means you can do all sorts of things! From your camera zooming in when you scream playing a horror game to triggering a timed scene change. So let’s discuss how macros and automation can make your streams easier and more powerful!

What are Macros?

Macros are an extension built into XSplit Broadcaster, if you don’t have macros installed, you can go into the plugins store (which can be found by going to the Tools menu and selecting Plugin Store), search for macros, and install it easily. The first time running macros you will need to give permissions so be sure to click OK. This is the first step to full live streaming automation!

Macros are basically scripts or a series of commands that are run when a basic condition is met. So the condition is when something happens, it can be on pressing a key when the audio is at a certain level, when a video stops playing at a specific time, there are really tons of possible event types and you can write your own custom scripts.

The Macro menus open in XSplit Broadcaster which makes live streaming automation possible.
An example of the Macros Plugin (remember to enable event listener!)

So when you set an event type, you can then select an action to happen. This could be switching to a scene, starting a stream, opening a projector, or event running another macro. You can have multiple actions happen after an event. You can even have multiple macros running simultaneously, which really means if you timed everything right you could add automation to almost all of your stream!

You can test your macros and they will only be active when the event listener is enabled. Now the possibilities are endless with macros, but I’d like to talk through some cool examples of how you can use them. For all the samples I show here, I’ll leave a link below each section to download the macros so you can import them into your own presentation and try them out.

A close up of a phone next to a gaming mouse and keyboard on a desk watching a live stream, adding live streaming automation could help you!
Photo by Caspar Camille Rubin on Unsplash

Automate Live Stream Commercial Breaks

So if you’re producing a live show, timing is everything, and live stream automation can help! You don’t want to miss a cue and cut back to talent too early or too late, so why not set a macro to automate your ad break? As Forbes said, streaming is presenting more opportunities for brands so getting this right could be important! If your ad break is running a series of videos in a playlist, it’s simple to automate this.

First set up your ad break scene. If you have a series of video and image ads, I recommend using your video editing software to stitch these together into a single file. Then in macros set up a macro for on key down. Then just set the key. Then set the action to switch to a scene, and select the scene with the ad break video. Enable the event listener and then set up another macro. This time the event is when a media source stops. Select your ad break video file then set the action to switch the scene to whichever scene you go to after an ad break.

You can add more macros to make this more complex like cutting to the ads intro video after a break or implementing custom stinger transitions.

Download this macro here

Making your camera zoom in on a loud noise is another great macro!

Starting a stream on time

If you need to start a stream at an exact time, regardless if you’re ready or not for a client, then this is a useful macro!

For the event, set the scheduled time and select the time your stream needs to start. Then set the switch to the scene and select a scene with a standby graphic that’s safe to start the stream with. Then set an action to start the stream. Make sure the event listener is on and you’re ready to go!

Download this macro here.

A person wearing an RGB gaming headset streaming on their gaming PC, adding live streaming automation could make their life easier.
Photo by Fredrick Tendong on Unsplash

Always stream and record

So one of the mistakes I always make when doing an event is not starting the recording when I start the stream. Depending on the format of your show, this can be an absolutely devastating error if you promised your client a high-quality archive or if your internet goes out and you want to keep capturing a live event for later upload.

So, you use macros to set a hotkey that will activate your stream and recording. This is especially useful if you’re planning to stream to many different platforms or record multiple scenes.

Download this macro here.

IRL Live Streaming Automation

A lot of IRL streamers actually relay the stream from their IRL backpack to a cloud PC running broadcasting software. This is to keep their stream live when they go into an area where their cell reception is cut off. This can also be managed by macros.

Set an event for when a stream source is online, this is the RTMP feed source you’ve added to your IRL backpack. Set the action to switch to the scene with the RTMP feed. Then set up a macro for when an RTMP source goes offline. Have it switch to a standby screen for whenever your stream feed re-connects.

This solution can also be used as a backup system for always keeping a stream online if you’re doing a project for a client, you would just need to set up an RTMP server to output an RTMP to this relay system.

Download these macros here.

There are really endless ways you can use macros for live stream automation, this is only a small sample of use cases. The possibilities are endless so play around with the extension and see what you come up with! What’s the most inventive use you’ve found for our macro system? Or if you’ve never used it before, what do you think this might be helpful for? Let us know in the comments below!

Start earning money by joining the NEW XSplit Affiliate Program!

The new XSplit Affiliate Program is here! We’ve taken the previous affiliate program and supercharged it, based on our current member’s feedback, with more opportunities to earn money with us and best of all, it’s open to absolutely everyone!

Benefits include:

  • You will get a personalized code of your choosing giving your audience 10% off any XSplit Premium subscription
  • For every purchase made using your code you will receive a 10% commission
  • You will get that 10% for each recurring purchase someone makes

All you need to do is head to https://xspl.it/affiliate and sign up! Once you’re accepted you will be able to set up your code and start earning with XSplit right away! You don’t need to have a big following, just sign up and you’re ready to go!

We look forward to welcoming you to the brand new XSplit Affiliate program! If you have any feedback or have any questions, you can reach out to us on our social channels!