What is the New Twitch Meta and Should You Take Part?

There’s a (sort of) new player that raced to the top of the Twitch meta in 2021: the subathon. Not a new concept in live streaming, a ‘subathon’, combining the words subscription and marathon. This is where the streamer pledges to remain live as long as viewers continue subscribing to the channel. Its recent popularity among top-tier streamers brought it squarely into the spotlight in the first half of 2021. In this blog, we’ll consider this streaming meta (and more) and whether or not it should be followed.

Twitch meta goes mainstream

It’s likely now that even people who have never watched a Twitch stream at all know what a subathon is. This is largely down to Twitch streamer Ludwig Ahgren. They found themselves in the middle of a marathon stream that lasted a record-breaking 31 days. Their story was picked up by traditional outlets like the New York Times and the BBC, places where usually Twitch is discussed only in the context of parent company Amazon’s stock price. This news coverage shone a light on what seemed to be emerging as a new streaming meta – the use of subathons on streaming accounts of all sizes.

A streamer using a gaming keyboard with a large gaming PC in the background looking at gaming headsets to chase the next Twitch meta.
Photo by ELLA DON on Unsplash

Success breeds imitation

With Ludwig netting an eye-popping 1.6 million dollars (US) from subs and bits alone, as well as a significant amount of free publicity from his more than 700 hours live on Twitch. It wasn’t long before the platform’s most-watched streamer, xQc, confirmed their own plans to try and top it. xQc planned to go live for 60 days sometime in the near future and will looked to break many of the records Ludwig set. This included the mark for most subscribers which was sitting at over 282,000. This may not indicate a full-on subathon arms race taking over Twitch, but there’s no question that when one of the biggest names in live streaming does something, people will be watching.

Should I follow the Twitch Meta?

Streamers of all sizes have benefited from following the meta and running their own subathons. If you’re considering running one, remember you’re committing to being live for an unknown amount of time, so plan accordingly. While you probably won’t be stuck on camera for 31 days like Ludwig, subathon streams generally go much longer than the typical 5-8 hour Twitch stream.

The concept of a subathon, however, is not a new one. The Just Chatting category on Twitch provides ample opportunities for any streamer to potentially reach new followers and subs as part of the stream. With Just Chatting being the often dominant category on the Twitch channel page, this is typically where you’ll also quickly spot the emerging streaming meta (not related to specific games). But, whether it’s a subathon or the controversial hot tub streams also forming part of the Twitch meta, should you be chasing the meta?

Staying true to yourself

Of course, chasing any short-term trend isn’t a recipe for long-term success. No matter how compelling it may look in the moment. Subathons in particular provide diminishing returns to viewers as the novelty wears off. Also, an obvious burnout threat for the streamers themselves due to the effort required. This example may seem self-evident to many experienced creators, but consider also the case of Among Us. Consistently one of the most-watched and streamed games on Twitch in 2020, it’s lost nearly 60% of its audience as viewers and streamers alike cooled on it.

The lesson here is clear: use trending content as a tool, but don’t make chasing it core to your streaming strategy. Instead, bet hard on your ability to build an audience around games and content that you have a lasting passion for. This way, you also avoid following trends and streaming games or activities you don’t actually enjoy, which contributes significantly to the feeling of burnout.

Between the public attention around subathons driven by Ludwig and xQc and their direct short-term benefits to streamers, it’s likely they’re here to stay as a major part of the Twitch meta in 2022. But instead of chasing the meta, why not consider other ways to build an audience for your stream?
Reasons Why Streamers Are Using TikTok

As a streamer, you’re probably using multiple social media platforms to get your schedule and clips out to the world at large. And there are so many platforms out there that deciding which ones to use can feel overwhelming. Twitter, Facebook, Instagram… Even as you opened this article, you might have been thinking to yourself, “I’m already posting all over social media. Why should I use TikTok, too?” We encourage you to read on as the answer to why streamers are using TikTok may surprise you.

User engagement is higher on TikTok

The key to getting the word out about your great content to more people on social media is engagement. Likes, favs, retweets – they all mean more people will see your post. TikTok is seeing explosive growth right now: at least a 75% increase in total users in 2020 alone in most of the UK, Europe, and the United States. Those figures alone mean you should be paying attention to this platform.

But more importantly, TikTok’s average engagement numbers are much higher than Twitter or Instagram, especially for smaller accounts. The average account with 5,000 or fewer followers gets an engagement rate of 8.6% on TikTok, 5.3% on Instagram, and a minuscule 1.2% on Twitter. More engagement means more users seeing your posts, which in turn means more people watching your streams.

A phone showing the TikTok logo on a bright background being held by a hand in shadow showing streamers using TikTok
Photo by Solen Feyissa on Unsplash

It’s got some secret sauce for your YouTube channel

Whether you go live directly to YouTube or use it to post your greatest hits when you’re offline, you’re going to want to start getting in the game with TikTok for one simple reason: the app lets you add a tappable link to your account inside your bio. No copy and paste are necessary for fans who are discovering you on the platform. If they like what they see, they can be getting even more of your content with a single click. This is a big reason why streamers are using TikTok!

This adds even more power to go-live posts on the platform if you’re streaming to YouTube since that one click will take them right to be able to view your stream. You grab their attention with a snippet of quality content from your channel, then direct them straight to the action. What could be better than that? The smoothness of the process shouldn’t be underestimated and is just one more reason to make TikTok a staple of your social media content plan.

Creating content for TikTok is actually fun

TikTok creators have embraced the portrait format of the app, and some of the most visually interesting content on the web is coming out of the platform right now. Live streamers most familiar with creating within a landscape format might be put off at first by having to figure out how to squeeze their clips and cams into a new configuration.

Rather than seeing it as an obstacle, take it as an opportunity to experiment with shaking up your content. Stack full-frame widescreen gameplay videos right on top of your uncropped face cam to capture bigger reactions to big moments. Or try cutting full-screen reaction shots into your game footage for dramatic effect. Just be sure to pick bitesize, dynamic clips that show the very best of what your stream has to offer. If you need help getting started, check out XSplit’s detailed guide to recording gameplay for TikTok, featured above, for more tips and tricks.

Even huge streamers like Ninja, TommyInnit, and AdinRoss have seen the value of TikTok and are producing content there. Now that you’ve added TikTok to your social media toolkit, check out XSplit’s guide to what you’re forgetting to do as a streamer to keep your channel moving in the right direction.

The Benefits of Multistreaming

If you’re looking for new ways to grow your channel’s audience and reach this year, one thing to consider trying is multistreaming. This means that, instead of going live to just one channel on a single platform, you send your stream to multiple platforms at the same time. It can be done directly from inside XSplit Broadcaster, giving you an easy pathway to new potential viewers and subscribers. Read on for our guide on why and how to multistream.

Getting yourself out there

Before we discuss the benefits, you may be wondering exactly how to establish a multistream. Fortunately, it’s more simple than ever to get your channel live on more than one platform. You can use XSplit Broadcaster to set this up easily. In a matter of minutes, you’ll have connections to your channels such as Twitch, YouTube, Facebook, etc established.

Go to Broadcaster and create a new output from the dropdown ‘Broadcast’ menu. You’ll see the most notable streaming services listed here for quick and simple connections. If you’re using another streaming service, however, you can also go to ‘Find More Outputs’ to add the one that works for you. Once you’re all set up, you’ll just need to activate each of your outputs and you’ll be multistreaming in no time. If you don’t see an option for your platform of choice you may need to set up a custom RTMP.

A smartphone is on a desk with a keyboard behind it displaying the Twitch app, a place you could stream to with multistreaming.
Photo by Caspar Camille Rubin on Unsplash

More platforms can mean a bigger audience

You will likely be keen to maximize your content’s reach as much as possible, especially when starting out as a streamer. The bottom line is that the more platforms you’re on, the more potential viewers you will reach. It’s worth mentioning that if you are partnered with one platform, it’s generally against their partnership agreement to stream to another at the same time.

If not, the possibilities are huge. Let’s say you’ve been trying to make your way in the Twitch world, this platform has a daily user base of around 2.4 million for you to attempt to capture with your content. Also, you may not be aware that YouTube Gaming Live has an average daily viewership of about 640,000, and simply adding a YouTube stream to your broadcast would increase your potential exposure by another 27%. It is certainly worth looking closely at the stats and perhaps thinking about platforms you may not have considered previously.

Testing your content with multistreaming

Multistreaming is also very useful in helping you figure out where to focus your efforts as a content creator. While it may initially seem that all live streaming platforms are more or less the same, the demographics of each vary wildly. Perhaps you have considered trying to stream to a smaller platform such as Trovo but are unwilling to give up your set Twitch schedule? Not a problem. Just use XSplit Broadcaster to stream to both platforms simultaneously, and see what happens. If you’re concerned about bandwidth and want to stream to multiple channels at once, you could also make use of the Restream plugin through Broadcaster.

You’ll need to head over to Restream first, to set up an account (where you can choose between a free one or one of the paid premium accounts, depending on your needs). Once you’ve done this, you can open up Broadcaster and download the Restream plugin from the plugin store. After downloading it, you just need to select Restream as the output from the Broadcast menu.

Why not give multistreaming a try? It could help broaden your audience. Check out our guide to better streaming through storytelling for tips to jumpstart your channel’s growth.

The Best Capture Cards of 2022 for All Content Creators

If you’re looking to upgrade your streaming setup to a more professional camera or to bring console gameplay into your stream this year, you’re going to need a capture card. But with new products and technology upgrades hitting the market each year, choosing the right card can be tricky. Fortunately, in this blog, we’ve got our expert breakdown of the best capture cards of 2022 for a variety of streaming needs.

The best external capture cards for console gamers

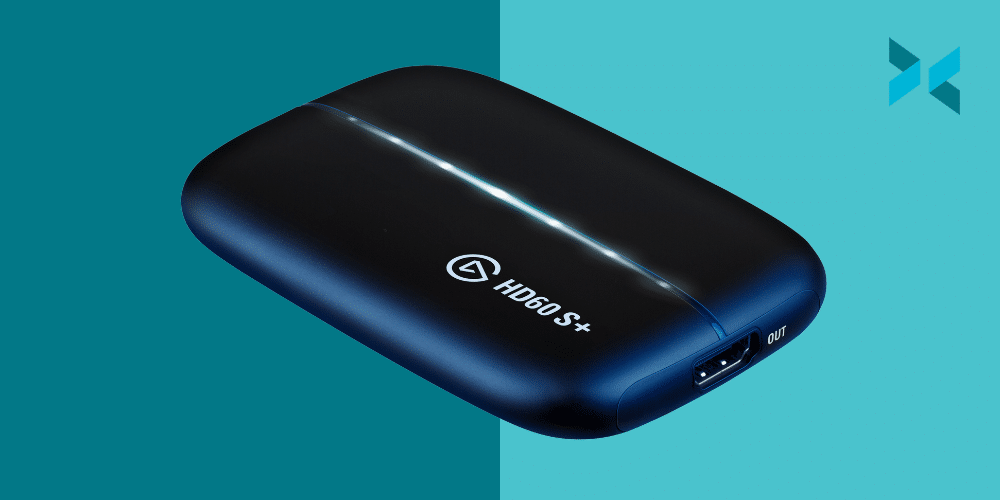
A name you’re going to see show up a lot on this list is Elgato – and for good reason. They’ve been making cards since 1992 and are considered the top brand by most streamers. Their current model aimed to console streamers is the HD60 S, widely hailed as one of the most reliable 1080p 60fps (frames per second) game capture cards on the market.

Another card to check out for console streaming is AVerMedia’s Live Gamer Portable 2 PLUS. This is an excellent card with an easy setup and some interesting features, including an audio jack to capture console party chat directly from the game itself. It also tends to price out lower than the HD60 S.

A Nintendo Switch with Animal Crossing is being displayed, you would need the best capture cards to stream this game.
Photo by Branden Skeli on Unsplash

The best external capture cards for cameras

Elgato also makes a dongle-sized capture device called the Cam Link 4K. Cheaper than their HD60 S, it lacks the HDCP decryption chip required to pass through but can pass a camera signal at resolutions up to 4K at 30 fps (frames per second). The Cam Link uses the UVC or Universal Video Class driver, meaning that cameras plugged into the device will be compatible with nearly every app, allowing for stress-free integration into any streamer’s setup.

Also of note in this category is Blackmagic Design, a company that has for years created professional-grade studio equipment and cameras. Recently they’ve channeled that knowledge into a pocket-sized combination HDMI and SDI capture device, the Ultrastudio Recorder 3G. Combining impressive capture quality with a competitive price, this card should be on every streamer’s list to consider. But be aware that to get the most out of this device, you’ll need to have a USB-C input on your computer.

A person sat in front of a pc with headphones on and a microphone on a boom arm, they are smiling as they are streaming using the best capture cards.
Photo by ConvertKit on Unsplash

Why not both?

Many content creators will need to add both a camera input and gameplay capture as they level up their live streams. For those who do, we recommend checking out the first internal card on our list, the AVerMedia Live Gamer Duo. Combining two inputs with 1080p60 capture capability on a single PCI Express card, the Live Gamer Duo provides a reliable way to bring both the stream’s talent and gameplay together in full HD, all while providing 4K60 fps pass-through to your monitor. This means that even while streaming at a lower resolution, you’re still enjoying the game on your own monitor at max settings.

The best 4K capture cards

While you’re probably not currently streaming in 4K, you might want to be ready to flip that switch when the time comes. To do that, you’ll need a card that can not just display but actually capture your gameplay at the highest possible resolution.

Also from Elgato is the second internal card on our list, the 4K60 Pro. Taking full advantage of the blazing speed of an onboard PCIe slot, the 4K60 Pro provides steady reliability and incredible capture quality with almost no latency, even with HDR (high dynamic range) video at the highest resolutions. Because of the speed and processing power advantages, we highly recommend going with an internal card for 4K capture.

But if internal cards aren’t a fit for your setup? Meet the Elgato Game Capture 4K60 S+, an external card that can capture at resolutions up to 4K at 60 fps, and also supports HDR video. This card is about as future-proof as you can get at the moment and supports onboard recording to an SD card. It can be a little tricky to set up, however.

You don’t need to add physical inputs to get more cameras on your stream. XSplit Connect: Webcam lets you wirelessly integrate your phone’s camera within any software like XSplit Broadcaster – an inexpensive option to increase production value. Now your capture card is sorted, find your next upgrade in our guide to the top streaming upgrades.

How To Livestream Your Local Sports Event

The last few years have seen a rise in the number of real-world teams using live video platforms such as Twitch and YouTube to bring local sports to their fans without the need for traditional TV deals. Streaming your local team’s matches live has all kinds of advantages from having highlights to share on social media and attracting new fans, to potential sponsorship deals. And the best news: getting started isn’t hard, and the XSplit team is here to walk you through how to livestream your local sports event.

Getting online from the field

It’s very unlikely you’ll be able to connect to a wired ethernet connection to livestream your local sports event. (the general recommendation you will find). Most recreational fields don’t come with built-in WiFi coverage. Even if you do have access, publicly available networks typically don’t provide the speed or stability required to stream successfully. It’s always worth testing though – connect your laptop to the network and run a basic network diagnostic such as Speedtest by Ookla to check it out. You’ll want to have between 4 and 6 Mbps (megabits per second) available on the upload side in order to successfully stream at 720p. This is a resolution we believe is a good trade-off in terms of quality and compression.

If you don’t have that, don’t worry, it’s not game over yet! 4G LTE connection speeds can run between 7 and 16 Mbps on the upload side, so using your phone or a personal hotspot to stream is a viable option.

Two people playing football on a green field in sunlight running for the ball which you could watch online if you learn how to livestream your local sports event.
Photo by Omar Ram on Unsplash

Your phone and laptop are a powerful pair

While it’s possible to stream directly to most live video platforms straight from your phone, this generally prevents you from adding valuable visual pieces to your sports team’s broadcast like a scoreboard, clock, or team names. It’s much better to connect your phone’s camera to your computer and use it as an input source within your live streaming software of choice. Connecting this way allows you to capture the action with your phone, but also add additional elements to your stream through XSplit Broadcaster like the ones mentioned earlier. XSplit actually has an app for seamlessly integrating your phone’s camera into your XSplit Broadcaster stream – XSplit Connect: Webcam.

Audio and commentary for your local sports event

Another great thing about running a stream through your computer is having high-quality, live commentary. You can plug a headset or microphone into the laptop from which you’re streaming and manage it as a separate audio input. If you’re looking to have more than one person on commentary, you could also use a small USB soundboard or audio interface. Something like the Scarlett 2i2 from Focusrite would work well, but make sure the headsets or mics you have can connect to it!

Whichever option you choose, remember that keeping that audio signal crisp and clear is important to your viewers. Test your levels beforehand – in XSplit Broadcaster, the meters are in the middle of the main screen just to the left of the microphone icon and right next to the scene title. Then, if you do need to adjust your levels up or down, this can be done easily by going to Tools on the menu bar and using the audio mixer.

Best camera to livestream local sports?

If you’ve outgrown your phone and laptop team-up, there are a number of options to upgrade your camera. But we’ve got you covered: before you buy an upgrade, check out the XSplit team’s Ultimate Camera Buying Guide for Content Creators.

Also, don’t forget that your new camera may not have the ability to connect wirelessly to your laptop and that your laptop likely doesn’t have a video input of its own either. You’ll need to return to a more traditional camera-to-streaming computer setup, likely using a micro HDMI cable to connect the camera to a video input adapter such as the Elgato HD60 S+. One last pro-tip on your live sports streaming setup: you’ll likely need longer cables than you would with a typical video gaming setup in order to give yourself more options for camera placement and movement.

How to Create and Stream a VTuber: A Step-by-Step Guide

The term “VTuber” or “Virtual YouTuber” was originally created in reference to the virtual online personality Kizuna AI in 2016. Until a couple of years ago, VTubers were limited to just a handful of accounts. Due to the complications involved in rendering and animating the character model in real-time. However, recent advances in cheap and well-designed motion capture software have made creating and using a virtual avatar while streaming accessible to almost anyone. Want to try it yourself? Here’s how to stream a VTuber!

How to stream a VTuber: Creating an avatar

Creating the 3D model that will represent you while you’re on stream is the first step to streaming a VTuber. For this guide, we’re going to use an online app called ReadyPlayerMe. This program lets you create a 3D model right in your web browser. It’s admittedly not the most powerful or detailed creation tool you can find, but it’s pretty good, very easy to use, and free.

You start your avatar by choosing a body type you want to model with. Next, upload a photo of yourself (or take one with your webcam) and customize it using the app, which lets you adjust things like skin color as well as hair color and length. You can also add some accessories if you wish, like glasses. Once you’re happy with how you look, click “Next” and download your avatar file somewhere where you can find it easily.

A person playing a game across three monitors with a gaming headset on facing the screens wondering how to stream a vtuber.
Photo by RODNAE Productions from Pexels

Converting your avatar for use

The next step is to get your avatar animated. We’re going to use a program called Animaze. This is the evolution of a program you may have heard of called FaceRig. Animaze is free to use on Steam, but it doesn’t natively support the model format that ReadyPlayerMe generates. So, we’ll have to run through a couple of quick steps to convert it.

Once you’ve downloaded and installed Animaze, you’ll find a program called “Animaze Editor” in the Tools section of your Steam library. You’ll need to run this program first, and use it to open the avatar you created by going to the Assets menu tab, clicking on “Import 3D Object” and selecting the file you downloaded from ReadyPlayerMe.

After a bit of loading time, you’ll see your avatar pop up on the main screen. You can use Animaze Editor to fine-tune your avatar, but if you’d rather just move on to the fun part, right-click on your avatar’s file name in the Hierarchy Panel on the left-hand side and select “Bundle”. Choose a folder to export to, and once you get the confirmation dialogue, open the main Animaze program from the Software section of your Steam library.

Get that model moving

Now it’s time to meet your virtual self! From the main Animaze screen, click the Avatars icon on the navigation bar on the left-hand side, and then choose “Imports” from the pop-out window. Then click the big plus button, and select the file you saved in the previous step. It ends in “.avatar” – be careful not to confuse it with ReadyPlayerMe file which ends with “.glb”.

After the import completes, you’ll see your virtual self on the main program screen. Make sure that the camera window (upper right by default) is showing your main camera. If it’s not, click the drop-down arrow to change it. Once you’ve got your avatar loaded and the right camera selected, just hit “Calibrate” and follow the directions to get your model moving more accurately with your actions.

A PC set up for streaming with two monitors, two lights and other streaming hardware on a desk with large speakers, this setup would be good to find out how to stream a vtuber.
Photo by Roberto Nickson from Pexels

How To Stream the VTuber

The final step is getting your VTuber into XSplit Broadcaster so you can go live with it and introduce your audience to the new you. Within Animaze, simply click the big button at the bottom of the screen labeled “Enable Virtual Camera”. Then switch back over to XSplit Broadcaster and use the Add Source menu to add the Animaze Virtual Camera, which can be found in the Devices section. You should see your VTuber pop right up on the screen, and you’re good to go. Note that if you’re planning to use a chroma key background for your avatar coming out of Animaze, you’ll need to activate the chroma key option on the Animaze Virtual Camera input within Broadcaster. For it to work properly right-click the input name and go to the “Color” tab of the menu for chroma options.

This guide showed just one of many possible ways to model a VTuber for use in your livestreams. Looking for other ways to invest in your stream? Check out our guide to the top streaming upgrades of 2021 for some great ideas.

Tips to Keep Your Twitch Channel Safe and Avoid DMCA Takedowns

It’s the email that every streamer dreads: the DMCA takedown notice. Remember, when it comes to copyright, Twitch has changed from a policy of muting audio to one of fully removing the offending clips. Repeat offenders run the risk of being banned completely, so streamers constantly need to be on their guard with the music and audio they’re allowing to go live on stream. Don’t worry though, we’ve got the tips and tools to help you avoid DMCA strikes on Twitch right here.

How to avoid a DMCA takedown on Twitch

After multiple massive, platform-wide DMCA headaches on Twitch in 2020 and 2021, it should be clear that you can’t use copyrighted music in your content. The most common way this has happened in the past is by listening to Spotify or some other music service during your livestream. But there are other ways that may not be as obvious for problematic audio to creep into your channel.

Got the football game on your tv in the background? If your mic picks it up, that’ll probably get flagged. Playing a trailer off YouTube that uses a pop song? A takedown notice could be headed your way. It’s important to keep your stream as clean as possible when it comes to audio. Come to mention it, if you need help getting your audio set up perfectly, we’ve got a guide for that too!

One person enjoying watching another stream a game on a PC, they both have gaming headsets on it would be useful to know how to avoid DMCA takedowns on Twitch
Photo by RODNAE Productions from Pexels

Will deleting clips and VODs protect your channel?

The DMCA rules on Twitch are in a constant state of flux. Early on, the platform would simply mute audio on VODs where it detected copyrighted music. There was no real way for live detection to happen. Technology and policies have both changed, however, and these days there is increasingly active live detection of copyright infringement. This is especially for TV and sports audio!

Twitch will remove or require the removal of any offending clips and VODs if flagged. It all adds up to potentially massive problems for streamers of all levels. Most importantly, the penalties for repeat offenders can still be very stringent, with permanent bans on the table. Really, the only thing to do is just be very diligent and make sure you’re sticking to music you have the rights to play.

So what can you safely play?

The good news is, there are a number of options out there that can provide music that’s safe for your channel to use. Gamecaster even has its own library of copyright-free music! Called Grooves, available for anyone to download and stream for free and use in their broadcasts. No registration or credit card is required, just click and go! There are more than 150 professionally produced tracks in a variety of genres that you can throw into your stream to set the mood without worrying about a DMCA claim ruining your day.

Music can be not only a great background to your content but sharing your favorite tracks with your community or other streamers can be a great way to connect further. Now that your channel is safe from the threat of DMCA strikes, learn how to secure the rest of your online life with our guide to protecting your privacy while streaming on Twitch.

The Twitch Affiliate Contract Explained

Every streamer on Twitch is out there shooting to get their channel to the level where they snag a Twitch Partnership invitation. That purple checkmark is a badge of honor for the content creators who work on the platform. But the first step to your streaming success is probably the Twitch Affiliate program. Today we’re going to help you understand a little bit about what the Twitch Affiliate contract looks like and what you can and can’t do with the program.

How is an Affiliate different from a Partner?

The Affiliate program exists to allow early-stage streamers who are serious about their careers to start earning money on Twitch. The differences between Affiliate and Partner are primarily in how much they earn. It’s probably easiest to think of the Affiliate program as the younger sibling of the Partner program. Affiliates can…

  • Receive payouts from viewers cheering bits on their channel
  • Earn commissions on paid and Prime subscriptions
  • Earn revenue on ads watched on their streams 
  • Earn commissions on games and merch sold through their channels
  • Activate channel points for viewers
  • Run polls directly through Twitch chat
  • Access five sub emotes

Partners get all of the above but also get custom Cheermotes, can access up to 60 emotes for subs, and earn ad revenue at a significantly higher rate than Affiliates.

A man standing in front of a bay of gaming PCs with his arms outstretched and a smile as he wears a gaming headset wondering about the twitch affiliate contract being explained.
Photo by RODNAE Productions from Pexels

What is ‘exclusivity’, and what does it mean for Affiliates?

The Twitch Affiliate contract has a clause that may be a little confusing, dealing with “exclusivity”. Essentially, it says that by becoming an Affiliate, you are giving up the right to go live on Twitch and another platform at the same time. That means Twitch has exclusive rights to your stream when you’re live. The important thing to understand, however, is that they only have exclusive rights to you when you’re live on Twitch. You’re free to end your Twitch stream then start a Facebook Gaming/YouTube multistream right after. You’re also allowed to embed your live Twitch stream on another site, such as your personal webpage, as many times as you like. Plus you can still upload any non-live content like VODs to other platforms as well.

It may seem a little limiting, but the tradeoff is being able to make money directly from your channel and start building towards Partner.

Twitch Affiliate requirements

Becoming an Affiliate does have some requirements, and technically there’s also an application process, but it’s more of a formality. Compare that to the Partner application, which, as most streamers know, is pretty heavily scrutinized. The Affiliate standards are:

  • you’ve reached 50 followers
  • you’ve streamed for eight hours total
  • you’ve streamed on seven different days in the previous month
  • you’ve averaged at least three viewers per stream

Once you’ve hit all of those milestones (it will track them on your dashboard in the ‘Road to Affiliate’ achievement) a button will appear on the page to let you apply to the Affiliate program. Just click that, wait a few days for a response, and you’ll be all set to start earning your keep as a professional streamer!

One big note we want to add is remember you still need to pay taxes, depending where you are located globally, on your Twitch earnings. So do keep this in mind!

It’s much easier to get on your streaming grind when you’re making a little money from your channel, and securing Twitch Affiliate is an important first step to becoming a Partner. Need help hitting those requirements? Check out our guide to finding your voice as a new streamer for ways to nudge that viewer count up.

The Best Graphics Cards For Your Streaming Setup

Crypto miners and pandemic-related disruptions to supply chains have led to a noticeable shortage in the number of chips and graphics cards available. This is a real nuisance for streamers looking to upgrade their setups in 2021. Unfortunately, there’s nothing you can do about what’s currently on the market. So, let’s run through the best of what you can actually get right now.

In some cases, these might not be the very first cards we’d recommend for the best streaming setup. They do, however, have one massive advantage over others in each category: you can actually get your hands on them!

The best graphics card for getting started

The effects of a decreased supply and increased demand have trickled down even into the entry-level tier of graphics cards. This has created scarcity and driven up prices. However, there is one card that’s actually both available from retailers and delivers a pretty good value for your money: the Nvidia GeForce GTX 1650 Super.

Overlooked perhaps because the original 1650 was something of a flop for Nvidia. The Super constitutes a slight upgrade on the architecture of the original card but makes a massive leap forward in the memory speed. Replacing the GDDR5 (Graphics Double Data Rate memory – the RAM of a graphics card) of the 1650 with ultra-fast GDDR6. This makes it a worthwhile investment for streamers looking to get started. As with any of the cards on this list, you’ll probably need to hunt around a bit to track them down. But, we’ve had the best luck with the ASUS version released under their ‘TUF Gaming’ line.

The best card to upgrade your rig

If you’re looking to make the jump to 4K gaming or higher-resolution streaming, the Nvidia RTX 2060 gives you all that, plus real-time ray-tracing (a high-tech method for rendering light and shadow within games) of the RTX series of cards. It also features the latest-gen GDDR6 in its onboard memory. Even if the markets were wide open, the RTX 2060 would be a good mid-level card, but it’s become even better value thanks to a drop in the retail price following the release of Nvidia’s RTX 3000 line in late 2020. The ASUS and Gigabyte versions are fairly easy to locate without much digging, but, as always, just consider the markups – it’s always worth checking the retail price of any of these cards before buying.

A Geforce RTX in a PC is one of the best graphics cards for streaming.
Photo by Christian Wiediger on Unsplash

The best high-end card

Demand for top-tier cards is crashing hard against that chip shortage mentioned earlier, creating historic scarcity. If you’re planning to go all-in here, your best bet is to pick up the AMD 6900 XT. It’s one of the most powerful cards on the market and there’s a window of availability right now if this is your time to upgrade. Although, it’s likely to be at a significant markup. It’s worth noting that AMD cards do seem to be lagging behind in the high-end GPU arms race, at the moment at least. They lack Nvidia’s Deep Learning Super Sampling (DLSS) technology that uses AI and machine learning to enhance performance. So, if you can hold out until the much cheaper RTX 3080 returns to retailers, we’d recommend you do so. 

Realistically, building and upgrading your streaming PC in 2022 will require patience and careful searching. Fortunately, hardware isn’t the only way to improve your stream! Check out our guide to improving your viewership for more ways to grow as a creator.

How to Pitch Your Non-Profit

Pitching and fundraising are probably the most important parts of operating a non-profit. They’re also the most challenging aspects. There is a lot of competition for grants and investments, and it’s more important than ever to try and distinguish yourself from others. Here’s how you can use XSplit Presenter to give yourself an advantage when pitching to non-profit investors.

Keep it professional to pitch a non-profit

We’ve all been in presentations where someone’s desktop or messaging notifications have popped up on the screen and interrupted or distracted them. At best, this comes across as a bit unprofessional, at worst this could cause potential investors to lose interest altogether. 

This is a danger specific to presenting by sharing your screen directly on pretty much all video meeting platforms. Fortunately, there’s a way to erase the worry about unwanted messages popping when trying to pitch your non-profit’s cause to interested parties. Because XSplit Presenter functions as a virtual camera pointed at your pitch deck, not your desktop. It shares your presentation, and only your presentation, with your audience. No need to worry about an errant Slack message disrupting your flow or distracting your audience.

Integrate your existing web and social presence

A common story for non-profits is limited bandwidth to generate creative and promotional assets. XSplit Presenter allows you to show off the hard work you’ve put into building your online presence. You can show this directly in your presentation by integrating your existing web pages and social media accounts with your pitch deck.

And this is not just a static screenshot: you can seamlessly add web pages with full functionality to your pitch. Within Presenter they act the same way as a slide in a conventional presentation. This allows you to show off things like apps, client portals, or even just media and promotional material in their native environment. You can also easily add videos from YouTube or files directly.

Multiple people sat around a large meeting room table with their laptops open, looking towards the far end of the table where someone is pitching a non-profit.
Photo by Christina @ wocintechchat.com on Unsplash

Stay in the picture

We’re sure we’ve all also experienced that moment of disconnect that happens when an online presenter in a meeting switches from their webcam to sharing their screen, visually pops out of existence to become just a disembodied voice speaking over their slides. So much of compelling non-profit investors to join your cause while pitching a non-profit is forming connections. In these online meetings, losing the connection to your face unquestionably makes that harder.

XSplit Presenter allows you to add your webcam as an overlay to your presentations. This lets you stay a visible part of your pitch. Not only that, but it has a number of attractive formatting options to help integrate your cam into the overall style of your deck. Want to bring in a co-presenter or specialist on a specific slide? You can do that, too, adding additional NDI sources such as Skype calls as overlays. This allows you to bring in additional voices easily and in an attractive manner.

While this guide may feel directed mainly toward remote presentations, you can actually use all these features in your in-person presentations as well. Looking for more ways to improve your online presentations? Check out XSplit’s video guide to leveling up your presentations with Presenter for more tips and tricks.