Why Email When You Could Send Video Messages for Work?

There are lots of good reasons to communicate via email – it’s a great tool when you need to quickly and easily share information like your point of view, a case study, or whitepaper. However, there are times when the written word doesn’t quite feel like enough and you might prefer to show the recipient what you’re trying to communicate. With XSplit Capture, it’s easy to send video messages for work with screen capture, or a bit more.

Why would I send video messages for work?

If you’re trying to tell someone how to perform a process, make them aware of a bug in a piece of software, or show off the latest design of your website, it can be easier to present a visual rather than send an email. Not only does it save time but also makes it easier to demonstrate the relative point – so, why not make a recording of your screen while you run through the steps on your own computer? This will make what you’re doing obvious to the viewer, as well as allow them to see exactly what the process involves. It will also make it much easier for them to retrace your steps if they need to. 

Recording a video doesn’t have to be a slow process either – you can record in the same time that it takes you to run through whatever you’re showing, and the recipient can watch it just as quickly, or slow it down if they need to catch the details. It can also be much easier to explain something out loud than in a text format, especially when you need to point at things for emphasis.

A person sat at a desk in a cafe using a laptop sending a video message for work with a mug next to them and books on the desk.
Photo by Brooke Cagle on Unsplash

How would I make this video?

XSplit Capture makes recording your screen easy. Simply select the area of your screen that you want to record, then carry on using the computer as normal. Once you’ve finished your recording, you can add any additional notes, or annotations, to cover anything you missed, then use the link provided in the software to share your video with your colleagues. There’s no need to worry about hosting or sending large files as the software will handle that for you seamlessly, automatically saving your videos to the cloud. 

If you want to make something a bit more complex, you can use the videos from XSplit Capture as the starting point for something more in-depth. This could involve joining multiple videos together, or even using them as part of a presentation. All of your captures, screenshots, and recordings are easy to access from your XSplit account so retrieving them is a quick and straightforward process. 

With XSplit Capture, it’s just as easy to attach a screen capture to your message as it is to send a text or a voice clip, so why wouldn’t you share that extra level of information? You could even give your clip a quick edit before sending it to make sure you’re completely happy with what you show in editing software. But the ease of doing everything quickly and in one take is what Capture is all about!

Making the Most of Virtual All-Hands Presentations

With meetings going digital, you’re likely to need to organize a virtual all-hands presentation at some point. But what’s the best way to do this? How can you make the most of the available technology? Are there any advantages of virtual over real-world meetings? There are plenty of things to consider and many powerful tools available. So let’s run through these questions!

The advantages of a virtual all-hands meeting

After two years of working from home, we’re all quite used to attending meetings on Zoom or Teams and some of the big advantages are starting to become apparent. If everyone’s joining the meeting from home, it cuts down dramatically on travel time and costs, especially if you have a number of widespread sites. It also means you don’t need to maintain an overly large, rarely used meeting room or shell out for conference space.

Plus, if you’re broadcasting the meeting with XSplit Presenter, you can also record it to allow anyone who was unable to attend to see it afterward. Finally, going virtual allows you to have more control over what your attendees see – whether that’s through video, slides, or other media.

A laptop on a desk with a large virtual all-hands meeting displayed on it with a mug sat next to the laptop.
Photo by Chris Montgomery on Unsplash

How to make the most of a virtual meeting

If your meeting is going to be virtual, take advantage of the digital format by adding in some media. You could include video clips, animations, or other multimedia to spice things up a bit. Just make sure your slides are interesting and polished since they’ll be front and center. Remember to have your webcam on to give a more personal feel to the meeting, and it’s a good idea to use software like XSplit Presenter to integrate it with the presentation. By having your feed appear over the top of the slides, it will put a human face to content that might otherwise feel overly businesslike or impersonal. The function to annotate in real-time can also be a clear and engaging way of highlighting the main points. 

Since you know that everyone will be watching on a computer, you can also include things like polls, using a third-party website, to allow people to vote on questions or give feedback. Use the chat system to allow people to ask questions and get involved. Adding images to your XSplit Presenter slides will give them a lot more depth as well. Whether you go for subject-relevant photos or humorous cartoons and memes depends on the feel you’re going for with the presentation – or maybe you just want to lighten the mood!

Bring a friend to your virtual all-hands!

Consider having multiple presenters, inviting external guests. Or calling on individual managers to report on their departments in order to break up the meeting and add some variety. If you can add multiple webcam views to your video stream, that can help too. But consider checking that the feeds have a similar feel with regards to lighting and quality – it can look quite strange if one presenter is well lit and clear and another is in pixelated shadow. 

This advice applies to backgrounds as well – virtual backgrounds are fine, but they can look strange and distracting if the lighting is completely different and looks wrong. If you’re superimposing your webcam feed onto your presentation, XSplit Presenter will allow you to use a transparent background so the slide is visible around your head. This also lets you move out of the way if your face covers any of the content!

Virtual meetings have a lot of advantages, especially with the help of today’s technology. They can cure a lot of the logistical problems of trying to bring people together, but it’s worth putting in the effort to ensure that you’re making the most of them.

The Advantages of Synchronous Vs Asynchronous Communication

If you want to show somebody a demo of a product, a bug report, or show them how to do a task, being able to use a video of it happening is generally the best way. This can be done either live, on a video call with a screen-share, or by sending a pre-recorded video message. Both of these methods have advantages, depending on whether you’re more interested in synchronous (same time) vs asynchronous (different time) communication. Below, we have a look at some of them.

Timing Advantages of Synchronous Vs Asynchronous Communication

The biggest difference between the two is that a video call is immediate. You’re in the moment, speaking to the other person live. This means that you can answer any questions they have and adjust the speed you’re presenting at – maybe even skipping quickly over parts of it – based on their understanding. It saves you time because talking about something live can be much quicker than editing a video about it. It also means you can potentially get an answer from them straight away. For more tips on using this handy medium, take a look at our DOs and DON’Ts of video calls.

On the other hand, sending a video to someone allows them to watch it whenever it’s convenient for them. It doesn’t matter if they’re in a different timezone or if you both have busy schedules. You can send the message when you’re ready and they can watch it when they have time.

Synchronous Vs Asynchronous Communication on display here as a person talks to someone on a zoom call which could also be recorded.
Photo by LinkedIn Sales Solutions on Unsplash

Media

You can include media in both a video call or a video message using XSplit Presenter. During live presentations, it lets you share your desktop if you need to demonstrate something, as well as include pictures, slides, or videos to add notes and emphasis to the meeting. However, if you choose to record your video for sharing, XSplit Presenter allows you to use visual transitions so that media changes are made without distracting from your commentary. This makes a big difference to how professional the end product looks.

A recording also lets you review presentations before sending them. If your first recording attempt doesn’t go too well, you can delete it and try again. This can make for a shorter, more information-dense message as well, which saves the recipient time. XSplit Presenter’s functionality also gives you the option to get more detailed with notes and overlays on the video – meaning you can include particular information for context without interrupting the flow of your narration.

Repeatability

While a live call is in the moment (unless recorded), a video message can be played repeatedly and sent to multiple people. This makes it ideal for things like sales demonstrations and product support FAQs. Video messages also work well for reports that recipients might pass around or need to watch more than once. If people want to ask questions, they can always get back to you. On the other hand, a video call allows you to tailor your presentation to each person specifically, making it more relevant to their needs and offering the option of a Q&A at the end of it.  

XSplit Capture is perfect for creating video messages as it lets you quickly capture your screen, add in any annotations or a voice over and share the video at the press of a button. Simply select what you want to record (it could be your computer screen or yourself) and hit record. Once finished, XSplit Capture creates a private link for the video which can then be sent to your colleagues. 

Depending on your needs, there are definite uses for both synchronous vs asynchronous communication and plenty of reasons to go either way. To go even further with your videos, check out our blog on creating interesting presentations.

How Can You Stream With Guests?

From time to time, you may want to run your stream with guests, perhaps because they’re keen to join you in a game or as part of a collaboration with other streamers. A lot of viewers get a lot out of their favorite streamers playing together. It’s also a great way to introduce your audience to creators you like! The good news is that, with the help of XSplit Broadcaster, it’s easier than ever to make them become a real part of the stream!

Where should their feed come from?

Since XSplit Broadcaster can capture any window on your computer, it doesn’t really matter what program you use to get their webcam feed to you. Your options include capturing a direct feed from using NDI on platforms like Zoom or Skype. You could also screen capture another platform such as Discord, Teams, or even a second Twitch stream if that’s more convenient for you.

However, we would strongly recommend going the NDI route as you can easily add each person’s call as an individual source. You can then easily move and resize without having to worry about the screen capture element. This is especially true with multiple guests where someone leaving and others joining. This can mean resizing everything again with a screen capture.

If you’re including your webcam feed or something else in the background, the quality is less important as their webcam will appear smaller on the final broadcast, but keeping the inputs at the highest possible quality does reduce the risk of visible compression artifacts on the finished video.

A person with an RGB gaming headset on, streaming a game on their monitor looking to stream with guests with a keyboard and Star Wars mug on their desk.
Photo by Sean Do on Unsplash

How to stream with guests

The simplest way to have two presenters in a single stream is to split the screen between them, using the direct feed from their camera. If there’s something in the background that the presenters are reacting to, such as a game or another video, then using a plain background along with XSplit Broadcaster‘s chroma key option can allow you to just cut out the head and shoulders of the presenters, and place them in the bottom corners of the video.

XSplit Broadcaster also allows you to crop the feeds manually, even using custom masks. This is useful if you’re capturing from another application and want to remove any window decoration or user interface from around the edges, or even with the chroma key to remove unwanted distractions, such as a doorframe or picture on the wall.

Keep it balanced

When running a stream from multiple sources, it’s important to balance things. Regardless of whether you opt for a voice-only stream or not, the most important factor here is the audio – if you have two presenters in different locations, it’s very easy for one of them to be set much higher than the other, and quite hard to notice this during a stream. Make sure you’ve tested this in advance by listening to the feed when both presenters are talking normally.

A voice stream in something like Discord is also very easy to set up, by the way. Simply make sure XSplit Broadcaster is capturing desktop audio and the call will easily come through. Discord even has a plugin that shows who is speaking on screen!

Similarly, with the video, you want to ensure that both presenters appear roughly the same size (unless you’re deliberately emphasizing one – and then it should be obvious) and you should make sure that the two camera feeds are a similar brightness and ideally a similar video quality. If one presenter is well lit and sharp and the other is gloomy and blurred, it makes it more obvious that you’re not together, and this again makes the stream feel of lower quality. 

Bringing guests into a stream can certainly be worthwhile. Why not check out these great tips we’ve put together on making your webcams look as good as possible to help give them the ultimate user experience?

What’s the Best Kind of Lighting for Conference Calls?

Even cheap cameras can produce surprisingly good images these days, although most models are very dependent on lighting. Low light can lead to noisy or blurry images. Badly positioned lights can leave you in shadow, while very harsh lighting can highlight your face in the wrong ways. Let’s touch on each of these in more detail so can look your best with the best kind of lighting for a webcam.

Do you have the best kind of lighting for a webcam?

Cameras work by catching the light and turning it into electrical signals. If lighting is insufficient, the camera will compensate, at the expense of image quality. Here’s what might happen if there isn’t enough light:

  • Exposures can be made longer, which can lead to blurring
  • The signal can be amplified, which causes noise
  • Pixels can be combined and smoothing algorithms used, which will make the image look blurry and blocky

Your studio or office may already have enough light in it, but if it doesn’t, you can mount additional lights behind the camera. Higher-quality cameras will often work better in lower light conditions. However, for webcam lighting, you’ll want to ensure you’re giving it as much help as you can.

A person sat in front of a ring light with headphones on is one of the best lighting for a webcam.
Photo by Karolina Grabowska from Pexels

Are your lights in the right place?

It’s very important for lighting to be situated behind the camera. This is because webcam lighting needs to illuminate your face without shining into the camera itself. This applies to sunny windows, too – the camera will automatically adjust to the brightest part of the image. If there’s a window behind you, it will darken the whole image leaving your face in shadow. Ideally, you want to have the light source no more than 45° from the camera, and definitely higher than your face.

Different angles will give different effects, so try experimenting to see which one you like most. If you’re using software like XSplit’s VCam to replace the background, getting good lighting can instantly improve it’s effetiveness. But it’s still a good idea to make sure that you’re well-lit generally for your conference calls. If you’re in low-light settings or don’t get access to lots of natural sunlight, you could try a daylight bulb. They are designed to imitate the natural light of the sun.

A person, well lit, is sat in front of a laptop on a call with someone, knowing the best lighting for a webcam. A notebook is on the table as well as a water bottle and some files.
Photo by LinkedIn Sales Solutions on Unsplash

What shape is your light?

Small lights, such as phone torches, give very harsh shadows. It’s a technique sometimes used in art, but best avoided in a video conference or streams since you don’t want the lighting to distract your audience. There are two main options for adding light:

  • The best lighting for webcams is probably a softbox or key light. These have a larger light-emitting surface, which results in softer shadows and a more natural feel. You can also place them at a slight angle (no more than 45°) from the camera to give your face a bit of depth from the soft shadows. If you’re looking at softbox lighting, you can easily get your hands on an entire kit from Amazon. Check out ESDDI for a durable light with smaller dimensions or Neewer for a high-quality dual light that’s also good for a budget. For key lights, Elgato is a popular choice as it’s ultra-bright, adjustable and fully dimmable. It also keeps the heat low in comparison to softbox lights so you won’t be sweating on camera!
  • Then there are ring lights. These are compact and versatile, so you can use them whether you’re on a conference call from your phone or computer. The Cyezcor Video Conference Lighting Kit is an ideal USB light. It can be attached to your laptop and delivers an adjustable colour temperature.

You can also produce the softbox effect cheaply and easily by shining a bright light onto a wall behind the camera. This effectively uses the entire wall as the lighting surface, though make sure that you use a white wall –⁠ you don’t want to change the color of the light.

This isn’t the first time we’ve touched on lighting –⁠ if you’d like to find out more, check out our recommendations on tips for improving webcam quality. And the next time you’re setting up for a video conference, remember to make sure your lights are in front of you and not behind.

Online Security When Working From Home

With the increase in working from home, there are a number of things we need to think about in order to stay secure online. These new challenges aren’t too difficult, but keeping your data safe is very important! We’ll take you through some of the key things to consider for online security in this blog.

Stay secure online

When data is at risk, it’s very important to ensure that your connection is secure. The best way to do this is to have a VPN set up so that all your connections go through a network. This ensures that any data that goes across the internet is fully encrypted, even if you’re using insecure protocols such as SMTP or HTTP. A VPN will also protect you if you’re using a public wifi connection, such as at a coffee shop – you’ll be protected even if someone else on the network is trying to snoop your data.

If you’re part of a company, the other big advantage of using a VPN is that it allows you to access all of the network services in the office as if you were actually there yourself. This includes servers, printers, projectors, and anything else that’s available on the network. With everyone on a VPN, those services don’t have to be made open to the internet in general, greatly improving the office network security.

A person sat on a bed using a laptop with a large open window behind them looking out on to a tree looking to stay secure online.
Photo by DocuSign on Unsplash

Personal data security

If you’re using a laptop outside the home or office you need to think about keeping your data secure. The first things to consider to stay secure online are:

  • Anti-virus software, which helps protect from viruses that could steal or encrypt your data – ransomware attacks where a criminal demands money to unencrypt your files are sadly getting more frequent.
  • Disk encryption will protect the data on your computer if somebody steals it – without your password, they won’t be able to read any of the data on the computer or even start it up without wiping it. This doesn’t get you your computer back, but at least it means you can be sure the data is safe!

Speaking of losing your computer, making regular backups is important as well. Keeping files on the office servers means you don’t have to worry about hardware loss or failure, and your IT department should already be backing up the servers. It’s also a good idea to make sure you’re familiar with what real and scam emails look like. Phishing attacks, where an email tries to convince you to go to a dodgy website, are also common. Remember to check the domain name in any links to help stay secure online.

Giving away information

Sometimes the simplest security slip-ups are the most damaging when you’re trying to stay secure online. Imagine doing a presentation to a supplier or client, but when you share your screen, you accidentally show your desktop where there’s a document about a deal with their competitor. Or perhaps, during a meeting, you’re sharing your screen when an email notification about a sensitive or personal matter comes through and a notification pops up. You can avoid these moments by using XSplit Presenter to share just a single application, rather than sharing your entire screen.

You can also use XSplit VCam to blur the background of your webcam if you’re in a call, which helps if your home office isn’t quite as private as you would like it to be.

Using complicated, random passwords and saving them in a password manager also helps enormously, giving you all the security of never repeating a password whilst still only having to remember one.

Whilst there are plenty of potential pitfalls in online security, there are also a lot of solutions. As long as you’re careful, you shouldn’t have any problems and can be confident that you will stay secure online.

Should You Put Your Content On Multiple Services?

It’s very tempting to reuse content by uploading the same footage to multiple sites, but is this actually a good idea? It feels sensible –⁠ after all, you’ve put all that effort into making your video or your stream. Why not try to show as many people as possible? There are definitely a few things to consider when it comes to multiplatform streaming, so let us take you through the options.

Different sites have different feels

The sort of content that viewers are looking for on different sites can vary. The greatest advantage of sites like Twitch is that it’s live and being able to interact with the streamer. People can then upload their VODs to places like YouTube. These polished videos are edited to show off the best bits, often with effects and overlays added. A live-stream viewer can sometimes treat a stream as background entertainment. Something that’s running on a secondary screen whilst they’re working on something else. But if someone is seeking out videos, they’re more likely to be concentrating on the show. They’re wanting a well-crafted story to follow –⁠ something which can hold their interest. So the content you upload to each site has to differ.

Then you have to consider social media channels, whether that’s Reddit, Facebook, Twitter, or TikTok. All of these require the audience’s attention to be grabbed very quickly and typically expect very short videos that don’t need much setup or explanation. A brief pause in their scrolling, rather than a real-time investment.

A person with a gaming headset on stood in front of a row of gaming PCs in a large room with two other people next to them, they are shrugging but smiling thinking about reusing content.
Photo by RODNAE Productions from Pexels

Is there a way to reuse content?

A number of very successful Youtube producers take footage from their Twitch streams and produce highlight videos. Turning anything from an evening to a month’s worth of streaming into a ten or twenty-minute best-of video. Twitch itself has the Clips feature, allowing short chunks of a stream to be saved as a highlight to show on your channel. Editing your footage to a fraction of its length by pulling out the best bits is a lot of work, but it’s very rewarding. It also shows your stream at its best, skipping over the mistakes and the grind and focussing on the highlights, the hilarity, and the moments of pure skill or luck.

Depending on the content of your stream or videos, it may be possible to pull out a short chunk for social media. However, you need something that grabs attention quickly and doesn’t require time to set the scene. A perfect sniper shot in Warzone or a big jump or crash in a racing game could work. But, showing off a machine in Minecraft or Factorio is might be less likely to grab people’s attention. But this can really depend, it’s best to use your judgment here. We’ve seen some amazing Minecraft machines blow up on Twitter!

How do I change my content to suit a different service?

There are many pieces of video editing software available with a variety of features –⁠ some come preinstalled on smartphones, but only allow you to trim the start and end of a clip. Others are very expensive but allow movie-quality effects to be created. Personally, I use Kdenlive which is free and reasonably powerful, allowing clips to be cut up, rearranged, and layered. It doesn’t touch actual image processing that might be used, for example, to remove a mustache from a character.

Some streams may be suitable for multiplatform streaming, allowing you to broadcast on more than one service with the same feed. A tool such as XSplit Broadcaster makes this very easy, streaming to wherever you want and allowing for eye-catching effects and transitions so you can switch between different sources, play pre-recorded clips, and more!

There are definitely ways to reuse content on different platforms, however, it does take some thought. You can’t just upload the same video to multiple platforms. But, with some careful editing and targetting your content to specific platforms, you can certainly make it fit.

How To Create The Perfect Pitch For Potential Streaming Sponsors

One of the simplest ways to get sponsors for Twitch or YouTube is to use a connection service to introduce you to companies that match your brand or level of influence. However, if you want to target specific companies to work with, then you’ll need to impress them with an attractive, informative pitch deck. Let’s have a look at what you should include when you pitch streaming sponsors to your channel and brand.

What key points should you include to get sponsors on Twitch?

It’s likely that these companies receive many pitches and proposals, so it’s a good idea to keep the introduction short and sweet. Tell them about yourself, the content of your stream, and why you have approached them. Also, detail how the proposal will benefit them.

Next, give them the important figures from your channel, including subscribers, average viewer numbers, and social media channel followers. Include your broadcast schedule, as it will give the company an idea of how often you stream and roughly how long each session is. If you have any positive reviews or comments from other companies, you could look into adding these as well.

Two people sat on a stage environment streaming looking to find out how to get sponsors on Twitch.
Photo by Alena Darmel from Pexels

What should you leave out?

While you want to show your channel figures to get sponsors for Twitch, try to avoid referring to Twitch’s own statistics as a company. These include general overviews of Twitch’s audience, including age, and how often viewers are watching Twitch streams. These apply to all channels, and, if the company you are reaching out to is aware of Twitch, they’re likely already aware of the growing influence it has.

It’s worth considering the tone you use as well. Over on your channel, you’ll be used to adopting a particular tone, language, and humor to attract viewers. With this pitch document, leave the jokes at the door and keep it formal. After all, when you pitch streaming sponsors, you’re entering into a business negotiation. However, keeping some of your own flavor is important so don’t go too dry, just maybe skip the memes.

How should you present your brand to get sponsors on Twitch?

Ideally, try to convey that your brand reflects the company you’re pitching to. Take time to do research and find out what the company’s mission is, what qualities it embodies and what type of culture it promotes.

Use this to create links between their brand and yours, in order to illustrate that there’s already an existing level of synergy. If you’ve used their products or services, include this and say why you liked them, but equally, don’t be dishonest. Rather than rely on third-party reviews, consider trialing at least one of the company’s products before approaching them. This will give your pitch authenticity.

Creating a live pitch deck

Instead of a simple letter, consider transforming your pitch into a live pitch deck using XSplit Presenter. This can make your proposal more engaging and more visually appealing by allowing you to include logos, screenshots, and graphs of your statistics. Rather than crash someone’s inbox with a graphics-heavy PDF pack, Presenter lets you record your presentation as you give it, you could also just record it, then upload it to YouTube and send the link over for even less hassle. You can appear in the video so they get an immediate sense of who you are and what you’re about. It’s also a good idea to add video and any web links in the video as well, again, you can appear in the video on top of them!

Before you consider sending out your proposal, complete a check on your channel to see what further improvements you could make to increase its appeal to both viewers and sponsors. Think about ways you could improve your viewership in order to increase your chances of landing a sponsorship deal.

Balancing Streaming and Working as a Part-Time Streamer

When you’re first starting out as a part-time streamer, you’ll need to fit your streaming schedule around your day job and around the rest of your life as well. This doesn’t have to be difficult, but it does take discipline and consistency to get the work-life balance right and to give your channel the chance it deserves.

Consistency as a part-time streamer

Streaming regularly and at the same time, every week, is vital for keeping an audience when streaming part-time. They want to know when they’re going to be able to find you – if one week you stream on a Sunday afternoon, then next it’s a Tuesday evening and so on, any fans you picked up in the first stream who want to come back will probably miss the next one. Additionally, people tend to look for something to watch at similar times based on their schedule, so sticking with a specific time and day means that the same people will come back repeatedly, building up their loyalty to your channel and the likelihood of them continuing to watch. 

Frequency helps too. If you can stream several times a week you’ll obviously get more total views than if it’s only once a week. It will probably also help your channel to grow more quickly as there are more chances for people to find you and follow or subscribe.

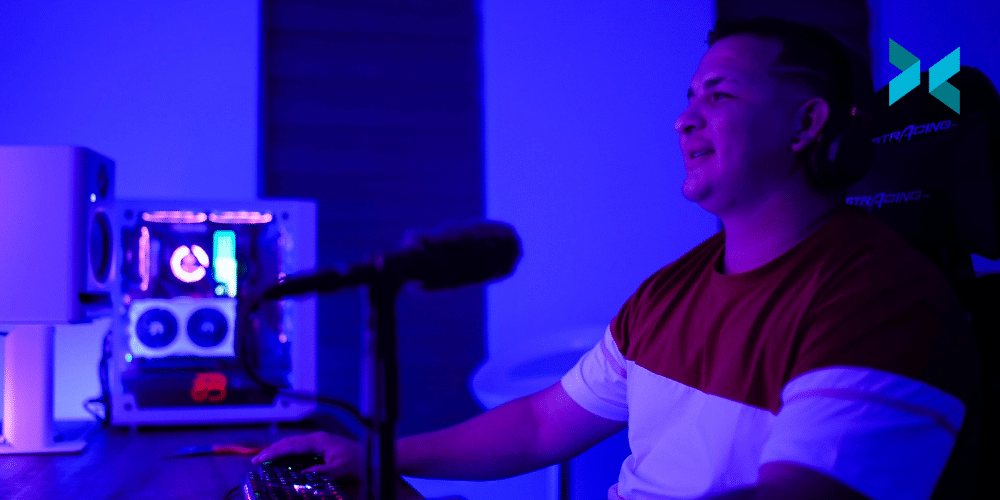
A streaming PC setup on a desk with a mic, monitor, keyboard, mouse and mood lighting for a part-time streamer.
Photo by Jack B on Unsplash

Don’t burn out

When you first start, it’s easy to think “I’ll stream every night – I’m always gaming, so why not do it on stream?” However, this isn’t always feasible especially if you work full time. Streaming involves putting on a show as well as just playing games, and even if you’re naturally eloquent and amusing, it’s still an effort to stay chatty and involved. Nevertheless, this shouldn’t put you off streaming even if you only manage to do this for a few hours a week. Streaming can be just as fun as a part-time hobby.

Plus, if you’re streaming just when you can and want to, you’re likely to enjoy it more and have the energy to put on a good show. You’re also likely to still see growth on your channel, particularly if you are streaming things you genuinely like and want to share with others – this will come across. It’s important to give yourself time off to relax as well as keeping the channel going however often you stream. You’ll probably also find there are other background tasks associated with streaming that need to be dealt with, such as designing thumbnails, promoting your channel, and so on.

It’s still a commitment

If your friends aren’t gamers, they might not understand that your streams are a commitment and it’s important to keep to them. Just because it’s online doesn’t mean there aren’t real people at the other end waiting for you who would be let down if you canceled. This is more important with multi-player games, however, it still applies to streaming, especially if you want the channel to do well.

On the flip side, it’s important to make time to see friends. Your channel should not become your entire life! Ideally, you’ll be able to find a schedule that fits everything in – work, streaming, socializing, and some relaxing – but achieving a work-life balance as a part-time streamer can be difficult. Being organized can help you stay on top of it, so why not set a schedule and stick to it to keep things simple? Just remember to include some time for yourself!

Building an audience takes time and dedication but it’s important to care for yourself too. Balancing work, streaming, and life, in general, can be tricky, but, once you do, it will make everything go much more smoothly – well worth the effort!

Adding Flair to Online Teaching

Moving classes online makes it much easier to offer them to a wider audience. It also gives you the opportunity to do a lot of extra things to streamline the class. You can make it more interesting, and help with visual learning. XSplit Presenter provides a great starting point to help create a more media-rich learning experience. This in turn can help make online teaching easier!

Bring in the media to online teaching

Running a lesson like a TV show allows you to go much further than relying on simple PowerPoint slides. With XSplit Presenter, you can do everything you’re already used to. Creating slides with separate notes and adding pictures and videos. But, you can add in other media as well! Perhaps you want to include a camera feed of yourself to make the presentation feel more personal? Or, share your screen while you demonstrate a particular point or feature?

Or, you may wish to speak to someone live on a Skype call and make that a part of the presentation. With the help of XSplit Presenter, all of these things can be done quickly and easily. Better still, they can be formatted and scheduled ahead, so you won’t need to waste time fumbling with sharing a window or your desktop. Everything can just appear on one screen, you, the slides, videos, notes, images, and more!

Plan ahead

If being able to plan your media, your screen shares, and your webcam footage in advance isn’t enough? Why not try pre-recording all of your online lessons? This is particularly ideal if there’s something complicated you want to show. If it’s pre-recorded, you can run through it in advance, then script and record a voice-over to go with it without worrying about your flow being interrupted. This is easily done by just hitting the record button in XSplit Presenter!

But why stop there? If you’re pre-recording your webcam footage as well, you can line up transitions and links. Allowing the ‘you’ on the video to point to things directly, rather than using arrows or highlights. This also allows you to record practice runs before you do the real thing, eliminating poor phrasing or awkward pauses. This ultimately results in a much more streamlined and professional learning experience.

A child looking at a laptop with a teacher on screen online teaching.
Photo by Giovanni Gagliardi on Unsplash

Watch the class back

A well-made recording can be made available for viewers to rewatch at a later date. A big advantage of this is that you can offer these videos as part of an online syllabus. For some, it will be more watchable than a recording of someone working through an online lesson in real-time. It also has the added benefit of allowing adult learners with busy schedules the opportunity to learn in their own time.

Making your online lesson available to your students as a video can make things much easier for you. It allows for flexibility for you when it comes to recording time and will allow them to revisit it to help with exam revision. It can also give you the freedom to direct your attention elsewhere whilst the presentation is running, and then step in at the end to deal with any questions your audience may have.

 XSplit Presenter can be used to help organize and enhance your online teaching content in many different ways, from helping with slide management to recording and playing a full presentation. Why not check out this list of tips we put together to help you plan your presentations better.