Setting up for a Couch Multiplayer Gaming Party

Playing cooperative or even competitive with friends is always fun when playing in one place, whether at your home or someone else’s. May it be for hours of competitive mayhem in Super Smash Bros. Ultimate or finishing that tough level in Overcooked! 2. The fun aspect of playing in a single room with friends is far better than playing online from separate locations, just like in the good old days. But that shouldn’t hold off gamers who would prefer having couch multiplayer sessions even if online multiplayer is now a thing. So with that in mind, we listed out some tips on setting up your couch gaming party for a whole night of non-stop gaming sessions.

Set up a schedule

Before preparing for the couch gaming party, you got to make sure that a date has been set. That means you need to schedule which day is available for everyone, and more importantly, where will the venue be. Make sure that all of the invited friends have agreed on a specific day, time and they will commit to it. Once that is done, you can also set up a reminder on your email calendar and add your friends as recipients, so in that way, they will be reminded for the game day. And if it goes well, maybe you can do a weekly or monthly schedule, just be sure to keep your friends updated and encourage them to bring other friends as well, as long as your place or whoever’s going to host the session can accommodate a lot of people.

Set up your gaming area

Now that a date has been set, it’s time to clean up your living room in preparation for game day. Be sure that there is ample space for your guests to relax, you can add a couple of bean bags and even pillows to keep them comfortable during game hours, also put up a place to keep their bags and other belongings in a secure place that they brought in. Have an area for your food and drinks to avoid getting your equipment get messed up with food stains and liquid spills.

You would also need to set up your network connection in case your gaming session would need multiple laptops to be connected either wired or wireless, and make sure to set up a guest Wi-Fi hotspot in case your friends need to use the internet. Don’t forget to bring out extra game controllers and fight sticks just in case some didn’t bring theirs.

Ready your snacks

Then, of course, having a gaming party would not be complete without the snacks. Be sure to head to the grocery store and stock up on your supplies or have your friends bring in their share. Make sure the snacks are in different varieties like chips, cookies or any other finger foods, as for drinks, ask your friends if they prefer alcoholic, soda or even both. Alternatively, you can have pizza deliveries as your midnight snack or dinner and have your friends share the payment, you can even do a potluck-style of food gathering where your friends can bring specific food and make your gaming session a feast.

Which games to play

Everything is almost complete, so it’s time for the games. You can ask your friends in advance on what certain games they would like to play, you can even ask them to bring their games as well. Having a variety of competitive and cooperative games can give a good balance so everyone won’t get tired of the same type of game. 

You can even set up a themed activity, like for example, a gaming session during the Halloween season. Maybe put up games that are themed on horror or zombies, or maybe more into fantasy-themed games and even encourage your friends to wear outfits or costumes of their favorite job classics. It’s a wacky idea but it’s definitely something worth considering.

Or as an icebreaker, bringing out a board game or card game that everyone can play to take a break from all those video gaming. Who knows, they might even discover a new game that they would actually get hooked into.

Setting up for streaming

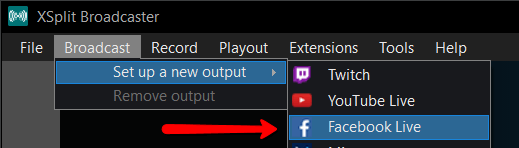
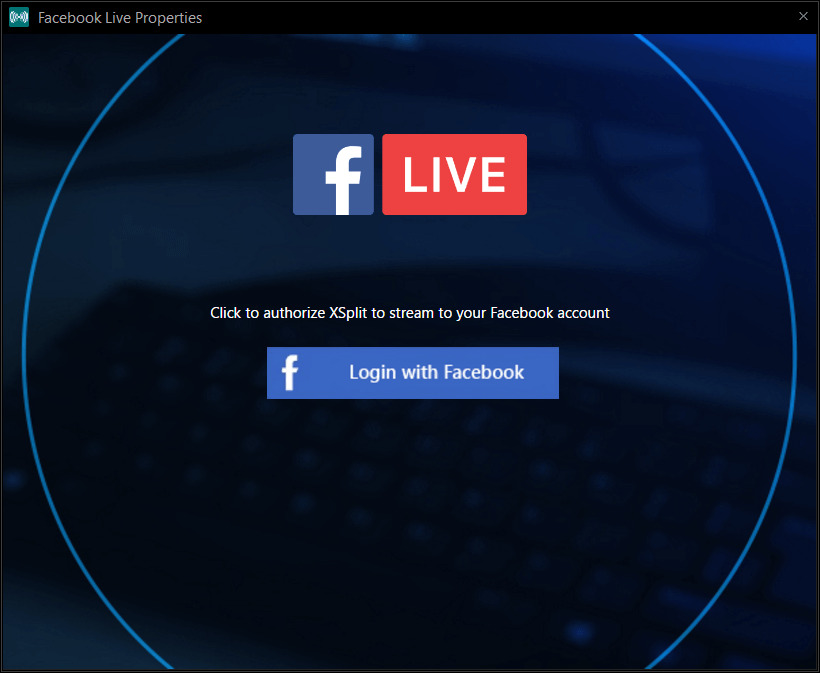
This is entirely optional but it wouldn’t be fun if you can’t share your epic moments with your friends in your game nights. So maybe you might want to stream it and share it with your other friends, hook up a webcam and a microphone and make sure the camera is angled in the middle so everyone is visible with the microphone placed on a table with everyone surrounding it so their voices are audible. For best results, you can try XSplit Broadcaster for easier setup and have a professional-looking overlay for your live stream, or go with the XSplit Gamecaster that is more straightforward for live streaming games and can add an overlay for chats that lets you interact with the viewers and other widgets to enhance the presentation. And if it all goes well, you could do this as a regular thing and who knows, maybe you can become a popular content creator someday.

Just have fun

Make sure everyone gets a chance to play, whether they haven’t tried the game or feel that they aren’t good enough to compete with other people. The session doesn’t need to be all about showing off their best moves or combos, it’s more about having fun and strengthening your bonds, just like in those anime series, well with less of the cheesy parts.

You can add some twists to your gaming sessions to make things fun or to encourage everyone to try out new games. Things like adding a new set of rules or conditions to make the games more challenging or even hilariously fun, but of course you have to make sure everyone agrees with the idea of setting new conditions to the games, as you can still enjoy. 

And there you have it, we hope that this little guide can help make your gaming session with your friends more enjoyable, and make more of this multiplayer gaming party your monthly or even weekly gathering. Plus, you can invite more friends to join the party, as we all usually say; the more, the merrier.


Fixing Common Audio & Video Problems for New Streamers

So you’ve finally built your dream streaming setup. You’ve got your scenes set and you’re ready to kick off your streaming career. You hit the stream button and jump into your game. All of a sudden your game feels laggy. You look in chat and everyone is saying they can’t hear you and the video is stuttering. You feel a rush of disappointment as hours of preparation have seemingly been wasted.

No need to despair, we’re here to help you solve some of the most common live-streaming issues for upcoming Twitch, Mixer, Facebook Gaming, and YouTube Live superstars!

Audio Issues

The most common issue with audio is noisy audio or a buzz in your audio.

If the audio seems noisy, first be sure to check the levels you’ve set on your microphone device. The higher the gain level on your microphone, the higher its sensitivity to surrounding sounds like air conditioning noise or background noise. One great way to check your microphone levels is to use the audio mixer extension.

XSplit broadcaster audio mixer extension

Go to extensions, add extensions, and click on find more extensions. Install the audio mixer extension and check your audio levels without speaking into the mic. If the levels seem too high, reduce the gain on your microphone. You can also try to move your microphone away from noisy items like a mechanical keyboard or your PC’s fans. 

If you have a buzz in your audio this is likely due to the power source. This usually happens if you are using a mixer or capturing audio with your streaming PC via the line in port. The cheap and simple way to try to fix this is adding a group loop isolator between your audio source and your line input.

ground loop noise isolator

You can also use a power conditioner to remove electrical hum if the ground loop isolator does not work. These tend to be pricey and could add more bulk to your setup. I only recommend using these if you absolutely need to get rid of every bit of buzz in your audio. 

power conditioner

For recent windows updates, especially one of the major fall updates, be sure to check your default audio devices. Windows has a nasty habit of changing your default audio devices after an update. Make sure to check that you aren’t using the wrong microphone device.

windows default audio devices

Finally, for complete peace and mind, keep an extra pair of headphones around to use with XSplit’s audio preview. The audio preview is the final mix that your viewers will hear and is great for fine-tuning audio levels.

XSplit Broadcaster audio preview

Video Issues

Modern-day game streaming is all about keeping a minimum of 60fps for both the streamer and the viewer.

If you, the streamer, feel like your FPS is dropping too much or the game feels off; it is likely your CPU and GPU running out of resources. Many games will try to use the maximum amount of GPU resources possible, and it can leave your streaming software without anything to work with.

The best way to manage this is to limit the frame rate of your games. So if you are on a 60hz display, set the frame rate limit in-game to 60fps. If your game does not have this option, XSplit’s game source can limit the frame rate.

XSplit broadcaster game source

If you are on a high refresh rate monitor, try to limit the frame rate to a multiple of 60 like 120 or 180 or even 240hz. 

Now if you see that your CPU is constantly at 100% while streaming, then you’ve likely set your encoding settings too high. If you are using an encoding preset like slow, try increasing it to medium or fast. To maintain 60fps, decrease your resolution, go for 1280×720 instead of 1920×1080. And, if your PC isn’t a multi-core monster, see if you have a GPU with a hardware encoder like NVENC, Quicksync, or VCE. 

XSplit Broadcaster Twitch properties

Check the stream if it’s choppy due to dropped frames, you need to adjust and drop your bitrate. If you know that your internet connection is unstable, then enable adaptive bitrate. Adaptive bitrate will increase or decrease the bitrate depending on the available bandwidth. If you notice the bitrate tends to stay consistently lower than your target, consider lower your resolution so that visual quality can be maintained. 

XSplit Video Encoding Setup

Having issues with your webcam looking too grainy or having a low frame rate? Check your area if you have proper lighting, fixing the lighting can easily solve this issue.

Even a simple desk lamp or switching on a room light can be a huge improvement.

desk lamp for lighting


Once your lighting is settled, there are a couple of key settings for your webcam.

First, if your camera has a poor frame rate, reduce the exposure level. Go into your camera source settings and configure your video output. 

camera source settings

If your camera looks too grainy, reduce the gain. If your camera looks too dark, then get some more lighting!

camera gain settings

Once your camera settings are good, don’t enable automatic or you’ll lose all your settings!

When using a capture card and see a message that the device is not available, you can try these fixes:

XSplit Broadcaster Device Not Available

First, make sure another video app isn’t using the device like skype or discord. If that doesn’t work try refreshing the device in the source menu. Finally, using the IT classic, unplug it and plug it back in.

If you are having issues with switching to scenes with videos, make sure you’ve tried saving the video in memory.

keep source in memory option

Finally, one last tip people overlook. Make sure to enable archives for your Twitch streams. This way, you can make clips or highlights to share on social media. You can find this option in your channel settings.

Channel settings save broadcast

For Facebook and YouTube streamers, make sure your broadcasts are 4 hours or less to have a VOD automatically created. Hopefully, these tips are helpful to both novice and experienced streamers.

What are the common audio & video issues you’ve encountered in your streaming career and how have you solved them?

Streamers, Care for Your Mental Health

From an outside perspective, streaming might seem like an easy gig. After all, most viewers see streamers playing video games all day, and they think to themselves, “Oh, he’s living the dream.” Little do they know, streaming as a day job involves a lot of pressure, and it isn’t as easy as it may seem.

Mental stress is a very real thing that can affect anyone, of course, not just specifically streamers and content creators, but because some parts of society expects them to be living the easy life, their mental health issues might be dismissed.

Effects of Mental Stress

Caring for your mental wellbeing is vital. Psychological stress can affect you in many ways, some more obvious than others.

When you’re starting to feel the strain of the grind and the pressures it brings, you may begin to experience anxiousness and inexplicable nervousness. You become easily distracted, tend to worry too much, and your sleeping pattern may start to change.

When stress levels get too high, you may go through a whole range of mental and physical symptoms. You may start feeling excessively fatigued for no good reason. Stress makes our bodies produce hormones that act as sedatives, which helps calm us down during times of extreme duress. When these hormones occur in large amounts for extended periods of time, they make us feel exhausted and in some cases, even depressed.

Depression is serious and should never be treated lightly. Everyone experiences periods of sadness, but when it becomes chronic and recurring, it may be time to do something about it.

People experiencing depression are always irritable and generally, lose interest in things that they used to do. This headspace can be troublesome for a streamer – what started as a project done out of love and passion will begin to feel like a chore.

Besides being excessively tired and having trouble sleeping or staying awake, depression can also manifest itself in physical pain such as headaches, muscle cramps, or digestive issues. It can even affect your appetite in either extreme direction.

Depression can make people see life through a different lens, making them want to stop doing things they used to enjoy and affecting the way you make decisions. In extreme cases, patients may wish to inflict self-harm. If you’re starting to feel like you want to harm yourself or others, reach out and ask for help. There are a number of hotlines in many countries that offer such services. Here’s a list of international suicide help hotlines.

Stress can also manifest itself physically. One can experience abnormally fast heart rate, dizziness, restlessness, shortness of breath, and hyperventilation.

When you start experiencing these symptoms and they seem inexplicable, then you should consult a doctor.

Prolonged stress also leads to burnout. Burnout happens when stress becomes overwhelming and you’re finding it hard to do anything because you’ll feel exhausted and frustrated and helpless. Burnout leads to a lack of energy, which means way less productivity, which then leads to less streamed hours, and potentially decreased income.

You’ll know you’re experiencing burnout when you feel a general lack of energy, and you don’t feel like doing anything, even getting out of bed seems like a herculean task. It may not even happen suddenly. It could just be something that gets worse and worse over time.

Burnout can lead to fatigue, headaches, muscle pain, reduced immunity, frequent illness and a change in sleeping and eating habits. Anybody experiencing burnout also feels emotional duress such as feelings of self-doubt, defeat, detachment, among others. Victims of burnout also feel a general lack of drive and motivation.1

Sources of Mental Stress for Streamers and Content Creators

Like with most healthcare, prevention is always better than cure. The first step is to identify the source of stress. For most people, familiar sources of stress include work and specific life experiences.

When it comes to working, it could be long hours or dangerous work conditions or just being generally unhappy with the job. Then there are some life events like the death of a loved one or the looming shadow of financial obligations, or to a more severe extent, traumatic events like natural disasters or violence.

All those sources can affect everyone and we all have to be careful to take care of our mental health, but there are certain sources of stress specific to aspiring and career streamers and content creators.

Beginners struggling to take off might find it challenging to find a footing. Sometimes just speaking to an empty chat room in and of itself can be stressful. If it’s something you’ve decided to try and do your full-time job, when it isn’t going as planned, it can be a source of undue pressure and anxiety.

Just getting people to interact with you can be difficult. Lurkers and channel jumpers won’t usually interact with a budding streamer.2

The pressure to stick to your streaming cadence can also lead to additional stress, although doing that is vital to a streamer’s success. In 2018, popular then-Twitch streamer, Ninja, lost about 40,000 subscribers after going on a two-day break3. With him being Ninja, it probably was easy for him to bounce back, but smaller streamers might have a much harder time doing so. But maybe it was the right call to go on break. It all depends on how much care you want to put into your wellbeing.

Another source of stress can be less-than-ideal physical health.4 Gaming streamers who are seated all day may experience some health issues related to general sedentariness. Mental wellbeing is easier to achieve when the approach is holistic, so one has to look after one’s physical health, as well.

How Can Streamers Improve Help their Mental Health

After identifying potential stressors, what can you do to make sure you’re taking care of yourself, both mentally and physically?

Here are a few tips:

Once you’ve identified your main source of stress, remove it if you can.

Of course, this may not always be possible, especially when the main stressor is very much part and parcel of your life, like bills or health issues, or even just the unrelenting monotony of following a 16-hour streaming schedule. If that’s the case, then you’ll need to do other things to deal with the realities of life.

Keep physically active.

When you’re not physically active, it can negatively affect your mental health and mood states. You don’t have to be an Olympic athlete; you just have to make sure you’re paying attention to your body. Keep a regular exercise schedule, as light as it may be. It can be something as simple as taking a brisk 15 minute walk every morning or a quick 5 minute HIIT session every day. It’d be much better if you follow an exercise program with professional help so someone can monitor your progress. Think of it like grinding out levels for a legendary piece of armor.

Just standing up and doing some stretches every half hour will help you with your energy levels. You can even just do some yoga poses. The good thing about that is, you don’t necessarily have to stop your stream. You can let your viewers watch you exercise. You can keep your mic on so they can hear your pained grunts. Not only will it be good for you, it’ll also be quality entertainment.

Eat properly.

You don’t have to follow a crazy diet, like limiting yourself to a piece of dry chicken breast and a half a piece of steamed asparagus every meal. You just have to make sure you eat at a regular schedule and you eat enough to satiate you.

The timing and volume of your food are important, but so is the quality of your food. Maintain a well-balanced diet to give you enough energy to maintain that streaming schedule, to keep your energy levels up to be entertaining for your viewers.

Eat less of the stereotypical food for gamers like energy drinks, cheesy junk food, and fizzy lime-flavored soda pop, and have more fiber, more vegetables, more fruit, more protein. Avoid trans fats and saturated fats.5

Plan your breaks.

You are a human being. You are not a machine. Heck, even machines need to be turned off and maintained every now and again. You have to make sure to take time to rest and give yourself to recuperate.

First, you have to decide how long you want to stream and play. Maybe try to use your analytics to see when your viewership is highest and plan your streaming hours during that time. Give yourself a set amount of streaming hours, and a set amount of recuperation time. It can be as simple as taking a 15 to 30-minute break after a few hours of streaming, and make sure to stand up every 30 minutes of sitting down to prevent blood pooling in your legs.6 That goes for everyone, not just streamers! Anyone sitting down on an office job or just gaming or just lounging around should stand up every 30 minutes and let their blood flow normalize.

TL;DR

Mental stress can turn the wonderful activity of streaming into a chore and drain your passion. Too much stress can lead to burnout and depression, which can affect your mood, your health, your relationships, and your career.

Make sure to take breaks, exercise, eat properly, and only stream if you enjoy it enough to keep doing it for extended periods of time. If you feel like your stress is too much to bear, then don’t be afraid to ask for help.

Always make sure to take care of yourself, mentally and physically. It’s the best way you can keep grinding away and streaming. It’s the best thing to do for yourself and for your viewers and fans.

How to Repost your Stream Clips on Instagram

As a content creator or live streamer, you no doubt already have an Instagram account, along with Twitter and Facebook. While it is likely true that you are already posting in a bid to get noticed among the never-ending feeds of content, are you posting the right type of content?

While it is a good practice to tell your audience when you are going live, did you know that according to a recent study by Mention, Video posts receive 38% more engagement than image posts? There is a reason more, and more creators are leveraging video on Instagram as part of their strategy to drive viewers back to their channel.

To get ahead of the competition, here are a few clever hacks you can use to help you make the most of your Instagram, even when you are not streaming. It’s all about cleverly recycling your content, and posting it meaningfully to grow your channel. Here are a few simple hacks to help you make the most of your content, and easily repost clips on to Instagram.

Finding the right type of content

If you are going to go to the trouble of reposting your stream clips to Instagram, it’s vital to ensure that what you are posting is engaging. First and foremost, targeting is everything. One good example could be putting together a short thirty-second moment, of something funny that happened on stream. For gamers, maybe you are playing a survival horror, and something jumped out at you, causing you to react. A moment like this can be instantly enjoyable to new viewers, giving them a taste of both the type of games you play and your personality. For non-gaming content such as a webinar or vlogging, clipping together a segment that is both short and succinct, can prove to be alluring to viewers, wanting to go back and watch your archive, video or subscribe to be notified the next time you go live.

Outside of simply posting to Instagram, stories can also be a great way to drive viewers to your channels, as they provide a more immediate and engaging way for you to showcase your content to viewers. Selecting a few choice clips, and posting them as a story can be a great way to inform audiences of the type of content you are making.

Picking the right tools for the job

Selecting the right tools for the job is everything, and when it comes to creating highlights of key moments from our stream there are a few ways you can do it. If you are streaming with OBS one of the best practices you can do is to start writing down time stamps, using a pen and paper while you are streaming. This way, you can easily make a note when something cool happens on stream, and then go back to it. If you have viewers, and stream on Twitch, you can also ask viewers to clip the moment, for you, so you have a healthy amount of content to review.

Alternatively, if you use XSplit Broadcaster or XSplit Gamecaster, you can assign a hotkey to insert cue points into your broadcast. Cue points can be a handy way to identify critical moments during post-production.

Speaking of post-production, and selecting the right tools, it’s worth downloading a video editor so you can easily import your recordings and clip them. There are a few different choices out there, most notably Adobe Premiere, which is an industry-standard for professional non-linear editing software. Alternatively, you can also check out XSplit Express Video Editor, a free and quick solution for editing clips in seconds.

Once you have selected your software and captured your recordings, its time to start editing, a good rule of thumb when reviewing your footage to post to socials is to try and find two or three key moments, and then experiment with regards to the duration and of course, the caption.

Picking the right tools for the job is everything, so make sure you choose an editor that allows for easy clipping and exporting.

A quick guide to aspect ratios

When dealing with multiple platforms, and mixed media, complications can arise along the way, especially when it comes to aspect ratios of your content. If you are uploading gameplay footage, there is a good chance that it is captured in 16:9, meaning that when you upload it to Instagram, you will have to either sacrifice screen real estate (by uploading the clip with borders) or zooming in on a portion of the clip. Keep this in mind when uploading your content. A good rule of thumb would be to always show the clip in its original aspect ratio unless there is something specific you want to zoom in and focus the viewers’ attention to.

Creating a PC to Mobile Workflow

When saving your clips, and trying to upload to Instagram from a desktop, you may find the experience limiting. This is because Instagram does not offer a proper way to upload content from your PC easily. While there are workarounds in the form of a few third-party apps, its generally recommended to instead upload your clip to Instagram via a phone or tablet.

The reason for this is simple; native mobile Instagram apps are far superior, offering the full suite of filters, badges, and captions. So how can you quickly transfer your finished clip from PC to your mobile device? While using a 3rd party messenger service can be convenient such as What’s App, or Facebook Messenger. Quite often, the clip will be highly compressed, sacrificing quality in favor of file size.

A more convenient alternative would be to upload your clips to a cloud storage solution such as Google Drive, or Dropbox. Both offer space for free, with their mobile apps downloaded, it can be a convenient way to organize and upload clips from your phone easily.

When posting, timing is everything

So you have your finished clip, and you are ready to repost it to Instagram! Before doing so, consider that timing is everything. According to Sprout’s recent 2019 study of the best times to post on Instagram, daily on weekdays (Tuesday to Friday) between 10 am – 3 pm generally nets the best positive results.

This pocket of high engagement can prove to be a great testbed for trying out different clips to measure what has the best results. So consider initially testing 2-3 clips across the week, and utilizing hashtags. Choosing hashtags is important for ensuring your content is targeted towards the right audience, for a list of some popular hashtags take a look at this handy study from earlier this year by Oberlo. Incidentally, the most popular hashtag on Instagram is #love!

Building an audience is a long-term goal

The purpose of reposting your stream clips to Instagram is really about maximizing your channels, your brand, while also having an opportunity to recycle footage already shot. Despite these tips, though, it would be unrealistic to assume that you can build an audience overnight. Like live streaming and content creation in general, consistency is key, and by regularly uploading your content to other channels off of Twitch or YouTube, you stand the best possible chance of attracting new viewers and raising your profile. So if you are already streaming or uploading YouTube videos, why not give it a try?

TL;DR List of Tips and Tricks

  • Add cue points to your live streams to find the best moments to highlight
  • download an editor to easily cut together your clips, start with some initial 30-second segments.
  • When you have exported your clip, use Google Drive or Dropbox to easily access and post to Instagram from your mobile or tablet device.
  • Timing is everything, weekdays between 10 am – 3 pm generally gives the best results.
  • Building an audience takes time, post consistently, and don’t give up! Experiment and find out what works for you.

8 Ways to Make Money on Twitch

Twitch.tv is one of the best ways to make money if you’re looking to create live content revolving around gaming, art, traveling and much more! This article will cover a variety of ways on how to make money on Twitch.

Direct Donations

The easiest way to start making money on Twitch is to set up a donation button. All you need to do is set up a PayPal account. Once you have set up a PayPal account, you just need to create a PayPal link and add it to your Twitch profile. Your Twitch profile allows you to add panels that have links to external sites. One way to attract attention to your donation button to put an attention-grabbing graphic. 

Paypal donation button

Donation Alerts

Most streamers display an alert on their broadcast to incentivize Twitch donations. You will need to sign up for a service like Streamlabs or Stream Elements to be able to display these alerts. Once you have created an account, look for an alert box widget. Alert boxes allow for unlimited creativity as you can add various graphics, sounds, gifs, and memes to display your viewer’s donations. One recommendation is to not make the alerts too obnoxious as this will dissuade your viewers from donating. Please note that some of the services may charge a fee for processing the Twitch donation.

Donation alerts

There are a variety of ways to incentivize Twitch donations. You can set up donation goals to get a new piece of streaming equipment or allow song requests to be made via donations. These can all be displayed on your stream as a call to action for your viewers.

Donation goals

Twitch Partnership and Affiliates

The next best way to make money on Twitch is to become a partner or affiliate. Becoming a Twitch affiliate has lower requirements and allows you to receive Twitch bits and subscribers. Twitch bits are currency your viewers can buy from Twitch and donate to you through your chat or Twitch extensions. You can further incentivize Twitch bits by displaying them on your stream alerts. Subscriptions are monthly recurring payments your viewers can opt into. These can allow access to ad-free viewing, custom emotes and special icons in your chat. You can offer additional perks like access to a private discord chat. Subscriptions are the most consistent way to make money on Twitch and the product you promote the most through alerts on your stream and your channel page. Twitch also allows people who have an Amazon Prime account to subscribe to your channel at Twitch’s expense, but these subscriptions do not automatically renew so be sure to remind your audience to renew their free subscriptions. Other viewers can also gift subscriptions to your audience as well. Finally, there are multiple tiers of Twitch subscriptions, so viewers can give you more money per month.

Twitch subscriptions

If you can reach the level where you can become a partner on Twitch, then you receive access to additional revenue streams. The best way a partner can make money through Twitch is via ads. When you are a partner, you can make money off the Twitch Ads your viewers see. In your Twitch dashboard, you will see a button where you can trigger ads for your viewers to see. Make sure not to spam your viewers with too many ads, it’s better to chunk them into a few minutes per hour.

Twitch ad breaks

Twitch also offers bounty boards to their partners. These bounties are partnerships Twitch has entered with various companies that allow streamers to earn cash from promoting specific products. This can vary from running a trailer for a movie during your stream or playing a specific game.

Affiliate Sales

Another way to earn income from your Twitch stream is through affiliate sales. Affiliate sales are when someone buys an item from a link you post and you earn a percentage from that sale. Since Twitch is owned by Amazon, it has directly integrated its own Amazon Associates affiliate program into Twitch. Once you sign up for Amazon associates you can enable the Amazon Blacksmith extension, where you can list all the different items you use for your stream.

Twitch affiliates

Patreon

An additional method to make money on Twitch is through Patreon. Patreon works like a Twitch subscription, but you don’t need to meet any specific requirements to create a Patreon account. Patreon allows you to offer various tiers for a sponsorship that can offer different incentives such as access to a private Discord and special shoutouts on stream. You can also display new Patreon subscribers on your stream via web-based alerts as well.

Merch

After you’ve built up a community and viewer base, a great way to make money from your Twitch content is by selling merch. One of the most common merch items is T-shirts with your logo. There are a variety of sites that will allow you to sell merch such as Teespring or Design by Humans. Merch sales can also be displayed on your stream via web alerts and your channel page.

Sponsorship

Finally, one of the most lucrative ways you can make money on Twitch is by doing sponsored streams. After you have spent some time building a dedicated viewer base, you should start marketing yourself to sponsor. A sponsor can be anything, from a soft drink to a keyboard manufacturer. Some of the most lucrative sponsorships are companies that pay you to play their games on stream. You can earn large amounts of money per the number of viewers watching and how long you stream the game.

Archives/Highlights

Finally, it is good to archive or create highlights of your streams for YouTube. Once you gain enough viewers on YouTube, you can apply for their partner program to make money from ads. This will also allow you to claim ad revenue from other channels that may be uploading your content. It is a great form of passive income that can build up over time.


That wraps up the various ways you can make money from Twitch. While it may take a while to earn enough to quit your day job, never stop finding ways to promote and monetize your content. If you have any questions, don’t hesitate to ask them in the comment section below or through our social media channels.

How to be a Successful Twitch Streamer?

Now that you’ve set the perfect Twitch overlays, figured out your Twitch settings and have been streaming for a while, you’re probably wondering how to become a top Twitch streamer. It is no secret that for the highest-paid Twitch streamers, most of their income comes from having a large and dedicated community, which creates additional income opportunities. If you’ve been wondering how to become a successful Twitch streamer, then this article will cover the variety of ways you can make a living from it.

Growing an audience

The first and most important goal of your Twitch career is growing an audience or community. You need to find ways to get people to watch your streams. First, post your upcoming and live streams across all your social media channels. Your first viewers will likely be friends and family. In order to gain new viewers, you will need to figure out what audience would be best suited to your content. For example, if your favorite game to stream is Apex Legends, create clips of your best moments on stream and share them on the Apex Legends Reddit and community forums. Make sure your clip includes the link to your stream and your stream schedule.

Reddit thread stream clip

Speaking of stream schedules, it is very important to set and maintain a streaming schedule. It will be easier for people to find and return to your stream if they know exactly when it is live. Try to be conservative with your stream schedule in the beginning and be sure to update your community in case you have to cancel a stream.

Stream schedule

If you have the budget, you can also pay to boost your posts on a variety of social media sites. When you first start out, you may not have a large following outside your circle of friends, so you can use the advertising platforms of various social media sites to boost the visibility of your live stream to specific demographics. Just be sure to put your advertising dollars towards audiences that will have an interest in the content you produce.

Another way of gaining an audience is by tapping into the audience of another content creator. To do this you will need to network with other content creators. You can network in a variety of ways, such as being an active member of their community or by meeting fellow content creators at gaming events. Once the connection is made, you can ask them to host your channel or play with them on stream. Twitch has introduced a new feature known as squad streaming to help with co-promotion. Many of the top twitch streamers got the first boost in their career by being hosted by another popular Twitch streamer.

Twitch hosting

Finally, another way to gain viewers is by doing giveaways. You can set follower or viewer goals to giveaway prizes. The only issue with this method is that viewers usually will only stay around for the giveaway. If you plan to do a giveaway or other paid methods to gain traffic, make sure you are showcasing your most engaging content in order to get viewers to stick around.

Monetizing your Audience

Once you have built up a stable and hopefully growing viewership, you can start to monetize your viewership. If you’ve been wondering how much Twitch streamers make, then this section will cover the variety of ways they can make money from their content.

Twitch offers both Partner and Affiliate programs for those who wish to monetize their content. Becoming a Twitch partner allows you to run ads during your stream, which you earn revenue from based on the number of people who viewed the ad. Both Partner and Affiliates also gain access to subscriptions. Subscriptions are purchased by viewers to gain access to custom emotes and badges in your chat. There are three different subscription tiers and the revenue is split between you and Twitch. Additionally, partners may be given access to bounty boards where Twitch allows you to stream specific games and earn revenue from the number of viewers watching. Tier 1 subscriptions can also be purchased for free if the viewer has an Amazon Prime account and you will still receive at least \$2.50 per subscription.

Twitch subscriptions

Subscriptions and ad revenues generate most of the income for the top Twitch streamers. You want to se tup your stream in a way that incentivizes subscriptions. This can include setting up subscriber alerts, subscription goals and using Twitch extensions that remind viewers when to renew their free subscription. For viewers that aren’t subscribing, use a chatbot or ask on stream to disable adblockers while watching. The highest-paid Twitch streamers also get to ask for better revenue sharing agreements for subscriptions and ads.

stream tipping and donations

The next method that you can earn an income is through donations or tips from viewers. The most common method is putting a link to your PayPal account on your profile and ask viewers to tip you to support the stream. You can then use a variety of services to display these tips on your stream and further incentivize this by allowing viewers to add messages to the tips, trigger special alerts or allow viewer-submitted videos to be played. It is a good practice to read any messages your viewers send no matter the donation amount so that they will continue to support your stream. You never know who is viewing your stream, so you may end up on a viral video of someone donating a huge amount of money to your channel.

If you don’t qualify or don’t wish to join Twitch’s partner program, you can create a Patreon account. Patreon is similar to Twitch subscriptions in that your viewers can subscribe to you for a monthly amount to gain access to a variety of perks like access to a private Discord or shoutouts on your streams.

If you have a large enough community, you can begin to sell merch. The most common merch is T-shirts and these can be of your logo or anything that you feel your community will enjoy. Popular sites like Teespring and Spreadshirt are great places to start creating your own merchandise.

Eventually you’ll be able to procure sponsorships for your stream. Sponsorships can vary. A sponsor may pay to have their logo or advertisement on their stream. Some of the most lucrative sponsorships are those that pay you to play or promote a specific game. When you are looking for sponsorships, it is important to create a deck highlighting your stream viewership and content. Also, be careful on social media and on stream to not engage in any behavior that would drive away sponsors.

Building a Streaming Career is a Long Term Goal!

Being a top Twitch streamer won’t happen overnight. It can take months or years before you build a sizable enough audience to make streaming your full-time job. As long as you continue to network, promote your streams and maintain a consistent streaming schedule, you’ll eventually find success!

How to Live Stream on Facebook

Facebook allows you to live stream all kinds of content, from your daily life to creative artwork and even showing off your gaming skills. This article will show you how to go live on Facebook.

From your Mobile Device

The simplest way to start a Facebook live stream is in the palm of your hand. You can go live directly from the Facebook app on your mobile device. When inside the app, click on the camera icon and then click on the live option. You will need to set where your live stream will be posted along with adding a description to your live stream.

Facebook live stream description

You can also add fun effects like masks for your face and different backgrounds. Once everything is configured to your liking, click on the start live video button. Live streaming on Facebook requires a lot of bandwidth, so it is recommended to connect your phone to wifi for streaming or you will use a lot of your mobile data.

From your Web Browser

You can also live stream to Facebook directly from your web browser. Go to your Facebook profile and in the section where you can write a new post, you’ll see an option for live video.

Facebook live video

You will be prompted to allow Facebook to access your webcam and microphone. Once permission is given, you will be taken to a window where you can set the details for your live stream post. You can even share your desktop if you want to broadcast your gameplay or creative works. If you have a compatible browser like google chrome, you can install a plugin that will allow Facebook to broadcast your desktop.

Facebook screen sharing plugin

This is a great way to start sharing live stream content on Facebook, however, you will be limited in the amount of customization you’ll be able to add to your stream to make it stand out. If you plan to broadcast gameplay, the desktop capture won’t allow you to stream silky smooth 60 fps gameplay.

Creating professional or gaming streams on Facebook

If you’re looking to start a streaming career on Facebook Gaming or just want to create professional Facebook streams, then you will need to use broadcasting software like XSplit Broadcaster. The XSplit team has worked closely with the Facebook live stream team to create the easiest method of producing high-quality live streams. XSplit Broadcaster allows you to capture your games in Full HD and with the highest frame rates. You can also add a variety of production elements to your broadcast, such as web-based overlays, capture cards connected to professional cameras and switch between different scenes.

Live stream on Facebook

To set up a Facebook live stream with XSplit Broadcaster, click on the broadcast menu, set up a new output and click on Facebook Live.

Facebook Live channel plugin

A window will pop up that will prompt you to log in to your Facebook account.

Facebook Live properties

While logging in, you may be asked which pages you wish to give XSplit permission to broadcast to on Facebook.

Once you have authorized XSplit to broadcast to Facebook, you will need to set the details for your stream. First, select if you wish to stream to your Timeline or a specific Facebook page. Next, select the resolution and frame rate for your stream. A recommended starting point for gaming streams is 720p at 60fps. Next, select the encoder for your broadcast, most streams use x264, but this will require a beefy CPU for a full HD high frame rate broadcast. If you have an NVIDIA or AMD GPU installed, it is recommended to use their respective hardware encoders namely VCE and NVENC. Finally set the bitrate, it is recommended to keep the bitrate in the green section so that your viewers won’t encounter any buffering while watching your stream.

Once you click start streaming, an additional window will pop up where you will input the details for your Facebook live stream post. If you plan to be visible on Facebook Gaming, make sure to set the title of the game you will be playing. If you plan to stream to Facebook Live for more than 4 hours, make sure to enable “continuous live”. Click on start broadcast and you will now be live streaming to Facebook!

While you are streaming to Facebook, XSplit Broadcaster will give you status updates on the health of your stream at the top of the program. The most important section to monitor is “dropped frames”.

Dropped Frames

Dropped frames can occur for a variety of reasons, but the most common is that you set your bitrate too high and your internet doesn’t have enough upload bandwidth. To change your bitrate, click on the broadcast menu and right-click on your Facebook channel. This will open a window where you can adjust your bitrate.

Facebook Live stream settings

How do I let people know I am streaming on Facebook?

Now that you know how to live stream on Facebook, you are going to want to get people watching. First, make sure that your live stream post is set to public so it will appear on your timeline as well as others. If you are streaming to a Facebook page, it is recommended to share the live stream post on your personal timeline so that family, friends, and colleagues can tune in. Make sure to keep a consistent stream schedule so people will know when to drop by your page or profile. If you will be streaming games, make sure to set which game you will be playing so that people can easily find you when searching for whichever games they wish to watch. Finally, be sure to promote your Facebook live stream on all your social media channels.

Finding your Voice as a New Streamer

One of the hardest things to deal with when you start streaming is not having a chat to interact with. When you have zero viewers or even a few that aren’t chatting, it can be hard to keep up the motivation to be entertaining. It can be even harder to figure out how to be entertaining. We here at XSplit want to help you with your broadcasting career by offering some tips on how you can find your voice as a new streamer or a content creator!

Talk about the game

While this may seem obvious, this is really the cornerstone of broadcasting games. However, instead of just doing play by play, talk about various aspects or details about the game. If you’re playing a single-player game you can talk about where you think the storyline is going, who is your favorite character, or if it is a retro game, what you were doing when that game was released. If it is a multiplayer game, you talk about your strategies or get hype about impressive plays. While a bit risky, you can have some fun conversations using proximity chat or chatting with random players you end up in a party with.

Stream with your friends and/or family

When you start streaming, it is recommended to share your stream on all your social media, including personal accounts. Your first viewers will likely be people you know, but at least you will have people in chat you are comfortable talking to and can give you topics to bounce off of in chat. The same goes for having a group call running with your friends. Dead air can be filled with conversations between your friends.

Write down topics for each stream

Streaming is great in the sense that you can talk about whatever you want, whenever you want, but sometimes it helps to have a few jumping-off points. If you stumble upon an interesting story or have something funny happen to you, write it down on your phone and talk about it during the stream. This is a great way to coax people to participate in the chat since everybody has an opinion on something.

Ask your viewers questions

Prioritizing chat interactivity is great for retaining viewers and making them feel part of a community. You can spur interaction by asking your chat questions like their favorite food or anime. One of the best tactics is to ask your viewers what game you should play or what decision you should make in the game. You may get crickets the first few times, but eventually, someone won’t be able to resist the urge to be a backseat gamer.

Check your analytics

Many of the streaming platforms, such as Twitch, give you detailed analytics showing if and when you had chat activity. If you see a period with a lot of chat activity, check your archive and try to determine what you were doing to drive that activity.

Shout out the lurkers

Your first viewers may not be the chatty type for a number of reasons. However, it is always good to make them feel welcome and part of your growing community by giving them shoutouts every so often. They may even decide to chat after a time!

Be your best self

While being yourself is better than being someone you’re not, what you are aiming to do is to highlight and amplify the most entertaining aspects of your personality. While this is subjective and probably will take the longest time to figure out, usually your friends and family can tell you what they like about you.

If all else fails, play a scary game

People love watching other people get scared while playing video games. Many of the largest content creation empires have been built on this simple notion.

Developing your casting skills for gaming can be a long path, but always remember to try to have fun. If you’re starting your Twitch or YouTube channel as a hobby or new career, it’ll be hard to keep creating if you’re dreading starting a stream.

Do you have any tips on how to get comfortable with the microphone? Let us know in the comments below or on social media (XSplit on Twitter, Instagram, Facebook, and YouTube).

How to Improve your YouTube Search Ranking

Do you create content on YouTube and you want to improve your searchability ranking? You know, we can’t all keep track of all the algorithm changes when it happens – it’s totally out of our control, what we can do as creators is to make sure that our content can easily be searched and optimized for search engine results.

There are many factors that can affect your searchability ranking in this platform. With great content comes great responsibility, in making sure that you have enough information attached to the video that you’re uploading to the internets.

As a content creator, I also struggle with SEO aka “search engine optimization”. But, what does SEO have to do with YouTube? Whether if you’re creating content for fun or for educational purposes – getting more views and people to see it is our main goal. How do you get your content to more people without paying money to boost it? Simple, optimizing it for searchability. Your content has to possess certain words within the title, description and… and…

No need to feel overwhelmed, here are some things that we do to make sure that you can easily search and watch our content.

When you click the upload button, you can already set the visibility of your video – you can set it to public right away if you don’t have a set schedule or schedule it anyway if you have the timeline. You can also set it to private and change the visibility whenever you feel like it.

Youtube upload video in public

Okay, now for the good stuff.

Always check your title

The title has to have the essence of what your content is about – does not need to have too many words, it needs to be precise and concise with no bullsh*t nor clickbait-y words (if possible) that deter to the content of the video. It should clearly summarize what it is about and what the audience can expect from it.

Create an informative description

From the title, the audience has gathered more or less the essence of what the video will be about. Here is where you can do in-depth with your description, you can add your sources and references as well. You do know that on the internet that plagiarism is quite rampant and you don’t what to be that person who does not give credit when it is due, right?

Create a thumbnail

Let’s get visual. We all know that people don’t like reading stuff on the internet, they prefer to listen and see whatever is on the content. Here’s where the thumbnail comes into play. It has to be visually appealing, not overly decorated. It has to have an impact and an outlook on what your content is about. It needs to have something that will have people linger on the visual or take a second glance. The more people you get to stop and look at your thumbnail, the more likely are they to click and watch it, does that one make sense?

Don’t forget the tags

Tags are, to put simply, keywords whereby one searches on the engine to look for certain topics or content pertaining to the keyword.

Add it to the appropriate playlist

Adding your videos to a playlist is crucial when you want to segregate your content into categories. It makes it easier for your audience to watch more content of the same category at one go.

Optionals but good to have

The End screen

If you have more time to spare, add a few more elements at the end of the video to direct your audience to another video or playlist. This ensures that they get sucked into the youtube playlist-video loop rabbit hole, if you know what I mean.

Annotation cards

Ever wondered what the little “i” icon on the top right of the video means? We know it as annotations, where you can add a website link or video to direct your audience to another content – this is especially helpful for those who might not be interested in the current video they’re watching and might want to switch to a new one. This you can direct the audience to a video of your own, making them still stay on your channel for a period of time.

Closed captions

This feature brings in more possibilities for a wider audience. Yes, sure you have a dedicated audience that can understand your content with your native language but – someone else from another nationality could’ve been looking for the same content but they might not understand it due to the language barrier. Having closed captions or translated subtitles can be a hassle to work with for every video but it does pay ten-folds in the long run.

Call to action within the video

Use a call to action within the video, usually, content creators add it to their intros and video outros. Here’s an example:

Hey friends! Welcome to the channel if you’re new, hello I’m (insert name here) and I usually upload (what content you usually create on the platform and your schedule, if there’s any). If you’re a returning subscriber, welcome back! For today’s episode, you’ll be (insert a quick summary of content) and if you’re interested in these kinds of videos consider subscribing and click the bell button to get notified every time I upload.

I hope that this helps you a bit with improving your YouTube searchability ranking. If you have other tips not mentioned above, please let us know in the Disqus comments and in our socials.

Why Content Creators are Switching to Streaming

In recent years we’ve seen the popularity of streaming reach a record high, with the expansion of streaming platforms and the evolution of social websites into offering streaming services for their users.

Facebook Gaming, for one, has grown in popularity since June of 2018; a seemingly big challenge to streaming platforms like Twitch, Mixer, and YouTube – to offer the same platform with the ability to stream easily without leaving the comfort of the website. Recently, Twitch and Discord have announced the impending launch of their own streaming abilities to their followers.

From the front runners of streaming software, XSplit alongside OBS and many more – has sparked a debate of whether content gets uploaded online or you do a live broadcast. With the growing popularity and demand for visually appealing and accessible content – video more than anything has possessed the top ranking for the most likely candidate to entice viewers to linger more, consuming content more than the average image or status posts. Doing live broadcasts or streaming, in general, have its pros and cons. Here are some of the pros that might get you into streaming your content this 2019.

As a (low-key) content creator like myself, there is an existing struggle to create online content consistently as we fight against the algorithm – YouTube, Instagram, Facebook and etc. have ‘em and we have to be consistent in uploading content to make sure that our audiences see it. So, why choose streaming over the usual “plan, edit and upload” cycle.

It’s innovating and creative

Just like normal online video content, it takes a lot of innovating and creativity to make sure that your content is different from the rest. It’s a challenging endeavor but also a rewarding one when you formulate your own style and presentation. More than the visuals, it also takes a lot of personality and charisma to attract and maintain a following. That makes streaming so enticing, it’s so fascinating to see more than just characters on screen but seeing personalities IRL.

Engaging and interactive

I’m not saying that the usual upload content is not engaging nor interactive – depending on what kind of content you might have, live broadcasts are more interesting and entertaining than the usual video content. As you stream, a variety of emotions and reactions cannot be faked or recreated. At the same time, the kind of engagement and interaction varies because audiences can be different for every stream.

Time-sensitive

The hype dies down if you’re not in the moment yourself, the interaction is simply too interesting to pass out for a replay run of the stream. Someone might feel an instant FOMO (fear of missing out) when you miss the streaming session itself. It’s never the same emotions when you’re on a live broadcast and interacting with the audience and merely seeing their comments/ reactions and engaging after. Be there when it happens as it happens, exclusive content and experience on every stream.

It’s fun

No two streams are the same – which makes it more exciting and fun. You have a different mix of audiences every time you do your live broadcast which makes every session interesting. Some might be outspoken, some might be more technical on the way you stream, it can be any mix of personalities.

If there’s anything you want to share with us and the XSplit Community, don’t forget to join our official Discord server here: discord.gg/xsplit and follow us on our socials. For any technical and account related questions, chat with us at xsplit.com/support