How to Run a Charity Stream: Using Your Channel for Good

Whether it happens to be around the holidays, a significant event, or just because you feel inspired, using your channel can be a great way to raise money for causes you care about. Charity streaming has been a mainstay of fundraising efforts for a while now with some great results. Aside from the benefit of raising money it can also be a great way to inspire your community in general. Here are our top tips on how to set up a charity stream and how to run a charity stream!

How to run a charity stream, getting set up right!

You want your charity stream to feel special to your viewers, it is important to prepare well. If it’s your first time, we recommend you check out some more seasoned streamers to see if they do anything that inspires you. Before you start moving your own plans forward, make sure you’ve got all the details locked down. Deciding on the charity you’ll support, setting your financial goal, and figuring out how you’ll take donations are all things that need to be settled. On that last point, it’s highly recommended if you’re relatively new to the streaming game that you use an established donation platform like JustGiving, Extra Life, or Tiltify. Partnering up with one of these will help people donate with confidence.

Another important consideration is the length of the stream. Most charity streams are significantly longer than a creator’s normal stream, but it’s important to know your limits. Don’t commit to a 16-hour stream if you’re not going to be able to manage it or fill the time. 8-10 hours is more typical. 24 hour streams might seem like a good idea but can be bad for your health. They’re best avoided unless you’re very prepared.

Two people sat a desk streaming a video game on a stage knowing how to run a charity stream.
Photo by RODNAE Productions from Pexels

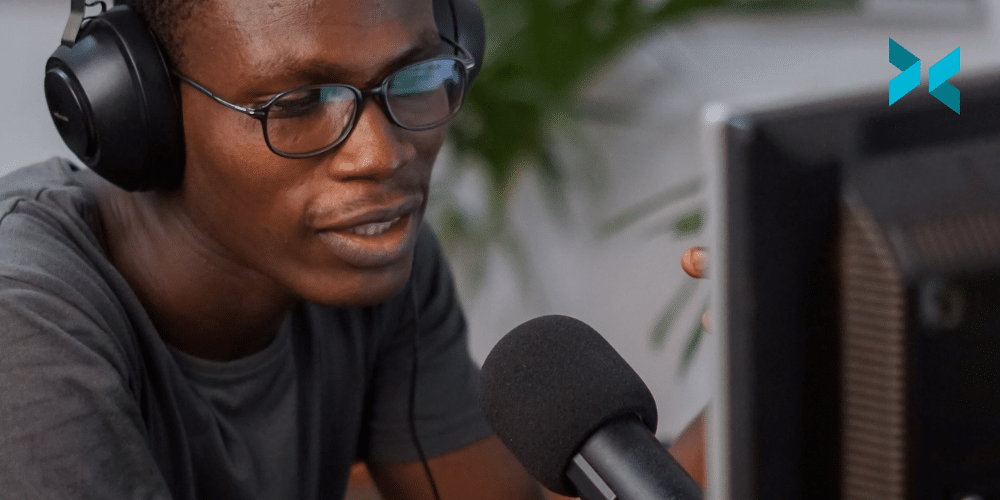
Create visual elements to engage and inform

Adding visual elements is next in finding out how to run a charity stream! Just as you acknowledge your viewers when they donate and subscribe to your stream, so you should when they donate to your charity. The best way to do this is to set up notifications for donations, and a fundraising ‘thermometer’ to track your progress. Many of the platforms mentioned have features you can use, but they can lack customization. XSplit Broadcaster has built-in widgets for JustGiving and Extra Life. You can tweak size, colour, and other aspects to match your own channel’s design. To access them, just head to the Plugin Store which is found under the ‘Tools’ menu on the main Broadcaster screen.
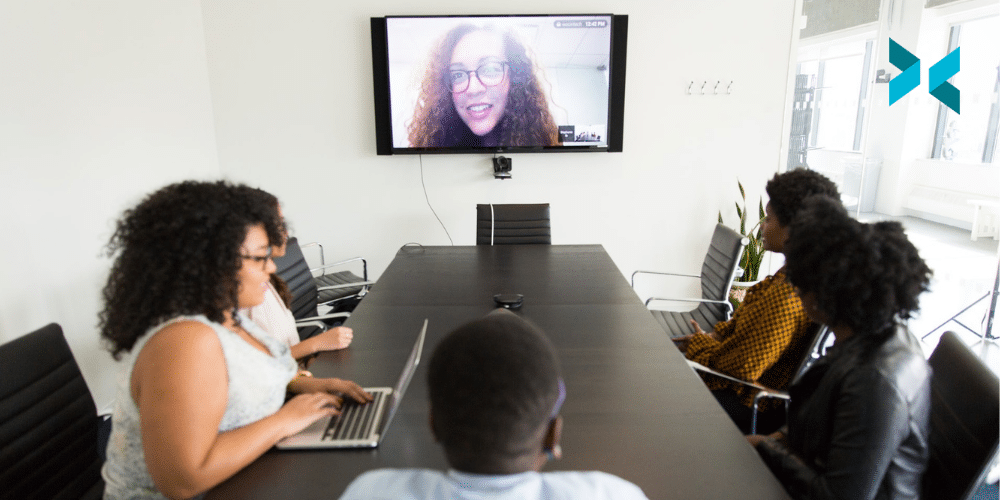
Bring some friends

Because it is likely that your charity stream is going to be longer than your normal streams, you’ll probably need to mix up the content a little bit to keep viewers engaged and entertained. A great way to help with this is to invite some of your friends to join you to help break things up. This could be in-game, to chat between sessions, or perhaps by allowing them to demonstrate a unique talent. Whatever you decide, remember to test how you’re going to bring them in before you start. This saves you time trying to troubleshoot while you’re live. 

Charity streams are a great way to reach new viewers and try something new, all for a good cause. We hope this helped you find out how to run a charity stream! Need some help figuring out how to schedule a stream that’s a little different from the usual? Check out our guide on deciding when to stream for some useful tips.

Virtual Onboarding: How To Run a Remote Induction

It’s so important to make new team members feel welcome – but how should you onboard remote employees? With hybrid and remote working now so common, virtual onboarding is an essential tool in management’s kit.

A good induction aims to immerse a new employee in the company and their role as effectively as possible, while also making them feel happy to be part of the team. In the days of the physical workplace, inductions followed a pretty standard pattern: introductions, presentations, tours, a slightly awkward lunch, and shedloads of paperwork. But how can digital onboarding replicate – and even improve upon – the onsite onboarding process?

Preparing for virtual onboarding

Onboarding starts with that initial job confirmation communication and carries on well after the new employee has started in the role. So, the first stage of the virtual induction is really the pre-onboarding period between the offer being accepted and the induction day.

This can be a good time to complete paperwork, carry out any outstanding checks, and get any other necessary admin completed. If you’re providing your remote colleague with hardware and software, getting that organized before they actually start will help them hit the ground running. Finally, make sure the joining instructions and agenda for their first day are clear and sent well in advance.

A remote induction day takes a bit more planning, but it can be a very effective way to focus on the essentials of the company and the job. Don’t assume everyone is virtual meeting-savvy though. Not everyone spent 2020 on Zoom, so check everyone’s understanding and think about a pre-induction training session if necessary.

Five people in an office around a large table while on person is on a screen at the end of the room on a zoom call taking part in virtual onboarding.
Photo by Christina @ wocintechchat.com on Unsplash

Welcome and induction day

This will look slightly different depending on whether you’re onboarding a single new person or a few employees. Either way, start with an informal online meeting so everyone can introduce themselves.

It’s tempting to simply send all the necessary health and safety information across as documents and ask them to read it. You can definitely do this; however, you have to make sure that all the essential and legal aspects of onboarding are properly covered. You could either pre-record short presentations using XSplit Presenter or run through them in real-time – whichever way you choose, it’s a handy tool to help you flag the main points succinctly. You can easily add videos and slides using Presenter too, which helps to keep people engaged. 

While it is harder to get company culture across remotely, again, a presentation can help. You might find it useful to make a short film about the company, perhaps giving more info on the area where their department is based. Make sure there are opportunities for questions, and why not try a virtual coffee break where you simply chat?

Role-specific digital onboarding

After the induction day, you can focus on individual onboarding. What will this look like? Your new team members need to feel confident with their role and supported by the company, so schedule regular check-ins. Daily is best at first, followed by two or three times per week for the first six weeks.

Don’t let these become a substitute for regular, informal communication, but make sure the channels are open and clear. Comms platforms like Slack help to keep the whole team in constant contact.

For individual job training, a mix of meetings, presentations, and webinars will help to keep things lively. Again, schedule and plan these so you know that everything is covered. Lastly, with the potential for information overload, try to keep things light and sociable for your remote team with events like virtual coffee breaks and Zoom quizzes.

Remember – onboarding and working with remote staff is all about flexible approaches, so don’t feel like there’s a one-size-fits-all approach. At some stage during this initial period, it might even be feasible to invite your new employee to visit the physical workspace. For more tips, take a look at our blog on managing your remote team.

How to Pitch to Clients Online

Your company has been invited to pitch to a new client, and you’ve agreed to deliver it. Firstly, congratulations: you and your company have clearly done the right things so far. Secondly: how do you make the right first impression? That first presentation online can feel daunting, especially if you’re used to building client rapport in person. However, there are plenty of techniques and tech that you can use to nail that all-important pitch.

You’ve already made a first impression…

Let’s start by reducing those “first impression” nerves: this is not their first impression of you. You’ve got as far as the pitch stage, so they are clearly familiar with your company and its work, and like what they have seen so far. This applies whether you’re part of a larger company or looking for freelance work.

To get to the next stage, you need to keep impressing. There are lots of advantages to online presentations when it comes to pitching. You’re not at the mercy of someone else’s tech for a start, and it’s easier to manage any signs of nerves. Your main focus is to create and rehearse a best-selling presentation – and that’s definitely something we can help with.

A person in a blue shirt talks to someone on a laptop while learning how to pitch to clients.
Photo by LinkedIn Sales Solutions on Unsplash

Creating that first presentation

When you’re preparing a virtual pitch, put content before the presentation. Work out what you need to say, then work out the best way to say it. You may be super-efficient and already have a company pitch deck in place. Don’t use it. A potential client will be more impressed by a tailored presentation that shows how exactly you can help them (you can still reuse bits of it, of course).

Make sure you read the brief. What information has the client asked for? Be sure you answer all their points, then add the extra wows that you’d like them to know. When this is all gathered, think about how to present it. Moodboard, animation, mostly talking, portfolio, PowerPoint (don’t knock it), YouTube video? There are a lot of options. Pick something you feel at home with so your confidence shines through. When it’s time to pull it all together, download XSplit Presenter. This versatile software helps you balance your images or film with your webcam and a virtual green screen.

How to pitch to clients: planning tips

With your presentation written, it’s time to do a bit of extra work to make sure it all works smoothly.

  • Plan your presentation to make sure you know your cues for screen sharing, any demonstrations, time for questions, and so on (XSplit Presenter will help you organize your timings and transitions).
  • Test your tech. So many meetings live or die on whether the technology is set up.
  • Clear your screen. Check what you’re sharing and what you don’t want to share. If you have notes, they can appear on screen with you in XSplit Presenter but only be seen by you.
  • What’s behind you? Download our VCam software to blur out your background or use the built-in background removal in Presenter.
  • Practice, practice, practice – just like a live pitch. You can pre-record your pitch to clients and watch it back!
  • Follow up with an email thanking the potential clients and sending them any relevant information. This helps to keep you in their minds.

All set? Your professional presentation is sure to impress your new clients. Find out more about how to create an online presentation in our blog.

How to Find the Next Big Thing in Streaming

Even if you’re not planning on changing up your content any time soon, it can be good to know where to look for the new trends and metas as you try to grow on Twitch. It may seem like these movements come out of nowhere (and sometimes they genuinely do!), but if you want to avoid FOMO, here are a few places to keep an eye on for the next big thing.

Grow on Twitch using top game lists?

You can access a huge amount of data about Twitch from places like Twitchmetrics, Twitchtracker and Sullygnome. It’s a little intimidating at first, but here are two tips to help you get started figuring out what might be ready to pop off. 

Firstly, when looking at ‘trending games’ on any of those platforms, toggle between 90 days, 30 days, and 7 days for the search ranges. This lets you start with a list that has a lot of data attached to it (90 days), and then get narrower and narrower with your view. Keep an eye on what games pop on and off the list. If something jumps up in the rankings when you switch to ’30 days’ and it’s still there when you switch to ‘7 days, you’ve found something that people are getting interested in, and it’s probably worth taking a closer look.

Secondly, don’t forget to look at the change in the number of channels streaming the game as well as the hours watched. If you see a massive jump in the number of people streaming something over the last thirty days or week, you might have found a game that’s ready to see explosive growth. And this can be a key to helping you grow on Twitch!

A person streaming using a PC with headphones on a microphone in front of them at a PC desk looking to grow on Twitch.
Photo by ConvertKit on Unsplash

Following the leader

It seems strange to pull one name out of a platform that has eight million active channels as of writing, but the influence that Félix ‘xQc’ Lengyel has on Twitch is undeniable. He’s the person most responsible for GTA V’s ascension to one of the most-watched games on Twitch, and he had a notable effect on the rise of both Among Us and Fall Guys as well. The choices he makes with content ripple through the rest of the platform.

This advice also applies to many of the top creators on Twitch. It can even apply to the circles you’re in of other streamers. If someone who frequently raids you is playing a certain game and you think you might enjoy it, it wouldn’t hurt to try it out! This is because the audience coming over already knows or likes seeing that game. When it comes to growing on Twitch, keeping an eye on what is being played is important!

Become a master of the release calendar

Our last tip probably sounds the most boring, but knowing the release calendar like the back of your hand can give you a leg up on understanding what the next meta could be. What games are coming out that could refresh a genre the way Valorant juiced the team-based shooter and became a top-10 watched game overnight? Maybe an older title is getting an update, DLC, or even a re-master that could pull it back into the mainstream. Knowing what’s on the horizon is a good way to see the next wave coming, and be ready to catch a ride.

Games and metas rise and fall: if you keep your eyes open, you’ll be ready to take advantage of opportunities when they arise. If you’re having trouble figuring out what to stream, check out our guide to streaming things that aren’t games to help get your creative juices flowing! Learning how to grow on twitch isn’t easy, but it can be rewarding!

XSplit Capture is now available in open beta!

XSplit Capture, our latest addition to the XSplit Suite of apps is available now in open beta! Designed to be the ultimate application for sharing screenshots and videos quickly, XSplit Capture saves you time by making use of powerful and intuitive features!

Share Your Ideas Quickly

XSplit Capture is the ultimate screen capture program letting you grab the exact part of the screen you need to share and add annotations, arrows, and highlights! Video is just as simple, with the ability to add voice-over to whatever you’re recording.

Everything, In The Cloud

All of this is uploaded directly to the cloud, and a link is added to your clipboard for instant sharing in an email, social media, or anywhere! If you, or the person you send it to, need to download the file, that’s just one click away! Your team members can easily add comments to this page on XSplit Cloud, where all your captures will be stored for easy access privately by you.

To try XSplit Capture, currently only available on Windows but coming soon to macOS, simply sign up and download the program from your dashboard! If you have any questions, thoughts, or feedback, let us know here in the comments or reach out to us on socials!

Getting Started with a Hybrid Meeting Space

Just when we’d become used to 100% virtual meetings, another new way of working has developed. The hybrid working pattern means a team might be made up of a blend of onsite and remote employees. This can be really beneficial for the individuals and the organization, but it can present us with a few logistical issues. How do we create and manage a hybrid meeting space?

With the help of some reliable AV equipment, a supportive tech team, and some fantastic remote working software, you can easily bring everyone into the boardroom, wherever they’re based.

Two people sat in a hybrid meeting space with people behind them as they talk.
Photo by Helena Lopes on Unsplash

Audio equipment needed for hybrid meeting spaces

Let’s start with the tech. We’ve all learned from experience that poor audio can be one of the most stressful things about virtual meetings – often more so than poor video. This can feel especially fraught in hybrid meetings when inconsistent audio can lead to the remote attendees feeling alienated from the action in the room.

In the physical meeting room, make sure you find a mic that can pick up multiple users. You can easily get hold of omnidirectional Bluetooth conference microphones from places like Amazon. One suggestion from our team? The Anker PowerConf S3 looks nice on the table and delivers good quality at a reasonable price point. Ideally, your virtual participants will also have access to a good audio setup. If they’re your employees, you may need to sort this out for their remote workstation. 

It’s also a good idea to set up clear “speaking in turn” protocols, which can help avoid cross-talking during more free-flow meetings like brainstorming sessions.

Three people sat around a table in a hybrid meeting space. One with a laptop and the others discussing.
Photo by Christina @ wocintechchat.com on Unsplash

Getting the visual aspect right

Okay, sound’s done. Now, what about video? If it’s a straightforward meeting with no presentations or documents to share, set up a webcam to capture the whole room. This gives remote attendees a participant’s eye view of their colleagues. A good tip is to make sure that the remote attendees aren’t tiny, as we don’t want them to be overlooked. If they can appear on a decent-sized screen, that will help those in the room engage better with their teammates.

What if you need to share a presentation? Just switch over to XSplit Presenter, giving remote participants a great view of the slides (and the presenter, if you wish), while those in person can follow along. If someone can’t make it, you can also record your presentation using Presenter, and send it out afterward.

Combining physical and hybrid meeting spaces

The first thing to think about when setting up the room is the remote attendees’ sightlines. This will determine where to put the webcam. Consider who or what they need to see, as well as where the screens need to go so you’re not blocking the physical attendees’ views.

Which room should you use for your hybrid meeting space? One with a fast internet connection or none of this is will work well. A good source of light is also handy, so everyone can see each other well and keep visual distractions to a minimum. You might also like to advise remote attendees on how to blur out their background with our XSplit VCam software if they’re working from home. The day before the first hybrid meeting, why not have a test run to make sure everything runs smoothly?

The key to the smooth running of a hybrid meeting is the facilitator. Choose your hybrid meeting host wisely: are they someone who can bring everyone in, at the right moment, like a skilled conductor? For more tips, read our blog about managing remote meetings.

Balancing Streaming and Working as a Part-Time Streamer

When you’re first starting out as a part-time streamer, you’ll need to fit your streaming schedule around your day job and around the rest of your life as well. This doesn’t have to be difficult, but it does take discipline and consistency to get the work-life balance right and to give your channel the chance it deserves.

Consistency as a part-time streamer

Streaming regularly and at the same time, every week, is vital for keeping an audience when streaming part-time. They want to know when they’re going to be able to find you – if one week you stream on a Sunday afternoon, then next it’s a Tuesday evening and so on, any fans you picked up in the first stream who want to come back will probably miss the next one. Additionally, people tend to look for something to watch at similar times based on their schedule, so sticking with a specific time and day means that the same people will come back repeatedly, building up their loyalty to your channel and the likelihood of them continuing to watch. 

Frequency helps too. If you can stream several times a week you’ll obviously get more total views than if it’s only once a week. It will probably also help your channel to grow more quickly as there are more chances for people to find you and follow or subscribe.

A streaming PC setup on a desk with a mic, monitor, keyboard, mouse and mood lighting for a part-time streamer.
Photo by Jack B on Unsplash

Don’t burn out

When you first start, it’s easy to think “I’ll stream every night – I’m always gaming, so why not do it on stream?” However, this isn’t always feasible especially if you work full time. Streaming involves putting on a show as well as just playing games, and even if you’re naturally eloquent and amusing, it’s still an effort to stay chatty and involved. Nevertheless, this shouldn’t put you off streaming even if you only manage to do this for a few hours a week. Streaming can be just as fun as a part-time hobby.

Plus, if you’re streaming just when you can and want to, you’re likely to enjoy it more and have the energy to put on a good show. You’re also likely to still see growth on your channel, particularly if you are streaming things you genuinely like and want to share with others – this will come across. It’s important to give yourself time off to relax as well as keeping the channel going however often you stream. You’ll probably also find there are other background tasks associated with streaming that need to be dealt with, such as designing thumbnails, promoting your channel, and so on.

It’s still a commitment

If your friends aren’t gamers, they might not understand that your streams are a commitment and it’s important to keep to them. Just because it’s online doesn’t mean there aren’t real people at the other end waiting for you who would be let down if you canceled. This is more important with multi-player games, however, it still applies to streaming, especially if you want the channel to do well.

On the flip side, it’s important to make time to see friends. Your channel should not become your entire life! Ideally, you’ll be able to find a schedule that fits everything in – work, streaming, socializing, and some relaxing – but achieving a work-life balance as a part-time streamer can be difficult. Being organized can help you stay on top of it, so why not set a schedule and stick to it to keep things simple? Just remember to include some time for yourself!

Building an audience takes time and dedication but it’s important to care for yourself too. Balancing work, streaming, and life, in general, can be tricky, but, once you do, it will make everything go much more smoothly – well worth the effort!

How to Create a Productive Workspace at Home

What makes a productive workspace? Most people tend to yield better results when they are in an environment they can feel relaxed in. So, how can you organize the area you have to increase your potential? Perhaps surprisingly, it is not necessarily the latest trends and Insta-worthy set-ups that will win out. Instead, nailing the basics of light, noise and space can be far more important when it comes to creating a place to help maximize your output.

A productive workplace to call your own

Some of us work better in absolute silence, while others need some background noise to help them focus. Whatever the environment you work best in, it’s important to make sure you can move around easily. When you become tired or hit a productivity wall, taking a physical break to move around can help you gain a new perspective.

For those with the right space and budget, a standing desk can be a great solution. But, there are other things you can do to build opportunities for movement into your workspace. For example, try placing the photocopier or filing cabinet on the opposite side of the room.

Moving your entire workspace can also help. If you are primarily based in an office, adopting a hybrid working model by clocking in some hours from home can be beneficial for a productive workspace. Also, reshuffling your space can just make things feel fresh and help shake your brain up a little, and get you working!

A productive workspace that includes a laptop on a riser, a light some potted plants and a keyboard on a simple desk with a comfortable chair.
Photo by Nathan Riley on Unsplash

Minimizing distractions

Keeping a tidy desk can help enhance productivity and taking some time to organize your files, gadgets, and paperwork will pay big dividends later on. The same goes for your computer desktop and email. If it’s crowded with folders, pictures, and apps to the point where you cannot navigate easily to what you want, your work – and output – will suffer.

Another way to help eliminate distractions is to turn off your notifications and dedicate just a few minutes each hour to checking and answering messages. Tidying everything away at the end of the day also allows you to draw a mental line under your work. This can help you can really enjoy your time off. Because, you know, a big part of a productive workspace is you being productive! Without turning off you can burn out and lose even more productivity!

Getting the furniture right in your productive workspace

An uncomfortable work environment can impact not only productivity but also your health. You don’t have to spend a fortune to get a top-of-the-line desk and chair. It’s more important that everything is adjusted properly for your body. The best work-from-home setup is one that allows you to type on a keyboard with your arms and hands roughly parallel to the floor with your feet flat and your legs fitting comfortably under the desk.

When it comes to choosing a chair, look for one that offers lumbar support with adjustable height armrests. You may also want to think about the fabric – mesh chairs tend to be less hot and sweaty. In addition to moving around and taking breaks, you can also improve your productivity by practicing proper posture. Rolling your shoulders back and sitting up straight and tall will minimize pain and distraction – and ultimately help you to maintain optimal productivity.

Creating a productive workspace is a combination of understanding how you work best and taking practical considerations into account. Design your space in line with both your physical comfort and personal working style and you won’t go wrong. Also, if you’re looking to get more time back our suite of apps can make your work life a little easier from creating better presentations to capturing and sending quick thoughts!

Adding Flair to Online Teaching

Moving classes online makes it much easier to offer them to a wider audience. It also gives you the opportunity to do a lot of extra things to streamline the class. You can make it more interesting, and help with visual learning. XSplit Presenter provides a great starting point to help create a more media-rich learning experience. This in turn can help make online teaching easier!

Bring in the media to online teaching

Running a lesson like a TV show allows you to go much further than relying on simple PowerPoint slides. With XSplit Presenter, you can do everything you’re already used to. Creating slides with separate notes and adding pictures and videos. But, you can add in other media as well! Perhaps you want to include a camera feed of yourself to make the presentation feel more personal? Or, share your screen while you demonstrate a particular point or feature?

Or, you may wish to speak to someone live on a Skype call and make that a part of the presentation. With the help of XSplit Presenter, all of these things can be done quickly and easily. Better still, they can be formatted and scheduled ahead, so you won’t need to waste time fumbling with sharing a window or your desktop. Everything can just appear on one screen, you, the slides, videos, notes, images, and more!

Plan ahead

If being able to plan your media, your screen shares, and your webcam footage in advance isn’t enough? Why not try pre-recording all of your online lessons? This is particularly ideal if there’s something complicated you want to show. If it’s pre-recorded, you can run through it in advance, then script and record a voice-over to go with it without worrying about your flow being interrupted. This is easily done by just hitting the record button in XSplit Presenter!

But why stop there? If you’re pre-recording your webcam footage as well, you can line up transitions and links. Allowing the ‘you’ on the video to point to things directly, rather than using arrows or highlights. This also allows you to record practice runs before you do the real thing, eliminating poor phrasing or awkward pauses. This ultimately results in a much more streamlined and professional learning experience.

A child looking at a laptop with a teacher on screen online teaching.
Photo by Giovanni Gagliardi on Unsplash

Watch the class back

A well-made recording can be made available for viewers to rewatch at a later date. A big advantage of this is that you can offer these videos as part of an online syllabus. For some, it will be more watchable than a recording of someone working through an online lesson in real-time. It also has the added benefit of allowing adult learners with busy schedules the opportunity to learn in their own time.

Making your online lesson available to your students as a video can make things much easier for you. It allows for flexibility for you when it comes to recording time and will allow them to revisit it to help with exam revision. It can also give you the freedom to direct your attention elsewhere whilst the presentation is running, and then step in at the end to deal with any questions your audience may have.

 XSplit Presenter can be used to help organize and enhance your online teaching content in many different ways, from helping with slide management to recording and playing a full presentation. Why not check out this list of tips we put together to help you plan your presentations better.

블랙 프라이데이 25% 할인 혜택 권한을 드립니다!

블랙 프라데이에는 어김없이 할인 행사의 축제의 장이나 다름 없습니다. 이번에는 엑스플릿 역사상 모든 블랙 프라이데이 이벤트를 통틀어 가장 높은 할인률인 25% 할인 혜택을 결정하게 되었습니다. 이번 플랙 프라이데이 25% 할인 혜택을 받으시면 ‘평생’ 25% 할인이 적용 됩니다! 즉, 매 달, 혹은 매 해 상관없이 각 주기에 결제 되는 금액 모두 25% 할인이 적용된다는 것 입니다!

이번 특별 할인 이벤트는 11월 24일 부터 11월 30일 동안만 진행됩니다!

절대 놓치지 마세요!

할인 혜택을 받는 과정은 간단합니다. 우선 엑스플릿 라이선스 구매 페이지에서 원하는 라이선스를 선택한 뒤 새로운 계정을 생성하라는 창이 뜨게 됩니다. 여기서 새로운 엑스플릿 계정을 만들고 라이선스 구매를 확인하면 됩니다.

2021년 11월 24일 ~ 30일 할인 쿠폰 – BF25
2021년 11월 29일 – 12월 2일 할인 쿠폰 – CM25

해당 쿠폰은 주어진 기간 내 단 한번만 적용 가능하기에 엑스플릿을 처음으로 알고 오신 분들께 각자 어떤 라이선스의 종류가 있는 지 알려드리도록 하겠ㅆ브니다.

엑스플릿 라이선스 종류

엑스플릿 프로그램들은 모두 번들로 묶어서 모든 프로그램의 라이선스를 구매할 수도 있지만, 원하는 프로그램만 선택하여 라이선스를 구별할 수도 있습니다. 대표적인 엑스플릿 프로그램들은 XSplit VCam, Presenter, Broadcaster, Capture, Connect: Webcam 이 있습니다. 번들로 구매하시게 되면 추후 개발될 새로운 엑스플릿 프로그램들에 대해 정식 출시 이전에 얼리액세스로 미리 체험해볼 수 있는 혜택도 받으실 수 있습니다.

라이선스를 구매하시면 각 프로그램의 고객센터 상담원들과 24시간 사용자들이 편리한 시간대에 문의를 주고 받을 수 있습니다. 언제 어디서나 질문이나 오류의 발생으로 인한 해결책이 필요하시다면 프로그램 내에 있는 메뉴에서 상담원들과 실시간 채팅으로 소통할 수 있습니다.

라이선스의 기간은 최소 1 개월 부터 평생 라이선스 까지 존재합니다. 처음엔 일정 기간 체험을 해보시는 것도 추천합니다. 추후 프로그램 사용에 어느적도 숙지되어 익숙하게 되었다면 평생 라이선스를 구매하는 것도 추천드립니다.

일정 기간 동안만 적용되는 특별 할인 기간을 놓치지 마세요! 지금이라도 궁금하신 점이 있으시다면 엑스플릿 SNS나 여러 소통 채널에 질문해주시거나 문의 남겨주시기 바랍니다. 감사합니다!