The Advantages of Synchronous Vs Asynchronous Communication

If you want to show somebody a demo of a product, a bug report, or show them how to do a task, being able to use a video of it happening is generally the best way. This can be done either live, on a video call with a screen-share, or by sending a pre-recorded video message. Both of these methods have advantages, depending on whether you’re more interested in synchronous (same time) vs asynchronous (different time) communication. Below, we have a look at some of them.

Timing Advantages of Synchronous Vs Asynchronous Communication

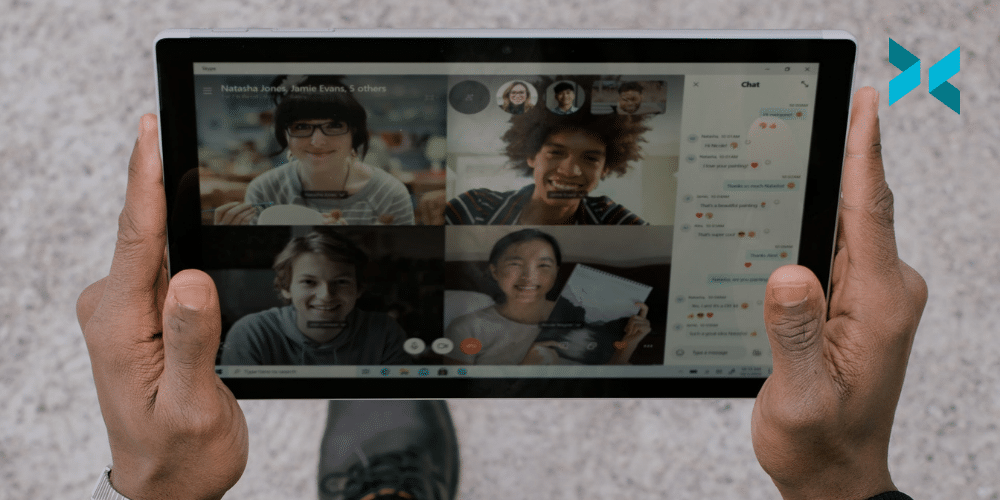
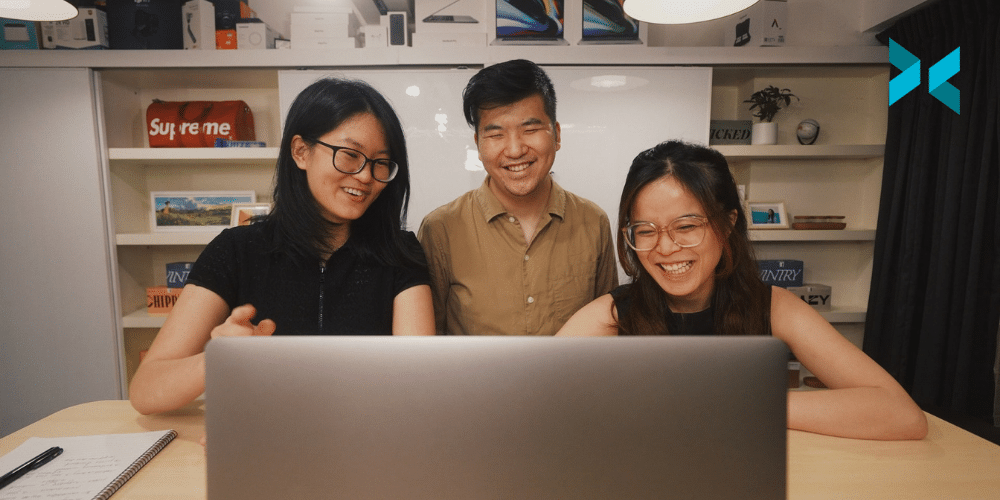
The biggest difference between the two is that a video call is immediate. You’re in the moment, speaking to the other person live. This means that you can answer any questions they have and adjust the speed you’re presenting at – maybe even skipping quickly over parts of it – based on their understanding. It saves you time because talking about something live can be much quicker than editing a video about it. It also means you can potentially get an answer from them straight away. For more tips on using this handy medium, take a look at our DOs and DON’Ts of video calls.

On the other hand, sending a video to someone allows them to watch it whenever it’s convenient for them. It doesn’t matter if they’re in a different timezone or if you both have busy schedules. You can send the message when you’re ready and they can watch it when they have time.

Synchronous Vs Asynchronous Communication on display here as a person talks to someone on a zoom call which could also be recorded.
Photo by LinkedIn Sales Solutions on Unsplash

Media

You can include media in both a video call or a video message using XSplit Presenter. During live presentations, it lets you share your desktop if you need to demonstrate something, as well as include pictures, slides, or videos to add notes and emphasis to the meeting. However, if you choose to record your video for sharing, XSplit Presenter allows you to use visual transitions so that media changes are made without distracting from your commentary. This makes a big difference to how professional the end product looks.

A recording also lets you review presentations before sending them. If your first recording attempt doesn’t go too well, you can delete it and try again. This can make for a shorter, more information-dense message as well, which saves the recipient time. XSplit Presenter’s functionality also gives you the option to get more detailed with notes and overlays on the video – meaning you can include particular information for context without interrupting the flow of your narration.

Repeatability

While a live call is in the moment (unless recorded), a video message can be played repeatedly and sent to multiple people. This makes it ideal for things like sales demonstrations and product support FAQs. Video messages also work well for reports that recipients might pass around or need to watch more than once. If people want to ask questions, they can always get back to you. On the other hand, a video call allows you to tailor your presentation to each person specifically, making it more relevant to their needs and offering the option of a Q&A at the end of it.  

XSplit Capture is perfect for creating video messages as it lets you quickly capture your screen, add in any annotations or a voice over and share the video at the press of a button. Simply select what you want to record (it could be your computer screen or yourself) and hit record. Once finished, XSplit Capture creates a private link for the video which can then be sent to your colleagues. 

Depending on your needs, there are definite uses for both synchronous vs asynchronous communication and plenty of reasons to go either way. To go even further with your videos, check out our blog on creating interesting presentations.

Top Office Chair Upgrades for 2022

The wrong office chair can not only be uncomfortable, but it can also have a lasting impact on your health and well-being. Poor support can lead to back pain, pinched nerves, and lasting medical problems. Since many of us are working from home a lot more now, it makes sense to consider an office chair upgrade. Here, we look at a few of your options.

All prices are correct at time of writing.

Value for money office chair upgrades

The best office chairs can be adjusted to your own requirements, allowing you to move the different parts around to fit your body and environment. These chairs can be expensive, but they don’t have to be.

The IKEA Markus costs around £179. It has a mesh back for breathability and offers a comfortable upright sitting position, with a long back and integrated headrest. You can adjust the height and tilt, and the back can be reclined. However, you can’t adjust the armrest height, so if they are not in an ideal position for you, this could be a drawback.

A more adjustable option is the Branch Ergonomic Chair. This is a smart-looking chair with premium features and a price tag of around £300. You can adjust not only the height of the seat but also the tilt tension, lumbar support, seat pan depth, and armrests. The breathable mesh backrest and high-density foam on the seat pan deliver all-day comfort.

Office chair upgrades could include this red chair which is in front of a desk with a laptop connected to a monitor, a red filing cabinet is next to the desk and a large framed poster is on the wall.
Photo by Laura Davidson on Unsplash

The middle range

High-end furniture maker Herman Miller makes a seriously comfy office chair, the Celle, which features, “interconnecting loops that are engineered to form a ‘flex map’ that conforms to your unique shape.” The chair also includes adjustable seat depth, tilt tension, and recline. For a little extra investment, you can opt for add-ons such as adjustable armrests and lumbar support. Prices start at around £600.

If you are looking for a minimalist design, check out the HÅG Capisco Puls 8010. It resembles a cross between a regular office chair and a stool and is designed to help you stay more active and alert by helping you maintain a more natural sitting posture. Height and seat depth can be adjusted. Prices start at around £360.

Office Chair Upgrade could be one of the two chairs on screen here, next to desks with good lumbar support.
Photo by Laura Davidson on Unsplash

When money is no object

One of the best office chairs on the market is the Humanscale Freedom, which automatically adjusts to the user, saving you the hassle of fiddling with knobs and levers. The armrests, seat, backrest, and headrest can also be adjusted manually. These chairs start at around £800, with higher prices for the leather and brushed aluminum models.

Also produced by Herman Miller is the Aeron, one of the most iconic office chairs ever made. Updated in 2016, this chair not only has great aesthetics, it features an elastomeric suspension seat and backrest with different tension zones, so that, as you shift around in your seat, it moves with you. Armrests, tilt, and tension are all fully adjustable, and the chair comes in different sizes to suit different body types. The downside? Prices start at around £1000.

Choosing an office chair can be much harder than you might think but there is a wide selection available on the market right now to suit all budgets and requirements. Check out this post for more great tips on creating a more productive work set-up at home. 

How To Livestream Your Local Sports Event

The last few years have seen a rise in the number of real-world teams using live video platforms such as Twitch and YouTube to bring local sports to their fans without the need for traditional TV deals. Streaming your local team’s matches live has all kinds of advantages from having highlights to share on social media and attracting new fans, to potential sponsorship deals. And the best news: getting started isn’t hard, and the XSplit team is here to walk you through how to livestream your local sports event.

Getting online from the field

It’s very unlikely you’ll be able to connect to a wired ethernet connection to livestream your local sports event. (the general recommendation you will find). Most recreational fields don’t come with built-in WiFi coverage. Even if you do have access, publicly available networks typically don’t provide the speed or stability required to stream successfully. It’s always worth testing though – connect your laptop to the network and run a basic network diagnostic such as Speedtest by Ookla to check it out. You’ll want to have between 4 and 6 Mbps (megabits per second) available on the upload side in order to successfully stream at 720p. This is a resolution we believe is a good trade-off in terms of quality and compression.

If you don’t have that, don’t worry, it’s not game over yet! 4G LTE connection speeds can run between 7 and 16 Mbps on the upload side, so using your phone or a personal hotspot to stream is a viable option.

Two people playing football on a green field in sunlight running for the ball which you could watch online if you learn how to livestream your local sports event.
Photo by Omar Ram on Unsplash

Your phone and laptop are a powerful pair

While it’s possible to stream directly to most live video platforms straight from your phone, this generally prevents you from adding valuable visual pieces to your sports team’s broadcast like a scoreboard, clock, or team names. It’s much better to connect your phone’s camera to your computer and use it as an input source within your live streaming software of choice. Connecting this way allows you to capture the action with your phone, but also add additional elements to your stream through XSplit Broadcaster like the ones mentioned earlier. XSplit actually has an app for seamlessly integrating your phone’s camera into your XSplit Broadcaster stream – XSplit Connect: Webcam.

Audio and commentary for your local sports event

Another great thing about running a stream through your computer is having high-quality, live commentary. You can plug a headset or microphone into the laptop from which you’re streaming and manage it as a separate audio input. If you’re looking to have more than one person on commentary, you could also use a small USB soundboard or audio interface. Something like the Scarlett 2i2 from Focusrite would work well, but make sure the headsets or mics you have can connect to it!

Whichever option you choose, remember that keeping that audio signal crisp and clear is important to your viewers. Test your levels beforehand – in XSplit Broadcaster, the meters are in the middle of the main screen just to the left of the microphone icon and right next to the scene title. Then, if you do need to adjust your levels up or down, this can be done easily by going to Tools on the menu bar and using the audio mixer.

Best camera to livestream local sports?

If you’ve outgrown your phone and laptop team-up, there are a number of options to upgrade your camera. But we’ve got you covered: before you buy an upgrade, check out the XSplit team’s Ultimate Camera Buying Guide for Content Creators.

Also, don’t forget that your new camera may not have the ability to connect wirelessly to your laptop and that your laptop likely doesn’t have a video input of its own either. You’ll need to return to a more traditional camera-to-streaming computer setup, likely using a micro HDMI cable to connect the camera to a video input adapter such as the Elgato HD60 S+. One last pro-tip on your live sports streaming setup: you’ll likely need longer cables than you would with a typical video gaming setup in order to give yourself more options for camera placement and movement.

How Can You Stream With Guests?

From time to time, you may want to run your stream with guests, perhaps because they’re keen to join you in a game or as part of a collaboration with other streamers. A lot of viewers get a lot out of their favorite streamers playing together. It’s also a great way to introduce your audience to creators you like! The good news is that, with the help of XSplit Broadcaster, it’s easier than ever to make them become a real part of the stream!

Where should their feed come from?

Since XSplit Broadcaster can capture any window on your computer, it doesn’t really matter what program you use to get their webcam feed to you. Your options include capturing a direct feed from using NDI on platforms like Zoom or Skype. You could also screen capture another platform such as Discord, Teams, or even a second Twitch stream if that’s more convenient for you.

However, we would strongly recommend going the NDI route as you can easily add each person’s call as an individual source. You can then easily move and resize without having to worry about the screen capture element. This is especially true with multiple guests where someone leaving and others joining. This can mean resizing everything again with a screen capture.

If you’re including your webcam feed or something else in the background, the quality is less important as their webcam will appear smaller on the final broadcast, but keeping the inputs at the highest possible quality does reduce the risk of visible compression artifacts on the finished video.

A person with an RGB gaming headset on, streaming a game on their monitor looking to stream with guests with a keyboard and Star Wars mug on their desk.
Photo by Sean Do on Unsplash

How to stream with guests

The simplest way to have two presenters in a single stream is to split the screen between them, using the direct feed from their camera. If there’s something in the background that the presenters are reacting to, such as a game or another video, then using a plain background along with XSplit Broadcaster‘s chroma key option can allow you to just cut out the head and shoulders of the presenters, and place them in the bottom corners of the video.

XSplit Broadcaster also allows you to crop the feeds manually, even using custom masks. This is useful if you’re capturing from another application and want to remove any window decoration or user interface from around the edges, or even with the chroma key to remove unwanted distractions, such as a doorframe or picture on the wall.

Keep it balanced

When running a stream from multiple sources, it’s important to balance things. Regardless of whether you opt for a voice-only stream or not, the most important factor here is the audio – if you have two presenters in different locations, it’s very easy for one of them to be set much higher than the other, and quite hard to notice this during a stream. Make sure you’ve tested this in advance by listening to the feed when both presenters are talking normally.

A voice stream in something like Discord is also very easy to set up, by the way. Simply make sure XSplit Broadcaster is capturing desktop audio and the call will easily come through. Discord even has a plugin that shows who is speaking on screen!

Similarly, with the video, you want to ensure that both presenters appear roughly the same size (unless you’re deliberately emphasizing one – and then it should be obvious) and you should make sure that the two camera feeds are a similar brightness and ideally a similar video quality. If one presenter is well lit and sharp and the other is gloomy and blurred, it makes it more obvious that you’re not together, and this again makes the stream feel of lower quality. 

Bringing guests into a stream can certainly be worthwhile. Why not check out these great tips we’ve put together on making your webcams look as good as possible to help give them the ultimate user experience?

What’s the Best Kind of Lighting for Conference Calls?

Even cheap cameras can produce surprisingly good images these days, although most models are very dependent on lighting. Low light can lead to noisy or blurry images. Badly positioned lights can leave you in shadow, while very harsh lighting can highlight your face in the wrong ways. Let’s touch on each of these in more detail so can look your best with the best kind of lighting for a webcam.

Do you have the best kind of lighting for a webcam?

Cameras work by catching the light and turning it into electrical signals. If lighting is insufficient, the camera will compensate, at the expense of image quality. Here’s what might happen if there isn’t enough light:

  • Exposures can be made longer, which can lead to blurring
  • The signal can be amplified, which causes noise
  • Pixels can be combined and smoothing algorithms used, which will make the image look blurry and blocky

Your studio or office may already have enough light in it, but if it doesn’t, you can mount additional lights behind the camera. Higher-quality cameras will often work better in lower light conditions. However, for webcam lighting, you’ll want to ensure you’re giving it as much help as you can.

A person sat in front of a ring light with headphones on is one of the best lighting for a webcam.
Photo by Karolina Grabowska from Pexels

Are your lights in the right place?

It’s very important for lighting to be situated behind the camera. This is because webcam lighting needs to illuminate your face without shining into the camera itself. This applies to sunny windows, too – the camera will automatically adjust to the brightest part of the image. If there’s a window behind you, it will darken the whole image leaving your face in shadow. Ideally, you want to have the light source no more than 45° from the camera, and definitely higher than your face.

Different angles will give different effects, so try experimenting to see which one you like most. If you’re using software like XSplit’s VCam to replace the background, getting good lighting can instantly improve it’s effetiveness. But it’s still a good idea to make sure that you’re well-lit generally for your conference calls. If you’re in low-light settings or don’t get access to lots of natural sunlight, you could try a daylight bulb. They are designed to imitate the natural light of the sun.

A person, well lit, is sat in front of a laptop on a call with someone, knowing the best lighting for a webcam. A notebook is on the table as well as a water bottle and some files.
Photo by LinkedIn Sales Solutions on Unsplash

What shape is your light?

Small lights, such as phone torches, give very harsh shadows. It’s a technique sometimes used in art, but best avoided in a video conference or streams since you don’t want the lighting to distract your audience. There are two main options for adding light:

  • The best lighting for webcams is probably a softbox or key light. These have a larger light-emitting surface, which results in softer shadows and a more natural feel. You can also place them at a slight angle (no more than 45°) from the camera to give your face a bit of depth from the soft shadows. If you’re looking at softbox lighting, you can easily get your hands on an entire kit from Amazon. Check out ESDDI for a durable light with smaller dimensions or Neewer for a high-quality dual light that’s also good for a budget. For key lights, Elgato is a popular choice as it’s ultra-bright, adjustable and fully dimmable. It also keeps the heat low in comparison to softbox lights so you won’t be sweating on camera!
  • Then there are ring lights. These are compact and versatile, so you can use them whether you’re on a conference call from your phone or computer. The Cyezcor Video Conference Lighting Kit is an ideal USB light. It can be attached to your laptop and delivers an adjustable colour temperature.

You can also produce the softbox effect cheaply and easily by shining a bright light onto a wall behind the camera. This effectively uses the entire wall as the lighting surface, though make sure that you use a white wall –⁠ you don’t want to change the color of the light.

This isn’t the first time we’ve touched on lighting –⁠ if you’d like to find out more, check out our recommendations on tips for improving webcam quality. And the next time you’re setting up for a video conference, remember to make sure your lights are in front of you and not behind.

How to Live Stream a DJ Set

On my daily browse of Twitch I stumbled across a DJ set that basically played all the dance hits from the 1990s through to the 2000s. It had special effects, background dancers, everything! Now, in the world of DMCA takedowns, streaming copyrighted music, something we have discussed before, isn’t really a good idea but if it’s DMCA safe? It can be a great way to connect with a new audience! Let’s take a look at how you can live stream DJ sets with a bit of production flair!

Setting up to stream a DJ set

At a very basic level, streaming a DJ set can be very simple. It’s likely you’re DJing old school with turntables and a mixer, or via software like Traktor or Serato DJ Pro. If it’s the former all you need to do is send an output from your mixer to an input on your PC. This can be your line input or a dedicated audio interface like the EVO4.

If you’re using software and the audio is coming from your PC, all you need to do is capture your system sound. XSplit Broadcaster does this automatically so out of the box you won’t need to change anything. However, if it’s not, just head to Settings, and Audio and select the correct audio. If you’re using software with a DJ controller, like a Pioneer DDJ, then all you need to do is see if it has an audio output you can capture like a traditional DJ system.

A digital set of DJ decks hooked up to a laptop is a good start with learning how to stream a DJ set
Photo by Gabriel Barletta on Unsplash

Visuals

Now you have your audio set up correctly to stream a DJ set, let’s take a look at setting up some visuals. A good start is for people to see your lovely face, so why not add a webcam? Or, if you’re not interested in having yourself on the screen you could point the camera at your mixing decks. No matter what, the best entry-level camera for streaming is the Logitech c920 series. They can mount on a monitor or you can use the ¼ threading mounting point to add it to a tripod.

If you’re using software, you could capture the software in XSplit Broadcaster as well as your webcam by adding it from either the Game Capture menu or, if it’s not showing up there, by using Smart Capture. You could even take a cue from lo-fi hip-hop beats to chill, max and relax to and put a looping video image or gif. These can be put directly into XSplit Broadcaster, for a video simply right click and set it to loop forever. With a gif, it will just run automatically. Simply resize it to fit the way you’d like and you’re good to go!

Taking streaming a DJ set to the next level

What is a DJ broadcast without some special effects? We need some air horns! With XSplit Broadcaster you can create a variety of special effects to help you stream a DJ set! We’ve actually made a hand video that I’ll link below which shows off some of the power effects systems that are built into Broadcaster.

It’s best to use effects in conjunction with macros so you can easily trigger them with a hotkey press or even automatically depending on the conditions you set. You can learn more about Macros here but basically, you can install the Macros plugin and set “if this, then Broadcaster should do that”. The “this” could be a button press and the “that” could be changed to a different camera, for example. We’d highly recommend checking out the Elgato Streamdeck as well. It works perfectly with Broadcaster and can trigger a whole bunch of things with a physical touchpad. This makes it much easier for you to hit production buttons while you’re DJing.

Broadcasting your DJ set

Now that you have your production setup, it’s time to stream! Broadcaster supports all the popular platforms like Twitch, YouTube, Facebook, all you need to do is login to your account. Some sites that don’t support direct login through Broadcaster will require that you use the Custom RTMP option. What you’ll need from the site is the RTMP URL and your stream key.

For your streaming settings, this will depend on your PC. For minimum requirements for a 720p 30fps stream, I recommend either a 4 core 7 series processor either AMD or Intel OR an NVIDIA RTX GPU. 
The most important setting though is your audio bitrate. Make sure to set this as high as possible to give your viewers the best audio quality possible. After you’ve configured your settings, just hit the stream button and go live!

As with all things, remember consistency is key, and make sure to let your community know when you are live! Let us know in the comments how you’ve got your DJ setup ready for streaming. What DJs do you watch already and what do they do that inspires you? Be sure to let us know! If you’ve enjoyed this guide, let us know as well so we can make more things like this for you!

How to Create and Stream a VTuber: A Step-by-Step Guide

The term “VTuber” or “Virtual YouTuber” was originally created in reference to the virtual online personality Kizuna AI in 2016. Until a couple of years ago, VTubers were limited to just a handful of accounts. Due to the complications involved in rendering and animating the character model in real-time. However, recent advances in cheap and well-designed motion capture software have made creating and using a virtual avatar while streaming accessible to almost anyone. Want to try it yourself? Here’s how to stream a VTuber!

How to stream a VTuber: Creating an avatar

Creating the 3D model that will represent you while you’re on stream is the first step to streaming a VTuber. For this guide, we’re going to use an online app called ReadyPlayerMe. This program lets you create a 3D model right in your web browser. It’s admittedly not the most powerful or detailed creation tool you can find, but it’s pretty good, very easy to use, and free.

You start your avatar by choosing a body type you want to model with. Next, upload a photo of yourself (or take one with your webcam) and customize it using the app, which lets you adjust things like skin color as well as hair color and length. You can also add some accessories if you wish, like glasses. Once you’re happy with how you look, click “Next” and download your avatar file somewhere where you can find it easily.

A person playing a game across three monitors with a gaming headset on facing the screens wondering how to stream a vtuber.
Photo by RODNAE Productions from Pexels

Converting your avatar for use

The next step is to get your avatar animated. We’re going to use a program called Animaze. This is the evolution of a program you may have heard of called FaceRig. Animaze is free to use on Steam, but it doesn’t natively support the model format that ReadyPlayerMe generates. So, we’ll have to run through a couple of quick steps to convert it.

Once you’ve downloaded and installed Animaze, you’ll find a program called “Animaze Editor” in the Tools section of your Steam library. You’ll need to run this program first, and use it to open the avatar you created by going to the Assets menu tab, clicking on “Import 3D Object” and selecting the file you downloaded from ReadyPlayerMe.

After a bit of loading time, you’ll see your avatar pop up on the main screen. You can use Animaze Editor to fine-tune your avatar, but if you’d rather just move on to the fun part, right-click on your avatar’s file name in the Hierarchy Panel on the left-hand side and select “Bundle”. Choose a folder to export to, and once you get the confirmation dialogue, open the main Animaze program from the Software section of your Steam library.

Get that model moving

Now it’s time to meet your virtual self! From the main Animaze screen, click the Avatars icon on the navigation bar on the left-hand side, and then choose “Imports” from the pop-out window. Then click the big plus button, and select the file you saved in the previous step. It ends in “.avatar” – be careful not to confuse it with ReadyPlayerMe file which ends with “.glb”.

After the import completes, you’ll see your virtual self on the main program screen. Make sure that the camera window (upper right by default) is showing your main camera. If it’s not, click the drop-down arrow to change it. Once you’ve got your avatar loaded and the right camera selected, just hit “Calibrate” and follow the directions to get your model moving more accurately with your actions.

A PC set up for streaming with two monitors, two lights and other streaming hardware on a desk with large speakers, this setup would be good to find out how to stream a vtuber.
Photo by Roberto Nickson from Pexels

How To Stream the VTuber

The final step is getting your VTuber into XSplit Broadcaster so you can go live with it and introduce your audience to the new you. Within Animaze, simply click the big button at the bottom of the screen labeled “Enable Virtual Camera”. Then switch back over to XSplit Broadcaster and use the Add Source menu to add the Animaze Virtual Camera, which can be found in the Devices section. You should see your VTuber pop right up on the screen, and you’re good to go. Note that if you’re planning to use a chroma key background for your avatar coming out of Animaze, you’ll need to activate the chroma key option on the Animaze Virtual Camera input within Broadcaster. For it to work properly right-click the input name and go to the “Color” tab of the menu for chroma options.

This guide showed just one of many possible ways to model a VTuber for use in your livestreams. Looking for other ways to invest in your stream? Check out our guide to the top streaming upgrades of 2021 for some great ideas.

How to Run a Hybrid Office: Top Apps

Even before COVID-19 forced the workforce to move home, office hybridization was on the rise. It gives workers the freedom to manage their lives around their workload. Removes the need to commute, and offers a better work/life balance. However, personal choice and job necessity mean that some workers prefer to be based in an office. Managing these dual requirements can often be a challenge, especially in terms of scheduling and communication. Leaving some businesses scratching their heads over how to run a hybrid office. Thankfully, there are several software solutions to help you, including time management and video conferencing packages.

How to run a hybrid office with Chat tools – Slack and Teams

Two of the top apps for a hybrid office are Slack and Microsoft Teams. For years, Slack has been the go-to tool for managing remote teams, such as a group of freelancers. Offering a clean, easy-to-use app for both mobile and desktop computers. At one point, Microsoft was considering buying the company for $8 billion, before it decided to create its similarly-styled Teams software. At first glance, both offer many of the same features including:

  • File storage
  • Audio and video calls
  • Screen sharing
  • Chat messages

There are some notable differences worth calling out, however. Teams currently offer a higher storage capacity – 10GB vs Slack’s 5GB – and also allows guest access. Users of Slack’s free version will also only be able to see the last 10,000 messages, which you can quickly reach in large organizations. Teams users, on the other hand, can go back through any of their chats without limitations.

Microsoft’s offering has its own limitations, however. Prior to the pandemic, meetings were restricted to 60 minutes. Afterward, this was increased to 30 hours, with no word on if it would eventually revert back. It’s also designed for integration with Microsoft Office 365, so if you work in a different ecosystem, it may not be the best choice.

A person sat on a sofa using a laptop in a room with large paintings behind them on the wall as they learn how to run a hybrid office.
Photo by Brooke Cagle on Unsplash

The best video conferencing apps – Zoom and GoToMeeting

While Teams and Slack are handy for day-to-day comms between colleagues, sometimes you might want something a little bit more advanced to fulfill your video conferencing requirements. Tools like Zoom and GoToMeeting, for example, offer more features and cater to larger conferences for big business.

Zoom became synonymous with video calls in 2020, although the company was founded almost a decade earlier. Zoom supports up to 100 participants for free, and up to 1,000 with its premium packages. With 49 participants (plus the host) being displayed on the screen at any one time. It also has useful features such as polling, screen share, calendar integration, breakout rooms, and the option to go old-school and dial in on a phone.

Another option is GoToMeeting from LogMeIn. It offers similar features to Zoom, but with arguably better mobile app integration and quality (based on reviews). The other advantage is that its highest price tier can accommodate up to 3,000 participants – three times that of Zoom. LogMeIn also offers a cloud-based phone system with GoToConnect included as part of that package, so larger businesses looking for a VoIP (Voice over Internet Protocol) solution may find that it saves them money in the long run.

Video presenting software – XSplit Suite

When managing a hybrid office, you need to have solutions for running remote presentations and other interactive sessions such as training or pitching. The XSplit Suite has a wide range of top apps for a hybrid office, including:

  • Presenter
  • Capture
  • VCam

Presenter gives you the tools to create stunning and engaging presentations. You can import slides from PowerPoint or Google Slides, videos from YouTube or Vimeo, and then run the presentation through Zoom, Teams, or any video call service. You can even add your own camera with background removal enabled and add guest speakers! Recording the presentation to be shared later is just as easy!

Capture is like a handy snippet tool for both screenshots and videos. You can specify the area of the screen you want to capture, record, or take a still image, and then add annotations or even a voice-over.

Finally, VCam takes the features to blur or replace your background on Teams or Zoom and ramps it up. The intelligent software can add a blur or simply strengthen the depth of field, giving your presentation a more cinematic quality. It also offers a high-quality background replacement, removing the need for a green screen while keeping you in focus. You can even use videos or YouTube videos as your backgrounds, adding lower thirds or company logos with ease for external calls.

Top Apps for time management and organization – RescueTime and Toggl Track

Calendar meetings and reminders are useful for scheduling, but what about the rest of your workday? That’s where you may want to try using an app to help you maximize not just your time, but that of your entire team as well.

RescueTime vows to help you take back control of your time. It does this in a number of smart ways, including tracking websites, blocking distractions when required, and assessing your schedule. It also has a smart coaching feature to keep you on track of what they term ‘Focus Work’.

While RescueTime is more focused on an individual, Toggl Track has a wider scope. It is more focused on your internal teams and external clients. With the aim of reducing time wasted on timecards, billing, and invoicing. It also has tools to look at new projects, with the ability to forecast timelines, budgets and track the overall progress. It can generate easy-to-read reports for clients that show them the progress being made.

With these tools at your disposal, you should find your hybrid office team working in a more streamlined way as they achieve a better work-life balance. If your team members are continuing to WFH, they may find our blog on the importance of keeping a schedule at home useful.

How To Record Any Video Conference, No Matter The Platform

In the new age of hybrid office working, the ability to record video conference content and share it with your workforce can be crucial. However, the quality of your recording may vary wildly depending on the platform you’re using. There are also questions surrounding data protection and permissions to take into consideration when recording a conference. Let’s look at these points in more detail and see what software is best suited to your specific needs.

Why do you need to record a conference?

In some instances, you might not strictly need a recording, but here are a few reasons why it’s a good idea. First of all, it means that if any colleagues are absent, they can easily catch up. By offering a recording, it means that no one feels excluded in your company.

Depending on the type of conference in question, it might also be something that you can reuse at a later date, without having to go to the trouble of setting up a new live stream. It also allows you to watch the footage back with a critical eye so that you can refine your next presentation and make it even better.

Four people are sat around a table with someone on a video call on a large screen at the end of the room they have the ability to record video conference with XSplit Broadcaster
Photo by Surface on Unsplash

Video conferences as reference points

Along with the immediate benefits of recording your video conference, there are also some potential long-term bonuses for your company. Video conferences can be used as an audit log for details, allowing external collaborators to quickly get up to speed on a specific project’s timeline by watching the relevant meetings.

It also means that you can compile a video library of all of your conferences, which can prove to be a valuable compendium if set up correctly. This databank will give interested parties access to knowledge and history about the company that may be lost once those who are speaking during the video conference have left the company.

Things to do before recording

The most important thing to do is to make sure that all the people who will be appearing and speaking on the conference call are aware that they are being recorded, and have given their permission to do so. You should make this explicit in the invitation.

The other thing to do is to check the quality of the audio and video. The best way to do this is to do a test run of the conference and then play the footage back. Just because it says it’s recording, it doesn’t mean you’ll be getting exactly the output you expect.

A laptop computer is on a desk with a mug next to it, on the screen is a Zoom call which you could easily record video conference with XSplit Broadcaster.
Photo by Chris Montgomery on Unsplash

Which video conference software should you use?

Most video conferencing software will have the ability to record, so if you want to know how to record a Zoom meeting, one option is to simply hit ‘Record’ on the video call itself. However, this will only track the conference as it appears on the screen.

There are better software options that work across multiple platforms, such as XSplit Broadcaster, which will easily capture your screen from Zoom, Teams, or even Discord. Not only does it allow you to record from multiple outlets including websites and videos, but also features multiple audio tracks and noise suppression filters to make your video conference crystal clear.

Using Broadcaster gives you a lot more flexibility, allowing you to live mix the recording people will get. You could add a “starting soon” screen so it skips the chatter at the beginning of a call, leaving out the audio and video people don’t need to hear. You could put any links or media up in Broadcaster so the viewer gets it in a much clearer vision. There are a lot of options when you can run your recording like a live TV show!

As already mentioned, recording your video conferences can save duplication if you have to give the same information to several groups. If you want to save even more time at work, you could also pre-record your presentations so they’re ready to go, rather than having to battle through a live broadcast.

Improve Teaching with XSplit Presenter

When the Coronavirus pandemic struck in 2020, children around the globe were taught at home by teachers using video conference software such as Zoom or Webex. And, though students have now largely returned to schools, teachers are still discovering how software and technology can improve teaching methods and help students to focus. While XSplit Presenter can be seen primarily as an online application, it can also be deployed in schools to bring lessons to life in new and exciting ways. Let’s take a look to see how it can be used in a physical classroom.

How to use XSplit Presenter to improve teaching

Modern classrooms will have some form of screen that teachers can use to show video clips or images such as graphs and charts. By connecting this to a laptop, teachers can seamlessly move between speaking to a class and displaying their presentation.

Not only can teachers use existing presentation software such as PowerPoint or Google Slides, but they can switch between different sources with ease, allowing for a more dynamic and engaging lesson. This can be achieved with a few simple clicks and allows teachers to select specific windows or applications to share, avoiding any embarrassing faux pas on the desktop in front of their class.

Children in a classroom all looking at a teacher who is using an old projector to show the class what they're learning, using XSplit Presenter in this scenario is a good way to improve teaching.
Photo by NeONBRAND on Unsplash

Improve teaching with media

XSplit Presenter has an integrated virtual green screen, which allows teachers or pupils to appear within the presentation. The ability to appear on the screen and interact with what is on the display could prove to be a fun and powerful tool to keep children and adults engaged in the subject being taught.

Another useful tool within the presentation software is the ability to annotate the presentation in real-time, the digital equivalent of writing on the chalkboard. Teachers can use a variety of colors to call out different parts of their presentation, drawing attention to smaller details, or even add reminders to find a solution to an unsolved problem.

How does XSplit Presenter make teaching easier?

XSplit Presenter can help make lesson planning quicker and easier. Rather than having to build a presentation and linking to videos and images for later consumption, you can play videos and display media directly from the presentation during the lesson.

If you need to amend part of your presentation after you’ve loaded it, you can sync the files. You can also access presenter notes from your original presentation file, so there’s no need to be searching through multiple sources while trying to teach the lesson. This will help you to deliver more polished and professional online lessons to your students.

A child sat at their desk wearing headphones with a laptop in front of them while they write in a school book, on their desk is a water bottle, pens, a hat, another note book and some snacks looking for ways to improve teaching.
Photo by Compare Fibre on Unsplash

Other benefits of using XSplit Presenter

One of the great benefits of XSplit Presenter is that it not only allows you to present but also stream or record your presentation. This could prove useful for absent students or those self-isolating. You can also use it as a reviewing tool to help improve your own teaching methods or to offer classroom tips to your colleagues.

If, as part of your lesson, you would like a guest to speak to your class, you no longer have to arrange permission for them to enter the school. You can add remote guests through XSplit Presenter, so they can simply dial in through a video call and be added to the presentation to speak to the class. 

Now that you know how to use XSplit Presenter in the classroom, you can explore other aspects of your professional or personal life where it could also be useful. Why not check out this post on how XSplit Presenter can improve your presentation.