Free Streaming Tools for Twitch, YouTube, Facebook, and More!

Streaming can be an expensive hobby, but it doesn’t have to be! From using your mobile device as a webcam, overlays, ditching capture cards, and more free live streaming tools in one article! You can’t say we don’t spoil you!

Webcam

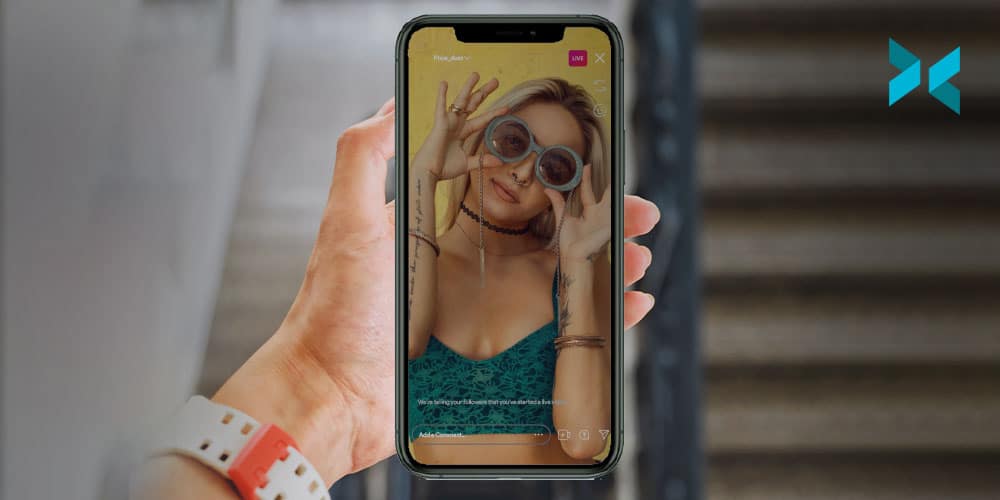
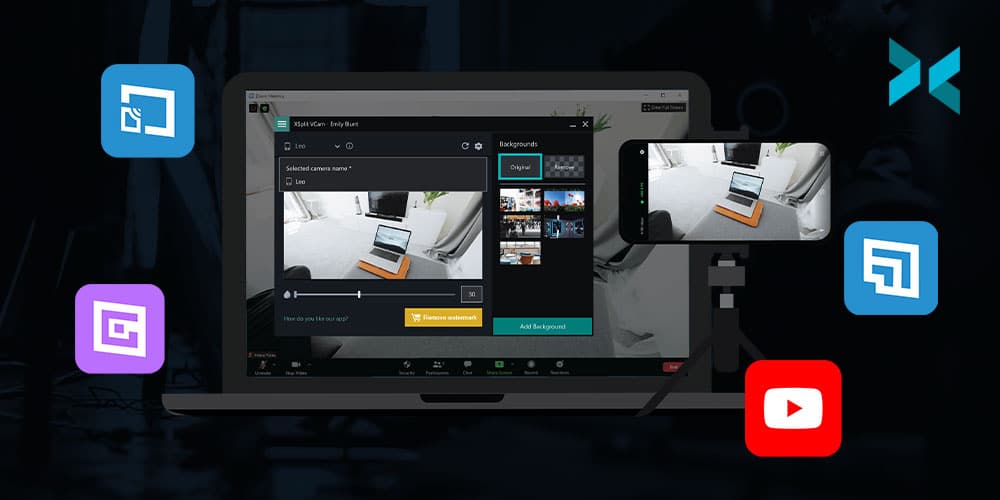
Instead of buying a webcam, just use the best camera you probably already have, your smartphone! Download XSplit VCam on your PC and XSplit Connect: Webcam on your phone. As long as your phone is connected via wifi you can connect it to XSplit VCam. In VCam you can remove or replace the background, then just add it as a source in XSplit Broadcaster which can also be used for free! Now you have a high-quality webcam and didn’t have to spend anything, you can even adjust the bitrate and switch between cameras in VCam.

Two iphones and a Google Pixel on a table, these could be used as webcams as a free streaming tool.
Photo by Arnel Hasanovic on Unsplash

Music

The streaming community has recently had to deal with the acronym combo of the RIAA and the DMCA, basically, copyright is something to take extra seriously when you stream, lest you have your channel banned or worse! So it’s good practice to get stream safe music and thankfully there’s now a good amount of free streaming tools here. On the one hand, you have streambeats, by the stream doctor, Harris Heller. This is available on all platforms and has a ton of free tracks and genres. Simply find the playlists on YouTube, Spotify or wherever you find music and just let the music play!

Alternatively, you can dip into the free music that’s provided on your platform. Both Facebook and YouTube offer extensive libraries of free music that you can use for your streams. I personally find it funny when I stumble on a YouTube video that uses the same tracks that I do, it’s always a weird moment. Like a flashback to the editing process and in that moment myself and the video creator are connected, a whole army of us out there trying to avoid a DMCA but keep the tunes good.

If you want to find more royalty-free music, check out this deeper dive we did over on our YouTube channel.

Ditch the Capture Cards

“Capture cards are great and pretty much required for doing a two PC streaming setup, right?” I’m here to answer that question with a solid “NOPE!”. As long as your PCs are both on the same network you can use a protocol known as NDI to send Full HD 60FPS videos from one PC to another with minimal latency. How’s that for a free streaming tool? Simply install XSplit Broadcaster on your “gaming” PC, capture your desktop or gameplay, set your resolution and frame rate, then send out NDI. On your streaming PC, all you need to do is add the NDI source and you’re ready to go! Now, this uses a lot of bandwidth so make sure you don’t have too much traffic going through your router. Also, I must stress, use a wired connection for all of this!

An image of a hand on a mouse in front of a gaming PC with a keyboard on a desk, no doubt looking for Free Streaming Tools!
Photo by Axville on Unsplash

Overlays and everything else

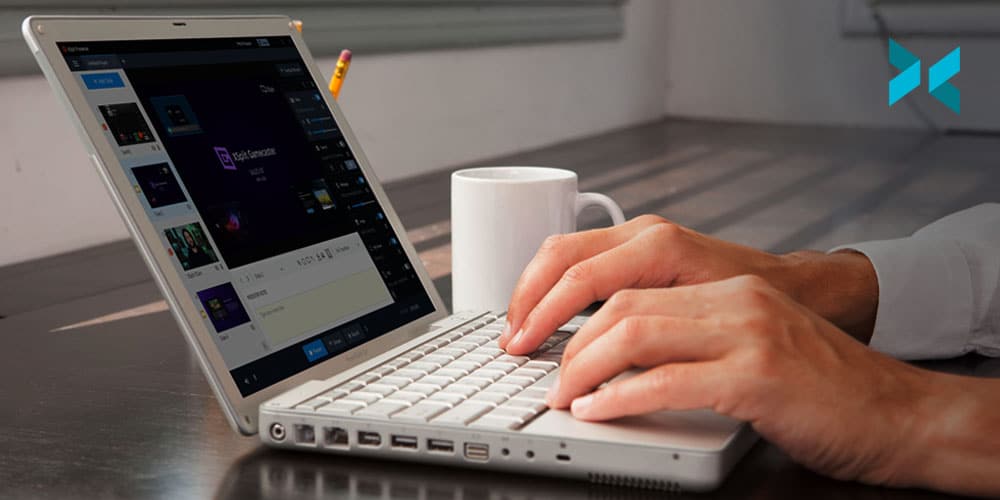
Are you looking to start streaming games and you want everything to be both free AND easy? Well, give Gamecaster a shot! They have free overlays and you can start streaming in a matter of clicks as well as control everything from inside your game! There’s a wide variety of different overlays included with Gamecaster to suit whatever game you’re playing as well as alerts, all easy to set up and integrated on whatever platform you’re streaming to!

Automation

Automation is probably the best way you can simplify your streaming life! Setting up a chatbot is free and easy, there are tons of great options like Moobot and Nightbot. Personally, I prefer Nightbot, it doesn’t have the flashy UI of Moobot but you get many more tools in the free version, which when we’re discussing free streaming tools is pretty important! You have your standard lists of banned words and commands to trigger messages in the chat, but you can also set up timers to post things like your socials or streaming schedule. You can also reward loyal viewers with giveaways as well!

Speaking of schedules, many social media accounts will let you schedule your posts in advance like Twitter or the Creator Studio for Facebook and Instagram. So, rather than doing an ad hoc tweet when you go live, schedule them in advance! Not only does this take some pressure off it also just saves you having to remember to do it in your go-live checklist!

An iPhone on a table with the Twitch app open, creating clips there is a great free streaming tool!
Photo by Caspar Camille Rubin on Unsplash

Clips and Highlights

The hardest part of the streaming grind is getting an audience. It’s quite hard to get people to find you and follow you, so in the beginning, you need to be a content factory. This means taking clips and highlights of your streams and posting them everywhere! But what’s one to do without editing software? There has some be a free streaming tool for that, right? Well if you’re streaming to Twitch they give you an editor for free! Aside from being able to download your clips, you can also use the highlight tool to cut segments from your stream and download it for upload to YouTube, Twitter, or wherever.

It’s a pretty basic cutting tool, but quite handy nonetheless, and remember to level up your thumbnails and clickbait game, something we discussed here! Last but not least, don’t forget the best creative resource, yourself! It doesn’t take any budget to entertain people, you just need to find what niche or creative outlet works best for you!

As you can see there are plenty of ways to get your streams up to the standard you’re after without spending a lot of money! As we always say, the content is the most important thing so be sure to focus on that first and add production values second!

Choosing a Streaming Platform That’s Right for You!

Making a decision about the best places to stream games can be overwhelming. There are a huge number of streaming platforms, with their own unique strengths and weaknesses. While the best way to find a platform that suits is to try them out, it helps if the choices can be narrowed down a bit first. So, let’s get narrowing.

A mobile phone on a desk displaying the Twitch app, is that the best place to stream games? Let's find out!
Photo by Caspar Camille Rubin on Unsplash

Going for community

While almost everyone on these sites is a gaming fan, different platforms can have a different feel to them. For example, major streaming site Twitch is probably the service most people associate with game streaming, but there are a lot of options.

The Twitch community has created a host of unique live streaming events, including Twitch Plays Pokémon – a crowdsourced Pokémon video game using commands sent by users through the channel’s chat room; and last year’s nostalgic Bob Ross marathon.

Amazon-owned Twitch is widely considered one of the best places to stream games, where you can watch your favorite gamers stream their games, and interact with them on a real-time basis. The site also contains a lot of different gaming communities that have regular viewers, making it a good place to build friendships with people from all over the world.

A gaming PC setup with a microphone and lighting ready to find out what the best place to stream games is.
Photo by Jack B on Unsplash

Follow the money?

In addition to Twitch, two other big streaming sites are YouTube Gaming and Facebook Gaming, which last year merged with Microsoft streaming site Mixer and sees these companies making an even bigger play to be one of the best places to stream games.

Facebook requires a high level of followers (10,000) before you can start monetizing. And that has to be as a single page, not a profile, which is a harder barrier to reach. Compare this with just 50 followers needed to start monetizing on Twitch.

With YouTube Gaming, you can live stream directly using the same software that you use for Twitch. However, while YouTube is often considered nearly as good as Twitch, its main focus is not purely on gaming. However, it is worth noting that a lot of the largest creators on YouTube do have a gaming element to their content. Do remember that monetizing on YouTube also requires a lot of followers.

That said, YouTube Gaming is both simple and easy to use, and it also provides excellent quality and features that make transcoding easier. One suggestion for those who want to monetize is to stream to Twitch, and then post highlights of your streams to YouTube or Facebook. It’s also worth noting that both of these sites are investing heavily in becoming the best places to stream games so these monetization goalposts are always going to be changing!

Someone stood at a PC with headphones on playing a game wondering what the best place to stream games is.
Photo by Fredrick Tendong on Unsplash

Even more options

Popular with Asian users is Bigo Live, which is offered in around 150 countries worldwide. The site uses Artificial Intelligence and Augmented Reality to help deliver its streaming services. Bigo supports live game streaming but also features a wide number of other options such as fan events.

Those who are more interested in shooting videos with their smartphones could consider Instagram Live. Instagram Live has become more and more popular but is currently only available via the smartphone app unless you happen to read this article from us that runs down how to stream from your PC to Instagram which could make it one of the best places to stream games if you have a large audience there or are looking to build one.

There is also Caffeine.tv, which offers decreased lag times and the ability to host your own sports broadcast, as well as a unique monetization pathway that involves asking viewers to purchase digital items for your stream. These innovations, however, as with many places, are becoming more common elsewhere as time goes on.

GosuGamers is another up-and-coming game streaming site. It is very popular with the esports scene and boasts a wide range of games. At the moment, monetization is mostly limited to winning tournaments and challenges though – so this site is worth considering if you are really into competitive esports.

If you’re hoping to stream your gaming, there are now a huge number of places to do this. But the great news is that XSplit Broadcaster works with all of them – making it easy to try out any number of sites to find the best game streaming platform for you!

Stream to Instagram from your PC: What you need to know!

Sometimes when you’re producing a live stream, people want you to stream to every platform at once. Twitter, Facebook, YouTube, Instagram, some random server. “No problem!” you say, “I’ll get a restreaming server with custom RTMP access!” and it’s all going great until you go to set up the Instagram stream. “How do I…where? How? Who?” Well, fear not because right here we’re going to discuss how you can stream to Instagram from your PC!

“Why can’t I just stream directly to Instagram like other services?” is a perfectly reasonable question you might ask yourself. Well, because they want you to use their phone app and unless you’re a celebrity, you probably don’t have access to the RTMP or stream key you’ll need to broadcast to your page. For this, we will have to go the third-party route! There are a number of services out there and some of them are paid, but the easiest I’ve found is with yellowduck.tv

A view of an iPhone being held up with someone looking to stream to instagram from the PC.

Setup

Before we go into how to set up Yellowduck to stream to Instagram from your PC, we’ll need to do some configuration with XSplit Broadcaster first. The first thing you’ll want to do is set your resolution to 720×1080 as this is the preferred resolution for Instagram, the recommended FPS is 30. You can do this by..

Clicking the Resolution Drop Down Menu in the Top Right > Resolution > Add Resolution > Custom Resolution > Input 720×1080.

In the same drop down menu > Frame Rate > 30FPS.

Now you’ll have to set up your sources to accommodate this resolution via cropping, which is easily done by holding the CTRL key after selecting the source in your main window. If you are still planning to produce 16:9 content you can try rotating it, but you may want to try laying it out with borders since most people are viewing Instagram in portrait mode.

Live social eating streams could happen from your PC as you stream to instagram from your PC.
Photo by Charles Deluvio on Unsplash

Yellowduck Setup

Now that you have your production configured let’s get the stream output setup! First, download the Yellowduck client and install it, it will ask you to log in to your Instagram account and then generate a stream key. Don’t do that just yet as we have a few bits to do in XSplit Broadcaster first then we will come back to it! We will need to create a custom RTMP output in XSplit Broadcaster and set the bitrate for the video and audio.

Click the Broadcast drop down menu > Set Up New Output > Find More Outputs > Search and Install Custom RTMP > Select Custom RTMP from the Setup New Output menu.

Here you can name the Output Instagram or whatever works for you! On codec select NVENC h.2624 if you have an NVIDIA graphics card that supports it, if not x264. For video, the Bitrate limit is currently 2000 and for audio, under Audio Encoding, set the bitrate to 128.

Now, in the Yellowduck client click generate stream key as you were prompted to do when logging in, which will now give you the RTMP URL and Stream Key which you’ll paste into their respective boxes in XSplit Broadcaster. After this, click “okay” and you’re ready to stream to Instagram from your PC!

Conclusions

Since this is quite a unique setup for streaming to a platform, you’ll likely need to have a dedicated encoder, like a separate instance of XSplit Broadcaster for broadcasting content to Instagram, so be sure to factor this into any costs you may have with your multi-stream production. Also, be sure to note that this is more of a workaround until Instagram decides to possibly make live streaming from a PC officially supported!

Over on our YouTube channel, we also show you how to record footage for Instagram!

Online Presentations: Top Tips to help you Succeed!

Online presentations have, quite simply, never been more important than they are today. With remote work now the new normal for most of us, making a good impression on screen should be a priority. Whether you’re presenting to colleagues at work, or to a prospective client, it’s important that you have the best and most flexible setup and tools available. Here at XSplit, we can help you out with some useful advice and amazing tool recommendations. Read on to learn more!

A person sits at their laptop, surronded by notebooks as they themselves make notes in preparation for an online presentation.
Photo by Windows on Unsplash

Preparation is key

The right preparation can help you to create a better remote presentation. Before you start, make sure that the lighting will leave you looking your best, or at least visible. Ensure that you have a good front light, so it shines brightly on your face. If the room you are using doesn’t have enough natural light, you could consider purchasing supplemental lighting to enhance your image.

Try to use a background that enhances your professional image and is aligned with your message. This will mean avoiding clutter and distracting images. Using a presentation platform that allows you to blur the background or, even better, inserting a virtual background with XSplit VCam, can be a big asset in creating the perfect look and feel for any presentation.

A remote presentation is a type of performance, and the best way to a smooth online performance is to know your technology. It’s a good idea to have a dry run, including a soundcheck, to get comfortable with the platform features, and to have a co-host or moderator to assist you with the technology during the presentation.

If possible, plug your computer directly into your router using an Ethernet cable. This will give you the best shot at a stable internet connection. Remember that a weak or unstable internet signal can ruin even the best presentation.

An above view of a desk, someone is using their laptop with notes next to them and a cup of tea as they give their online presentation.
Photo by Daniel Thomas on Unsplash

And … action! What to do in front of the camera

Just as it’s important to make eye contact with an audience when presenting live, you should look directly into the camera when presenting remotely. One trick is to place the camera at eye level – this helps to avoid the dreaded double-chin appearance from a camera that is positioned too low, or constantly looking up at people if it is positioned too high.

Ideally, the camera should frame your face, neck, and shoulders. Practice your positioning to find the sweet spot between being too far away, so you appear far off in the distance, and being too close, so that you are just a giant, disembodied head.

Standing up can add a sense of animation and energy to your presentation. If you are sitting, you can add some energy by leaning forward, as if you were a TV news anchor. Leaning back and slouching gives the impression that you are disconnected from the audience.

Remember that the best way to keep people engaged virtually is to be engaging. Research shows that happy and engaged people retain information better than bored people, so model the energy that you want to create. One trick to doing this is to smile. This can help you sound, as well as look, more engaged.

A side shot of a person at a desk with their notes and phone next to their laptop as they give an online presentation.
Photo by Headway on Unsplash

Adding visual appeal

Researchers have found that people remember much more of what they see than what they hear. This means that creating a visually interesting online presentation could be the key to engaging your audience. Consider incorporating polls, videos, raised hand features, etc. Try not to speak for more than a few minutes without some sort of audience engagement.

The flip side to this is that audience comments and chats can be distracting, particularly if you try to read them while speaking. Instead, have the co-host or assistant monitor this for you. Another option is to engage directly with the chats by acknowledging them, reading them out loud, and then commenting on them, a bit like a radio show.

One benefit of remote presenting is that you can dispense with the slides and use more engaging visuals – incorporating videos and using elements like virtual pointers, and scrolling infographics. Or present information as a design feature, giving your presentation a more cinematic feel. Incorporating a ‘guest’ speaker also adds interest and can generate a sense of excitement.

To accomplish this, and make your presentations really pop, you can use a tool like XSplit Presenter! Find out how in the next section.

A person working at their fashion business easily giving an online presentation with XSplit Presenter.
Photo by LinkedIn Sales Solutions on Unsplash

An app that can do it all – and more!

The new XSplit Presenter can help you create exciting and engaging presentations with its wide range of features. Add the personal touch by becoming part of the presentation. It uses AI technology to allow you to remove your background without a green screen and integrate yourself into your presentations. Instead of a talking head – your audience will see your online presentation, with you standing at the side, narrating. XSplit Presenter also allows you to annotate your presentation in real-time, and add a virtual pointer to make rapid annotations and draw viewers’ attention to a particular point.

If something comes up during Q&A that needs you to share a window or application on your computer, you can share just that window with a few clicks – and avoid showing the audience everything on your desktop. XSplit Presenter also makes it easy to add remote guests or co-hosts into your presentation with both their webcam and microphone, whether it’s an expert to talk on a specific subject matter or someone different. It will also allow conference call guests to hear and listen to the media you play.

As for visuals, XSplit Presenter allows you to add scene transitions and to add your webcam and other overlay elements. Particularly useful are features that support YouTube, LinkedIn, Facebook, and other types of streaming, allowing you to get your presentation in front of more eyes.

Although tech like XSplit Presenter can help you create the perfect presentation, only you can bring it to life. Whether you are presenting to clients, co-workers, or investors, letting your personality show through will have the most lasting effect.

4K Stream Capture: Does it Improve Stream Quality?

One of the big questions facing streaming today is, should you stream in 4K? It seems like just yesterday that 1080p Full HD was the best quality you needed, but 4K streaming and recorded content is becoming more and more present. 4K capture cards have been on the market for years now and software has allowed you to record or stream in 4K if you have a capable machine. Now, this had me curious, because I know for cameras they tend to downsample 8K and 6K sensors for a crisper 4K, so can this same principle be applied to streaming? Let’s look into 4K stream capture with some test footage for you to review!

A powerful gaming PC with two wife monitors on a desk ready to do some 4K Stream Capture
Photo by Caspar Camille Rubin on Unsplash

What are we using?

First, let’s give you a rundown of the setup I’m using. We’re going to be running a two PC setup, one is our gaming PC with an NVIDIA 2080ti and an Intel i9-9900k. Not the most state of the art, but it should at least give us a stable 4K 60FPS on some games. On the capture side, we’re using a Ryzen 7 1700 with an NVIDIA 2060 GPU. Now we’re not streaming in 4K, we’re going to just be capturing 4K, and downsampling that into 1080p. Having said that, even this dusty old PC can handle streaming at 4K 30FPS with the RTX GPU.

For capturing the gaming PC for this 4K stream capture we’re using an Elgato 4K 60Pro, 1st Gen. I’m outputting from my GPU to a 4K monitor and to capture software, then I’m just duplicating my desktop. I didn’t want to just show PC capture, I also wanted to add a 4K camera. So I coupled this with a Magewell USB 3.0 capture card, which is capable of capturing up to 4K 30FPS. I’m using my Sony A7III, which can do 30FPS 4K output, however, it has a slight crop. For all of this, we’re using the appropriate HDMI 2.0 and high-speed cables and I’ve verified that everything is sending a 4K signal for this 4K stream capture.

A PlayStation 5 controller being held in front of a TV. The new generation of consoles will no doubt up the 4k stream capture demand!
Photo by JESHOOTS.COM on Unsplash

Streaming Software

Now we have our setup, how are we going to test all of this? Well, for streaming software we’re going to be using XSplit Broadcaster and we’re going to test three scenarios. In each of these scenarios we’re going to stream to a random channel, but we’re going to enable a carbon copy of the recording to review and compare. We’re also going to be using the NVENC encoder for each of these 4k stream capture tests, which you can enable in streaming settings by clicking the Broadcast drop-down menu, click the gear icon next to your output and under Video Encoding select NVENC. I’ll also be setting the max quality to 6000 bitrate, this can be changed in the same menu right next to the NVENC dropdown labeled “Bitrate”.

I’ve included links to the videos from the tests I’ve run so you can review the results, as uploading them to YouTube will add compression and this can affect your perception.

Test One: I will be setting XSplit Broadcasters’ base resolution to 4K 60FPS, but the live streaming output to 1080p 60FPS. You can view the raw file for this test, here!

Test Two: XSplit Broadcaster is set to 1080p resolution 60FPS output, which means it’s automatically scaling the 4K source on its own. The raw file for this test is here!

Test Three: is setting the sources to 1080p and then streaming. The raw file for this test is, unsurprisingly, here!

A PC Livestreaming setup ready for 4K stream capture.
Photo by Jack B on Unsplash

So there we have it, and honestly, it can really be in the eye of the beholder as to whether things look better enough for it to be worth upgrading parts of or even your entire setup. Capturing games at 4K and streaming at 4K, as I say, is certainly the future and one thing you can rely on to be ready is XSplit Broadcaster! Supporting many resolutions and ready to stream at the bitrate you need, XSplit Broadcaster is the ultimate solution for future-proofing your high-quality streams! Be sure to let me know what you thought looked best in the comments below as it would be great to see what you think about 4K stream capture!

원격 온라인 프레젠테이션 꿀팁!

자영업 또는 직장인 모두 우리가 본래 경험했던 일반적인 업무 환경은 일부 제한되어 있는 상태입니다. 이런식으로 가다가는 온라인으로 비즈니스를 확장해야 할 수도 있습니다. 예를 들어 신입 사원들에게 온라인으로 인수인계를 진행 한다던가 아니면 바이어들에게 프레젠테이션을 보여준다던가 해야 하셨을겁니다. 상황이 어떻던, 아래 공유할 꿀팁을 활용하여 더욱 생산성 있는 온라인 비즈니스를 시도 해보시기 바랍니다.

A laptop on a desk ready to make a remote pitch
Photo by Karthikeya GS on Unsplash

원격 온라인 프레젠테이션의 장점

발표를 하는 입장에서, 직접 사람들과 대면하던지 또는 온라인 비대면 방식으로 진행하던지, 성공적인 결과를 위한 가장 중요한 요소는 진정성을 가진 소통입니다. 정말로 획기적인 제안이라 할지라도 소통의 방식이 타당치 못하면 무용지물이 될 수 있습니다. 특히나 원격으로 진행 되었을 경우 소통이 원할하지 못했을 경우 최소한 사람 대 사람의 숨결이나 의사를 상대방이 잘 느끼지 못하는 것 도 사실입니다. 예를 들어 커피를 대접한다거나 잔잔한 농담거리를 주고 받지도 못 하는 환경이기 때문입니다.

준비가 철저했다면 자기소개부터 눈에 띄게 발표 하는 것이 중요하다고 생각합니다. 아무런 소개도 없이 바로 발표 자료로 넘어간다면 상대방 역시 당황스러울 수 있습니다. 초반에는 충분히 상대방과 교류하며 공통점을 찾는 다거나 최소한 간략한 소개는 반드시 필요합니다. 베테랑 비즈니스인 이라고 해도 누구나 처음 보는 상대를 대할때는 긴장하는 법 입니다. 게다가 발표 시간에는 내가 주인공이기 때문에 이 시간을 빌려 내 매력을 최대한 발산하는 것도 전략이 될 수 있습니다.

A laptop on a desk next to a notepad and a cup of coffee ready to make a remote pitch
Photo by Designnn.co on Unsplash

현대 기술을 최대한 포용하라

중요한 비즈니스 회의를 할 때는 가능한 아는 대부분의 온라인 서비스 및 도구를 활용하시는 것이 추후에 편리해 질 것 입니다. 새로운 기술이나 도구를 사용하면서 상대방에게 어필을 할 수 있으며 나 또한 자신감이 생길 수 있습니다. 물론 이러한 도구들을 최소한 활용하려면 일단 빠르고 안정적인 인터넷 서비스를 마련해야 합니다. 아무래도 멋있게 보이게 위해 시간을 많이 투자했더라도 인터넷 환경 때문에 화질이 떨어지거나 끊김 현상이 발생한다면 모두 헛수고가 될 수 있겠지요.

다행히 현재 시장에 있는 중상위권 스펙을 가진 노트북 컴퓨터들은 쓸만한 웹캠이 장착되어 있습니다. 현재 데스크탑 컴퓨터를 사용하고 있다면 인기 유튜버나 스트리머들이 사용하는 웹캠 정도는 마련해야 합니다. 캠 장비가 갖춰졌다면 이를 최대한 활용할 수 있는 온라인 서비스 중에 XSplit Presenter를 사용하시면 온라인 프레젠테이션을 손쉽게, 신속하게 제작할 수 있으며 클라이언트와 바이어들에게 충분한 어필을 제시할 수 있습니다. 이미 기존에 사용하던 PPT 또는 구글 슬라이드 같은 서비스를 연동하여 사용할 수 있고 추가적인 요소들도 최소한의 클릭으로 이루어 낼 수 있습니다. 밋밋하던 PPT 화면을 더욱 역동적이게 만들도록 최적합의 환경으로 이루어져 있습니다.

전 세계를 내 손아귀에

이제 더이상 비싼 항공료를 내고 방향도 모르는 타지에서 일일이 사람들을 만나가며 비즈니스 제안을 하지 않아도 됩니다. 물론 어려운 시기 및 복합적인 문제로 현재로써의 해외 출장은 더욱 제한적인 것 도 있습니다. 그렇다 하더라도 여행에 드는 경비, 시간 등 무시하지 못하는 요소들은 이미 준비 절차부터 스트레스를 받게 될 수 있습니다. 이제 간편한 도구를 활용하여 나만의 제안서를 전 세계에 뿌릴 수 있다는 가능성이 여러분들을 흥분케 하는 부분입니다. 물론 새로운 환경에 적응하기 위한 충분한 연구와 연습이 필요로 하겠지만 이러한 시간을 투자라 생각하고 이전에는 타지의 지리와 언어를 배우기 위해 비워둔 시간이었다면 이제는 나만의 방식으로 언제 어디서나 사용할 수 있는 기회의 시간으로 전환 해보시기 바랍니다.

물론 이전처럼 대면 형식의 회의는 없어지는게 아닙니다. 대면으로 진행된 요소와 경험을 토대로 더욱 멋진 비대면 회의를 꾸밀 수 있다면 그야말로 금상첨화 겠지요. XSplit Presenter로 학업, 직장 생활을 더욱 업그레이드 해보시기 바랍니다!

The Remote Pitch: Improve Yours Today With These Tips!

Whether you run your own business from home or are one of the many employees whose usual premises are closed at the moment, the chances are you’ll need to give an online presentation at some stage. Perhaps you have been asked to train some colleagues remotely or you may even have to give a fully-fledged business pitch online. Whatever the circumstances, the tips below will help you make the process less stressful and deliver a more professional result.

A laptop on a desk ready to make a remote pitch
Photo by Karthikeya GS on Unsplash

The Benefits of Remote Presentation

Regardless of whether you’re pitching your idea remotely or face to face, one of the key elements to a successful business pitch is human connection. Even the most amazing idea can suffer if the delivery is cold and disingenuous. It might feel as though the human touch is lost through a remote business setup. There’s no opportunity to offer drinks or make small talk in the lobby and as normal as video chat has become over the past year or so, screens can still be seen as a barrier by some.

A well-planned introduction can make almost as strong an impression virtually as in real life. Rather than diving headlong into your presentation, take time to establish a rapport with your target audience. A brief, but warm informal chat will put everyone involved at ease. Those who are a little more shy can benefit from both planning and the presence of a screen. Even the most seasoned presenter can be intimidated by an important business pitch, so why not take advantage of the slight disconnect from the real world and star in the performance of your lifetime?

A laptop on a desk next to a notepad and a cup of coffee ready to make a remote pitch
Photo by Designnn.co on Unsplash

Take full advantage of available technology

Particularly when you’re making an important business pitch online, it’s best to ensure you take full advantage of the technology available. Utilizing the newest tech tools will show you in a capable and professional light. Investing in a fast and stable internet connection should be a priority, particularly if this type of presentation is a regular task. Whilst it sometimes can’t be helped, patchy unstable video calls can, unfortunately, put a dampener on business meetings.

Most laptops have a reasonable quality webcam as standard these days, and desktop machines can be fitted with an external webcam very inexpensively. There are some amazing software packages available specifically aimed at making your remote pitch go more smoothly. XSplit Presenter is an excellent tool for presentations that allows you to have full control of your presentation! Its handy annotation function can also be a great way to interact with clients, rather than just talking at them. The ability to import Google Slides is ideal for showing a visual presentation alongside yourself, meaning that you don’t need to click between screens, losing eye contact with your clients, or potentially clicking the wrong link mid-pitch.

A person giving a remote pitch from their coffee table.
Photo by Mohammad Shahhosseini on Unsplash

The world is your oyster

Gone are the days of international travel to pitch businesses overseas. Forget the fact that it’s not really possible for most of the world to travel at the moment – there’s also really no need to! Long-haul trips to negotiate business deals are not cost-efficient for most small businesses, but it’s so easy to give a remote pitch to anyone in the world. This opens up a plethora of new opportunities to SMEs. Don’t let superficial map-drawn boundaries narrow your opportunities for success! Always do your research first, but consider the possibility that you can pitch your ideas worldwide.

It can certainly take time to adjust to our new virtual approach to historically face-to-face tasks. Armed with the right knowledge, preparation and attitude, however, you can take full advantage of the new world of working from home. Whether you present regularly or have a big one-off business pitch online, use these tips to improve your chances of winning your clients over. You can check out some additional info about XSplit Presenter here.

How to Write Video Tutorials for Online Learning: Top Three Methods!

Over on our YouTube page, we had previously discussed how to make your own tutorial videos, something linked below. Probably the most important element of any tutorial, however, is the script as it’s your plan for whatever it is you wish to teach. Today, I’m going to discuss three ways you can write tutorials, which kind of content works best for each method, and some additional script writing tips to find out how to write a video tutorial.

How to make Tutorial videos on your PC.

Freestyle

This is probably how a lot of people script their first videos, completely freestyle. This is where you come up with a topic and just talk about it for however long you feel and then put it together in the edit. The George Lucas approach to tutorials, if you’ll excuse the Star Wars reference. Now, if you’re going for more personality-based content or maybe more general advice, guru-type content then this is a great choice. It gives you the freedom to put out a lot of information in a way that makes sense to you and creates a more intimate feeling for the audience as if they were getting advice from a friend. There are, however, some drawbacks to using this method.

The main challenge will come when you get to the edit. If you missed something you needed to mention, you’ll need to re-record, which may be a challenge as getting the exact same lighting conditions, clothing, hairstyle, etc is always a pain. Although, you can be smart about it and make these cutaways more of an aside to the audience, which is an established aesthetic and can be useful when you’re learning how to write a video tutorial with this method.

Another challenge is if you aren’t naturally the best talker and fumble over your words it can lead to some pretty rough cuts of all your good takes together. Nobody wants to be the Tekken 3 of tutorials.

A person bullet pointing notes at a desk learning How To Write Video Tutorials
Photo by Thought Catalog on Unsplash

Bullet-Points

The next method of writing involves creating a brief outline of your talking points. Since this requires a bit more organization, I’d like to reiterate some things from the video at the top of the page about the importance of dividing your videos into segments. With this in mind, the workflow would become video topic, segment topic, bullet points of discussion topics

For example, say you are doing a video about how to make a sandwich. You have a segment on bread, and then each bullet point could be different types of bread and while recording you’d talk about how suitable that bread is for a sandwich.

This tends to be the preferred method for a lot of online content creators when learning how to write a video tutorial. You get to pass along accurate information while also maintaining some flexibility to inject some personality into the tutorial to keep your audience engaged. It can also be helpful by allowing you to rearrange your content in your post-production process if you don’t find the original order you recorded in makes as much sense as you’d hoped. One tip while using this method is to make sure your last take is your best take on the subject you’re discussing, as this will speed up the editing process.

Post-it notes and a sharpie next to a keyboard on a desk as someone learns how to write video tutorials
Photo by Kelly Sikkema on Unsplash

Fully Scripted

The final method of writing tutorials is to fully script out each word you’ll be saying in the tutorial. Much of the advice for bullet-pointed scripts in terms of organization also applies here, but you can take it a step further during the pre and post-production stages.

Since you know exactly what you’re going to be saying, this means it’ll be easier to subtitle and translate your video, thereby opening up your content to a larger audience. You will also be better able to plan out the b-roll segments for your tutorial, which in turn will give you a better idea of how long a video will take to make. So, if you’re rigid or strict on deadlines for releasing content, it’s good to know in advance if the video you are plotting is going to require an elaborate shot.

If your content needs to be accurate and detailed, like if you’re teaching someone how to put together a model or talking about history or philosophy, then it is really important to script all this out and plan in advance. This is also helpful if you won’t be the on-screen talent for your videos, just make sure you get feedback from your talent so that you can write things that fit their natural way of speaking.

A person sat at a desk, using their laptop with notes and a mug of tea on the desk as they learn how to write video tutorials
Photo by Daniel Thomas on Unsplash

I personally use the fully scripted model for most of my videos because I find it hard not having set endpoints for whatever I’m describing or explaining. I’m susceptible to going off on tangents that aren’t related to the main topic, which can just make the editing process even longer! There are, of course, drawbacks to this method.

It can be hard for people to follow a script, especially if you have to use exact phrases. In these cases try to separate things into shorter phrases. While this can make editing a bit more difficult, it can really help you or your talent not feel exhausted at the end of a recording session. Also, if you’re reading off a script, say you’re just doing a voiceover, or happen to use a teleprompter, then it can be easy to sound robotic or lacking energy. In this case, it’s important to be present and listening to yourself or the delivery of the talent and make adjustments where needed. And hey, speaking of teleprompters, adding your script into XSplit Broadcaster or Presenter’s projector mode can make a great make-shift teleprompter on your monitor.

Now, I recommend experimenting with each method and see what works best for you. You don’t need to stick to any given method, perhaps some videos work best with a full script, especially when working with collaborators and for other short and quick videos you just need a few bullet points! Whatever the case, you’ll hopefully find writing your next video tutorial script that bit easier!

How to Create the Best Work From Home Routine For You!

“Do you wear your pajamas all day?” “Do you mostly watch daytime telly?” Yes, those of us who’ve been working-from-home warriors for years have gotten pretty used to these questions. Suddenly, many more folks are faced with the WFH lifestyle and are realizing that there’s a lot of self-motivation and work-life management going on behind the keyboards. Now, we are being asked, “what is the best work from home routine?” Here’s your chance to shape your day to suit your own rhythms and find your own!

A person at work on their sofa at home, could this be the Best Work From Home Routine?
Photo by Surface on Unsplash

Why is a routine important?

When unleashed from the office, the temptation may be to throw routine to the wind and just work as-and-when. However, like the kid allowed to help themselves to the cookie jar, eventually, we have a full belly of freedom. Having set work hours and a dedicated workstation helps you to keep on top of your workload, and prevents that vaguely lost feeling that many of us experience when our usual rituals vanish.

You’ll also feel more professional if you’re dressed and at your desk (XSplit VCam can help by blurring out the background of your meetings, but it can’t block out a pair of old pajamas). Try using software like our XSplit Presenter to create a professional-looking online presentation without taking up too much time or adding too much stress!

Everyone has a different line in the sand when it comes to work-life balance. You may find juggling cooking the evening meal with answering emails either a liberating use of your time or a complete imposition. Those of us who’ve chosen to work from home generally accept that lines get a little blurry; however, if you’re new to this, you may prefer to set a routine that keeps business and family life strictly separate. This is your call, and don’t be afraid to stick your out-of-office on after a certain time as this can be a big help when looking for the best work from home routine.

A person sat at a kitchen table in a large open looking living room. Maybe this is part of the best work from home routine?
Photo by Nguyen Dang Hoang Nhu on Unsplash

Do we have to work 9-5?

This is the good bit: within reason, we can set our own work routines when we’re in our own space. However, this does really depend on your job and your home surroundings. If you’re a teacher running live classes from nine until three every day, then you’ll have very little flex in your working hours. Likewise, if your job involves consultations, interviews, and meetings, you have to work alongside other people’s timetables.

However, with some jobs, provided you meet your deadlines and communicate when required, you have the freedom to work to your own rhythms. If you’re a night owl or a morning lark, you can adjust your hours to accommodate this and find your best work-from-home routine. Keep some overlap with your colleagues if you need a responsive relationship; but if you find you’re more creative at 6 pm than at 11 am, put your working hours back. Juggling work with home educating? Take the pressure off by dividing the day into work and school times. If you’re struggling, speak to your line manager or your school to come up with a routine that suits both roles: don’t wear yourself out trying to accomplish everything at once.

A father and child share time together over breakfast. Making time for yourself and others are an important part of the best work from home routine.
Photo by Jimmy Dean on Unsplash

Breaks from routine

Most work schedules build in breaks and lunch hours. It’s all-too-easy to ditch those when you’re working home, grabbing lunch at your desk. One of our top work from home tips has to be: build-in breaks! If you can, go into a different room or even outside, and enjoy the change of scene for a while. Missing your colleagues? Schedule a coffee break Zoom catch-up, or have “lunch together” on a Friday.

Conversely, working near the fridge can lead to a lot of breaks! Having proper time-out sessions for a coffee break can cut down on the grazing. That leads into another WFH pitfall: the sedentary aspect, which can be a double health-whammy when combined with the snacking opportunities. Many people find they’re missing the walk into town at lunchtime or even the commute – our advice is to step away from the screen and go for a walk or run during the working day.

So, while a routine is important, you will hopefully have the chance to plan your day in a way that suits you. Setting up a new home office? Take a look at our blog.

Live Stream or Record Your Digital Art With This Guide Today!

One group that has been at the forefront of the work from home experience has been artists. Many artists have begun to look into other revenue streams like live-streaming the creation and process of making their art or providing educational content teaching others the skills they have learned. How you may ask, do you stream or record your art? Well, you may have noticed it in the title but today we’re going to discuss how to live stream or record digital art!

Someome at a table with an iPad and an Apple Pencil ready to stream digital art
Photo by Kelly Sikkema on Unsplash

Requirements

First up, you’ll need a computer, a desktop PC or laptop are both good for this, just make sure it hits certain requirements, something you can read about here. Briefly though, make sure you have at least an NVIDIA RTX GPU or a six-core CPU. Next, if you’re doing physical art, like painting on a canvas or sculpture, you’ll need some type of camera. You can grab a webcam, a Logitech C920 is a good start, or you can even use your cellphone! Download XSplit VCam, get the XSplit Connect: Webcam App, and make sure your phone and PC are on the same WIFI network and you can use your phone as a camera!

If you’re creating digital art on something like an iPad you’ll need to be able to capture your screen to stream digital art. There are two ways to do this, one is using an HDMI adapter (HDMI to Lightning or USB-C in the case of some iPads) to connect the device to a capture card. Or you can use software like airserver to airplay your screen over WIFI. Another important thing as well is to make sure you have a microphone if you’re going to be talking to people in the chat, but especially if you are going to be creating tutorials! A lot of webcams come with built-in microphones but we would recommend a standalone one, something we’ve discussed here.

A digital artist at their workstation creating and streaming the process in order to stream digital art.
Photo by Kelly Sikkema on Unsplash

Setup

We’re going to be using XSplit Broadcaster as our streaming software. First thing, I recommend setting your resolution to 1920×1080 and a frame rate of 30fps. You’ll want to add whichever source will be displaying your art, if this is from a capture card simply use the sources menu by clicking Add Source > Devices > Video and selecting the name of the capture card you have. If you’re going to be capturing the software you use to make digital art like Adobe Photoshop on the same PC you’re streaming from again go to the sources menu, Add Source > Screen Capture and you can either select Smart Capture to capture only the software you’re using or you can select monitor capture. This will, however, mean people can see anything on your desktop so we’d advise using Smart Capture.

Adding your camera is just as easy as adding the capture card, but this time select the name of your webcam and it will go in the main XSplit Broadcaster window where you can easily move and resize everything. Then you just need to go into your audio settings (Tools > Settings > Audio) and select your microphone. Leave your system sound set to default, this is basically capturing any sound that your PC makes, such as audio from a video or music playback.

An ipad pro next to a wacom tablet which could both stream digital art.
Photo by Cristofer Jeschke on Unsplash

Another useful source, especially if you’re teaching people about software that uses a lot of shortcuts is the keyboard input display. This can be found by going to the plugin store, which can be found by selecting Add Source > Find More Sources and in the search bar typing Input Visualizer. Click on it and select Install and now back in the sources menu selecting Add Source > General Widgets and selecting the Input Visualiser. You’ll need to enable permissions for this, a bar will however automatically appear at the top of XSplit Broadcaster prompting you to do so. After that, all your keyboard inputs will appear visualized on the screen!

If you’re doing timed lessons, you can easily set up a text source to be a countdown timer which you can do again by heading to the source menu Add Source > Text then right-clicking on text source that appears and click the box that says “Use Custom Script” then clicking “Edit Script”. From here select in the Template drop-down menu “General Purpose Clock” and setting it up as you like. Finally, I recommend setting up a starting soon scene just so you can be sure everything is ready for your session. This is easily done in the scene menu clicking the + button, adding some of your artwork, some text that says Starting Soon, and maybe another countdown timer from the custom scripts. Or however you want it to look, honestly!

A person draws on a wacom tablet connected to their laptop which could also stream digital art.
Photo by Josefa nDiaz on Unsplash

Streaming and Recording Digital Art

Now that you’re all set up let’s get a stream or recording going! If you’re streaming to any of the popular platforms like Twitch, Facebook, or YouTube this is pretty straightforward, just log in to your account when you first open up XSplit Broadcaster (or by going to the File dropdown menu and selecting Log in) and let the wizard set you up with all the recommended stream settings. If you’re streaming to a different platform you’ll use the custom RTMP plugin. This is found in the plugin store which you can find by going to Extensions > Add Extensions > Find More Extensions and installing it in the same manner we did with the Sources store above.

You’ll need to get the RTMP URL and the stream key from the service you’re using and put them in by heading to Broadcast > Set Up New Output and select Custom RTMP. You’ll also need to manually input your stream settings. Twitch offers some good guidelines for bitrates that are roughly applicable in most places and can be found here. The most important thing to take note of is your internet upload bandwidth, do a quick speed test to find out your upload speed. Basically, you want to set a bitrate that’s about 70% of your upload bandwidth or less.

A digital art station with a computer, Wacom tablet and digital DSLR camers ready to be set up and stream digital art.
Photo by Jeff Hopper on Unsplash

Now, you’re ready to stream digital art! You can record while you’re streaming at the same time easily by checking the “Automatically save a recording on local drive” box in your Custom RTMP output or particular service Properties box which can be found by clicking the gear icon next to its name in the broadcast menu. To set your recording settings click the Record drop-down menu and click the gear icon. You’ll want to set the quality to Ultra High and enable multi-track audio and select Force constant frame rate if you’re going to be editing your video after the fact. From here just click okay and then hit record when you’re ready to go! Finally, it’s not a bad idea to hit the little camera symbol up the top in order to take screenshots, something that’s useful for sharing your finished work or using it to create thumbnails.

That’s all it takes to get started streaming or recording your artwork! Of course, there’s still promoting your content and getting people to watch, but that’s a subject for another day!