Everyone knows and loves the old logo, it’s iconic and has been with us since 2014 so why change it, you might be asking? Aside from naturally wanting aesthetic improvements, a lot has changed with XSplit since that time. Our overall focus has gradually shifted especially during the last couple of years with newly-released products and some upcoming ones.
Fun fact: Not many people know that XSplit wasn’t originally created with gamers in mind. When the first XSplit product was launched in 2009, it was more of a productivity suite aimed at helping people share content with others in the form of screenshots, short videos with annotations, etc.
Long story short, XSplit Broadcaster eventually became widely known as a live streaming and recording software that was embraced by gamers, and the rest was history. While the previous logos were not super explicit, they still communicated content creation and sharing throughout its evolution.
The last logo stayed for a while undergoing minor revisions. Our product portfolio began to grow to the point where XSplit was no longer just about Broadcaster. Our markets had expanded outside of gaming and content creation. Last year was the pinnacle when the interest in XSplit VCam skyrocketed as more and more people worked from home. Other people have started using XSplit Broadcaster as well for other purposes like online meetings and webinars.
We’ve come full circle, once again serving the productivity and the general workforce market. And while gaming will always continue to be ingrained in our identity, the need for tools and applications that will help people face the ‘new normal’ has been stronger than ever, and we know we can deliver!
At this point, we know there’s no delaying the inevitable, and the time is now to reveal our new logo (unless you’ve seen it at the top there, but hey, we like to build suspense).
The new XSplit
This new logo better encapsulates, thanks to the work of our designer Diana Chanco, what and where we are as a brand and slots in nicely with our existing and future products. More importantly, it looks more refined and flexible to scale easily in various applications which cannot be always said with our old logo.
In addition, we will be retiring SplitmediaLabs corporate website and consolidating all communications, updates, and job postings through the XSplit brand. Be sure to stay tuned for more updates in 2021! We hope you like it.
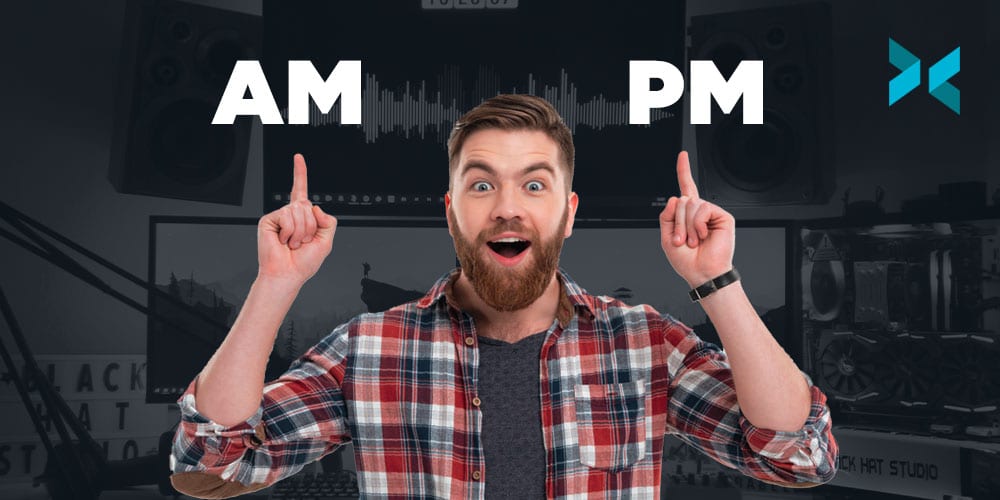
전 세계에 수 많은 스트리머, 유튜버들이 인터넷 방송을 하고 있지만 대부분 본업으로 삼고 있지는 않습니다. 아직도 개개인의 주어진 하루의 삶에서 매일 16시간 동안 꾸준히 방송을 할 수 있는 사람이 많지 않는 이유는 각자 다른 삶을 살고 있으며 본업이 있거나 가정 또는 취미활동으로 인한 여러 일정이 겹치기 때문일 것 입니다. 게다가 본업으로 인터넷 방송을 하고 있지 않아도 방송 최대한 제한된 시간 내에 최고의 품질과 최적화된 컨텐츠를 뽑아내려고 노력하는 사람들이 있습니다.
다양한 시간대, 취향, 지역에 따라 공통점을 찾기란 어렵지만 일부 기록된 데이터를 기반으로 현재 인터넷 방송의 활동력은 주로 어느 시간대에 활발한지 알아보았습니다. 여기 기재된 시간대는 모두 UTC 기준의 시간대이니 참고하시고 읽어보시기 바랍니다.
트위치에 시청자가 가장 많은 시간대는 언제인가요?
인터넷 방송 도중 최대한 잠재적 유입 시청자들을 사로잡기 위해 트위치 플랫폼의 경우, 어떤 시간대에 일반 시청자 수가 가장 많은지 알아봐야 할 가치가 있습니다. 트위치 플랫폼을 예시로 든 이유는 비교적 다른 플랫폼에 비해 공개된 자료 및 도구가 많이 존재하기에 접근성을 고려하여 내려진 판단입니다.
평일에는 최대 시청자 수가 오후 6시에서 8시 사이 인것으로 보여집니다. 약 1백6십만 ~ 1백75만명의 시청자들이 해당 시간대에 트위치에 접속하고 있습니다. 가장 타당한 이유는 이 시간대에 성인들이 알바, 직장 등에서 퇴근하거나 청소년들이 학업을 마치고 집에 돌아오게 되는 시간대인 이유가 가장 유력합니다. 오후 8시 30분에서 9시가 되어서야 서서히 시청자 수가 다시 줄어드는 추세입니다.
주말에는 대부분 사람들이 평일보다 더 한가할 수 밖에 없습니다. 그러기에 자연적으로 더욱 일찍이 트위치 시청자 수가 늘어나게 됩니다. 데이터에 의하면 오후 4시부터 6시 30분 사이에 약 2백30만 ~ 2백70만명의 시청자들이 트위치 방송을 시청합니다. 약간 다른점이 있다면, 주말에는 오전 11시부터 피크 지점인 오후 6시 30분까지 서서히 시청자 수가 항상 올라가는 그래프 인것이 인상적입니다. 피크 시간이 지나서야 서서히 다시 시청자 수가 줄어들게 됩니다.
재밌는 점은 주중에 어느날이던 아침 일찍인 오전 7시에서 오전 9시에 전체 시청자 수가 가장 낮은 수치 인것으로 드러납니다.
이 정보를 가지고 어느정도 감을 잡으셨다면, 직장인 및 학생의 경우 바로 집에 온 뒤 오후 5시 에서 6시 사이에 방송을 켜는것이 방송 시간의 길이와는 상관없이 더 유입 시청자를 받을 확률이 높을 것입니다. 방송 시간도 고려한다면 최소한 오후 9시까지는 한다면 더욱 최적화된 환경에서 방송을 한다는 이론입니다.
하지만 이것은 이론일 뿐 다른 데이터를 확인해보면 조금 더 섬세한 부분을 확인할 수 있습니다.
어느 시간대에 스트리머들이 방송을 주로 켜는가?
각 시청자들도 주어진 시간에서만 원하는 방송 채널을 선택하여 시청할 수 밖에 없습니다. 게다가 전 세계에 수 많은 스트리머 및 유튜버들이 앞다투어 인터넷 방송에 뛰어들고 있으니 그만큼 어려운 경쟁률을 뚫고 시청자들의 관심을 끌어야 합니다. 생각해보면 본업이 있거나 학생인 스트리머들은 대부분 비슷한 시기에 방송을 시작하고 비슷한 시기에 방송을 종료할 수 밖에 없습니다. 그러기 때문에 내가 조금 더 시간의 여유가 있다면 남들이 방송을 하지 않는 시간대에 내 방송 시간을 관리하는 것이 경쟁률을 줄일 수 있다는 점 입니다.
인터넷 방송인들도 평일과 주말에 따라 방송 시간 패턴이 각자 다르게 나타납니다. (언급되는 시간은 UTC 시간대 입니다.)
놀랍지 않지만 평일에는 스트리머들이 활동할 때 시청자들이 활발히 활동하는 시간대와 얼추 비슷합니다. 대부분 오후 6시에서 8시 사이에 여러 트위치 채널들이 생방송 송출을 시작하며 이때 시작된 채널들만 따로 모아서 분석하면 대략 총합 6만명의 트위치 채널들이 활성화 되어 있습니다. 그럼에도 불구하고 금요일이 예외였던 이유는 대부분의 스트리머들이 목요일 밤 늦게 까지 방송을 하더라도 금요일에는 새벽부터 방송을 시작하는 패턴이 보입니다. 금요일 새벽 1시에서 2시 사이에도 채널 개수는 약 6만3천명 정도였습니다.
주말에는 당연히 스트리머 및 시청자들이 시간에 여유가 있어서 피크는 오후 8시에 시작하지만 평일과는 달리 대략 7만2천 ~ 7만 3천개의 트위치 채널들이 실시간 방송을 하고 있습니다.
이와 반대로 가장 적은 트위치 채널 개수가 활성화 되었을때는 언제였을까요? 평일엔 아침 9시 즈음에 가작 적은 트위치 채널 개수로 대략 2만2천 ~ 2만3천개의 채널들이 활성화 되어 있으며 주말에도 마찬가지로 아침 9시에는 약 2만7천 ~ 3만1천개의 트위치 채널들만 실시간 상태인 것으로 확인됬습니다.
위의 상식대로 풀어 나가자면 아침 시간대에는 스트리머 경쟁률이 적으니 곧 아침에 방송을 시작하면 더 많은 시청자들을 유입할 수 있을까 라는 질문이 성립되지만 일단 답변은 No 입니다. 왜냐면 그 시간대 역시 가장 적은 시청자 수를 보여주기 때문입니다.
이러기에 조금 더 고민해야될 부분은 시간대 뿐만 아니라 시청자들의 요구사항이라던가 내가 방송할 때의 다른 스트리머들의 공통점을 찾아 해당 부분에서 경쟁력 있는 컨텐츠를 생각해보며 균형을 맞춰야 하는 것 입니다.
최적화된 스트리머와 시청자 수 비율은 언제인가?
시청자들이 수요라면 스트리머들은 공급자 입장이 되는 것입니다. 우리는 스트리머의 입장으로 이 글을 보는것이기에, 우리도 공급자의 입장이 되어봐야 합니다. 즉 나 말고 다른 스트리머들은 곧 경쟁자들이라는 낙인이 주어집니다. 자연스럽게도 스트리머 개채수가 많다면 시청자들의 분포도 역시 분산되어 많은 시청자들이 흩어지게 됩니다. 하지만 이 예시는 모든 시청자들이 모든 스트리머들을 골고루 시청한다는 전제하에 이루어 지지만 현실은 그렇지 않습니다. 하지만 데이터를 분석하면 현실과 이상적인 현상의 타협점을 찾아 볼 수 있으니 확인 해보도록 하겠습니다. 조금 더 공정한 분석을 위해 ‘인기’ 또는 ‘인지도’를 배려하지 않는 채로 데이터를 분석해보겠습니다.
SullyGnome에 의하면 시청자들이 골고루 분산되어 있을땐, 주말을 기준으로 오후 4시에서 6시 사이에 한 개의채널 당 시청자 28 ~ 29명 꼴 이라 합니다. 평일에도 월요일부터 목요일 까지 동일한 기준이며 금요일만 유독 오후 6시에서 7시 사이에 채널 당 시청자 38 ~ 40명 꼴 이라고 나옵니다.
토요일에는 피크 시간대가 오후 12시 에서 2시 사이이며 채널 당 시청자 40 ~ 45명 꼴이며 일요일엔 더욱 더 힘차게 토요일과 같은 시간대에 채널 당 시청자 50 ~ 60명 까지 올라가는 수준이라 합니다.
반대로 스트리머 수와 시청자 수 비율이 최악일 때는 평일 기준으로 새벽 1시에서 3시 사이이며 대략 채널 당 시청자 18 ~ 19명 정도 라고 합니다. 이 현상도 금요일만 유독 20 ~ 21명의 시청자 꼴로 확인된다 합니다.
주말에는 비슷한 비율이 나오는 시간대는 새벽 3시에서 4시 사이라고 합니다. 대략 채널 당 시청자 18 ~ 19명 정도 입니다.
이 정보를 가지고 날짜, 시간, 기간 등을 조합해보면 어느정도 감이 잡히리라 생각합니다. 내 성격과 콘텐츠 주제를 중점으로 시청자가 적을때 방송을 하는것이 맞는지, 경쟁률이 극심하더라도 시청자들이 많을때 할지 고민해보시기 바랍니다. 여기서 이제 플러스 알파 (+@) 요소들을 적용해보면 나만의 방송각을 잡는데 도움이 될 것입니다.
인터넷 방송 시작 버튼을 누르기 전 추가 요소들
마냥 숫자만 보고 판단한다면 위 여러가지 복잡한 분석 사이에서도 어느 정도 정답을 걸러낼 수는 있지만. 앞서 말한듯이 다양한 언어, 지역, 문화권의 스트리머들을 비롯하여 시간대, 계절, 낮과 밤이 재각각이기 때문에 일정한 확답이 주어지지는 않는 부분입니다.
한가지 짚고 넘어가야 하는 것은 내 시청자들은 어떠한 부류이며 어떠한 성격을 지녔기에 내 방송을 보러 오는가 정도는 파악해두면 좋습니다.
이와 비롯하여 아래 질문들에 내가 해당되는지 확인해보세요:
내 주요 콘텐츠는 무엇인가. 어떤 사람들이 내 콘텐츠를 즐겨 하는가?
만약 학교를 다니는 친구들이 좋아할 만한 콘텐츠일 경우, 학교 수업이 끝난 후에 잠깐 텀을 두고 방송을 시작하는게 학생들이 방송 플랫폼을 켜고 접속하는 시간대와 대강 맞출수 있을 것입니다. 만약 직장인들이 좋아할만한 콘텐츠라면 저녁에 회사 퇴근시간 후에 방송을 켜면 될 것 같습니다. 하지만 모든 직장인들이 같은 시간에 퇴근한다는 보장도 없으니 이 부분은 역시나 정답을 내리기 어려운 분야입니다.
나와 가장 근접한 경쟁자들은 누구인가?
만약 철권 게임을 주로 다루는 스트리머라면 다른 철권 스트리머들이 없을때 방송을 켜는게 어느정도 어드벤티지가 주어질 지도 모릅니다. 또는 내가 꼭 다른 철권 스트리머들이 방송을 할때 내 방송도 켜야 한다면 철권 콘텐츠와 한가지 요소를 더 추가한 콘텐츠를 한다면 조금 더 특색있는 철권 스트리머가 될 수 도 있으니 이러한 방법도 고려해보세요.
내가 방송하기 가장 적합한 시간은?
내가 여러가지 일정을 두고도 인터넷 방송을 하는거라면 올바른 시간표를 먼저 작성하는게 가장 중요시 되는 부분입니다. 억지로 방송을 하거나 너무 길게 방송을 하여 다른 일정에 지장을 준다면 인터넷 방송을 떠나서 시간 관리를 못하게되는 버릇이 들기 때문에 항상 조심해야 하는 부분입니다.
그러니까 언제 방송을 해야 가장 좋은가요?
위의 여러가지 요소를 조합해보면 결국 내 개인 일정을 쪼개서라도 다른 일정에 피해가 되지 않을때 하는 것이 가장 적합할지도 모릅니다. 시간표를 잘 짜맞추고 잘 이행한다면 기존의 일상에서 크게 벗어나지 않고도 인터넷 방송을 진행 할 수 있게 됩니다. 물론 얼마나 해야하고, 무엇을 방송하는지는 본인 결정에 달렸지만 나에게 주어신 시간에 최대한 알맞는 콘텐츠를 정하는 것 자체가 숙제입니다.
그래도 위의 자료를 토대로 여러분이 인터넷 방송 새내기일 경우 평일에는 오후 4시에서 6시 정도가 가장 적합할 시간대 입니다. 거기서부터 시작해서 조금씩 시간표를 조절하면서 나에게 알맞는 시간대를 찾아보시기 바랍니다.
엑스플릿 브로드캐스터 버전 4.0 에서는 프로그램을 갈아엎어서 새로 탈피된 수준이었다면 이번 업데이트는 기존의 인기 기능들을 중점으로 더욱 강화되고 최적화 하는것에 중점을 두었습니다. 사용자 커뮤니티의 피드백을 기반으로 많은 버그들도 고칠 수 있었습니다. 미래에도 쭉 나아질 엑스플릿 브로드캐스터, 현재로써는 어떤 상황인지 살펴보겠습니다.
엑스플릿 브로드캐스터 4.1 새로운 부분은?
동영상을 시청하는 것보다 문구를 읽는것을 추구하신다면 아래 목록을 확인하시기 바랍니다.
장면 프리셋 매니저 – 한 장면에 여러가지 구성요소 프리셋을 구축하여 관리할 수 있습니다.
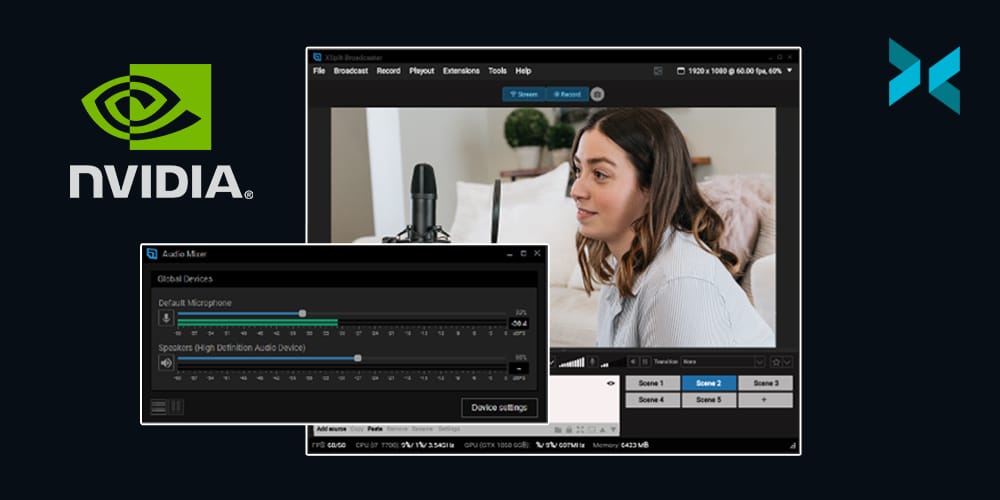
신규 오디오 엔진 도입 – 원하는 만큼의 오디오 장치, 마이크 등을 추가하여 재각각 볼륨을 조절하고 동시에 활용할 수 있습니다.
NVIDIA 잡음 억제 기능 – NVIDIA Audio Effects SDK for RTX GPUs를 설치하시면 기존의 마이크 장치에 잡음 억제 기능을 적용 할 수 있습니다.
개선된 텍스트 소스 – 전보다 더 실용적이고 쉽게 텍스트를 커스터마이징 할 수 있는 플러그인으로 변경 되었습니다.
가상 카메라 장면 선택 기능 – 기존에는 활성화된 장면만 가상 카메라로 설정할 수 있었지만, 이제 원하는 장면만을 가상 카메라로 설정할 수 있게 되었습니다.
엘가토 HDR 10-bit 입력 지원 – 엘가토 캡처 장치의 10-bit HDR 입력 신호는 자동으로 8-bit로 전환됩니다.
새로운 라이선스 개념 – 엑스플릿 브로드캐스터만 사용하시고 다른 엑스플릿 제품들은 사용하지 않으신다면, 오직 브로드캐스터에서만 사용할 수 있는 라이선스가 따로 마련되어 있습니다.
프로그램 내 고객지원과의 소통 경험 개선 – 이번 업데이트를 통하여 더욱 개선된 고객지원 서비스를 도입하였습니다. 프로그램 내에서 고객지원 상담원과 소통하여 방송에 대한 궁금증을 해결해보세요.
어두운 테마 – 새로운 인터페이스 디자인을 따라 눈의 피로도를 줄일 수 있는 어두운 테마를 선택할 수 있습니다.
버그 픽스 – 당연하지만 서도 이번 업데이트를 통하여 크고 작은 버그들을 고쳐나갔습니다.
최신 버전의 엑스플릿 브로드캐스터는 xsplit.com/ko/broadcaster에서 다운로드 받으시거나 프로그램 내에서 도움말 >> 업데이트 확인 메뉴를 선택하시면 최신 버전으로 업데이트가 진행될 것입니다.
그리고 베타 테스트 버전의 브로드캐스터를 사용해주신 사용자 커뮤니티에게 감사드립니다. 이로 인해서 최대한 안정적인 버전의 엑스플릿 브로드캐스터 4.1을 출시할 수 있었습니다. 여러분들도 베타 테스트 버전을 시험삼아 사용하시려면 xsplit.com/ko/ptr에서 다운로드 받으실 수 있습니다. 베타 테스트 버전의 브로드캐스터는 정식 버전에서 보다 더 빨리 새로운 기능을 실험해볼 수 있지만, 테스트 버전인 만큼 예기치 않은 오류가 발생할 수 있으니 주의해주세요. 그리고 테스트 버전이나 새로운 버전에서도 버그 및 피드백이 있으시다면 언제든지 공식 엑스플릿 디스코드에 오셔서 의견을 남겨주세요.
이제 저희는 브로드캐스터 테스트 버전 4.2를 준비할테니 여러분들은 마음껏 4.1버전을 사용해주시면 됩니다. 감사합니다!
If version 4.0 was about introducing big new features, this update focuses more on enhancements of existing features, handy quality of life improvements, and tons of bug fixes. That’s not to say there’s nothing new and exciting in this update though and if we’re being honest, we think there’s just as much here!
What’s new in XSplit 4.1
If watching a video isn’t your thing and you prefer reading text, here’s a quick summary of all the goodies in this update.
Scene Presets Manager – Organize your presentation by adding multiple presets to your scene.
New and improved audio engine – Add as many microphones and playback devices as you want, and tweak them individually as you see fit.
NVIDIA Noise Removal – With the NVIDIA Audio Effects SDK for RTX GPUs, you can apply their noise removal directly to your microphone device.
Overhauled text source plugin – Everything is now done easier than ever with the updated plugin while still retaining its customizability.
Virtual camera scene selection – You can now specify what scene is outputting to the virtual camera.
HDR 10-bit input support for Elgato – Added support for 10-bit HDR input which is converted to 8-bit.
New License type – Only using Broadcaster and nothing else? There is now a Broadcaster-only Premium license!
Better in-app customer support experience – Exceptional support has been our priority ever since and in this update, we’ve made in-app customer support more intuitive than ever.
Dark Theme – The UI has had a lick of paint including a brand new dark theme.
Bug fixes – Any version update won’t be complete without a ton of bug fixing. This one’s got plenty! You can refer to the release notes for the full details.
You can download and install the latest version at xsplit.com/broadcaster, or go to Help >> Check for Updates from inside the XSplit Broadcaster app.
Quick shout out to our PTR warriors who have been helping us test all of these new things and ensuring the product that comes out to the general public is ready for prime time! If you want to be part of that awesome group, go check out our PTR page and join our Discord server.
We’re looking forward to hearing back your thoughts on this update, while also preparing for PTR 4.2 ?
Hosting a podcast or a live talk show is something I have a bit of experience with and honestly, the live element is probably the most exciting part for me! I’ve hosted TV shows, live stages, interviewed a bunch of people in a live environment, and been a part of a number of podcasts. With all this, I have developed some hosting tips and experience that I think will help make your life easier when it comes to doing it yourself!
Research!
This is probably one of the biggest elements a lot of people tend to skip and the thing that can make your life easier! The first thing I like to know if I have a guest is what are the key points they’re going to be discussing? By this, I mean what are you talking to them about. In my case, a lot of the time I was talking to game developers about a game that had either just come out or was set to be released so. So, key points there would be the name of the game, its release date, the platforms it’s releasing on, etc. There would also be other larger themes like a specific gameplay mechanic or theme they wish to highlight. Ideally, I’d find all this out long before the interview took place over emails with the person or a PR representative. Be sure to ask for this information, however, as it’s going to inform the run of show, something we’re going to discuss later in these hosting tips!
If the subject you’re going to be discussing is a piece of media, my hosting tip would be to make sure you consume that media! As I said, a lot of my guests were game developers so, ideally, make sure you play the game before you talk to the developer! Or you know, watch the film, listen to the album, read the book, etc. If you can’t, for whatever reason (it’s not released yet, it’s not even finished, etc) then be sure to tailor your interview to that and ask the appropriate questions based on your genre knowledge. Now, you won’t always have that depth of knowledge already on the subject you’re discussing but this is something you can research as well so you are at least grounded in the terminology you’re going to need to conduct your interview.
This, to me, is a key point because one of the two main jobs I believe you have as an interviewer is to inform the audience about the subject your interviewee is discussing. Most of the time, the person you are interviewing is perfectly capable of doing that themselves, but I believe when you’re dealing with a complicated subject it can be important for you to break down the answers people give. A classic example would be to say “So, you’re saying..” and quickly summarise what they’ve just said. I wouldn’t, however, do only that, try to say that and at least ask another question in relation to that, saving you from repeating the same point for those who did understand the answer given. Also, again, your own depth of knowledge is what is going to mean you knowing when something might be complicated and require that kind of explanation.
The run of show is one of the most important documents you can get and something I advise you make use of in these hosting tips! If you’re working with a producer, they may make this for you but if you’re pulling double duty you really should make one for yourself! The run of show is essentially a long list with some expanded details. Not only the interviewees’ name and social handles/websites want to go in there but so do the key points you’re going to want to hit. Another key thing you’ll want to have in here is timings.
So, for example, when I would host the Indie[dot]XSplit showcase stage at places like PAX we would have multiple guests on over the course of a day to discuss their different games. Everything would be timed out as we are only allowed in the convention center halls for a set time and the guests were also showing their games on other stages and at their own booths. Knowing how long your guest is booked to be there is important because you have to make sure everything sticks to these times, not only for your own show but as a courtesy to the guest. They don’t want to be late for everything they have to do that day because you let the interview run over.
One hosting tip that can be useful, if you’re working with a producer, is to have them display some of this information, as well as a clock, using XSplit Broadcasters projector mode. This is something we used to do for our shows, just a simple scene with this information on “finish at 14:30” and a clock so I can see how close to that time I am. This is then projected to a monitor which is being displayed in front of me on the stage! It saves having too much info in the form of notes and keeps you able to stay ahead of time. It’s also a great way for the producer to communicate anything to you live during an interview!
So once you get to the day of your interview there are still a couple of hosting tips I can give you before you go live. Once your guest arrives, make sure you say hello to them and set the tone right from the start. You’re relaxed, positive and you know what’s going on and what’s going to be coming up in the interview. This is not only a professional courtesy but it will help someone who might be a little nervous getting interviewed in a live situation, possibly for the first time. Find out how they are doing, how the day is going, and double-check if there are any other key points than the ones you already have written down that they would like to make sure you hit in the interview.
Now when you get into the interview itself, you should introduce your guest so something to do before the interview is ask how to pronounce their name and what their pronouns are. You may think you know how to pronounce someone’s name, and you could well be right, but starting an interview off with the wrong name isn’t the best way to start. I’ve been guilty of saying a name wrong, I’ve even been guilty of the worse “introduce yourself”. This is, for you, easier, but for your interviewee, it’s putting them on the spot and not really giving them enough of a brief as to how much information they should be giving at that point. Always introduce the guest!
For me, keeping the tone conversational is the ideal way to go. I think an interview should feel a bit like a chat more than a prescribed set of questions going one after another. This, to me, means not holding yourself to where you think the interview should go, if everyone is having fun discussing something and it’s still serving the point of the interview, follow that! If something funny is said and your guests are having fun, stick with it! Don’t forget your key points, however, as you need to keep the conversation on track and hitting the key points we discussed earlier.
If the conversation does take too far of a shift away from the key points you’re there to discuss it’s your job to steer the conversation back. Ideally, you want to find a way to do that with what they’re saying but honestly, sometimes you just need to change the subject. Keeping that shift fun is important and it takes some experience but you’d be doing your interviewee a disservice by not doing that. Remember, everything you say should, ideally, be in service to what you’re there to discuss. Leave room for people to speak! Unless you’re telling an anecdote to relax the person you’re interviewing or to let them know “fun times are cool!”, it’s not your time to shine, it’s theirs!
It’s easy to try and fill time with a funny thing you want to say or going off on tangents purely because you’re enjoying them, but do remember why the person you’re talking to is there. And, why you’re there, which is as I said before to inform the audience but the second part of that is to get the best of the person you are interviewing. I truly believe that a big part of what an interviewer is there to do is show the person they are interviewing in their best light and leave the viewer/listener with the best impression possible.
One final, bonus hosting tip, from me, would be to always watch the people who inspire you or admire you in the interviewing field. To me, Graham Norton is one of the best in the world so I will always watch his chat show and listen to his radio show to get a sense of how he does what he does. Figure out what it is you really like about how they are interviewing people and then how you can incorporate that into your own personal style. I wouldn’t say it’s a great idea to emulate them but this kind of knowledge can help define your own style.
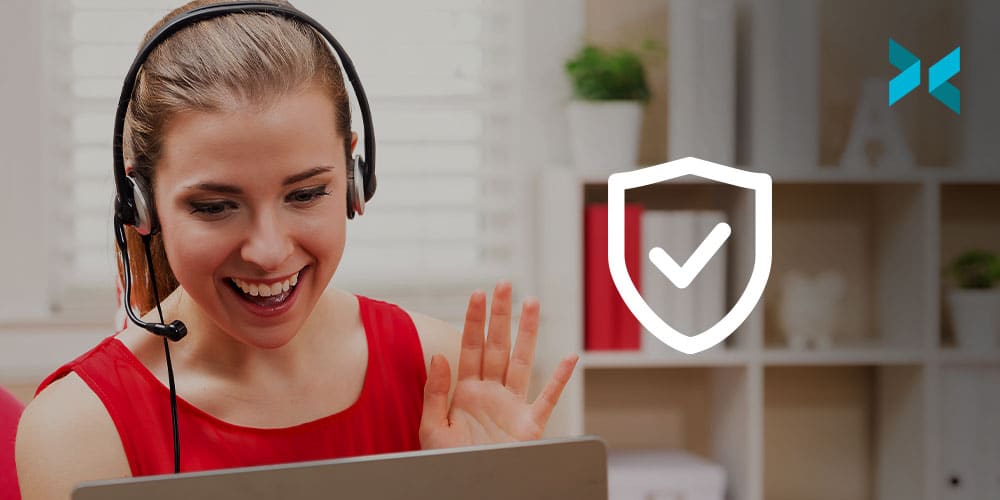
Security can be a given in the physical school environment, but how can you recreate this online? It’s actually really straightforward to prevent “Zoombombers” and other unwanted guests from barging into your remote classroom: all the help you need are in the settings for a secure online class. Let’s take a look at our secure online teaching tips for teachers.
Take time to learn about Zoom’s safety features before launching into your lessons. If you’re a regular Zoom user, don’t use your ID for classroom teaching or meetings, but generate a new one each time. Allow only invited people to join, which means no one else can sneak into class. You can also firmly shut the classroom door once the lesson has started, via the Lock Meeting option (this will be a lesson in punctuality, too!).
There are a few other safety features you can use for a secure online class. Go to the Advanced Sharing Options menu to make sure you’re the only one that can screen share. Don’t forget that as the host you have the authority to block, mute, or prevent online chatting, and to disable anyone else’s videos. You cannot completely recreate your live classroom online, but you can set the same standards for respect and behavior.
The same principles apply to other online learning platforms. Google Classroom, with its blend of Google Hangouts and work-sharing capabilities, is proving a popular tool for remote teaching. As the admin of a Google Classroom, you can easily control the settings to make the session as secure as possible. With this handy tool, the work lies in how you configure the classroom to begin with, and access and permissions are strict. Schools can also control their Classroom settings by setting up school email addresses and using only these for logging into class.
Microsoft Teams has similar security settings for a secure online class. You can set up different roles (presenters and attendees) and prevent anonymous users from attending. Make sure that options that let students set up their own groups and chats aren’t enabled either. This is super-important to help prevent online bullying, as well as cutting down on distractions during lessons.
An important safeguarding issue, secure surroundings are about showing respect for each other’s privacy and personal space as part of a secure online class. Teachers who are streaming from home are advised to use a neutral room (not their bedroom or their kids’ bedrooms, which possibly have the best IT set-ups!) and dress appropriately for a formal teaching environment. Likewise, no PJs for pupils, and remind them not to have anything in the background that they wouldn’t want their classmates to see (involve parents in this for younger pupils).
Whichever platform you use, make sure you close all other tabs on your screen if you’re sharing it. Try downloading our XSplit Presenter software, which prevents your audience from seeing your desktop as well as offering a fun, interactive presentation for your class. Honestly, it can really help elevate a lesson and remove a few security worries in one program! It also works with any of these video call solutions!
To create the ultimate safe surrounding, download our XSplit VCam software, which will remove, replace or blur your background whatever software you’re using. For primary school pupils, place yourself in a fun, relevant background (Ancient Rome? Just download an image and you’re there!). For older students, you can simply blur the photo, so they don’t spend the entire lesson distractedly peering into Miss or Sir’s kitchen.
Everything you need for a secure online class is in the settings. Take time to set up your remote classrooms securely, then you can concentrate on the lesson. For more online teaching tips, read our blog.
온라인 프레젠테이션 발표는 이제 선택적인 사항이 아니라 필수 능력으로 자리잡고 있는 영역입니다. 원격 작업 또는 재택 근무의 실용성이 증명 된 지금, 모니터 화면상 보이는 요소들이 모든 작업의 과정 및 결과물에 굉장히 중요한 비중을 차지하고 있습니다. 회사 동료들에게 발표하거나 비즈니스 클라이언트에게 보여질 프레젠테이션을 준비할 때 내가 얼마나 준비되어 있는지 구분할 줄 안다면, 항상 꾸준한 품질의 프레젠테이션을 제공할 수 있게 됩니다. XSplit에서 연구하고 조사한 다양한 온라인 프레젠테이션 도구와 함께 알맞는 팁을 공유해드리려 합니다.
올바른 준비성이 온라인 프레젠테이션에 매우 큰 활약을 합니다. 시작 하기 전에 조명이 알맞게 비추고 있는지 꼭 확인하세요. 만약 자연광 만으로 충분하지 않다면 작은 추가 조명 장치를 구입하는 것도 괜찮은 선택입니다. 게다가 빛이 얼굴에 너무 강하게 비출시엔 그림자가 짙어질 수 있으니 적절한 타협점을 찾아야 합니다.
카메라에 비추는 화면 중 반 정도는 뒷 배경의 모습입니다. 카메라 화면으로 내 뒤의 배경에 무엇이 보이는지 확인 후에 정리하거나 새롭게 꾸미는 것을 추천합니다. 배경의 모습이 아무래도 마음에 들지 않다면, 추가적인 장비의 설비가 필요없는 최신 기술로 뒷 배경을 투명하게 감추거나 흐리기 효과를 적용하는 XSplit VCam을 사용하는 것도 괜찮은 방법입니다.
온라인 프레젠테이션은 마치 방송 무대와 비슷한 개념입니다. 올바른 기술과 도구를 활용한다면 더욱 자연스럽고 부드러운 연출을 할 수 있게 됩니다. 방송을 진행하는 플랫폼의 기능을 어느정도 연구하고 다스릴 줄 안다면 남들이 잘 사용하지 않는 영역까지 활용하여 나만의 개성으로 살릴 수 있게 됩니다. 게다가 굳이 나 혼자 모든 것을 감당 하기보다 지인이나 동료와 함께 출연하여 작업을 이행해 나아가는 것도 방법입니다.
내가 준비한 모든 화면상 연출들은 기본적으로 인터넷을 활용하는 기술이기에 온라인 환경을 최대한 안정적으로 하기 위해 컴퓨터에 이더넷 케이블을 직접적으로 연결하는 것이 와이파이로 작업하는것 보다 나을 것이라 예상합니다. 물론 와이파이도 인터넷을 할 줄 있지만 무선이라는 편의성은 내가 준비한 프레젠테이션에 안정성을 제공하지는 않습니다. 모르는 이유로 인터넷이 끊기거나 화질이 저화되는 것을 방지하려면 반드시 유선 인터넷을 사용하는 것을 권장합니다.
실제 무대나 회사에서 이루어지는 공개 발표는 대상 및 관객과 눈을 마주치며 소통하는 것 입니다. 온라인 프레젠테이션도 마찬가지로, 무언가 강한 임팩트를 남기거나 강조를 하고 싶을땐 카메라 정면을 바라보며 말을 이어나가는 방법이 있습니다. 그나마 내 자세와 눈빛이 자연스럽게 연출 되려면, 카메라를 눈높이로 맞추는 방법 도 있습니다. 카메라가 너무 낮은곳에 있을 경우, 아랫턱이 더 강조되어 보이거나, 너무 높으면 정수리가 보이는 사태가 발생할 수 있으니 주의하세요.
보편적으로, 카메라 각도는 얼굴을 중앙에 자리잡고 목, 어깨 까지만 보여지면 충분합니다. 추가적인 확대 작업이 필요 없을만큼의 거리를 측정하여 카메라 위치를 선정하면 됩니다.
만약 서있는 상태로 발표를 진행하려면 자연스럽게 발표 화면에 맞춰 움직임을 준다거나, 앉아서 진행 할 경우 손 제스쳐를 활용하여 발표를 진행할 수 있습니다. 너무 편안한 자세로 고정되어 있거나 아무런 움직임 없이 서있는다면 시청자 입장에서는 진정성이 보이지 않을 수 있습니다.
온라인으로 진행되는 발표인 만큼 시청자들이 꾸준히 관심을 가지게 하도록 전달하고자 하는 정보에 감정과 집중력을 이끌어 가는것이 중요합니다. 준비 작업 도중 충분한 연구를 토대로 짤막한 상식을 전달하거나 하는 부가적인 요소는 언제나 긍정적입니다. 얼굴 표정 및 바디 랭귀지를 충분히 활용하여 상대방이 항상 집중하고 몰입이 방해되지 않는 선에서 원하고자 하는 주제를 소통하는 것은 말처럼 쉽지 않을 경우가 대다수입니다. 기본적으로 깔끔한 옷차림, 밝고 깨끗한 카메라 품질, 연습을 토대로 한 발표 자료라는 모습이 시청자들에게 잘 전달되도록 여러가지 요소를 복잡적으로 활용하는 방법을 연구 해보시기 바랍니다.
조사 자료에 의하면 미디어 매체를 접하는 시청자들은 소리의 요소 보다는 시각적 요소에 더욱 집착할 수 밖에 없다는 연구 자료를 공유했습니다. 간단한 문구와 사진, 동영상도 좋지만, 컴퓨터 프로그램으로 활용할 수 있는 미술적인 감각을 돋보이게 하는 모션 그래픽 요소들은 시청자들에게 흥미를 놓치지 않도록 도와주는 연출입니다.
이러한 추가 요소를 받들여주는 것은 발표 자료의 화면 전환 타이밍 및 직접 말로 소개하는 구간과 합이 잘 맞아야 합니다. 가장 어려울 수 밖에 없는 환경적인 요인은, 만약 시청자들의 마이크가 항상 켜져 있다면 발표 도중 방해를 받을 수 있다는 점 입니다. 이러한 방송 사고를 연상케 하는 환경을 방지하고자, 발표 전에 미리 마이크를 음소거 해달라는 요청과, 질문을 받는 구간은 따로 준비해 놓았다는 공지를 해야 내 발표 자료와 시청자들의 합을 맞출 수 있게 됩니다.
전통적으로 프레젠테이션 발표는 ‘슬라이드 쇼’ 형식으로 진행 되었지만, 이제는 연출의 중요성을 고려하는 차원에서 원하는 타이밍에 동영상이나 음악이 재생 되기도 하고, 시청자들이 직접 참여할 수 있는 고급 기술도 활용할 수 있습니다. 조금만 더 신경쓰면 그 누구나 대기업의 고품질 제품 발표회 처럼 연출할 수 있게 됩니다.
어려운 시기에 맞춰 이러한 복잡한 작업들을 손쉽게 해주는 XSplit Presenter를 활용하면 설명한 대부분의 요소들을 손쉽게 추가하고 연출할 수 있습니다.
새로 선보이는 XSplit Presenter는 다양한 기능들이 존재하며 이들을 활용하면 내가 원하고자 하는 간단한 프레젠테이션 부터 고급 연출까지 적용할 수 있는 편집 도구 입니다. AI를 활용한 카메라 배경화면 투명화를 적용하여 밋밋한 문구들만 적혀있는 화면보다는 내 모습이 직접 출연하는 진정성 있는 발표회를 준비할 수 있습니다. 준비되지 않은 요소들 역시 실시간으로 편집이 가능하기에, 준비된 화면에 추가 설명 및 화면 연출을 마치 방송국 엔지니어처럼 자유롭게 실행할 수 있습니다.
예를 들어 질의응답 시간에 내가 미처 준비하지 못한 자료에 대한 대화가 오갈경우, 바로 인터넷 브라우저를 화면에 띄운 뒤 해당 주제를 검색할 수도 있고 동시에 화면을 모든 시청자들과 공유할 수 있습니다. 프레젠테이션에 도움 자료를 제공할 다른 인물이 언제든지 카메라와 마이크로 연결되어 게스트를 초청하는 연출도 가능합니다.
마치 TV, 인터넷 방송처럼 자연스러운 화면 전환을 위한 특수 효과까지 마련되어 있어서 시청자들이 한편의 무대를 보는것 처럼 연출이 가능합니다. YouTube, LinkedIn, Facebook 등의 온라인 동영상 플랫폼으로도 연동하여 나만의 방송, 커머스, 토크쇼, 홈쇼핑을 진행 하는것도 충분히 가능한 편집 도구입니다.
여러 가지 프레젠테이션 작업에 필요한 요소 중 디자인, 방송 연출, 정보 전달 및 콘텐츠 제작 중 특별한 작업에만 치중되어 있지 않고 이 모든것을 XSplit Presenter 하나로 가능하게 됩니다. 이제 나만의 창의력을 더해서 완벽한 온라인 프레젠테이션을 공유해보세요.
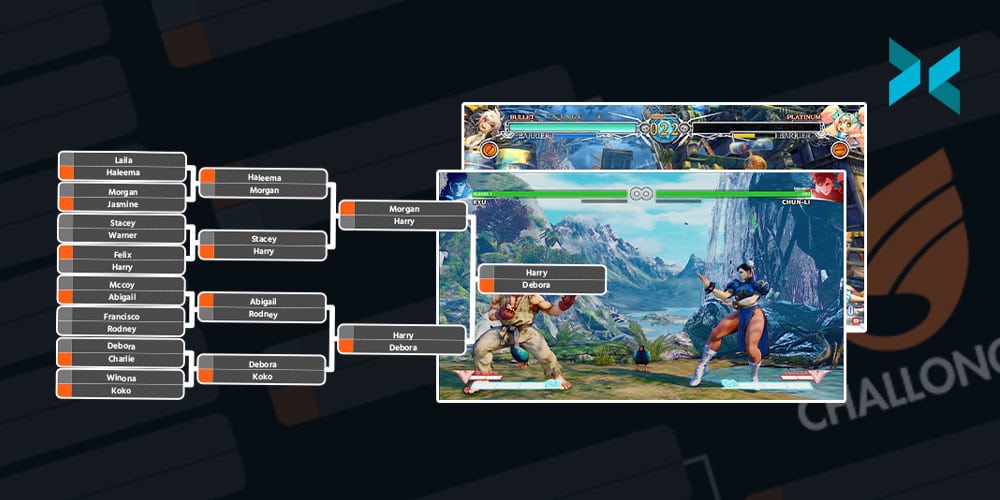
Team building is more important than ever with many working from home or in isolation. If you’ve ever been thinking about something else to do besides a Zoom happy hour we’re going to discuss how to put together an online tournament for team building. First things first, let’s discuss some tournament basics. There are basically four types of tournaments; Swiss, Round Robin, Free for All, and Elimination so let’s take a look at each!
Types of Tournaments
Swiss is generally reserved for tournaments like Chess or card games where opponents of similar skills are matched up against each other each round. This is great if you’re planning to do an office league or playing, for example, poker, you can control how long the tournament will take by setting the number of rounds, however, you may not get a clear winner unless you have a certain amount of rounds. Also, this system isn’t ideal if you don’t have many entrants in your tournament.
Round Robin has every player entered play against each other. This is a great format if you think you’ll have a handful of players. If you think you’ll have more than eight entrants, one of the other formats would work best as the number of rounds and length of the tournament can add up quite quickly.
Free for All is a format that can vary, but basically, it is focused on the number of points earned per round and is great for battle-royale style games like Apex Legends or Fortnite.
Finally, there’s elimination-style, which is the tournament format most are likely familiar with. This is a bracket-style tournament with a single elimination, which means one loss and you’re out. You could however do a double-elimination style which has an upper and a lower bracket. Once you’ve decided which kind of tournament you want to host, it’s time to use some tournament management software for your online team-building event.
For this article we’re going to be looking at Challonge and Discord, both are free and give you a bunch of tools to work with. For Challonge you just need to fill out a few fields like the tournament format, the game being played, and the date/time. Make sure you put in detailed rules and instructions on how to report scores to prevent issues popping up down the line. This is especially important if people are new to tournaments and will save you a lot of time later on if there is some sort of dispute. Seriously, setting your rules is an important step to keep everything fair and most importantly, fun!
With Challonge you can opt to create a signup page people can use to fill in their details, or enter in the participants manually later yourself. One important thing when creating a tournament signup page is to create a form to collect important registration information like in-game name, Discord number, and the participants’ email address.
Next, we recommend setting up a Discord server to facilitate setting up matches easily and for the people taking part to report their results. You’ll only need a general text chat for this and you can set up roles if you will have people helping you run the tournament. You can also set up voice channels for your contestants if they’re playing a team-based game and will need to communicate. This is also useful as you will be able to quickly dip into a team’s voice channel if you need to tell them something important during the online team-building tournament. Once you’ve configured everything simply create an invite to the server and send it out to the participants and they’ll be able to download the Discord client and get going!
Running the tournament itself is pretty straightforward! On tournament day make sure your participants have checked in, they can do this just by dropping a message in Discord. This is useful as both you and they will know they’re ready to go! Next, you need to generate the bracket, which can be easily created on Challonge like we discussed earlier and will easily map out each round until the final. Once you’ve done that it will generate a link that you can drop in the Discord general chat for everyone to see who they are up against! You participants can post screenshots of their match results inside Discord and you just need to sit back and process the results to advance the bracket.
Live Streaming
Playing with co-worders is fun and all, but it’s even better if everyone can watch along and root for their fellow co-workers! Live streaming a tournament is easy depending on the game. If you’re playing any games that have a lobby or spectator mode then all you need to do is host the match, use XSplit Broadcaster and stream the gameplay from your online team building event. You can even use a text source and color matte sources to add some players’ names and scores.
You can find out how to setup XSplit Broadcaster on our YouTube channel
If you have some co-workers willing to do some commentary, you can create a voice channel in Discord and let them spectate and commentate over the gameplay by using XSplit Broadcasters virtual camera as a video source in Discord. This is easily done by just setting your camera source in Discord to be XSplit Broadcaster when you’re setting up a video call to them.
Picking the Game
One subject we’ve danced around is what game you should pick for your tournament. Well, first you need to know what your co-workers like to play, although to be honest it can sometimes be hard to find fellow gamers in your company! If your co-workers don’t play too many games it’s good to pick team games or easier games to grasp quickly and get playing like Overwatch or Street Fighter. If you don’t think your co-workers have a gaming PC or console then it’s good to go for free to play games or mobile games like chess or PUBG. If you’re planning to stream the matches it’s best to pick a game that has a spectator mode built-in like DOTA 2 or Mobile Legends.
That’s about all you need to know to get started with hosting a tournament within your organization or friendship group! I do have one bonus tip, though! Be sure to structure your tournament in a way so you can finish the whole thing in about three to four hours. You can do this by limiting entrants or picking a format with a set number of rounds like Swiss. The main thing, however, is to have fun and you’ll not only make a fun time for the people in the online team-building tournament but you’ll put on a fun show for everyone watching on the live stream!
최근들어 방송 화질에 많은 관심이 쏟아지는 만큼, 미래를 대비하여 4K 화질로 송출 하는것이 과연 이득일지 궁금해하는 사람들이 많다. 지금까지만 해도 1080p 화질이면 충분할 줄 알았는데 매체와 주변 사람들이 주로 4K와 관련된 주제로 이야기를 나누는 것을 주로 목격하곤 한다. 생각해보면 4K 캡처 보드는 이미 시중에 판매되고 있을더러 4K를 지원하는 게임, 영상들이 홍보 목적으로도 많이 언급되고 있다. 유튜버들은 항상 최고급 화질을 추구하기에 이미 고품질로 콘텐츠를 제작하는 사람들은 다운샘플링된 8K, 6K 화질을 4K로 출력하는 카메라 기능을 활용하여 편집 영상을 만들어 내곤 한다. 편집 영상 뿐만 아니라 실시간 방송 송출에도 이와 같은 화질이 가능한지 알아보자.
일단 필자가 사용하는 장비는 다음과 같다. 기본적으로 두 개의 PC를 사용할 것이며 하나는 게이밍을 위한 스펙인 NVIDIA RTX 2080ti 그래픽 카드와 Intel i9-9900k CPU가 갖춰져있다. 보편적인 세팅은 아니지만 4K 호환이 되는 게임들 중에 그나마 60FPS를 유지할 수는 있는 정도이다. 캡처 및 송출을 담당하는 PC는 NVIDIA RTX 2060 그래픽 카드에 CPU는 Ryzen 7 1700. 일단 송출 자체는 4K로 진행되진 않아도 캡처 자체를 4K이지만 1080p로 다운샘플링을 적용할 수 있다. 이렇게 조금 시대가 지난 캡처용 PC로도 4K에 30FPS정도는 유지할 수 있다.
PC게임을 4K로 캡처 하는 주요 장치는 Elgato 4K 60Pro이다. GPU 인코딩을 사용하여 4K 호환 모니터와 방송 프로그램에 신호를 전송한다. 방송 프로그램에서 데스크탑 캡처를 한 뒤 4K 카메라 역시 적용할 예정. 카메라의 캡처는 Magewell USB 3.0 캡처보드에 연결했다. 이 캡처보드 역시 4K 30FPS를 지원한다. 이 모든것에 연결되는 HDMI 케이블은 반드시 2.0 케이블이어야만 안정적이거나 아예 적용되지 않을 수 있다. 이로인해 모든 영상 신호가 4K 품질의 신호인것을 확인했다.
이제 장비가 갖춰졌으니 이를 모두 실현할 수 있는 방송 프로그램을 선택해야 한다. 이번 테스트에 사용될 프로그램은 XSplit Broadcaster. 총 3가지 시나리오를 실험해볼 예정이다. 세 가지 시나리오 모두 임의 방송 플랫폼에 송출할 것이지만 동시에 로컬 녹화를 통해서 품질을 비교해볼 수 있다. 4K 방송 송출은 그래픽 카드의 힘을 빌린 NVIDIA 인코더, NVENC를 사용할 예정이다. 송출 설정에서 인코더를 변경하려면, 방송 (Broadcast)메뉴에서 톱니바퀴 아이콘을 클릭 후 나오는 설정창에 인코더 (Encoder)목록에서 선택할 수 있다. 최대 비트레이트는 6000kbps로 설정할 것이며 이를 변경려면 역시 같은 설정창에서 직접 비트레이트 값을 입력할 수 있다.
테스트 결과물은 각자의 시나리오 마다 링크를 게시해두었으니 아래의 링크를 참고할 수 있다. 유튜브 같은 동영상 플랫폼에 업로드 할 경우 기존 설정의 품질과는 멀어질 수 있으니 복잡하더라도 실제 결과물을 비교할 수 있도록 게시해두었다.
첫 번째 시나리오: XSplit Broadcaster의 해상도를 4K로 설정하고 프레임률은 60FPS로 맞췄다. 하지만 송출 설정에서 1080p 60FPS로 고정한 설정이다. 첫 번째 테스트 결과물 링크
두 번째 시나리오: XSplit Broadcaster의 해상도를 1080p, 프레임률은 60FPS로 맞췄다. 기존의 캡처를 4K로 받는다 해도 프로그램에서 자동적으로 다운샘플링을 적용한다. (송출 설정도 기본 Default 설정을 사용함.) 두 번째 테스트 결과물 링크
세 번째 시나리오: 4K를 출력하는 원본 소스들을 강제로 1080p로 맞춘 뒤 송출을 진행했다. 세 번째 테스트 결과물 링크
이렇게 4K를 활용한 송출법을 여러가지 예시로 진행해봤다. 솔직하게 말하자면 사람들의 눈과 품질을 느끼는 감정은 모두 제각각이기에 모두를 만족하게 하는 설정을 찾는것 자체가 어려운 일이다. 조금이라도 개선된 화질을 위해 수 많은 비용을 들여야 하는 것이 가성비와는 멀어질 수 있다. 아직은 한 개의 PC에서 4K 게임과 4K 방송을 송출하는 것 보다, 이렇게 4K 게임용 PC를 따로, 캡처용 PC를 따로 연결하여 연동하면 그나마 나은 결과물을 내세울 수 있다. XSplit Broadcaster에서는 다행히도 4K 해상도를 지원하기에 조건만 맞다면 고품질 송출이 불가능하지는 않다. 4K와 더불어 세로 형식의 해상도와 사용자 지정 해상도를 모두 지원하니, 복잡한 영상 제작 프로젝트가 있더라도 대부분 소화해낼 수 있는 점은 큰 장점으로 남는다.
With more people working from home than ever before, having a versatile monitor that can be used for a variety of purposes is a growing priority. You might wonder if two monitors will offer you a better workflow, or whether an ultrawide screen might be more beneficial? Let’s take a look at some of the top monitors for 2021 to help you work out which ones will best suit your needs.
Do you need two monitors?
If you have desk space, having dual screens can be a lifesaver for multitasking, whether you are editing videos, writing code, or joining a conference call. The separated screens even come in handy when playing games – keep your map or other info on one screen and the main game action on the other. And if you’re streaming, you can keep an eye on the chat while you play. One of the best monitors for dual screens is the Dell UltraSharp U2721DE with its daisy chain feature, which makes it effortless to link two monitors together.
Ultrawide, curved, or both?
Ultrawide monitors extend out to offer a screen ratio of 21:9 or even 32:9, significantly more than a standard 16:9 monitor. Because of this, many ultrawide monitors are curved, allowing the full screen to better fit into your field of vision. It also makes for a more immersive viewing experience, whether you are playing games or watching movies or live streams.
Ultrawide monitors can stretch up to 49 inches, like the Samsung C49RG9, giving you much more space to work with. The main advantage over a dual-screen set up is that you can split up your on-screen space according to your various tasks with no gap between them.
Monitors for different types of work
Naturally, choosing the best monitor for work will depend on what your work is. If you do a lot of video editing, you’ll likely prioritize resolution and an HDR color gamut, while those working in the gaming industry will be looking for a monitor with low input lag and a high refresh rate to offer a fast and focused experience.
Gaming-centric monitors may also support G-Sync (NVIDIA) or FreeSync/FreeSync 2 (AMD) display technologies to take your gaming and streaming to the next level, especially if you are using XSplit Broadcaster to deliver your content. If your job involves reviewing documents or working with spreadsheets, choosing a screen with a high resolution is sensible for readability.
The monitor you use will play an important part in maintaining a healthy posture. Check that your monitor can be adjusted to different heights, tilted and rotated, allowing you to position it in whichever way works best for you and your body.
Many monitors will also come with additional features that can help prevent strain on your eyes, such as the VX2457-MHD from ViewSonic with FreeSync Eye Care. It has a flicker-free feature as well as a blue light filter, both of which can help reduce headaches and fatigue.
Work hard, play harder
In this age of working from home, monitors are no longer solely for work, or even just for gaming. Many people will use their monitor and computer as their main entertainment center, both for browsing the internet and watching TV and movies. To truly enjoy the benefits of Ultra HD movies or the latest Netflix show streaming in crystal clear 4K, you’ll want a monitor with a resolution to match. If you fancy recreating the darkroom experience of the cinema, look for monitors with high contrast ratios to make the blacks deeper and the colors explode off the screen, such as the Samsung Odyssey G7.
Ultimately, coming up with a shortlist of potential new monitors may mean prioritizing some features over others. There are some great all-round monitors out there at budget prices. However, if you need a monitor designed for a specific purpose, such as content creation, gaming, or streaming, you may have to pay a little bit more, but it will be a worthwhile investment, especially when your content starts making money.