Best Monitors For Work, Play, and Content Creation in 2021

With more people working from home than ever before, having a versatile monitor that can be used for a variety of purposes is a growing priority. You might wonder if two monitors will offer you a better workflow, or whether an ultrawide screen might be more beneficial? Let’s take a look at some of the top monitors for 2021 to help you work out which ones will best suit your needs.

Do you need two monitors?

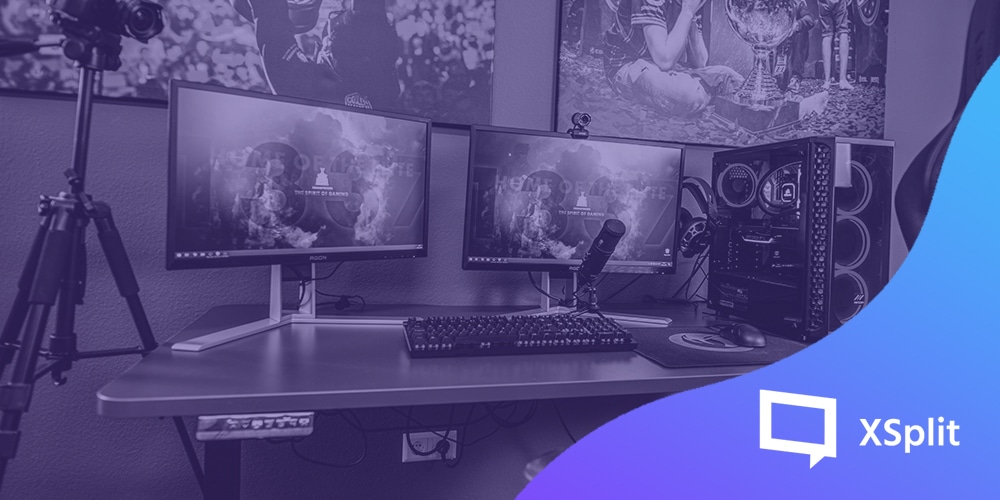
If you have desk space, having dual screens can be a lifesaver for multitasking, whether you are editing videos, writing code, or joining a conference call. The separated screens even come in handy when playing games – keep your map or other info on one screen and the main game action on the other. And if you’re streaming, you can keep an eye on the chat while you play. One of the best monitors for dual screens is the Dell UltraSharp U2721DE with its daisy chain feature, which makes it effortless to link two monitors together.

An ultrawide curved monitor on a desk with an iPad and an iPhone, could this be the Best Monitor For Work?

Ultrawide, curved, or both?

Ultrawide monitors extend out to offer a screen ratio of 21:9 or even 32:9, significantly more than a standard 16:9 monitor. Because of this, many ultrawide monitors are curved, allowing the full screen to better fit into your field of vision. It also makes for a more immersive viewing experience, whether you are playing games or watching movies or live streams.

Ultrawide monitors can stretch up to 49 inches, like the Samsung C49RG9, giving you much more space to work with. The main advantage over a dual-screen set up is that you can split up your on-screen space according to your various tasks with no gap between them.

Monitors for different types of work

Naturally, choosing the best monitor for work will depend on what your work is. If you do a lot of video editing, you’ll likely prioritize resolution and an HDR color gamut, while those working in the gaming industry will be looking for a monitor with low input lag and a high refresh rate to offer a fast and focused experience.

Gaming-centric monitors may also support G-Sync (NVIDIA) or FreeSync/FreeSync 2 (AMD) display technologies to take your gaming and streaming to the next level, especially if you are using XSplit Broadcaster to deliver your content. If your job involves reviewing documents or working with spreadsheets, choosing a screen with a high resolution is sensible for readability.

A widescreen Alienware monitor on a desk next to a PC and headphone setup. Could this be the Best Monitor For Work?
Photo by Alienware on Unsplash

What about ergonomic monitors?

The monitor you use will play an important part in maintaining a healthy posture. Check that your monitor can be adjusted to different heights, tilted and rotated, allowing you to position it in whichever way works best for you and your body.

Many monitors will also come with additional features that can help prevent strain on your eyes, such as the VX2457-MHD from ViewSonic with FreeSync Eye Care. It has a flicker-free feature as well as a blue light filter, both of which can help reduce headaches and fatigue.

Work hard, play harder

In this age of working from home, monitors are no longer solely for work, or even just for gaming. Many people will use their monitor and computer as their main entertainment center, both for browsing the internet and watching TV and movies. To truly enjoy the benefits of Ultra HD movies or the latest Netflix show streaming in crystal clear 4K, you’ll want a monitor with a resolution to match. If you fancy recreating the darkroom experience of the cinema, look for monitors with high contrast ratios to make the blacks deeper and the colors explode off the screen, such as the Samsung Odyssey G7.

Two monitors side by side on a desk, could two monitors be the best monitor for work?
Photo by Fotis Fotopoulos on Unsplash

Ultimately, coming up with a shortlist of potential new monitors may mean prioritizing some features over others. There are some great all-round monitors out there at budget prices. However, if you need a monitor designed for a specific purpose, such as content creation, gaming, or streaming, you may have to pay a little bit more, but it will be a worthwhile investment, especially when your content starts making money.

Free Streaming Tools for Twitch, YouTube, Facebook, and More!

Streaming can be an expensive hobby, but it doesn’t have to be! From using your mobile device as a webcam, overlays, ditching capture cards, and more free live streaming tools in one article! You can’t say we don’t spoil you!

Webcam

Instead of buying a webcam, just use the best camera you probably already have, your smartphone! Download XSplit VCam on your PC and XSplit Connect: Webcam on your phone. As long as your phone is connected via wifi you can connect it to XSplit VCam. In VCam you can remove or replace the background, then just add it as a source in XSplit Broadcaster which can also be used for free! Now you have a high-quality webcam and didn’t have to spend anything, you can even adjust the bitrate and switch between cameras in VCam.

Two iphones and a Google Pixel on a table, these could be used as webcams as a free streaming tool.
Photo by Arnel Hasanovic on Unsplash

Music

The streaming community has recently had to deal with the acronym combo of the RIAA and the DMCA, basically, copyright is something to take extra seriously when you stream, lest you have your channel banned or worse! So it’s good practice to get stream safe music and thankfully there’s now a good amount of free streaming tools here. On the one hand, you have streambeats, by the stream doctor, Harris Heller. This is available on all platforms and has a ton of free tracks and genres. Simply find the playlists on YouTube, Spotify or wherever you find music and just let the music play!

Alternatively, you can dip into the free music that’s provided on your platform. Both Facebook and YouTube offer extensive libraries of free music that you can use for your streams. I personally find it funny when I stumble on a YouTube video that uses the same tracks that I do, it’s always a weird moment. Like a flashback to the editing process and in that moment myself and the video creator are connected, a whole army of us out there trying to avoid a DMCA but keep the tunes good.

If you want to find more royalty-free music, check out this deeper dive we did over on our YouTube channel.

Ditch the Capture Cards

“Capture cards are great and pretty much required for doing a two PC streaming setup, right?” I’m here to answer that question with a solid “NOPE!”. As long as your PCs are both on the same network you can use a protocol known as NDI to send Full HD 60FPS videos from one PC to another with minimal latency. How’s that for a free streaming tool? Simply install XSplit Broadcaster on your “gaming” PC, capture your desktop or gameplay, set your resolution and frame rate, then send out NDI. On your streaming PC, all you need to do is add the NDI source and you’re ready to go! Now, this uses a lot of bandwidth so make sure you don’t have too much traffic going through your router. Also, I must stress, use a wired connection for all of this!

An image of a hand on a mouse in front of a gaming PC with a keyboard on a desk, no doubt looking for Free Streaming Tools!
Photo by Axville on Unsplash

Overlays and everything else

Are you looking to start streaming games and you want everything to be both free AND easy? Well, give Gamecaster a shot! They have free overlays and you can start streaming in a matter of clicks as well as control everything from inside your game! There’s a wide variety of different overlays included with Gamecaster to suit whatever game you’re playing as well as alerts, all easy to set up and integrated on whatever platform you’re streaming to!

Automation

Automation is probably the best way you can simplify your streaming life! Setting up a chatbot is free and easy, there are tons of great options like Moobot and Nightbot. Personally, I prefer Nightbot, it doesn’t have the flashy UI of Moobot but you get many more tools in the free version, which when we’re discussing free streaming tools is pretty important! You have your standard lists of banned words and commands to trigger messages in the chat, but you can also set up timers to post things like your socials or streaming schedule. You can also reward loyal viewers with giveaways as well!

Speaking of schedules, many social media accounts will let you schedule your posts in advance like Twitter or the Creator Studio for Facebook and Instagram. So, rather than doing an ad hoc tweet when you go live, schedule them in advance! Not only does this take some pressure off it also just saves you having to remember to do it in your go-live checklist!

An iPhone on a table with the Twitch app open, creating clips there is a great free streaming tool!
Photo by Caspar Camille Rubin on Unsplash

Clips and Highlights

The hardest part of the streaming grind is getting an audience. It’s quite hard to get people to find you and follow you, so in the beginning, you need to be a content factory. This means taking clips and highlights of your streams and posting them everywhere! But what’s one to do without editing software? There has some be a free streaming tool for that, right? Well if you’re streaming to Twitch they give you an editor for free! Aside from being able to download your clips, you can also use the highlight tool to cut segments from your stream and download it for upload to YouTube, Twitter, or wherever.

It’s a pretty basic cutting tool, but quite handy nonetheless, and remember to level up your thumbnails and clickbait game, something we discussed here! Last but not least, don’t forget the best creative resource, yourself! It doesn’t take any budget to entertain people, you just need to find what niche or creative outlet works best for you!

As you can see there are plenty of ways to get your streams up to the standard you’re after without spending a lot of money! As we always say, the content is the most important thing so be sure to focus on that first and add production values second!

Choosing a Streaming Platform That’s Right for You!

Making a decision about the best places to stream games can be overwhelming. There are a huge number of streaming platforms, with their own unique strengths and weaknesses. While the best way to find a platform that suits is to try them out, it helps if the choices can be narrowed down a bit first. So, let’s get narrowing.

A mobile phone on a desk displaying the Twitch app, is that the best place to stream games? Let's find out!
Photo by Caspar Camille Rubin on Unsplash

Going for community

While almost everyone on these sites is a gaming fan, different platforms can have a different feel to them. For example, major streaming site Twitch is probably the service most people associate with game streaming, but there are a lot of options.

The Twitch community has created a host of unique live streaming events, including Twitch Plays Pokémon – a crowdsourced Pokémon video game using commands sent by users through the channel’s chat room; and last year’s nostalgic Bob Ross marathon.

Amazon-owned Twitch is widely considered one of the best places to stream games, where you can watch your favorite gamers stream their games, and interact with them on a real-time basis. The site also contains a lot of different gaming communities that have regular viewers, making it a good place to build friendships with people from all over the world.

A gaming PC setup with a microphone and lighting ready to find out what the best place to stream games is.
Photo by Jack B on Unsplash

Follow the money?

In addition to Twitch, two other big streaming sites are YouTube Gaming and Facebook Gaming, which last year merged with Microsoft streaming site Mixer and sees these companies making an even bigger play to be one of the best places to stream games.

Facebook requires a high level of followers (10,000) before you can start monetizing. And that has to be as a single page, not a profile, which is a harder barrier to reach. Compare this with just 50 followers needed to start monetizing on Twitch.

With YouTube Gaming, you can live stream directly using the same software that you use for Twitch. However, while YouTube is often considered nearly as good as Twitch, its main focus is not purely on gaming. However, it is worth noting that a lot of the largest creators on YouTube do have a gaming element to their content. Do remember that monetizing on YouTube also requires a lot of followers.

That said, YouTube Gaming is both simple and easy to use, and it also provides excellent quality and features that make transcoding easier. One suggestion for those who want to monetize is to stream to Twitch, and then post highlights of your streams to YouTube or Facebook. It’s also worth noting that both of these sites are investing heavily in becoming the best places to stream games so these monetization goalposts are always going to be changing!

Someone stood at a PC with headphones on playing a game wondering what the best place to stream games is.
Photo by Fredrick Tendong on Unsplash

Even more options

Popular with Asian users is Bigo Live, which is offered in around 150 countries worldwide. The site uses Artificial Intelligence and Augmented Reality to help deliver its streaming services. Bigo supports live game streaming but also features a wide number of other options such as fan events.

Those who are more interested in shooting videos with their smartphones could consider Instagram Live. Instagram Live has become more and more popular but is currently only available via the smartphone app unless you happen to read this article from us that runs down how to stream from your PC to Instagram which could make it one of the best places to stream games if you have a large audience there or are looking to build one.

There is also Caffeine.tv, which offers decreased lag times and the ability to host your own sports broadcast, as well as a unique monetization pathway that involves asking viewers to purchase digital items for your stream. These innovations, however, as with many places, are becoming more common elsewhere as time goes on.

GosuGamers is another up-and-coming game streaming site. It is very popular with the esports scene and boasts a wide range of games. At the moment, monetization is mostly limited to winning tournaments and challenges though – so this site is worth considering if you are really into competitive esports.

If you’re hoping to stream your gaming, there are now a huge number of places to do this. But the great news is that XSplit Broadcaster works with all of them – making it easy to try out any number of sites to find the best game streaming platform for you!

Stream to Instagram from your PC: What you need to know!

Sometimes when you’re producing a live stream, people want you to stream to every platform at once. Twitter, Facebook, YouTube, Instagram, some random server. “No problem!” you say, “I’ll get a restreaming server with custom RTMP access!” and it’s all going great until you go to set up the Instagram stream. “How do I…where? How? Who?” Well, fear not because right here we’re going to discuss how you can stream to Instagram from your PC!

“Why can’t I just stream directly to Instagram like other services?” is a perfectly reasonable question you might ask yourself. Well, because they want you to use their phone app and unless you’re a celebrity, you probably don’t have access to the RTMP or stream key you’ll need to broadcast to your page. For this, we will have to go the third-party route! There are a number of services out there and some of them are paid, but the easiest I’ve found is with yellowduck.tv

A view of an iPhone being held up with someone looking to stream to instagram from the PC.

Setup

Before we go into how to set up Yellowduck to stream to Instagram from your PC, we’ll need to do some configuration with XSplit Broadcaster first. The first thing you’ll want to do is set your resolution to 720×1080 as this is the preferred resolution for Instagram, the recommended FPS is 30. You can do this by..

Clicking the Resolution Drop Down Menu in the Top Right > Resolution > Add Resolution > Custom Resolution > Input 720×1080.

In the same drop down menu > Frame Rate > 30FPS.

Now you’ll have to set up your sources to accommodate this resolution via cropping, which is easily done by holding the CTRL key after selecting the source in your main window. If you are still planning to produce 16:9 content you can try rotating it, but you may want to try laying it out with borders since most people are viewing Instagram in portrait mode.

Live social eating streams could happen from your PC as you stream to instagram from your PC.
Photo by Charles Deluvio on Unsplash

Yellowduck Setup

Now that you have your production configured let’s get the stream output setup! First, download the Yellowduck client and install it, it will ask you to log in to your Instagram account and then generate a stream key. Don’t do that just yet as we have a few bits to do in XSplit Broadcaster first then we will come back to it! We will need to create a custom RTMP output in XSplit Broadcaster and set the bitrate for the video and audio.

Click the Broadcast drop down menu > Set Up New Output > Find More Outputs > Search and Install Custom RTMP > Select Custom RTMP from the Setup New Output menu.

Here you can name the Output Instagram or whatever works for you! On codec select NVENC h.2624 if you have an NVIDIA graphics card that supports it, if not x264. For video, the Bitrate limit is currently 2000 and for audio, under Audio Encoding, set the bitrate to 128.

Now, in the Yellowduck client click generate stream key as you were prompted to do when logging in, which will now give you the RTMP URL and Stream Key which you’ll paste into their respective boxes in XSplit Broadcaster. After this, click “okay” and you’re ready to stream to Instagram from your PC!

Conclusions

Since this is quite a unique setup for streaming to a platform, you’ll likely need to have a dedicated encoder, like a separate instance of XSplit Broadcaster for broadcasting content to Instagram, so be sure to factor this into any costs you may have with your multi-stream production. Also, be sure to note that this is more of a workaround until Instagram decides to possibly make live streaming from a PC officially supported!

Over on our YouTube channel, we also show you how to record footage for Instagram!

4K Stream Capture: Does it Improve Stream Quality?

One of the big questions facing streaming today is, should you stream in 4K? It seems like just yesterday that 1080p Full HD was the best quality you needed, but 4K streaming and recorded content is becoming more and more present. 4K capture cards have been on the market for years now and software has allowed you to record or stream in 4K if you have a capable machine. Now, this had me curious, because I know for cameras they tend to downsample 8K and 6K sensors for a crisper 4K, so can this same principle be applied to streaming? Let’s look into 4K stream capture with some test footage for you to review!

A powerful gaming PC with two wife monitors on a desk ready to do some 4K Stream Capture
Photo by Caspar Camille Rubin on Unsplash

What are we using?

First, let’s give you a rundown of the setup I’m using. We’re going to be running a two PC setup, one is our gaming PC with an NVIDIA 2080ti and an Intel i9-9900k. Not the most state of the art, but it should at least give us a stable 4K 60FPS on some games. On the capture side, we’re using a Ryzen 7 1700 with an NVIDIA 2060 GPU. Now we’re not streaming in 4K, we’re going to just be capturing 4K, and downsampling that into 1080p. Having said that, even this dusty old PC can handle streaming at 4K 30FPS with the RTX GPU.

For capturing the gaming PC for this 4K stream capture we’re using an Elgato 4K 60Pro, 1st Gen. I’m outputting from my GPU to a 4K monitor and to capture software, then I’m just duplicating my desktop. I didn’t want to just show PC capture, I also wanted to add a 4K camera. So I coupled this with a Magewell USB 3.0 capture card, which is capable of capturing up to 4K 30FPS. I’m using my Sony A7III, which can do 30FPS 4K output, however, it has a slight crop. For all of this, we’re using the appropriate HDMI 2.0 and high-speed cables and I’ve verified that everything is sending a 4K signal for this 4K stream capture.

A PlayStation 5 controller being held in front of a TV. The new generation of consoles will no doubt up the 4k stream capture demand!
Photo by JESHOOTS.COM on Unsplash

Streaming Software

Now we have our setup, how are we going to test all of this? Well, for streaming software we’re going to be using XSplit Broadcaster and we’re going to test three scenarios. In each of these scenarios we’re going to stream to a random channel, but we’re going to enable a carbon copy of the recording to review and compare. We’re also going to be using the NVENC encoder for each of these 4k stream capture tests, which you can enable in streaming settings by clicking the Broadcast drop-down menu, click the gear icon next to your output and under Video Encoding select NVENC. I’ll also be setting the max quality to 6000 bitrate, this can be changed in the same menu right next to the NVENC dropdown labeled “Bitrate”.

I’ve included links to the videos from the tests I’ve run so you can review the results, as uploading them to YouTube will add compression and this can affect your perception.

Test One: I will be setting XSplit Broadcasters’ base resolution to 4K 60FPS, but the live streaming output to 1080p 60FPS. You can view the raw file for this test, here!

Test Two: XSplit Broadcaster is set to 1080p resolution 60FPS output, which means it’s automatically scaling the 4K source on its own. The raw file for this test is here!

Test Three: is setting the sources to 1080p and then streaming. The raw file for this test is, unsurprisingly, here!

A PC Livestreaming setup ready for 4K stream capture.
Photo by Jack B on Unsplash

So there we have it, and honestly, it can really be in the eye of the beholder as to whether things look better enough for it to be worth upgrading parts of or even your entire setup. Capturing games at 4K and streaming at 4K, as I say, is certainly the future and one thing you can rely on to be ready is XSplit Broadcaster! Supporting many resolutions and ready to stream at the bitrate you need, XSplit Broadcaster is the ultimate solution for future-proofing your high-quality streams! Be sure to let me know what you thought looked best in the comments below as it would be great to see what you think about 4K stream capture!

How to Write Video Tutorials for Online Learning: Top Three Methods!

Over on our YouTube page, we had previously discussed how to make your own tutorial videos, something linked below. Probably the most important element of any tutorial, however, is the script as it’s your plan for whatever it is you wish to teach. Today, I’m going to discuss three ways you can write tutorials, which kind of content works best for each method, and some additional script writing tips to find out how to write a video tutorial.

How to make Tutorial videos on your PC.

Freestyle

This is probably how a lot of people script their first videos, completely freestyle. This is where you come up with a topic and just talk about it for however long you feel and then put it together in the edit. The George Lucas approach to tutorials, if you’ll excuse the Star Wars reference. Now, if you’re going for more personality-based content or maybe more general advice, guru-type content then this is a great choice. It gives you the freedom to put out a lot of information in a way that makes sense to you and creates a more intimate feeling for the audience as if they were getting advice from a friend. There are, however, some drawbacks to using this method.

The main challenge will come when you get to the edit. If you missed something you needed to mention, you’ll need to re-record, which may be a challenge as getting the exact same lighting conditions, clothing, hairstyle, etc is always a pain. Although, you can be smart about it and make these cutaways more of an aside to the audience, which is an established aesthetic and can be useful when you’re learning how to write a video tutorial with this method.

Another challenge is if you aren’t naturally the best talker and fumble over your words it can lead to some pretty rough cuts of all your good takes together. Nobody wants to be the Tekken 3 of tutorials.

A person bullet pointing notes at a desk learning How To Write Video Tutorials
Photo by Thought Catalog on Unsplash

Bullet-Points

The next method of writing involves creating a brief outline of your talking points. Since this requires a bit more organization, I’d like to reiterate some things from the video at the top of the page about the importance of dividing your videos into segments. With this in mind, the workflow would become video topic, segment topic, bullet points of discussion topics

For example, say you are doing a video about how to make a sandwich. You have a segment on bread, and then each bullet point could be different types of bread and while recording you’d talk about how suitable that bread is for a sandwich.

This tends to be the preferred method for a lot of online content creators when learning how to write a video tutorial. You get to pass along accurate information while also maintaining some flexibility to inject some personality into the tutorial to keep your audience engaged. It can also be helpful by allowing you to rearrange your content in your post-production process if you don’t find the original order you recorded in makes as much sense as you’d hoped. One tip while using this method is to make sure your last take is your best take on the subject you’re discussing, as this will speed up the editing process.

Post-it notes and a sharpie next to a keyboard on a desk as someone learns how to write video tutorials
Photo by Kelly Sikkema on Unsplash

Fully Scripted

The final method of writing tutorials is to fully script out each word you’ll be saying in the tutorial. Much of the advice for bullet-pointed scripts in terms of organization also applies here, but you can take it a step further during the pre and post-production stages.

Since you know exactly what you’re going to be saying, this means it’ll be easier to subtitle and translate your video, thereby opening up your content to a larger audience. You will also be better able to plan out the b-roll segments for your tutorial, which in turn will give you a better idea of how long a video will take to make. So, if you’re rigid or strict on deadlines for releasing content, it’s good to know in advance if the video you are plotting is going to require an elaborate shot.

If your content needs to be accurate and detailed, like if you’re teaching someone how to put together a model or talking about history or philosophy, then it is really important to script all this out and plan in advance. This is also helpful if you won’t be the on-screen talent for your videos, just make sure you get feedback from your talent so that you can write things that fit their natural way of speaking.

A person sat at a desk, using their laptop with notes and a mug of tea on the desk as they learn how to write video tutorials
Photo by Daniel Thomas on Unsplash

I personally use the fully scripted model for most of my videos because I find it hard not having set endpoints for whatever I’m describing or explaining. I’m susceptible to going off on tangents that aren’t related to the main topic, which can just make the editing process even longer! There are, of course, drawbacks to this method.

It can be hard for people to follow a script, especially if you have to use exact phrases. In these cases try to separate things into shorter phrases. While this can make editing a bit more difficult, it can really help you or your talent not feel exhausted at the end of a recording session. Also, if you’re reading off a script, say you’re just doing a voiceover, or happen to use a teleprompter, then it can be easy to sound robotic or lacking energy. In this case, it’s important to be present and listening to yourself or the delivery of the talent and make adjustments where needed. And hey, speaking of teleprompters, adding your script into XSplit Broadcaster or Presenter’s projector mode can make a great make-shift teleprompter on your monitor.

Now, I recommend experimenting with each method and see what works best for you. You don’t need to stick to any given method, perhaps some videos work best with a full script, especially when working with collaborators and for other short and quick videos you just need a few bullet points! Whatever the case, you’ll hopefully find writing your next video tutorial script that bit easier!

Live Stream or Record Your Digital Art With This Guide Today!

One group that has been at the forefront of the work from home experience has been artists. Many artists have begun to look into other revenue streams like live-streaming the creation and process of making their art or providing educational content teaching others the skills they have learned. How you may ask, do you stream or record your art? Well, you may have noticed it in the title but today we’re going to discuss how to live stream or record digital art!

Someome at a table with an iPad and an Apple Pencil ready to stream digital art
Photo by Kelly Sikkema on Unsplash

Requirements

First up, you’ll need a computer, a desktop PC or laptop are both good for this, just make sure it hits certain requirements, something you can read about here. Briefly though, make sure you have at least an NVIDIA RTX GPU or a six-core CPU. Next, if you’re doing physical art, like painting on a canvas or sculpture, you’ll need some type of camera. You can grab a webcam, a Logitech C920 is a good start, or you can even use your cellphone! Download XSplit VCam, get the XSplit Connect: Webcam App, and make sure your phone and PC are on the same WIFI network and you can use your phone as a camera!

If you’re creating digital art on something like an iPad you’ll need to be able to capture your screen to stream digital art. There are two ways to do this, one is using an HDMI adapter (HDMI to Lightning or USB-C in the case of some iPads) to connect the device to a capture card. Or you can use software like airserver to airplay your screen over WIFI. Another important thing as well is to make sure you have a microphone if you’re going to be talking to people in the chat, but especially if you are going to be creating tutorials! A lot of webcams come with built-in microphones but we would recommend a standalone one, something we’ve discussed here.

A digital artist at their workstation creating and streaming the process in order to stream digital art.
Photo by Kelly Sikkema on Unsplash

Setup

We’re going to be using XSplit Broadcaster as our streaming software. First thing, I recommend setting your resolution to 1920×1080 and a frame rate of 30fps. You’ll want to add whichever source will be displaying your art, if this is from a capture card simply use the sources menu by clicking Add Source > Devices > Video and selecting the name of the capture card you have. If you’re going to be capturing the software you use to make digital art like Adobe Photoshop on the same PC you’re streaming from again go to the sources menu, Add Source > Screen Capture and you can either select Smart Capture to capture only the software you’re using or you can select monitor capture. This will, however, mean people can see anything on your desktop so we’d advise using Smart Capture.

Adding your camera is just as easy as adding the capture card, but this time select the name of your webcam and it will go in the main XSplit Broadcaster window where you can easily move and resize everything. Then you just need to go into your audio settings (Tools > Settings > Audio) and select your microphone. Leave your system sound set to default, this is basically capturing any sound that your PC makes, such as audio from a video or music playback.

An ipad pro next to a wacom tablet which could both stream digital art.
Photo by Cristofer Jeschke on Unsplash

Another useful source, especially if you’re teaching people about software that uses a lot of shortcuts is the keyboard input display. This can be found by going to the plugin store, which can be found by selecting Add Source > Find More Sources and in the search bar typing Input Visualizer. Click on it and select Install and now back in the sources menu selecting Add Source > General Widgets and selecting the Input Visualiser. You’ll need to enable permissions for this, a bar will however automatically appear at the top of XSplit Broadcaster prompting you to do so. After that, all your keyboard inputs will appear visualized on the screen!

If you’re doing timed lessons, you can easily set up a text source to be a countdown timer which you can do again by heading to the source menu Add Source > Text then right-clicking on text source that appears and click the box that says “Use Custom Script” then clicking “Edit Script”. From here select in the Template drop-down menu “General Purpose Clock” and setting it up as you like. Finally, I recommend setting up a starting soon scene just so you can be sure everything is ready for your session. This is easily done in the scene menu clicking the + button, adding some of your artwork, some text that says Starting Soon, and maybe another countdown timer from the custom scripts. Or however you want it to look, honestly!

A person draws on a wacom tablet connected to their laptop which could also stream digital art.
Photo by Josefa nDiaz on Unsplash

Streaming and Recording Digital Art

Now that you’re all set up let’s get a stream or recording going! If you’re streaming to any of the popular platforms like Twitch, Facebook, or YouTube this is pretty straightforward, just log in to your account when you first open up XSplit Broadcaster (or by going to the File dropdown menu and selecting Log in) and let the wizard set you up with all the recommended stream settings. If you’re streaming to a different platform you’ll use the custom RTMP plugin. This is found in the plugin store which you can find by going to Extensions > Add Extensions > Find More Extensions and installing it in the same manner we did with the Sources store above.

You’ll need to get the RTMP URL and the stream key from the service you’re using and put them in by heading to Broadcast > Set Up New Output and select Custom RTMP. You’ll also need to manually input your stream settings. Twitch offers some good guidelines for bitrates that are roughly applicable in most places and can be found here. The most important thing to take note of is your internet upload bandwidth, do a quick speed test to find out your upload speed. Basically, you want to set a bitrate that’s about 70% of your upload bandwidth or less.

A digital art station with a computer, Wacom tablet and digital DSLR camers ready to be set up and stream digital art.
Photo by Jeff Hopper on Unsplash

Now, you’re ready to stream digital art! You can record while you’re streaming at the same time easily by checking the “Automatically save a recording on local drive” box in your Custom RTMP output or particular service Properties box which can be found by clicking the gear icon next to its name in the broadcast menu. To set your recording settings click the Record drop-down menu and click the gear icon. You’ll want to set the quality to Ultra High and enable multi-track audio and select Force constant frame rate if you’re going to be editing your video after the fact. From here just click okay and then hit record when you’re ready to go! Finally, it’s not a bad idea to hit the little camera symbol up the top in order to take screenshots, something that’s useful for sharing your finished work or using it to create thumbnails.

That’s all it takes to get started streaming or recording your artwork! Of course, there’s still promoting your content and getting people to watch, but that’s a subject for another day!

Improve Stream Quality On Twitch (Or Anywhere!) Today With These Tips!

Building your streaming brand and increasing your viewing figures can be the result of many factors, but the one thing underpinning them all is your ability to deliver high-quality videos consistently. If you want to showcase superior streams to your viewers, check out these tips on how to improve stream quality and give your broadcast that extra edge.

The inside of a gaming PC which has been upgraded and has LED lights. The lights won't improve stream quality, but the RAM could.
Photo by Timothy Dykes on Unsplash

Connection – hardwired or Wi-Fi?

A hardwired connection is the cornerstone of a reliable stream. While convenient, Wi-Fi can be too unreliable for consistent video streaming. Streamers using Wi-Fi can lose signal strength and speed, which can result in pixelated streams, buffering and freezing issues – all of which are immediate turn-offs to your audience.

It might be an idea to invest in an ethernet connection directly from your PC to your router to improve stream quality. If this is not possible because of the room you are streaming from, consider buying a separate router. Alternatively, you could also use powerline adapters. These devices are relatively easy to install and utilize your home’s electric wiring to transmit the signal from your router to your PC.

The need for speed to improve stream quality

Another factor that comes hand-in-hand with connection is your upload speed. High-quality streaming at 1080p at 60fps requires upload speeds 7.5 to 11 Mbps. To reach these sorts of speeds with any level of consistency, you may need to shell out for your internet provider’s premium plan. This is likely to vary (both in terms of speed and cost) depending on where you live and which providers serve your area.

You may also wish to do a bit of forward planning as streamers push towards 4K streaming as the norm. In fact, YouTube already supports 4K and HDR. However, to stream at this quality at 60fps, you will need a super-fast upload speed somewhere between 24 Mbps and 61 Mbps.

A gaming PC setup with a microphone front and centre, a higher end PC could imrpove your stream quality.
Photo by ELLA DON on Unsplash

Which resolution and frame rate should you aim for?

While gamers want to play the latest games in crystal clear 4K resolution, streaming at this level is in its early days. YouTube supports 4K streaming but other popular platforms such as Twitch, at the time of writing, do not. As a broad rule of thumb, it pays to focus more on the frame rate than the pixel density when you’re looking to improve stream quality.

For example, the ideal streaming rate is full HD 1080p with a frame rate of 60 fps. This will present your viewers with a sharp, smooth broadcast, though your internet upload speed may not be able to cope with this. Lowering the resolution to 720p will help you maintain 60 fps. An alternative to this is to reduce the frame rate slightly, but no lower than 30 fps, which is where you will find issues and pixelation.

Which bitrate should you output at to improve stream quality?

If you are streaming footage in full HD 1080p resolution, most streaming services recommend that you set your bitrate around 3500 kbps to 4000 kbps. The higher the number, the better looking your stream will be.

For those who have very high internet upload speeds, you could push this to 5000 kbps to 6000 kbps for pixel-perfect streams. Those looking to adopt 4K streams will need to be reaching somewhere in the region of 8000 kbps. One thing to be wary of is that streaming services may frown upon higher bitrates or even cap it depending on your platform of choice.

The NVIDIA RTX 2080 graphics card, which can improve your stream quality with the NVENC encoder.
Photo by Nana Dua on Unsplash

Which codec offers the best encoding?

If you have an Nvidia graphics card, then you can stream using the NVENC H.264 encoder. Those who don’t will need to employ the standard .x264 codec. This may result in the loss of a frame or two as the CPU powers the stream, so it is worth investing in a good graphics card. Either of these are possible with XSplit Broadcaster which will automatically optimize your stream based on the system and connection speed you have!

The main difference between the two is how you set your encoding quality. Those using the NVENC codec should ensure that the Encoder Preset is switched to Max Quality. On the x264 codec, you will have a CPU Usage Preset, which ranges from ultrafast to very slow. What you use here will depend on your computer’s CPU, but if it can handle it, switch to fast or medium for a high-quality stream.

Following these tips should place you in a prime position to grow your viewing figures and start capitalizing. There are many other tweaks and settings that can be fine-tuned to further improve stream quality, such as the profile, keyframes and B-frames. Experiment and see which combination works best for your PC setup.

Livestream Your Own Podcasts and Talk Shows Easily!

While going live is easier than ever, learning how to livestream an online podcast can still be a bit difficult. Adding a guest, especially with video can be a bit tricky depending on the platform you’re trying to use. In this article, we’re going to discuss how to produce your own talk shows or podcasts, add some production values and make your life as a host and producer easier.

A podcast studio with a PC setup in the background to livestream a podcast.
Photo by Austin Distel on Unsplash

Setup

We’re going to be using XSplit Broadcaster to set all this up. For the host, they just need to set the microphone device and add their webcam to the main scene. This part is pretty easy in XSplit Broadcaster, for the audio head into the Tools drop down menu > settings > Audio and select the microphone you wish to use. For your webcam, in the Sources menu select Add Source > Devices > Video > and select the webcam you wish to use.

Adding a guest really depends on the software you’re planning to use. If you’re using something like Discord, Zoom or Hangouts you’ll need to use the screen capture feature in XSplit Broadcaster to get the video feed. This is found in the Sources menu again, Add Source > Screen Capture, and either Smart Selection or Window Capture and select the program. From here you can crop and move the source around. If you have multiple monitors, I recommend dedicating one monitor to place all your video calls and be sure to set them to full screen so you can get the highest resolution from the window capture.

The only outlier to this process is Skype. With Skype you can enable NDI output, which means you can pull the video feeds of your guests as an independent NDI source. This is easily done in Skype by going into the Settings > Calling > Advanced > Allow NDI Usage, then is XSplit Broadcaster go to the Source menu > Streams > NewTek NDI stream > select the caller you’re bringing in. Also, if you’re pulling all your system audio as your main output for the stream, be sure to mute the NDI source in XSplit Broadcaster or you’ll end up with doubled up audio, this is easily done by right-clicking on the video source and hitting the “mute” button.

One pro tip, if you have an additional laptop or PC to livestream your podcast, designate that as the call laptop. You can then capture the calls from the laptop via a capture card and use an audio mixer to adjust levels. This is a bit more expensive and you should only really do this if you’re planning to invest in your online talk show.

A person sits at a desk with headphones on, talking in to a microphone as they produce a livestreamed podcast.
Photo by ConvertKit on Unsplash

Production Elements

If you want to add some production elements, here’s where you’d call on a designer to make some graphic overlays to use, but if you don’t have access to such resources there are some tools within XSplit that can help!

First, if you need a background for your cameras or a bar for a lower third, you use the color matte source. This can be found in the XSplit Plugin Store which can be found in the Source menu by clicking “Find More Sources” and once installed it will be found in the General Widgets section of the Source menu. Adding a Text Source (again, in the sources menu) will let you add names and other info on top of a color matte source to make a lower third! You can then group these sources together and add source effects like animating in and out during the scene changes. Source effects can be found by right-clicking on a source and selecting the “Effects” tab. In these same settings, you can also add a border around your video feeds like your screen capture and webcam source.

Combine all this with presents and/or scene transitions so you can dynamically add in or out guests throughout the broadcast. One particularly useful element is having a countdown timer before the show starts. You can easily create one of these using the text source we used earlier and clicking enable custom scripts. You can use the clock script and either use the count or timer function to set up a timer.

Two people sit on the floor with micriphones on their coffee table as the livestream a podcast
Photo by Kate Oseen on Unsplash

Recording and Streaming

Streaming with XSplit Broadcaster is pretty straightforward. Login to your platform of choice and use the setup wizard to configure your stream settings. For recording, you want to record in the highest quality and highest audio bitrate possible which can be changed by clicking on the Record drop down menu and clicking the cog symbol next to the recording profile you’re using. Enabling multitrack audio will allow you to adjust the audio levels later in your editing software of choice.

Setting up these multiple recording profiles can also be very useful when you’re recording a talk show. Basically, you can setup multiple recordings from different scenes, so for example you could set up a scene per camera source, and then when you come to edit the talk show later for YouTube you can zoom in or crop your guests based on what’s going on. You can find out more about multiple recording profiles right here.

A latte sits on a table next to an iPhone which is listening to a livestreamed podcast.
Photo by Juja Han on Unsplash

Managing your show

One important final element for livestreaming a podcast or talk show is that your guests need to be able to see what’s going on! XSplit Broadcaster can act as a virtual camera which means you can display whatever the current live scene is as your camera output in programs like Skype or Zoom. This means that your guests can easily see when they’re live, when you’re on a break, or just what the focus of the stream is. It’s good to know you’re not on camera if you need to take a sip of your coffee!

Another important feature is split view mode. This mode will give you a preview scene that you can edit before pushing live. This is really helpful for cueing up your next segment or easily adding new elements smoothly before pushing them live. So, for example, did one of your guests just mention a new trend or video? You can find it and add it to your scene then push it live in a smooth and seamless way. This can be easily accessed in the top right corner drop down menu for the resolution > work space and selecting split mode.

As with most things practice makes perfect, so don’t be dissuaded if the first few shows don’t go off perfectly, we’re all at the mercy of the internet! Just stick with it and add production elements as time goes on, remember the content is what’s most important when you livestream your podcast or talk show!

Live Stream Music for Your Fans: What You Need To Know!

It’s a tough time across the world right now, and those with careers in the performing arts are particularly limited at home. Social media is a great tool, but let’s face it, it’s the live experience your fans really want. Musicians are increasingly tech-savvy these days, as album production, mixing and mastering is largely software-based. What you might not know, however, is how best to live stream music. Whether you’re looking to set up a live-streamed concert or simply produce content about the creative process for your YouTube channel, here’s what you’re going to need.

A person plays a keyboard connected to a laptop as they live stream music
Photo by Soundtrap on Unsplash

Minimum hardware requirements

In order to live stream music, you’re going to need everything you use in your home studio and a few key add-ons. As bands are likely to be contributing from separate rooms and, in some cases, separate countries, you’ll need to ensure that all members have the same basic set-up available to them before you can arrange this type of performance.

If you already use an audio interface to record, you’ll be familiar with the process. The Focusrite Scarlett 2i2 is ideal for solo artists and bands alike. It combines studio-quality sound and affordability, making it one of the most widely used audio interfaces around. If you have multiple instruments to mic up, you might need to hook up a mixer, but you can easily achieve a solid setup for a mic and guitar, two guitars, a drumkit, or another non-electric instrument. In terms of vocals, condenser (studio) mics are great if you have one, but a dynamic (live performance) mic will work in a pinch – and, of course, a pop shield is always a plus.

A bass guitar being played by a person who could live stream music
Photo by freestocks on Unsplash

Lights, camera, action

It might seem obvious, but a quality camera is almost as important as your audio set-up to live stream music. Your fans will be missing the gig scene almost as much as you are, so audio alone is not going to cut it. If you don’t have a top of the range webcam lying around, you can easily convert your phone into a high-quality webcam with XSplit Connect: Webcam. If you’re more of a shy performer, no problem. Live streaming your Ableton (or preferred Digital Audio Workspace) screen is going to give your fans something interesting to look at whilst they listen.

Back to the concert-goers. Though not essential, if you can access some, smart lighting rigs will add an extra touch of live performance authenticity. The Philips Wiz Connected Smart lights don’t need a hub and can be fully controlled via a phone app. There are some great tutorials available on YouTube, like this one by artist Aaron Rutten.

A person at a laptop playing a keyboard who will live stream this music
Photo by Soundtrap on Unsplash

Achieving optimal broadcast quality to live stream music

Hopefully, you’ll have the required set-up in place at this point. Essentially, this is still a live performance, so though it might not feel as important as playing Glastonbury, remember that this is your chance to provide a high-quality alternative for your audience. I would strongly suggest plenty of rehearsals using this set-up, as it’s not always as cohesive as you might imagine, particularly with multiple musicians.

Once you’re good to go, XSplit Broadcaster is a great choice for your live event. You can stream in 4k 60 FPS (Frames Per Second) from multiple sources simultaneously to provide your fans with an experience as close to the real thing as possible. You can even preview scenes prior to the live broadcast to ensure everything is in place. While the show is underway, you can also get feedback and virtual cheers from your audience via your social media platform of choice, as XSplit Broadcaster supports all web-based alerts and widgets.

We’re living in crazy times but it is possible to set up a live-streamed concert for your fans from the comfort of your own home. This could be the well-needed boost that gets you through to your next live event and who knows how many more lives you might help to brighten in the process.