Finding your Voice as a New Streamer

One of the hardest things to deal with when you start streaming is not having a chat to interact with. When you have zero viewers or even a few that aren’t chatting, it can be hard to keep up the motivation to be entertaining. It can be even harder to figure out how to be entertaining. We here at XSplit want to help you with your broadcasting career by offering some tips on how you can find your voice as a new streamer or a content creator!

Talk about the game

While this may seem obvious, this is really the cornerstone of broadcasting games. However, instead of just doing play by play, talk about various aspects or details about the game. If you’re playing a single-player game you can talk about where you think the storyline is going, who is your favorite character, or if it is a retro game, what you were doing when that game was released. If it is a multiplayer game, you talk about your strategies or get hype about impressive plays. While a bit risky, you can have some fun conversations using proximity chat or chatting with random players you end up in a party with.

Stream with your friends and/or family

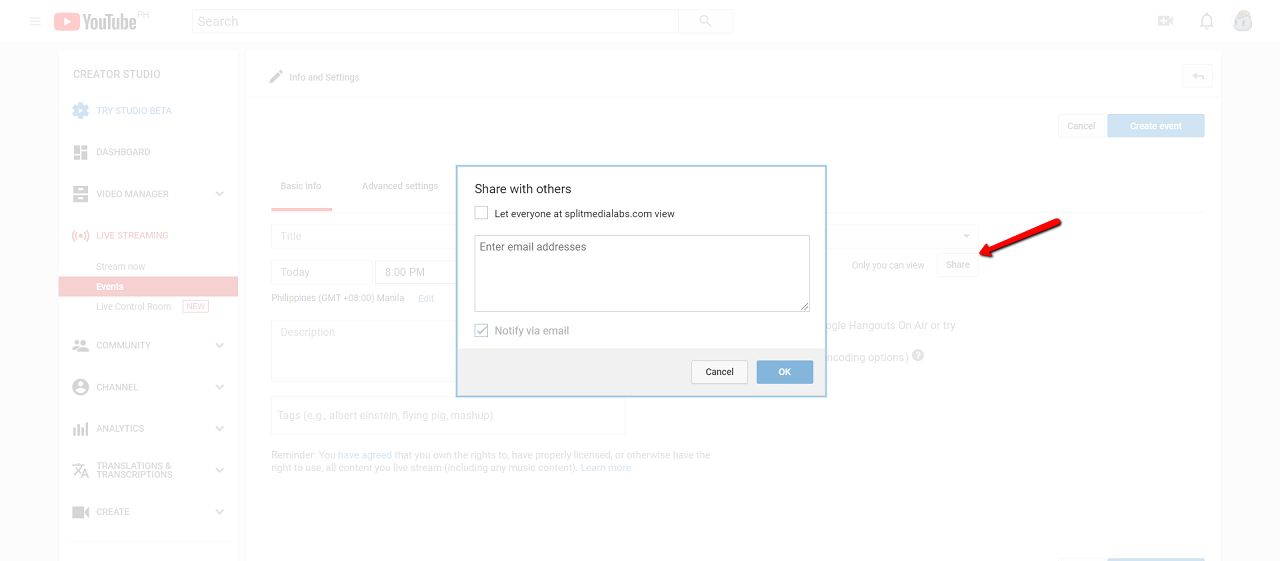
When you start streaming, it is recommended to share your stream on all your social media, including personal accounts. Your first viewers will likely be people you know, but at least you will have people in chat you are comfortable talking to and can give you topics to bounce off of in chat. The same goes for having a group call running with your friends. Dead air can be filled with conversations between your friends.

Write down topics for each stream

Streaming is great in the sense that you can talk about whatever you want, whenever you want, but sometimes it helps to have a few jumping-off points. If you stumble upon an interesting story or have something funny happen to you, write it down on your phone and talk about it during the stream. This is a great way to coax people to participate in the chat since everybody has an opinion on something.

Ask your viewers questions

Prioritizing chat interactivity is great for retaining viewers and making them feel part of a community. You can spur interaction by asking your chat questions like their favorite food or anime. One of the best tactics is to ask your viewers what game you should play or what decision you should make in the game. You may get crickets the first few times, but eventually, someone won’t be able to resist the urge to be a backseat gamer.

Check your analytics

Many of the streaming platforms, such as Twitch, give you detailed analytics showing if and when you had chat activity. If you see a period with a lot of chat activity, check your archive and try to determine what you were doing to drive that activity.

Shout out the lurkers

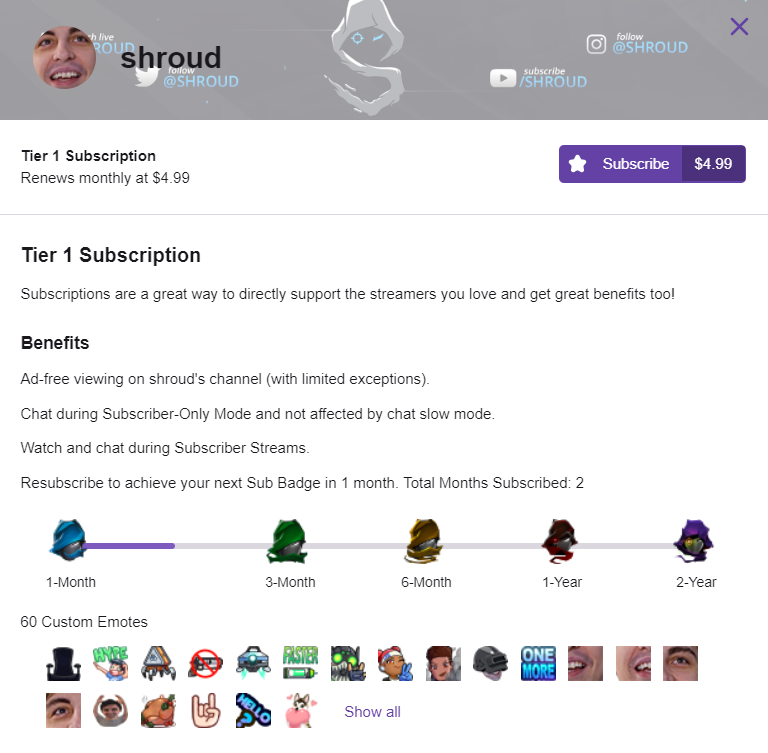
Your first viewers may not be the chatty type for a number of reasons. However, it is always good to make them feel welcome and part of your growing community by giving them shoutouts every so often. They may even decide to chat after a time!
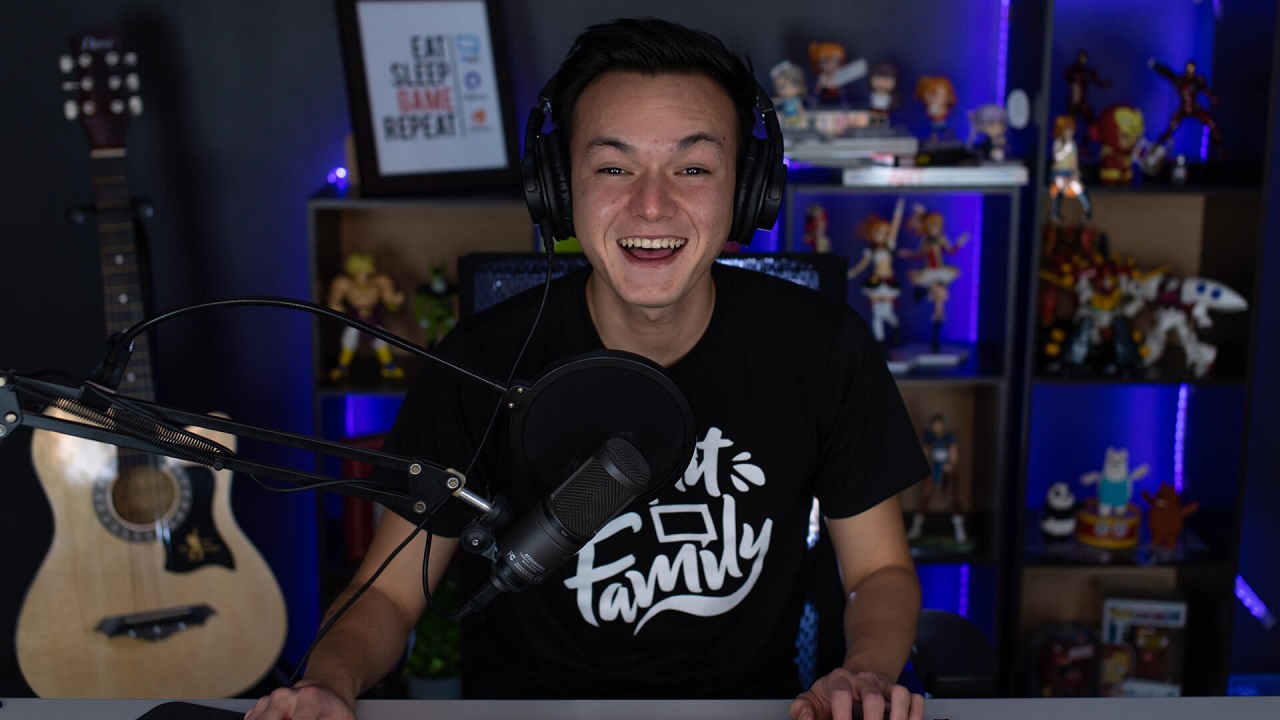
Be your best self

While being yourself is better than being someone you’re not, what you are aiming to do is to highlight and amplify the most entertaining aspects of your personality. While this is subjective and probably will take the longest time to figure out, usually your friends and family can tell you what they like about you.

If all else fails, play a scary game

People love watching other people get scared while playing video games. Many of the largest content creation empires have been built on this simple notion.

Developing your casting skills for gaming can be a long path, but always remember to try to have fun. If you’re starting your Twitch or YouTube channel as a hobby or new career, it’ll be hard to keep creating if you’re dreading starting a stream.

Do you have any tips on how to get comfortable with the microphone? Let us know in the comments below or on social media (XSplit on Twitter, Instagram, Facebook, and YouTube).

Live Streaming Platform Right for your Needs

If you have decided to live stream, you want to choose a live streaming platform that will give you the best exposure. Some streaming platforms are focused on a particular niche such as gaming, and it can be hard to gain an audience on such a site if you’re planning to do archery tutorials. In this article, we’ll take a look at a few different use cases for live streaming and recommend the best live streaming service.

Business Presentations

If you’re looking to do business presentations and your co-workers are spread around the world, then you’ll need to use a platform that can restrict access to the live stream. A YouTube Live Stream would be the best solution for this, as it offers a variety of controls for privacy.

You will need to use the classic YouTube studio and create a new live stream event. When you are setting up your live stream event, make your event private in the drop-down menu. Click on the share button and invite the people you wish to view your live stream presentation via email.

If your company uses Google to manage email accounts, YouTube live streaming has an additional feature to share the live streaming with everyone in your organization. This is useful for company-wide presentations with a lot of employees.

YouTube streaming

A Facebook live stream is another option if your company has a page. If you gain admin rights to a company page you can broadcast directly to that page using your own Facebook account. However you will not be able to restrict this page to only employees, so this is not recommended for internal presentations.

Vlogging

If you’re looking to connect with your fans or build a community, using a live video streaming site is one of the best ways to interact. Social media sites like Facebook, Twitter and Instagram have live streaming built into their mobile apps and websites, so you can start a stream anywhere you have an internet connection.

If you’re looking to monetize your vlogs, then Twitch and YouTube offer a variety of tools. One of the largest communities on Twitch is the just chatting section, which is meant for personal vlogs. Twitch live streams offer a variety of ways to monetize your content via the affiliates program. Once you’ve reached a certain level of viewership, you can become an affiliate which lets you receive paid subscriptions for your channel. These subscriptions can unlock badges and chat emoticons for your subscribers. The only problem with Twitch is that it’s discovery tools make it difficult for new broadcasters on the platform and you will have to rely on other social media to grow your audience.

A YouTube live stream is my recommendation for live vlogs. YouTube offers all the same monetization options as Twitch, but joining their partner program has a bit more strict requirements. YouTube has the added benefit of discoverability as long as you do proper SEO on your live stream titles and thumbnails. If you plan on doing VOD content in addition to your YouTube live stream, you’ll create a great funnel to amass subscribers to turn into followers on your other social media accounts.

Gaming

The undisputed king of gaming live streams is Twitch. Twitch’s browse features are entirely designed around finding streams of the games you are interested in watching. If you are able to join Twitch’s partner program you gain access to a variety of monetization tools from bits, subscriptions, subscriber-only streams and sponsorship opportunities via bounty boards. Twitch partners are also regularly promoted on the home page, which opens up more opportunities to expand your audience. Twitch partners also gain access to stream transcoding, so that viewers with poor internet connections can still watch your broadcast.

Twitch subscriptions

Competition is fierce on Twitch and some games, like Fortnite, have such an abundance of streamers that it can be hard to grow or even get viewers. Mixer is a great alternative for people who are just starting with live streaming. Mixer offers all the same features as Twitch, in addition to adding interactive elements with the spark system and using FTL broadcasting to allow mixer live streams to have little to no latency for the viewer.

YouTube and Facebook are also great sites for gaming live streams, with Facebook launching their new FB.GG portal and offering monetization options for gaming creators.

Commerce

A growing trend in live streaming is creating personal home shopping networks. You can amplify the sales of your goods by live-streaming the products being used. A good rule of thumb is to broadcast to the site where your social media following is strongest. If you are just starting out, Facebook and Instagram are the best platforms for live broadcasts. These sites will allow you to highlight your products in posts along with giving you boosting tools to promote your products to targeted audiences. You can also use direct messaging tools on these platforms to complete sales. You can also incorporate a chatbot or moderators to send viewers links to purchase the items you are showing.

Music or Live Performances

For music performances, you will need to be careful which platform you select if you will be performing copyrighted works. Sites like Twitch and YouTube will mute or restrict copyrighted material.

Streaming live performance

If you will be performing original material, then you can use any site, but it is recommended to use the site where you have the highest concentration of followers, such as Facebook or Twitter. One thing to note is that because many free platforms limit the bitrate for audio, you viewers may not receive the highest quality sound for your performance.

Educational

The best platform for educational content, like teaching guitar or vocal coaching, depends on if this will be paid or free lessons. If you will be doing free lessons, then using your social platform of choice works best. If you intend to charge for your classes, you will need a method of restricting access to your live broadcast. The best platform for this is YouTube live streaming, as it allows you to create private broadcasts where you can invite specific people.

Podcasts

If you have decided to take your podcasts online, YouTube is the best platform to show your live stream. YouTube will allow you to schedule your podcast so your viewers will know when to tune in and allows you privacy options if you wish for podcasts to be exclusive content for something like Patreon subscribers. You can also use YouTube to archive your podcasts or host highlights like the H3H3 podcast.

streaming podcasts

A good alternative is Twitch, which has a section dedicated to talk shows and podcasts. If you will be hosting a podcast with remote guests, Skype has some useful tools to improve the production of the show, which you can find out more about in this video.

How to broadcast to these platforms?

Broadcasting to these platforms is easy with XSplit Broadcaster! We’ve built custom plugins for all the popular streaming platforms. All you need to do is login to your account and our setup wizard will provide the best settings for your live stream! Focus on the content, not the setup.

We have an in-depth tutorial guide on our YouTube channel that can help you get started.

Picking Your First Facecam

One of the cornerstones of streaming is seeing the player’s reactions. Viewers love to see people react to jump scares, thrilling victories and even crushing defeats. Thankfully you don’t have to break the bank to get an amazing looking facecam. This article will cover the variety of options available for selecting a facecam for YouTube or Twitch depending on your budget.

Budget/Entry Level

If you have a very limited budget, you can actually turn your cell phone into a facecam. Purchase the NDI camera app for iOS or Android and make sure your phone is connected to the same router as your streaming PC. Start output from the NDI Camera app on your phone. In XSplit Broadcaster go to add source > streams > NewTek NDI streams and select the stream coming from your phone.

If you have a small budget for a facecam, then the Logitech C922 is a great option. The Logitech C922 is small enough to be placed on top of your computer monitor or mounted on a tripod. You can output 1080p 30fps video or 720p 60fps if you plan to pair your webcam with gameplay. XSplit Broadcaster has worked with Logitech to optimize the performance of Logitech cameras. Once you have added a Logitech camera to XSplit Broadcaster, right click on the camera to see the profiles to optimize the camera for frame rate or exposure.

Logitech HD Pro Webcam C920

If you wish to add blur effect to your Logitech camera to look like an expensive DSLR camera, you can use XSplit VCam! It is included with an XSplit premium license. Simply launch XSplit VCam and select the Logitech camera as the source. Set the blur settings to your liking and add XSplit VCam as the camera source in XSplit Broadcaster.

XSplit VCam Logitech Camera

The next big leap requires a capture card. The general requirements for a capture card are minimal input latency and the ability to capture at least 1080p60fps via HDMI. USB 3.0 and PCIE capture cards tend to fit these requirements.

Once you have selected a capture card, it is time to decide what type of cameras you want to use. If you’re looking for a depth of field effect, it is recommended to use a DSLR or Mirrorless camera along with a lens that has a minimum aperture of 3.5.

There are some important features you need to check for when purchasing a DSLR or Mirrorless camera. Most importantly you need to check if the camera has a clean HDMI output. This setting will prevent the settings on your camera from displaying on your capture card feed. It is also important to check if there is an AC adaptor available for your camera or you will need to constantly charge batteries. You will also need a tripod to mount your camera on.

Another option is buying a camcorder instead of a camera. Consumer camcorders can be budget friendly and give amazing image quality. Regardless of which type of camera you use, people will only be able to see your face clearly if you are well lit. While dedicated lights work best, if you don’t have the budget use whatever you can to light your face, like desk lamps or room lights.

Be sure to always remember when your facecam is on to avoid any embarrassing moments ending up on the internet. A tip is to always remember to have a webcam cover or lens cap around for whenever you are going offline.

Once you have selected your camera, you can use it with XSplit Broadcaster. This will allow you to create a screen recorder with your facecam. XSplit Broadcaster allows you to add a variety of sources like a capture card for console gameplay, or recording your PC gameplay with game source.

What kind of facecam will you use for your content? Let us know in the comments!

Setup Your Presentation Using XSplit Broadcaster

Thanks for your interest in using XSplit Broadcaster for your vlog or podcast!

Please follow the steps below to quickly setup your presentation

  1. Download the presentation zip file by clicking here.
  2. Unzip the bpres file and file folder to the same location
  3. Open XSplit Broadcaster
  4. In XSplit Broadcaster click on file, then load presentation. Load the “vloggingpresentation.BPres” file.

XSplit Broadcaster Load Presentation

XSplit Broadcaster vloggingpresentation BPres file

XSplit Presentation for Creating Gaming Content

Thanks for your interest in using XSplit Broadcaster for creating gaming content!

Please follow the steps below to quickly setup your presentation

  1. Download the presentation zip file by clicking here.
  2. Unzip the bpres file and file folder to the same location
  3. Open XSplit Broadcaster
  4. In XSplit Broadcaster click on file, then load presentation. Load the “gamingpresentation.BPres” file.

XSplit Broadcaster Load Presentation

Gamingpresentation BPres File

XSplit VCam Tips and Tricks

We’ve recently launched XSplit VCam, the most advanced webcam background removal tool available! While XSplit VCam is relatively easy to set up, this guide will offer some tips and tricks to get the most of the app.

Optimizing XSplit VCam

To get the best performance out of XSplit VCam, make sure you are position in a well-lit area.

XSplit VCam Lighting

Make sure you are centered in the frame of your camera, you can use XSplit VCam’s preview window to help with this.

framing in XSplit VCam

If you still aren’t seeing results you like, try re-calibrating XSplit VCam. Calibration can be accessed from the top left menu in XSplit VCam.

VCam calibration

If you are setting a low frame rate or high CPU usage, click on the gear icon in the filter section to open up additional filter settings. Here you can set the video quality for XSplit VCam and what device will be used for hardware acceleration. If you are seeing high CPU usage, make sure to set hardware acceleration for any available GPU.

VCam video settings

Background Blur with Background Replacement

Whenever you replace your background you can also apply blur to the replacement background.

how to blur background in VCam

Using Webpages for Background Replacement

When replacing the background, you can select a webpage for use. This can lead to some creative options, such as having a motion background.

replace webcam background

Using XSplit VCam with streaming software

You can use XSplit VCam as a video device in a variety of broadcasting software.

In XSplit Broadcaster you can add XSplit VCam as a video device.

Use VCam for streaming

In OBS, you can add XSplit VCam as a video capture device

Use VCam in OBS

Using XSplit VCam with Video Chat Software

You can also use XSplit VCam as a video source with a variety of communication software. You can use it in Discord, Skype, Facebook Messenger, Whatsapp, Google Hangouts, and many more!

XSplit Vcam in Video Chat Software

We hope you enjoy using XSplit VCam. If you have any interesting use cases, be sure to share them in the comments or reach out to us on social media. For those who have not tried the app still, you can download XSplit VCam for free.

How to Use Macros in XSplit Broadcaster

Macros are a powerful new feature in XSplit Broadcaster 3.3. Macros allow you to set up a variety of automated actions that can be triggered in a variety of ways. In the guide, we’ll show you some examples of how you can use Macros to expand your production capabilities.

Using Macros to Set Per Scene Transitions

If you’re a  fan of using various transitions and stingers between your scenes, you can streamline this process using macros. Select “On key press” as your event and select your hotkey. For the first action select “set scene transition”  and choose your transition or stinger for the scene. Next, add the “Switch to scene” transition and pick the scene you wish to apply the transition to. Now when you use the hotkey, you’ll switch to the scene with your preferred transition.

Automating a broadcast

If you’re looking to set up an automated broadcast, say running a greatest hits show with pre-recorded clips, macros make this easy to set up. This setup will require setting up various macros that will work in conjunction with each other. For the first macro, set “on scheduled time” as the event and select the time you wish for your stream to start. Next, add an action to “start/stop broadcast” and select the channel you will stream to, and select start. Now add an action to “switch to scene” that will play the first recorded clip in your broadcast.

Now you will create another macro where the event is “when a media source stops” and select the video file from the scene you select in the first macro. Add another action to switch to the scene for the next video in the broadcast. You can duplicate this macro over and over for however many files you have in your broadcast. For the ending of the broadcast, create a macro with “when a media source stops” as the event and select the scene with the last video in your broadcast. Add an action to stop your broadcast and congratulations you’ve set up your own automatic broadcast!

IRL Broadcasting

The production quality of IRL streams has grown by leaps and bounds over the last year. Many people have built custom backpacks that stream to RTMP servers that can be used in conjunction with streaming software to add their favorite streaming widgets. The problem that arises is that it can be hard to access a PC while streaming to shut off streaming software. Macros can be used to alleviate this pain point. First, create a macro with “when a stream source goes online/offline”  as the event. Next, select the scene and RTMP or RTSP source and select online. For the action, select start broadcast and choose the channel you will be streaming to.

Since IRL streaming depends on cellular signals, you will have temporary interruptions of service which will affect the stream feed. To prevent your stream from constantly going offline, setup up your going offline macro the same way as the online macro, but add a wait action before the stop broadcast action. The stream will only end if the stream is offline longer than the wait period. That’s all there is to automating IRL Broadcasting with macros

Toggling Sources Via Hotkey

One of the most requested features by users is the ability to toggle their sources via hotkey, but this is now possible with macros. Start by setting the event action to “on key press” and selecting your hotkey. For action pick “set source visibility”, select the source you wish to toggle, and set the action to toggle visibility. Make sure to enable the event listener and you’re ready to go.

Streamlining Advanced XSplit Presentations

Macros allow you to group a variety of actions in a production so that operations can be as easy as one click. For example, when running video ads, it is very easy to miss the cue of when to switch scenes at the end of the ad or muting microphone audio so that casters don’t speak over the video. To automate this add a macro and select “When a media source stops” and select the scene and your video ad. Then add an action “switch to scene” to choose the scene you’d like to switch to when the ad finishes. You can use this in conjunction with the per scene audio extension to ensure the microphone input from casters is muted.

This was just a small sample of the possibilities with Macros. We encourage experimentation and if you’ve created some cool macros make sure to share them with us on social media! Happy streaming #XSplitFamily!

Improving your XSplit Experience with NewTek NDI

The latest update to XSplit Broadcaster and XSplit Gamecaster 2.8 includes some important improvements for our NewTek NDI integration. We now support NDI inputs and outputs with audio and alpha channel for video. We’ve also made a variety of stability improvements for NDI sources.

What is NewTek NDI?

NDI is NewTek’s new protocol that can allow software and hardware to interact with each other via LAN.

Why would I use NewTek NDI?

While NewTek NDI may seem like a complex feature, it can actually be used in a variety of situations by both new and experienced broadcasters. This article will outline some use cases for NDI, both simple and complex.

Using NewTek NDI to create Multiplayer Gameplay Content

One of the common requests we’ve received in the past is an easy way to allow players to display multiplayer gaming sessions with their friends. As long as you have a router with open ethernet ports, this can be easily achieved with NewTek NDI!

Say you have a friend over to play Overwatch with, and you want to share both your screens on your stream. If you are connected to the same LAN network, have your friend open up XSplit Gamecaster and go to the settings tab. In the settings tab, check the “Enable NewTek NDI Output” box.

XSplit Gamecaster settings tab enabling NewTek NDI Output box
On another PC, launch XSplit Broadcaster and go to Sources > Other > NewTek NDI Stream and select the broadcast from your friend’s PC.

XSplit Broadcaster Sources NewTek NDI Stream
Now arrange your scene as you like and create multiplayer content with your friends!

multiplayer gameplay content using NewTek NDI

Using NewTek NDI to connect XSplit Broadcaster with NewBlueFX Titler Live Broadcast

One of the biggest benefits to NewTek NDI is that it allows XSplit Broadcaster users to gain access to a wide array of high end production software. One of great piece of software is NewBlueFX’s Titler Live Broadcast. Titler Live Broadcast allows you to easily create dynamic 3D graphics similar to what you see during sports broadcasts with scoreboards and lower thirds. Using NewTek NDI, you can easy bring your Titler Live Broadcast graphics and animations in your XSplit Broadcaster scene.

First, make sure to enable the NewTek NDI output in Titler Live Broadcast. Go to Settings -> Device and select the NDI option.

enabling NewTek NDI output in Titler Live Broadcast

Now add the NDI output from Titler Live Broadcast to XSplit Broadcaster. Go to Sources > Other > NewTek NDI stream and select the machine that is running Titler Live Broadcast.
adding NDI output from Titler Live Broadcast to XSplit Broadcaster

Once you have positioned Titler Live Broadcast’s NDI output on your scene, anything you display in Titler Live Broadcast will appear in XSplit Broadcaster.

Titler Live Broadcast in XSplit Broadcaster

And that’s how easy it is to use different applications with XSplit Broadcaster via NDI. There are countless of other ways you can use NewTek NDI with XSplit Broadcaster. Make sure to follow XSplit’s social media for more NewTek NDI guides and you can read more about NewTek NDI here.

Some notes on NewTek NDI in XSplit 2.8

A lot of upgrades and improvements have been added to this since. Check out this blog post for more details. 

We here at SplitmediaLabs are excited to bring you cutting edge broadcast technology such as NewTek’s NDI™. However as with all new technology, there’s always a few kinks to work out. The release of XSplit Broadcaster and XSplit Gamecaster 2.8 adds beta support for NewTek’s NDI™ protocol and we’re excited for user feedback, however we just want to be sure to let you know of a few known issues at the point.

  • No audio: The current implementation of NDI™ does not send audio. We found some issues with audio buffering and freezing, so we’ve removed it for the time being. Don’t worry, we’ll add audio back in as soon as stability has improved.
  • Video Freezes: There is a known issue where video and XSplit Broadcaster can freeze over time.
  • Sizing Issues: There is a known issue where XSplit Broadcaster can freeze while re-sizing an NDI™ source on the stage.

If you encounter any other issues than the aforementioned above, please contact us at XSplit.com/Support. Rest assured that we are working hard to improve the NDI™ functionality as well feel this will create a world of possibilities for broadcasters or all sizes and types.