Mirrorless Cameras for Beginners

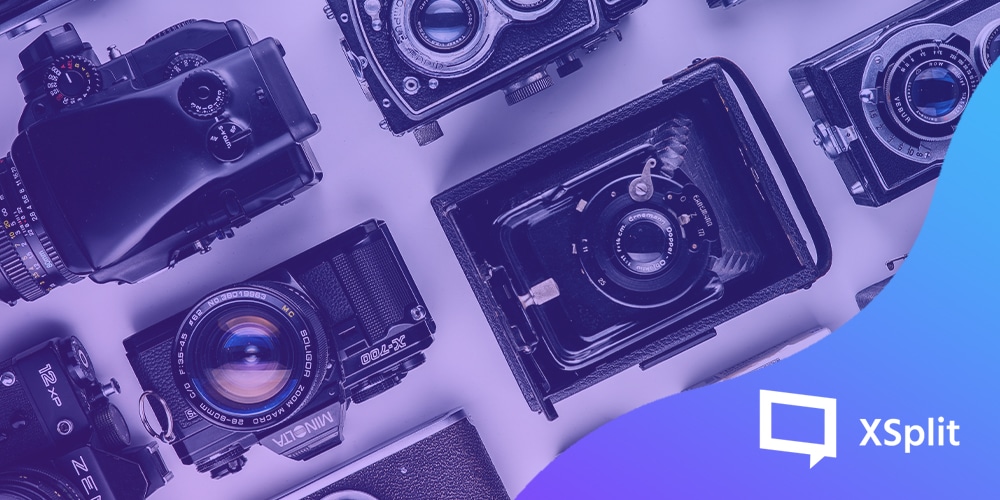
If you’re looking to produce interview content or just upgrade your camera for conference calls then you’ve probably been checking out a mirrorless camera. Now, if this is the first time you’ve thought about purchasing one of these cameras it can be very intimidating with terms like iso and aperture to learn and wondering if the camera will even work for the sort of thing you want to do! That’s why we’re here, to give you a beginner’s guide to mirrorless cameras.

Photo by ShareGrid on Unsplash

Using Cameras for Streaming or Recording

Before we dive into all the different mirrorless camera configurations and settings there’s something really important we need to figure out first; will it work with your content creation or productivity software? There are two things you want to check for on any mirrorless camera you’re looking to buy. First, check if it has a clean HDMI feed. This means that when you hook the camera up to a capture card it won’t have all the settings information you see on the preview screen going to the HDMI output. This clean feed usually has to be enabled in the settings.

Second, as an alternative to using a capture card, many modern mirrorless cameras have an app that will allow the cameras to functions as webcams via USB. This sort of information is normally found in the product description but if not either the manufacturer’s website or just giving it a Google will get you the answers you need!

A canon camera body.
Photo by Chris Yang on Unsplash

Camera Bodies

The first item you’ll need to purchase is a camera body and there are a variety of factors you need to take into consideration. First, it’s going to be the sensor size, of which there are three primary sizes for mirrorless cameras; micro four-thirds, APS-C and full-frame. Basically, what these sizes are referring to is the crop factor of the cameras. So, the full-frame is standard, APC-C is a 1.5x crop and micro four-thirds is a 2x crop. So, for example, if you had a 12mm lens on a full-frame the focal length would remain at 12mm, for APS-C that would become 18mm, and on a micro four-thirds lens that would be 24mm.

Generally speaking, the larger the sensor size the more expensive the camera body is going to be. So, if you’re on a budget you’ll likely get an APS-C or micro four-thirds as full-frame bodies are more expensive. This increase in price is also reflected in the lenses you can get for these camera bodies, which we will discuss later.

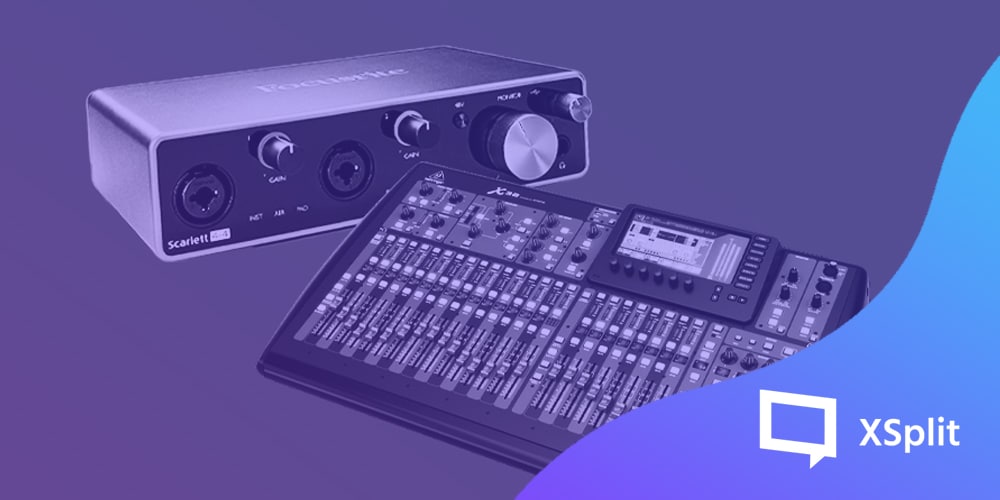
Also, most mirrorless cameras will have a micro-HDMI output, so you’ll need to buy a special HDMI lead, or an adaptor for your current HDMI leads if you plan to use the camera with a capture card. You’ll also need to buy a power supply for your camera as well or a lot of batteries to swap in and out if you plan to use it for an extended period of time. Some of these cameras will charge via USB, but a lot of the time you need to buy dummy batteries for third-party retailers if you wish to use them for something like streaming, or any use case that sees the camera on for hours at a time.

No matter which type of camera body you purchase, the image it outputs isn’t dependent on the amount of money you have spent on the camera, but by the effort you put into your lighting setup, this a topic we will cover here in the future so be sure to check back!

Camera lenses on a table top.
Photo by ShareGrid on Unsplash

Lenses

There are two main types of lenses, prime and zoom. Prime has a fixed focal length although you can usually play with that using zoom features on the camera body. Zoom lenses, as implied in the name, can change their focal lengths, but there are different kinds of focal lengths, large and small so let’s discuss what the differences are between them!

With a large focal length or longer length, you get a much narrower field of view and greater magnification. Basically, it brings things close and tight. With a smaller or shorter focal length, there’s a wide field of view and less magnification, so you can see the object and more of the background.

Lenses that are shorter than 24mm are known as wide-angle lenses. These are useful if you don’t have the space to put your camera far away, but wide-angle lenses can distort the facial features of a subject. Above 24mm, such as 35mm, 50mm, and 85mm, are popular focal lengths that don’t distort but generally complement facial features while giving you the space to keep the camera far enough away from the subject.

A mirrorless camera with a medium sized zoom lens.
Photo by Fabio Porta on Unsplash

The next important feature of a lens is the aperture or f-stop. On your camera, you’ll see a number, usually below the focal length which shows the f-stop, the lower this number is the more light can get into the lens. This is not only useful for low light settings but also to add depth of field to a shot and get that blurred background effect.

A lot of the time, however, the cost can be a big deciding factor in what lens you are going to get. Generally speaking, wide-angle, zoom and lenses with lower aperture ranges will be more expensive. The price gap between a lens that’s for example, 2.8 vs 1.4 is quite high!

Also, it’s good to keep in mind the size of your camera body and your lens together. See how much space you have for your camera, take into account your sensor size and then look at your budget to make sure you can afford both the body and the lens. You may want to make some sacrifices in the aperture or focal length depending on the kind of content you’re looking to make or use case you have.

An over the shoulder shot showing the settings screen of a camera.
Photo by JESHOOTS.COM on Unsplash

Camera Settings

The settings with a mirrorless camera can seem confusing at first so let’s go over some of the basics! First, let’s look at the settings that affect exposure, or how light or dark the image coming out of the camera looks.

First up, aperture, which controls the amount of light coming through the lens. Lower apertures let in light but as we mentioned before, also affect the depth of field or the level or blur between objects that are in and out of focus. A higher aperture means more objects are in focus, but you’ll require more light from other methods to achieve good exposure. Another method is the iso. Iso is basically a digital gain that amplifies the amount of light coming in which can also add noise to the image, making it look less crisp. The higher the iso, the brighter the image but also the more noise you introduce.

Next is shutter speed. Shutter speed is usually meant for photography but for video, there is a rule of thumb you can generally follow. For a pleasing motion blur, you want to set your shutter speed to 2x that of your frame rate. So, if you’re doing a 30fps video, for example, set your shutter speed to 1/60. The lower the shutter speed the more light you let in, so use this as the final adjustment for exposure if necessary.

Photo by Brent Ninaber on Unsplash

Next up, let’s have a look at setting your white balance, which is crucial to get accurate colors. While you can use auto-white balance, something most cameras offer, it’s recommended that you set your white balance using either the custom settings in the camera, using a white balance card held up next to the subject, or setting the kelvin manually if you know the kelvin settings for your lights.

Now cameras have a ton of other settings, like picture profiles and 10bit vs 8bit that will affect the look of the image and while we’re not covering all of them here I will say focus on getting your white balance and exposure right and you’re about 95% of the way to getting an amazing image out of your camera. Of course, if this is all too much there’s always full auto mode which usually gives pretty good results on modern cameras.

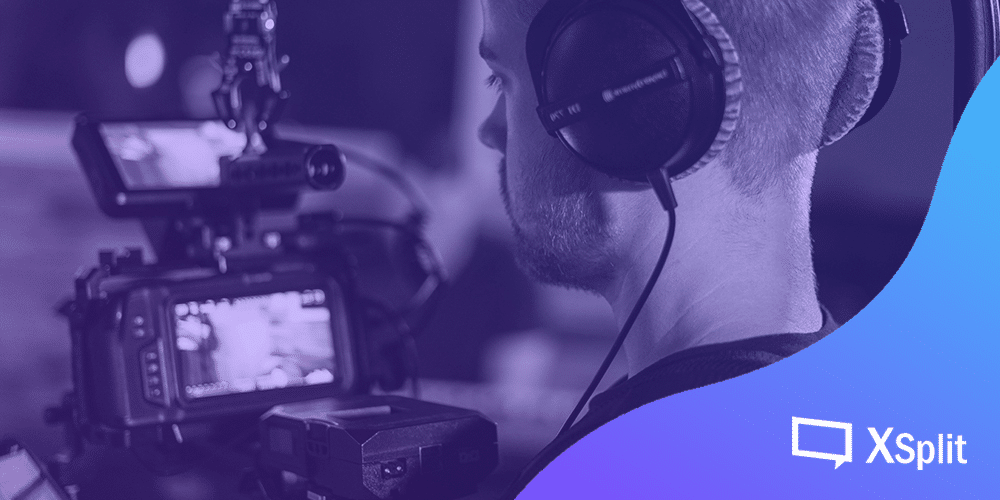
Capturing Your Camera

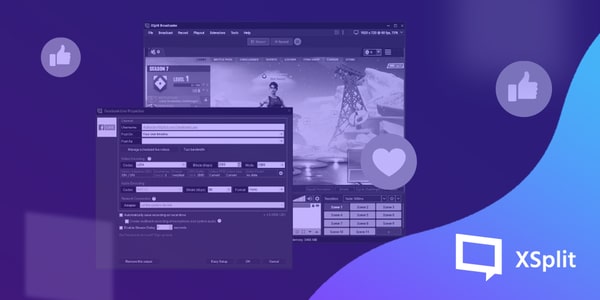
Now that you’ve gotten familiar with your camera’s settings and you have your exposure set it’s time to get it connected to your computer to create some content or look great in your next call! With software like XSplit Broadcaster and XSplit VCam you can capture your camera in a couple of different ways.

As we’ve mentioned, pretty much all modern mirrorless cameras have an HDMI output so connect this up to your capture card of choice and add it as a source in XSplit. This is easily done by going to Add Source > Devices > Video and selecting the capture card you have listed. From there it’s easy to move, adjust and resize your camera source. It’s pretty much the same with XSplit VCam, just select your capture card from the drop-down menu and you’re ready to use it in any software like your next Zoom call!

Two Sony mirrorless cameras next to eachother.
Photo by TheRegisti on Unsplash

If you’re using the software provided with your camera, this can vary by manufacturer. Some will convert your camera into a virtual camera which you can then add in the same manner we described above. Other solutions will just have the camera appear in it’s own window on your desktop that you will then have to screen capture that in software like XSplit Broadcaster, which can itself act as a virtual camera and still be added to software like VCam or Zoom. One thing to note with this method is that due to limitations on USB bandwidth, you likely won’t be able to get above a 720p 30fps video signal.

Conclusion

With that, you should have a basic grasp of how to pick the mirrorless camera and lens to suit your needs, how to configure the settings and capture that video, but honestly, the videography well is endless! Try not to get too trapped in settings and purchasing bigger and better cameras. Finding the right body and lens that fit what you want to do with it but also conform to your budget are probably some of the biggest factors in your decision making! Let us know if this has been helpful or if there is anything else you’d like us to cover like this in the future!

Ultimate Camera Buying Guide For Content Creators

Like many of you, I’ve made a new years resolution to become more knowledgeable about my equipment and what it is or isn’t capable of. One of the things I spent a lot of time on last year was learning how cameras worked; shutter speed, aperture, exposure, white balancing, you know, camera things. Since I was learning via YouTube university, one thing I noticed is that while there are tons of videos about the most cinematic camera, 4k video, or 120fps video, there wasn’t really a guide for cameras based on people’s budget and needs. So what I wanted to do was create the ultimate camera buying guide to save everyone else some time!

Photo by Nicholas Santoianni on Unsplash

Free, Cheap, Starter Cameras

One of the first categories to discuss is the budget-conscious options, and what could be more budget-conscious than free? First up in the free category let’s talk about the best camera you probably have that you also probably forget about all the time, your smartphone! Smartphone technology has come so far in the past few years that basically any flagship smartphone camera can rival a standalone camera or webcam.

Smartphone cameras are also great because they’re beginner-friendly, they basically work automatically, you don’t need to learn a bunch of settings to get a good quality image. They’re also easy to set up with your streaming and recording software.

You just need to install an app like XSplit Connect: Webcam on your phone, iOS or Android, then install XSplit VCam on your PC. Make sure your phone and PC are connected to the same WiFi router, launch both apps and then click connect on VCam.

Next in the cheap line up of our camera buying guide is the workhouse/gold standard, the Logitech C920. Now 2020 made these a bit scarce, therefore expensive, but things have evened out now and these are pretty much the best deal you can find for a webcam that can last you a long time. You can also combine this camera with VCam to add a blur effect to your background, making it look like the more expensive cameras we’ll be talking about next.

Photo by Kushagra Kevat on Unsplash

Camcorders

If you’re looking to take the dive into getting a full-fledged camera for your setup there are some things you’ll need to take into consideration and our camera buying guide is here to help! First and foremost is budget. If you don’t have a big budget you probably don’t want to get a camera that requires a capture card or one that will require you to buy an expensive lens. So in this scenario, point and shoots are your best bet. You may remember this type of camera from the early 2000s before our phones became our main cameras. These cameras are great as they have a fairly wide lens, they’re small and you can basically mount them anywhere you want.

Cameras like the Sony ZV-1 and Canon GX7 Mark 3 are popular in this range and they also have the added benefit of working as webcams over USB via software from their manufacturers. To use this software for streaming or recording, you’ll either need to screen capture the preview window or the camera can appear as a virtual camera device in your software. Now mileage may vary with frame rate and resolution, but this is a great starting point if you don’t have the additional budget for a capture card in our camera buying guide.

Photo by Julian B. Sölter on Unsplash

Getting Serious Cameras

Now the next level in our camera buying guide depends on your use case. So there are basically two different types of cameras here, each with its own application. There are interchangeable lens cameras like DSLRs and Mirrorless cameras. Then there are video camcorders, you know the ones you’ve probably seen your parents use to film all those embarrassing birthday parties.

If you’re going to have a more permanent setup for streaming or recording, then you probably want to go with a DSLR or Mirrorless camera. Now there are way too many types of these cameras to recommend just one, instead, we’ll need to look at some key features to look out for.

The first is a clean HDMI output, this is a setting in these cameras that removes the display info on the HDMI output. Now, most modern cameras have these, you just need to dig through the menus. Next is a full-sized HDMI output. Most cameras have a micro HDMI output, which is fine, but easy to damage, a full-sized output is definitely preferred however, this is usually only available in the more expensive cameras. Last you’ll need to take into account the sensor size and crop factor. So there are micro-four-thirds, APS-C and full-frame.

What does this mean? It means each has a crop factor of 2x for Micro-Four-Thirds, 1.5 for APS-C and none for full-frame. That means if you buy a 16mm lens for Micro-Four-Thirds, it actually is a 32mm lens. I don’t want to get too into the weeds with this camera buying guide, but basically the longer the focal length the further away you have to be from the camera, which can be an issue if you’re in a tight space. Wide-angle lenses tend to be a bit pricey and full-frame cameras cost more than APS-C or Micro-Four-Thirds so take that into account when picking your camera.

As for what camera looks the best, well that’s really all subjective. If you don’t want to do a bunch of tweaking, like applying LUTs, then generally Canon or Fuji have great looking color profiles. If you like to tweak, then it’s great to go with Sony or Panasonic.

Photo by Sam Moqadam on Unsplash

Serious Mode Cameras

Generally, you would be purchasing these if you’re planning to do some type of event coverage or multi-camera production like a news show, talk show, sporting event or church gathering. Now, unless you buy used you’re likely going to spend at least 1,000 USD on these, but there are some key features to look out for so you can get the camera that’s right for you instead of spending thousands of dollars on features you don’t need.

The most important feature for this type of camera is that it has an SDI output. SDI is a video cable like HDMI but is far more convenient to run over extended distances and a lot more resilient than HDMI cable as well. Some great entry-level cameras with SDI are the Canon XA-15 and the Sony PXW-X70.

If you’re covering events or running a live production and want to take it to the next level or need to use telephoto lenses for some reason, then it’s time to step into the realm of Cinema Cameras. These are basically like the interchangeable lens cameras from the earlier section, just with more features meant for video production. These also generally have SDI outputs and for the most part, allow you to use the same lenses that you use with your DSLR or Mirrorless cameras, however there are much more expensive cinema lenses you can use as well.

Some popular cameras in this range are Canon’s C cameras like the C200, or Sony’s FX series like the FX6 and Blackmagic’s line of cinema cameras, some of which are designed to be used for productions like the Studio Camera or Ursa.

Now I know that’s a lot of information to take in at once in our camera buying guide so let’s just summarize this! Free or Cheap camera? Use your phone or webcam. With good lighting and apps like XSplit Connect: Webcam or VCam, these will take you pretty far. When you have a bit of a budget Point and Shoot cameras are a great step up. Some of these you can use as webcams but you also might need to use a capture card to use them with your recording software. Making money off your content or looking to do professional work? Get an SDI camcorder or cinema camera depending on your needs.

Make Great Thumbnails Fast!

When people start making videos sometimes one of the last things they think about is making a thumbnail. After all those hours spent writing, filming and editing you just want to get it out into the world for people to see. However, the reality, especially on YouTube, is that no matter how good your videos are, most of the time you only have one key opportunity to get people to watch and that’s with the thumbnail!

Now while I know many of you out there are already using programs like Adobe Photoshop but this article is for those who either don’t have access to that program or want to find a Photoshop alternative that’s easier to use!

YouTube Face

Studies have shown that viewers are more likely to click on a video when there’s a face emoting on the screen..

Two people pulling expressive faces for a YouTube thumbnail.
Look at those two, emoting!

Now if you’re willing to do some “YouTube face”, it’s very easy to incorporate this into the thumbnail you’re making. Basically, when you’re making a thumbnail, you’re going to want a photo of yourself with the background removed. One way we’d recommend is to use XSplit VCam. Basically, setup VCam and replace your background with a color that you can use with a chroma key, like green, red or blue. Then, in XSplit Broadcaster, add VCam as your camera source and resize your camera so it fills the screen then just make some reaction faces that suit your video and take screenshots!

This is easily done by going to Add Source > Devices > Video > XSplit VCam.

The default Hotkey for taking a screenshot in XSplit Broadcaster is CTRL+Shift+C but you can change this by going to the Hotkey Settings, something you can read more about here. Remember, when making a thumbnail, the key to background removal no matter which method you use is to have a contrast with your background, so try not to have a shirt or top that matches your background!

Find An Interesting Background

The next element when making a thumbnail is going to be finding a background element. It’s good to find something that is going to catch the eye of someone scrolling through a variety of videos. It should also complement the reaction from the “YouTube face” photo we took earlier. One of the best ways to get your image is to drop your video into XSplit Broadcaster, scrub through the footage until you find something that might be interesting and take a screenshot of that. Then, drop that screenshot back into XSplit Broadcaster, drop in your “YouTube Face” screenshot, use chroma key, and arrange the thumbnail how you’d like it to look. Chroma Key settings for your image can be found by right-clicking on the image itself, Colour > In “Keying” select “Chroma Key” > Select the color you used as your image background.

One trick is to blur an object in your background. An easy way to do this is to duplicate your background, then just crop it out and apply the smoothing filter to this image layer. This can be done by right-clicking the image as we did before Effects > Filters > Smoothen.  Then just make sure the layer is on top of your background. There really is unlimited potential for creativity here, just try and create intrigue or make someone wonder what’s going on so that they click!

A Laptop displaying YouTube
Photo by Leon Bublitz on Unsplash

Adding Text

For a final touch when making a thumbnail, you may want to include some text to further reel in the audience. This is where you’ll need to exercise some restraint as less is definitely more here. Adding the text is simple, just add a text source in XSplit Broadcaster. This is done by clicking Add Source in the source menu and selecting Text. From here you can change the color, font, add stroke shadows and more! The main thing is to stick to text colors and fonts that are easily legible with your background. Colors like white and yellow tend to pop on backgrounds!

Short phrases or asking questions are generally best practice for the kind of text you should be putting on your thumbnail. Again, keep it short and simple. You want to put things on there that get the audience’s attention without looking too cluttered.

Putting It All Together

Now you have the basic elements you need for a thumbnail, you just need to arrange the elements to your liking in XSplit Broadcaster and hit the screenshot shortcut we mentioned above! Now, in your screenshots folder, which can be found by going to File > My Screenshots, you have your thumbnail ready to go! Add it to your YouTube upload and hope you are blessed by the algorithm gods!

Thumbnails are also useful for sharing your videos on social media, so use them for your tweets, TikToks, Stories, Fleets, wherever you can!

Connecting Your Microphone to Your PC: Mixer or Audio Interface?

Investing in the right microphone is one of the biggest, and sometimes most important, upgrades you can make to your content creation setup. However, you’ll need a proper mixer or audio interface to power many of these microphones, so let’s figure out which one is right for you! 

Mixers

Photo by Alexey Ruban on Unsplash

A mixer is a device that helps you adjust and route incoming and outgoing audio signals and can generally take in a variety of analog audio inputs such as XLR, RCA, ¼ inch and 3.5 mm. Some mixers also manage digital audio from USB, which means you can sometimes mix in your computer’s audio and send that back to your PC with the analog inputs audio as well.

Mixers are generally preferred when you need to constantly manage the audio levels from a variety of sources, such as your microphone, audio from your gaming PC, audio from a console and perhaps even audio from sources like musical devices or connected phones. Generally, if you’re going to be managing content for an event you’ll need an audio mixer for all potential inputs, not to mention the sound from a live audience. This also applies to a live stream from your home for whatever kind of content you are doing that requires multiple input sources.

One key feature you’ll need to look out for, regarding your microphone (something we have spoken about before!), is phantom power as if you have a condenser microphone this is a required feature, so finding a mixer that can provide that phantom power is vital!

Yamaha AG03 USB Mini Mixer

Another thing to consider is electrical noise. Unless a master electrician blessed your space you’re likely to have issues with grounding and electrical noise, especially when you plug in things like consoles and PCs into your mixer. You’ll hear the very distinctive hum of electrical noise, this is also common if you need to connect your mixer into the line in port on your PC. The best way to resolve this issue is to buy ground loop isolators. Basically, you plug your source into your ground loop isolator before plugging it into your mixer. The same then applies to your output if you’re not connecting via USB, plug it into the isolator then into the PC.

The final point is the size of the mixer you might need. Mixers can range from tiny to the size of an entire room and really you will need one that has as many ports as sources you intend to plug into it. For most content creation, a small compact mixer with USB functionality is ideal but for someone broadcasting music, live production or an event, you will need to start scaling up. Do, however, keep in mind the space you’re going to be putting this mixer in. The more inputs, the more of your desk it’s going to take up!

Audio Interfaces

Photo by Sven Brandsma on Unsplash

Audio interfaces are a type of mixer, but a type with a more specific purpose. Generally, interfaces have a limited amount of inputs and these inputs tend to be specifically meant for microphones such as an XLR or ¼ inch inputs. Usually, these run off USB power and normally require a type of special driver get installed on your computer. Interfaces that have more than one input tend to also come with mixing software with many of the same routing and adjustment options that larger mixers have as physical interfaces. This usually means that audio interfaces offer the highest quality audio recording capabilities with high sample rates and bit depth.

Sample rate, briefly, is basically the resolution at which your audio is captured, higher sample rates mean clean audio, as long as you have your levels adjusted correctly. Bit depth is the dynamic range of your audio recording. This is basically how loud your incoming signal can be. Now, most recording software will have an upper limit of 24 bits, but some interfaces are capable of 32 bits, which means you can recover audio that might have otherwise been missed.

Photo by JC Gellidon on Unsplash

Virtually all audio interfaces will include phantom power inputs, but it’s also helpful to check if additional features are included for microphones. These could include things like limiters, which help prevent incoming audio from clipping or have special features that can add filters or sound signatures to your microphone that can emulate more expensive microphone pre-amps. A lot of these features can also be included in the software that comes with the audio interface.

One of the biggest features audio interfaces have over a mixer is size! You can find yourself tiny one input interfaces that will fit perfectly on a desk!

So which do you choose?

As you might be figuring out, honestly it depends on what needs you have. Are you going to be running a live event, live stream or broadcasting some music? Do you have multiple sources you need to control the volume of on the fly? A mixer is the thing you’re looking for, just make sure you have the space for it! If you need high-quality audio coming in from a microphone that you can just set and forget, an audio interface is the best choice. Also, if you’re looking to have a portable setup for recording or streaming an audio interface is ideal!

Photo by Kevia Tan on Unsplash

Whichever device you end up using, they’re easy to use with XSplit products! If you’re connecting via USB or Line input, you can set these devices as your microphone input in XSplit Broadcaster and have everything go out to your stream or into your recorded content exactly the way you want it to sound. XSplit Broadcaster also has advanced audio features that may be missing depending on what kind of device you go for with various DSP effects available.

Creating Fighting Game Content with XSplit

The fighting game community or FGC has grown tremendously since the release of Street Fighter IV in 2009. With Riot’s fighting game on the horizon, the FGC is poised for another boom and exposure to a whole new community. This means there are many more opportunities for content creators to build their audience with FGC content. XSplit has all the tools you need to create unique FGC content

xsplit gamecaster main ui

Streaming Online Matches

By far the easiest way to start creating FGC content is by streaming your online matches, especially ranked mode to show how you stand against the best players in the world. If you want to stay focused on your matches and not have to worry about a complicated stream setup, then XSplit Gamecaster is the perfect choice. All you need to do is login with your streaming platform of choice and XSplit Gamecaster will help you configure your perfect stream with overlays and alerts already setup. XSplit Gamecaster also features an in-game overlay so you can chat, view stream event and control your stream all without leaving your game.

Creating Educational Content

Now if you aren’t planning to become the next Capcom Cup champion, there is still a huge need for people to teach fighting game fundamentals to all the newcomers. Concepts like footsies, bread and butter, and mind games are better shown through gameplay. XSplit Broadcaster offers a variety of tools to help break down difficult concepts.

The first tool is the gamepad visualizer. The gamepad visualizer allows you to display the inputs from the controller you’ve connected. It also has skins for different controller types like arcade sticks and hitbox.

gamepad visualizer

Another important part of educational content is review specific points of a match to teach things like option selects or explore match psychology and decision making. There’s two methods of doing this with XSplit Broadcaster. First you can record your matches using local recording and then play the recordings within XSplit. Combine this with XSplit Broadcaster’s whiteboard source and you can do really detailed analysis of footsies and other tactics.

whiteboard plugin

If you’re looking to take a quick look back at the end of a round or a short moment, then that’s where the replay sources comes in handy. Just add the replay source to a scene and set the length of the replay and a hotkey to trigger it. Now anytime something hype happens, you just have to hit the hotkey to display the replay. 

FGC Podcasts

Sometimes, the best way to start creating content is with friends and colleagues. One of the best parts of the FGC is the diverse set of voices from all over the world telling their stories. XSplit Broadcaster gives you powerful tools for creating high quality podcasts. For the best quality, it is recommended to use skype, which has integrated NDI technology. When you start a video call on Skype, if you have enabled NDI you can add each video independently as a source in XSplit. This will give you more flexibility in positioning each guest’s video feeds, especially if you plan to use lower thirds and other graphics.

XSplit NDI support

If you are using other VOIP software, then you can use XSplit’ screen capture to capture different video feeds from the call.

Finally, audio is extremely important for podcasts, especially if you will be uploading your archives to audio only platforms. XSplit Broadcaster’s audio mixer extension is extremely helpful in making sure you have proper audio levels. The audio mixer will give you accurate decibel levels for your system sound and microphone devices, so just make sure one level isn’t higher than the other and that your audio isn’t clipping or going over 0 db.

audio mixer

FGC Tournaments and Event Production

Possibly the most popular use of XSplit has been for live stream production of FGC tournaments and events like EVO, Final Round, and CEO by crews like Team Spooky and Ten/o productions. Now covering the ways to setup an FGC stream with XSplit can be its own separate blog post, so I just want to cover some important tools and features XSplit has for FGC events.

First and foremost is the projector mode! Projector mode let’s send video from your live scene or any other scene you have to each one of the outputs on your video card. So one projector output can be for the live audience, one output could be a raw gameplay feed for recording and one output for your commentary team. 

Next is enabling adaptive bitrate, especially if you will be broadcasting in a variety of venues where stable internet isn’t a guarantee. You can find the option for adaptive bitrate in the advanced encoding settings of your broadcast plugin.

video encoding setup

Finally make managing audio easier with the per scene audio extension. This extension will allow you to set audio levels for microphone and system sound for each scene. This will help avoid issues like when you are playing a video ad while your commentary team is still talking. 

per scene audio

Creating and Manage VOD Content for the FGC

Just because you’ve streamed doesn’t mean you are done creating content. You can repurpose your archives into highlights or VODs to upload to YouTube or on your social media.

As mentioned before, XSplit has a local recording function, but if your PC doesn’t have the juice to stream and record, then you can use the carbon copy function. You can enable carbon copies being generated via the broadcast settings plugin. Just note that these carbon copies will reflect any frame drops that happen during the broadcast.

automatically save recording

Next you can use the free Express Video Editor to make highlight reels of your clips. For even faster editing, cue points are automatically generated every time a scene is switched. You can also insert your own cue points with a hotkey.

XSplit Express Video Editor

Finally XSplit’s media manager will allow you to upload your videos directly to YouTube! Go to file > my recordings, right click on your video and upload to YouTube!

Upload directly to YouTube

That about wraps up all the tools you can use to create fighting game content with XSplit for Twitch, YouTube, Mixer, Instagram, wherever you want to build your digital empire! If you have any questions about this let us know in the comments!

Useful Tools and Tips for Esports Coaching

With esports on track to becoming the next big industry in entertainment, more resources will be required to ensure high-level gameplay and entertaining matches. One of these resources is coaches, which has grown within the industry over the years with a variety of websites offering coaching services. If you’re looking to coach the next Bugha, Shroud or just some casuals with limited time to practice, then make sure to give yourself a competitive edge with these important tools and tips. The tools outlined in this post are available in XSplit Broadcaster, which you can start using for free by signing up for an account.  

Using Skype and NDI to review student gameplay

One of the most important aspects of a coach is to be able to view your student’s practice and give feedback with minimal delay. This is best achieved by using Skype’s NDI functionality. Have your student install skype and set XSplit Broadcaster as the video input on Skype using the settings menu.

Skype settings audio and video
Skype settings advanced calling

Now go to the calling section, click on advanced and allow NDI usage.

XSplit Broadcaster add gameplay

In XSplit Broadcaster have your student add gameplay source to capture their PC gameplay or use a capture card for console gameplay.

Now when you start the skype call you will be receiving their gameplay feed with minimal delay. You can also capture this feed in XSplit by going to add source, streams, and adding the NDI stream from the Skype call. This will be useful for recording and giving feedback on their gameplay using the other tools mentioned in this blog post. 

Recording and Editing sessions

XSplit Broadcaster local recording properties

XSplit Broadcaster allows you to local record your coaching session so that your students can review your lessons. Some useful features for local recording are the ability to automatically split files based on time and pausing recordings, so you can avoid recording downtime during the session.

XSplit Broadcaster recording locally

After a few sessions with a student, you can use XSplit’s express video editor to pull together clips from various sessions to show their progress. The express video editor is 100% free and easy to use. You can also insert cue points into your recordings to make it easier to locate highlights.

XSplit Express Video Editor

Reviewing Replays with Whiteboard Source

One of the most common coaching practices is reviewing replays of matches and pausing to point out strategies. One powerful tool is XSplit’s whiteboard source. To enable the whiteboard source, go to add source > general widgets and click on whiteboard. Right-click on the whiteboard source to view the instructions. 

Whiteboard source

Using the drawing tools from the whiteboard source you can review your student’s matches and outline strategies or highlight mistakes they may have made in their gameplay. 

XSplit Broadcaster Public Test Release whiteboard source

Teaching advanced techniques with gamepad and keyboard visualizers

XSplit Broadcaster gamepad visualizer

One of the newest additions to XSplit Broadcaster is the gamepad visualizer. This lets you display the inputs of any gamepad device connected to your PC. To use the gamepad visualizer, go to add source, find more sources and install the gamepad visualizer. Once you have added the gamepad visualizer as a source, you can right-click on it to choose from a variety of skins, even arcade sticks!

This is a great tool for showing off advanced techniques like combos, option selects and more. With the power of recordings and the replay feature, you can also see where you may have missed an input or blocked in the wrong direction. If you’re teaching PC games, we also have an input visualizer for keyboard and mouse.

XSplit Broadcaster keyboard and mouse visualizer

Virtual Camera Support for One on One Sessions

If you will be doing a private one-on-one session with your students, you can use XSplit Broadcaster’s virtual camera with any of the popular VOIP services like Discord, Skype and Google hangouts. The virtual camera will display your live scene in XSplit. In your VOIP software, look for the menu where you select video input and select XSplit Broadcaster as your camera source. You can also watch this video for more details on how to set up the virtual camera.

Skype private one-on-one session

Using Projector Mode for In-Person Sessions

Multiple displays

If you will be coaching a live session with your students, then projector mode is a helpful tool instead of a group of people crowding around a monitor. Connect a screen to your PC’s GPU and set your desktop to extend.

XSplit Broadcaster projector mode

In XSplit, go to Playout, Projector, select your screen and the scene you wish to display. If you launch notepad in windows and screen capture it, you can also display an easy to edit lesson plan for the day!

Use a meeting scheduler for training sessions

If you are a freelance coach, it can become daunting to avoid scheduling conflicting sessions with a variety of students. I recommend using one of the various free scheduling websites that integrate with popular calendars like Gmail and Outlook. Hubspot offers this service for free, which you can check out here. One of the features to take advantage of is offering multiple slots for your students to choose for training sessions. 

Create a Lesson Plan for Sessions

You are as much a teacher as you are a coach for your pupils. It is good to create a lesson plan in advance for each section. This will be where you can outline your objectives for each training session, working to achieve the desired goal. There are a variety of resources online that will show you how to build a lesson plan online. It is recommended to give your lesson plan to students in advance so they can know and prepare for the session, so they can spend more time improving, rather than listening to the instructions for each session.

We hope these tools are useful for kickstarting your esports career! If you’re an experienced coach, let us know in the comments other useful techniques and tips you’ve learned!

Fixing Common Audio & Video Problems for New Streamers

So you’ve finally built your dream streaming setup. You’ve got your scenes set and you’re ready to kick off your streaming career. You hit the stream button and jump into your game. All of a sudden your game feels laggy. You look in chat and everyone is saying they can’t hear you and the video is stuttering. You feel a rush of disappointment as hours of preparation have seemingly been wasted.

No need to despair, we’re here to help you solve some of the most common live-streaming issues for upcoming Twitch, Mixer, Facebook Gaming, and YouTube Live superstars!

Audio Issues

The most common issue with audio is noisy audio or a buzz in your audio.

If the audio seems noisy, first be sure to check the levels you’ve set on your microphone device. The higher the gain level on your microphone, the higher its sensitivity to surrounding sounds like air conditioning noise or background noise. One great way to check your microphone levels is to use the audio mixer extension.

XSplit broadcaster audio mixer extension

Go to extensions, add extensions, and click on find more extensions. Install the audio mixer extension and check your audio levels without speaking into the mic. If the levels seem too high, reduce the gain on your microphone. You can also try to move your microphone away from noisy items like a mechanical keyboard or your PC’s fans. 

If you have a buzz in your audio this is likely due to the power source. This usually happens if you are using a mixer or capturing audio with your streaming PC via the line in port. The cheap and simple way to try to fix this is adding a group loop isolator between your audio source and your line input.

ground loop noise isolator

You can also use a power conditioner to remove electrical hum if the ground loop isolator does not work. These tend to be pricey and could add more bulk to your setup. I only recommend using these if you absolutely need to get rid of every bit of buzz in your audio. 

power conditioner

For recent windows updates, especially one of the major fall updates, be sure to check your default audio devices. Windows has a nasty habit of changing your default audio devices after an update. Make sure to check that you aren’t using the wrong microphone device.

windows default audio devices

Finally, for complete peace and mind, keep an extra pair of headphones around to use with XSplit’s audio preview. The audio preview is the final mix that your viewers will hear and is great for fine-tuning audio levels.

XSplit Broadcaster audio preview

Video Issues

Modern-day game streaming is all about keeping a minimum of 60fps for both the streamer and the viewer.

If you, the streamer, feel like your FPS is dropping too much or the game feels off; it is likely your CPU and GPU running out of resources. Many games will try to use the maximum amount of GPU resources possible, and it can leave your streaming software without anything to work with.

The best way to manage this is to limit the frame rate of your games. So if you are on a 60hz display, set the frame rate limit in-game to 60fps. If your game does not have this option, XSplit’s game source can limit the frame rate.

XSplit broadcaster game source

If you are on a high refresh rate monitor, try to limit the frame rate to a multiple of 60 like 120 or 180 or even 240hz. 

Now if you see that your CPU is constantly at 100% while streaming, then you’ve likely set your encoding settings too high. If you are using an encoding preset like slow, try increasing it to medium or fast. To maintain 60fps, decrease your resolution, go for 1280×720 instead of 1920×1080. And, if your PC isn’t a multi-core monster, see if you have a GPU with a hardware encoder like NVENC, Quicksync, or VCE. 

XSplit Broadcaster Twitch properties

Check the stream if it’s choppy due to dropped frames, you need to adjust and drop your bitrate. If you know that your internet connection is unstable, then enable adaptive bitrate. Adaptive bitrate will increase or decrease the bitrate depending on the available bandwidth. If you notice the bitrate tends to stay consistently lower than your target, consider lower your resolution so that visual quality can be maintained. 

XSplit Video Encoding Setup

Having issues with your webcam looking too grainy or having a low frame rate? Check your area if you have proper lighting, fixing the lighting can easily solve this issue.

Even a simple desk lamp or switching on a room light can be a huge improvement.

desk lamp for lighting


Once your lighting is settled, there are a couple of key settings for your webcam.

First, if your camera has a poor frame rate, reduce the exposure level. Go into your camera source settings and configure your video output. 

camera source settings

If your camera looks too grainy, reduce the gain. If your camera looks too dark, then get some more lighting!

camera gain settings

Once your camera settings are good, don’t enable automatic or you’ll lose all your settings!

When using a capture card and see a message that the device is not available, you can try these fixes:

XSplit Broadcaster Device Not Available

First, make sure another video app isn’t using the device like skype or discord. If that doesn’t work try refreshing the device in the source menu. Finally, using the IT classic, unplug it and plug it back in.

If you are having issues with switching to scenes with videos, make sure you’ve tried saving the video in memory.

keep source in memory option

Finally, one last tip people overlook. Make sure to enable archives for your Twitch streams. This way, you can make clips or highlights to share on social media. You can find this option in your channel settings.

Channel settings save broadcast

For Facebook and YouTube streamers, make sure your broadcasts are 4 hours or less to have a VOD automatically created. Hopefully, these tips are helpful to both novice and experienced streamers.

What are the common audio & video issues you’ve encountered in your streaming career and how have you solved them?

8 Ways to Make Money on Twitch

Twitch.tv is one of the best ways to make money if you’re looking to create live content revolving around gaming, art, traveling and much more! This article will cover a variety of ways on how to make money on Twitch.

Direct Donations

The easiest way to start making money on Twitch is to set up a donation button. All you need to do is set up a PayPal account. Once you have set up a PayPal account, you just need to create a PayPal link and add it to your Twitch profile. Your Twitch profile allows you to add panels that have links to external sites. One way to attract attention to your donation button to put an attention-grabbing graphic. 

Paypal donation button

Donation Alerts

Most streamers display an alert on their broadcast to incentivize Twitch donations. You will need to sign up for a service like Streamlabs or Stream Elements to be able to display these alerts. Once you have created an account, look for an alert box widget. Alert boxes allow for unlimited creativity as you can add various graphics, sounds, gifs, and memes to display your viewer’s donations. One recommendation is to not make the alerts too obnoxious as this will dissuade your viewers from donating. Please note that some of the services may charge a fee for processing the Twitch donation.

Donation alerts

There are a variety of ways to incentivize Twitch donations. You can set up donation goals to get a new piece of streaming equipment or allow song requests to be made via donations. These can all be displayed on your stream as a call to action for your viewers.

Donation goals

Twitch Partnership and Affiliates

The next best way to make money on Twitch is to become a partner or affiliate. Becoming a Twitch affiliate has lower requirements and allows you to receive Twitch bits and subscribers. Twitch bits are currency your viewers can buy from Twitch and donate to you through your chat or Twitch extensions. You can further incentivize Twitch bits by displaying them on your stream alerts. Subscriptions are monthly recurring payments your viewers can opt into. These can allow access to ad-free viewing, custom emotes and special icons in your chat. You can offer additional perks like access to a private discord chat. Subscriptions are the most consistent way to make money on Twitch and the product you promote the most through alerts on your stream and your channel page. Twitch also allows people who have an Amazon Prime account to subscribe to your channel at Twitch’s expense, but these subscriptions do not automatically renew so be sure to remind your audience to renew their free subscriptions. Other viewers can also gift subscriptions to your audience as well. Finally, there are multiple tiers of Twitch subscriptions, so viewers can give you more money per month.

Twitch subscriptions

If you can reach the level where you can become a partner on Twitch, then you receive access to additional revenue streams. The best way a partner can make money through Twitch is via ads. When you are a partner, you can make money off the Twitch Ads your viewers see. In your Twitch dashboard, you will see a button where you can trigger ads for your viewers to see. Make sure not to spam your viewers with too many ads, it’s better to chunk them into a few minutes per hour.

Twitch ad breaks

Twitch also offers bounty boards to their partners. These bounties are partnerships Twitch has entered with various companies that allow streamers to earn cash from promoting specific products. This can vary from running a trailer for a movie during your stream or playing a specific game.

Affiliate Sales

Another way to earn income from your Twitch stream is through affiliate sales. Affiliate sales are when someone buys an item from a link you post and you earn a percentage from that sale. Since Twitch is owned by Amazon, it has directly integrated its own Amazon Associates affiliate program into Twitch. Once you sign up for Amazon associates you can enable the Amazon Blacksmith extension, where you can list all the different items you use for your stream.

Twitch affiliates

Patreon

An additional method to make money on Twitch is through Patreon. Patreon works like a Twitch subscription, but you don’t need to meet any specific requirements to create a Patreon account. Patreon allows you to offer various tiers for a sponsorship that can offer different incentives such as access to a private Discord and special shoutouts on stream. You can also display new Patreon subscribers on your stream via web-based alerts as well.

Merch

After you’ve built up a community and viewer base, a great way to make money from your Twitch content is by selling merch. One of the most common merch items is T-shirts with your logo. There are a variety of sites that will allow you to sell merch such as Teespring or Design by Humans. Merch sales can also be displayed on your stream via web alerts and your channel page.

Sponsorship

Finally, one of the most lucrative ways you can make money on Twitch is by doing sponsored streams. After you have spent some time building a dedicated viewer base, you should start marketing yourself to sponsor. A sponsor can be anything, from a soft drink to a keyboard manufacturer. Some of the most lucrative sponsorships are companies that pay you to play their games on stream. You can earn large amounts of money per the number of viewers watching and how long you stream the game.

Archives/Highlights

Finally, it is good to archive or create highlights of your streams for YouTube. Once you gain enough viewers on YouTube, you can apply for their partner program to make money from ads. This will also allow you to claim ad revenue from other channels that may be uploading your content. It is a great form of passive income that can build up over time.


That wraps up the various ways you can make money from Twitch. While it may take a while to earn enough to quit your day job, never stop finding ways to promote and monetize your content. If you have any questions, don’t hesitate to ask them in the comment section below or through our social media channels.

How to be a Successful Twitch Streamer?

Now that you’ve set the perfect Twitch overlays, figured out your Twitch settings and have been streaming for a while, you’re probably wondering how to become a top Twitch streamer. It is no secret that for the highest-paid Twitch streamers, most of their income comes from having a large and dedicated community, which creates additional income opportunities. If you’ve been wondering how to become a successful Twitch streamer, then this article will cover the variety of ways you can make a living from it.

Growing an audience

The first and most important goal of your Twitch career is growing an audience or community. You need to find ways to get people to watch your streams. First, post your upcoming and live streams across all your social media channels. Your first viewers will likely be friends and family. In order to gain new viewers, you will need to figure out what audience would be best suited to your content. For example, if your favorite game to stream is Apex Legends, create clips of your best moments on stream and share them on the Apex Legends Reddit and community forums. Make sure your clip includes the link to your stream and your stream schedule.

Reddit thread stream clip

Speaking of stream schedules, it is very important to set and maintain a streaming schedule. It will be easier for people to find and return to your stream if they know exactly when it is live. Try to be conservative with your stream schedule in the beginning and be sure to update your community in case you have to cancel a stream.

Stream schedule

If you have the budget, you can also pay to boost your posts on a variety of social media sites. When you first start out, you may not have a large following outside your circle of friends, so you can use the advertising platforms of various social media sites to boost the visibility of your live stream to specific demographics. Just be sure to put your advertising dollars towards audiences that will have an interest in the content you produce.

Another way of gaining an audience is by tapping into the audience of another content creator. To do this you will need to network with other content creators. You can network in a variety of ways, such as being an active member of their community or by meeting fellow content creators at gaming events. Once the connection is made, you can ask them to host your channel or play with them on stream. Twitch has introduced a new feature known as squad streaming to help with co-promotion. Many of the top twitch streamers got the first boost in their career by being hosted by another popular Twitch streamer.

Twitch hosting

Finally, another way to gain viewers is by doing giveaways. You can set follower or viewer goals to giveaway prizes. The only issue with this method is that viewers usually will only stay around for the giveaway. If you plan to do a giveaway or other paid methods to gain traffic, make sure you are showcasing your most engaging content in order to get viewers to stick around.

Monetizing your Audience

Once you have built up a stable and hopefully growing viewership, you can start to monetize your viewership. If you’ve been wondering how much Twitch streamers make, then this section will cover the variety of ways they can make money from their content.

Twitch offers both Partner and Affiliate programs for those who wish to monetize their content. Becoming a Twitch partner allows you to run ads during your stream, which you earn revenue from based on the number of people who viewed the ad. Both Partner and Affiliates also gain access to subscriptions. Subscriptions are purchased by viewers to gain access to custom emotes and badges in your chat. There are three different subscription tiers and the revenue is split between you and Twitch. Additionally, partners may be given access to bounty boards where Twitch allows you to stream specific games and earn revenue from the number of viewers watching. Tier 1 subscriptions can also be purchased for free if the viewer has an Amazon Prime account and you will still receive at least \$2.50 per subscription.

Twitch subscriptions

Subscriptions and ad revenues generate most of the income for the top Twitch streamers. You want to se tup your stream in a way that incentivizes subscriptions. This can include setting up subscriber alerts, subscription goals and using Twitch extensions that remind viewers when to renew their free subscription. For viewers that aren’t subscribing, use a chatbot or ask on stream to disable adblockers while watching. The highest-paid Twitch streamers also get to ask for better revenue sharing agreements for subscriptions and ads.

stream tipping and donations

The next method that you can earn an income is through donations or tips from viewers. The most common method is putting a link to your PayPal account on your profile and ask viewers to tip you to support the stream. You can then use a variety of services to display these tips on your stream and further incentivize this by allowing viewers to add messages to the tips, trigger special alerts or allow viewer-submitted videos to be played. It is a good practice to read any messages your viewers send no matter the donation amount so that they will continue to support your stream. You never know who is viewing your stream, so you may end up on a viral video of someone donating a huge amount of money to your channel.

If you don’t qualify or don’t wish to join Twitch’s partner program, you can create a Patreon account. Patreon is similar to Twitch subscriptions in that your viewers can subscribe to you for a monthly amount to gain access to a variety of perks like access to a private Discord or shoutouts on your streams.

If you have a large enough community, you can begin to sell merch. The most common merch is T-shirts and these can be of your logo or anything that you feel your community will enjoy. Popular sites like Teespring and Spreadshirt are great places to start creating your own merchandise.

Eventually you’ll be able to procure sponsorships for your stream. Sponsorships can vary. A sponsor may pay to have their logo or advertisement on their stream. Some of the most lucrative sponsorships are those that pay you to play or promote a specific game. When you are looking for sponsorships, it is important to create a deck highlighting your stream viewership and content. Also, be careful on social media and on stream to not engage in any behavior that would drive away sponsors.

Building a Streaming Career is a Long Term Goal!

Being a top Twitch streamer won’t happen overnight. It can take months or years before you build a sizable enough audience to make streaming your full-time job. As long as you continue to network, promote your streams and maintain a consistent streaming schedule, you’ll eventually find success!

How to Live Stream on Facebook

Facebook allows you to live stream all kinds of content, from your daily life to creative artwork and even showing off your gaming skills. This article will show you how to go live on Facebook.

From your Mobile Device

The simplest way to start a Facebook live stream is in the palm of your hand. You can go live directly from the Facebook app on your mobile device. When inside the app, click on the camera icon and then click on the live option. You will need to set where your live stream will be posted along with adding a description to your live stream.

Facebook live stream description

You can also add fun effects like masks for your face and different backgrounds. Once everything is configured to your liking, click on the start live video button. Live streaming on Facebook requires a lot of bandwidth, so it is recommended to connect your phone to wifi for streaming or you will use a lot of your mobile data.

From your Web Browser

You can also live stream to Facebook directly from your web browser. Go to your Facebook profile and in the section where you can write a new post, you’ll see an option for live video.

Facebook live video

You will be prompted to allow Facebook to access your webcam and microphone. Once permission is given, you will be taken to a window where you can set the details for your live stream post. You can even share your desktop if you want to broadcast your gameplay or creative works. If you have a compatible browser like google chrome, you can install a plugin that will allow Facebook to broadcast your desktop.

Facebook screen sharing plugin

This is a great way to start sharing live stream content on Facebook, however, you will be limited in the amount of customization you’ll be able to add to your stream to make it stand out. If you plan to broadcast gameplay, the desktop capture won’t allow you to stream silky smooth 60 fps gameplay.

Creating professional or gaming streams on Facebook

If you’re looking to start a streaming career on Facebook Gaming or just want to create professional Facebook streams, then you will need to use broadcasting software like XSplit Broadcaster. The XSplit team has worked closely with the Facebook live stream team to create the easiest method of producing high-quality live streams. XSplit Broadcaster allows you to capture your games in Full HD and with the highest frame rates. You can also add a variety of production elements to your broadcast, such as web-based overlays, capture cards connected to professional cameras and switch between different scenes.

Live stream on Facebook

To set up a Facebook live stream with XSplit Broadcaster, click on the broadcast menu, set up a new output and click on Facebook Live.

Facebook Live channel plugin

A window will pop up that will prompt you to log in to your Facebook account.

Facebook Live properties

While logging in, you may be asked which pages you wish to give XSplit permission to broadcast to on Facebook.

Once you have authorized XSplit to broadcast to Facebook, you will need to set the details for your stream. First, select if you wish to stream to your Timeline or a specific Facebook page. Next, select the resolution and frame rate for your stream. A recommended starting point for gaming streams is 720p at 60fps. Next, select the encoder for your broadcast, most streams use x264, but this will require a beefy CPU for a full HD high frame rate broadcast. If you have an NVIDIA or AMD GPU installed, it is recommended to use their respective hardware encoders namely VCE and NVENC. Finally set the bitrate, it is recommended to keep the bitrate in the green section so that your viewers won’t encounter any buffering while watching your stream.

Once you click start streaming, an additional window will pop up where you will input the details for your Facebook live stream post. If you plan to be visible on Facebook Gaming, make sure to set the title of the game you will be playing. If you plan to stream to Facebook Live for more than 4 hours, make sure to enable “continuous live”. Click on start broadcast and you will now be live streaming to Facebook!

While you are streaming to Facebook, XSplit Broadcaster will give you status updates on the health of your stream at the top of the program. The most important section to monitor is “dropped frames”.

Dropped Frames

Dropped frames can occur for a variety of reasons, but the most common is that you set your bitrate too high and your internet doesn’t have enough upload bandwidth. To change your bitrate, click on the broadcast menu and right-click on your Facebook channel. This will open a window where you can adjust your bitrate.

Facebook Live stream settings

How do I let people know I am streaming on Facebook?

Now that you know how to live stream on Facebook, you are going to want to get people watching. First, make sure that your live stream post is set to public so it will appear on your timeline as well as others. If you are streaming to a Facebook page, it is recommended to share the live stream post on your personal timeline so that family, friends, and colleagues can tune in. Make sure to keep a consistent stream schedule so people will know when to drop by your page or profile. If you will be streaming games, make sure to set which game you will be playing so that people can easily find you when searching for whichever games they wish to watch. Finally, be sure to promote your Facebook live stream on all your social media channels.