Top Tools for your Remote Staff

Some of us are slowly, perhaps begrudgingly, coming back from WFH. The remote work industry, however, has been growing for years and will continue to grow. In this age, if you’re a business owner, you may have to look towards being WFH first and therefore you need to offer the proper tools for your remote staff.

Webcams

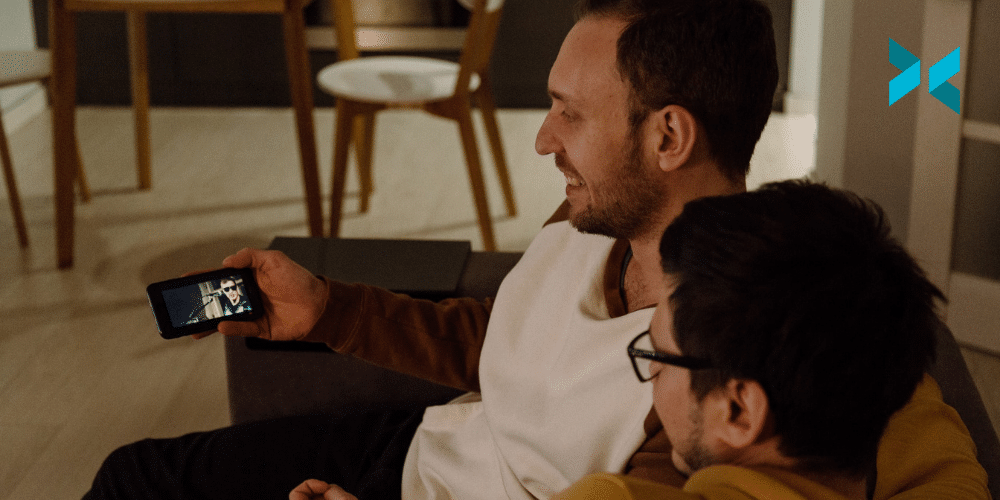
It’s really easy for your staff to feel isolated in a remote work environment, so it’s good for team building and overall morale for people to see the face behind the Slack messages and ClickUp tasks.

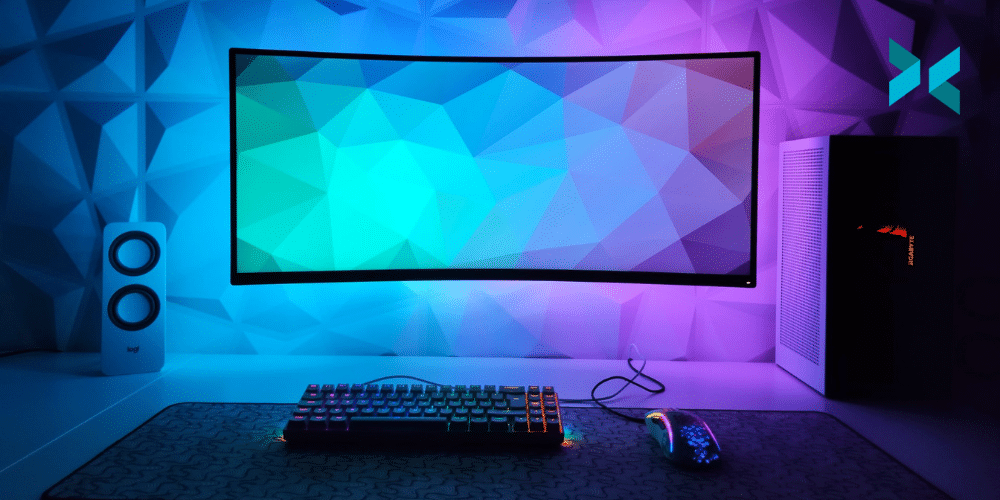
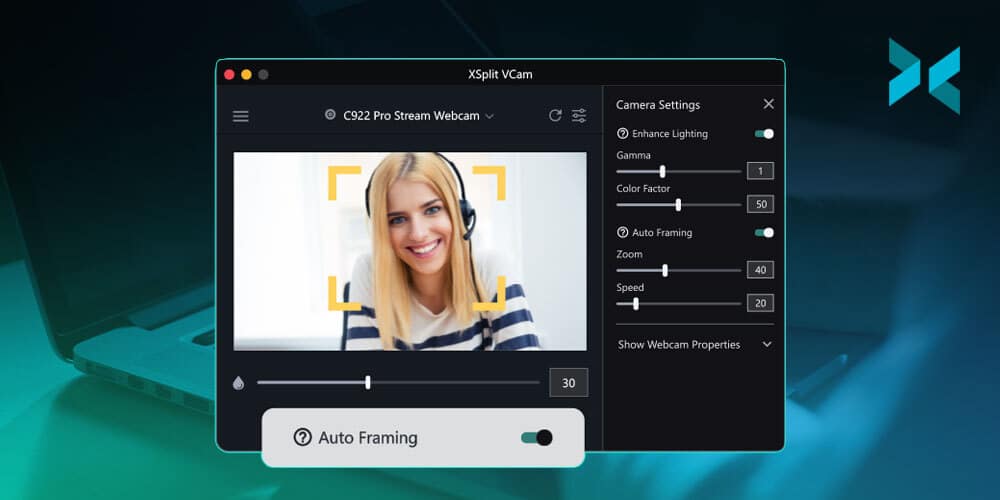
Webcams are fairly cheap these days, and we would recommend something like the Logitech C922. You may not have considered that your staff may have great webcams already on devices they own! Try using XSplit Connect: Webcam and XSplit VCam to turn their phones into webcams. If you’d like more details on how this works you can check the video below, but generally, all you need to do is have the devices on the same wifi network.

Unified Calendar Tools for Remote Staff

Having staff in different parts of the world can make things tricky when trying to coordinate a meeting. That’s why it’s good to have a unified calendar for your organization as a tool for your remote staff. GSuite from Google offers these tools, basically, it gives everyone in the team a personal calendar they can opt to share. You can also set up a company-wide calendar for important events like team meetings or for people to post their vacation schedules.
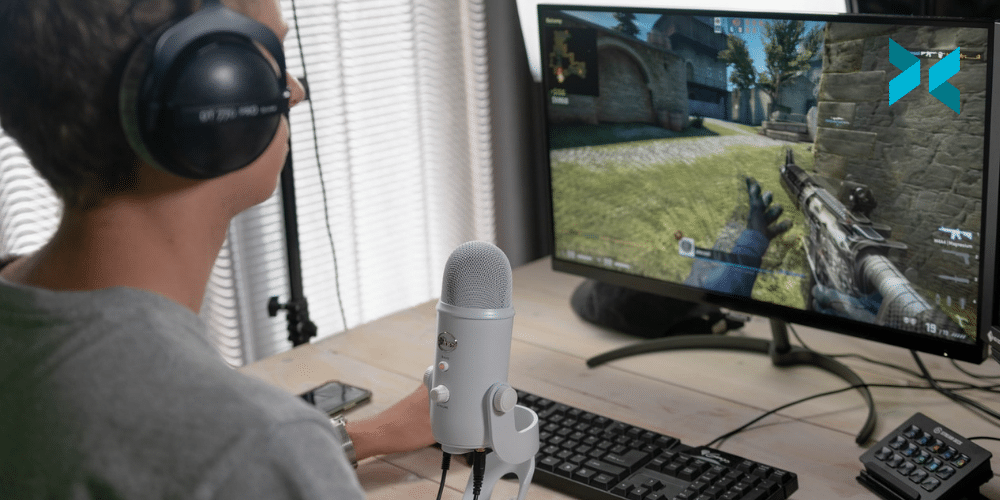
A person sat on a sofa talking to someone on a call using a laptop computer which would contain tools for remote work.
Photo by Surface on Unsplash

Team Building

It’s good to find time for the team to bond and unwind together, while it would be nice for everyone to go out to eat, in the meantime, you can play games together online. Some great games are Jackbox Games, which you can play in a browser or on your phone with other people. You can also play games like Pictionary or host a trivia night using something like XSplit Broadcaster.

Task Management Tools For Your Remote Staff

Now if you’re a small business, it might not seem like you need task management software, but without people interacting in a single space, it can be easy to lose track and progress of what’s going on in each project. 

Something as simple as notion, monday.com, or ClickUp, whatever let’s you assign tasks and keep track of what is going on will really help your team stay organized and help you track how your projects are going. This blog is organized via ClickUp as you can not only schedule your events in a list but export a viewable calendar that can be seen by the wider company.

A person using a smartphone next to their laptop which is on the table in front of them next to a cup of coffee they could be using tools for remote workers on both!
Photo by Christina @ wocintechchat.com on Unsplash

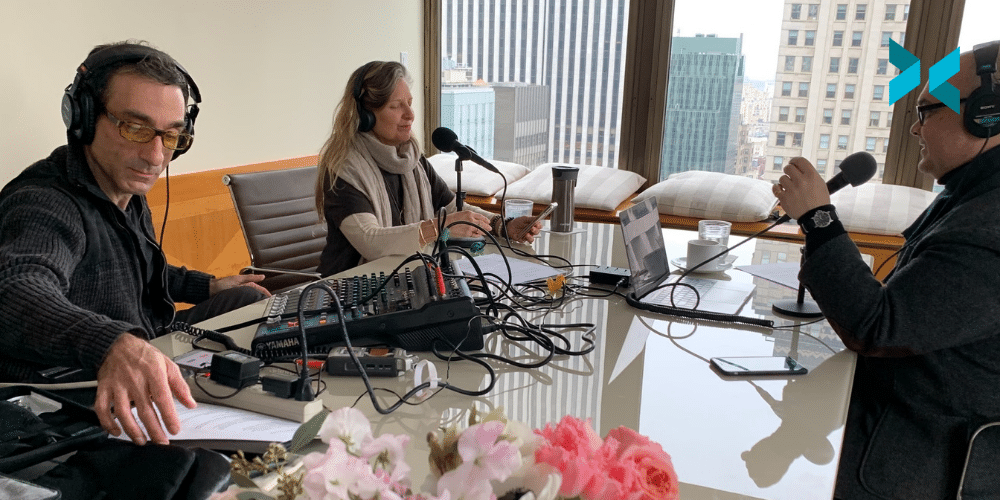
Headsets or Microphones

Circling back to start of this blog post, as nice as it is to see your staff, it’s probably even more important to hear them. Your remote staff could be working anywhere, from home, from a cafe, maybe even on the beach. So it’s important that external noise doesn’t interfere during meetings, which is why you should look to give your staff a decent headset for calls.

If you’re in an indoor, home office environment and they have headphones they like, a simple USB microphone like the Blue Snowball or one built into their webcam would work fine.

Headsets do, however, have the versatility we mentioned of being able to plug into a laptop and be taken anywhere. They will also offer that noise isolation. They don’t have to be expensive fancy ones, just something with a mic built-in.

Communication Tools For Your Remote Staff

So having a messaging app is a given, but keep your sanity and keep all communication to one app. It can be a nightmare to sort through PMs from various apps. Now you don’t need a paid service like Slack, but it can be extremely useful to have any app with a solid search function, the ability to make channels and threads.

Discord does most of this for free, but it is tailored to gamers rather than the working crowd, so it does have a bit of a learning curve.

What tools for remote staff have you found useful for getting your staff collaborating from different parts of the world? Let us know in the comments below!

How to Stream Games on Facebook

Facebook has become one of the bigger destinations for streaming games. It’s no surprise that the big Meta company would be able to find a foothold with such a large userbase. The company hasn’t relied on this alone, however, they’ve been putting in the time to make Facebook Gaming an attractive site for streamers. So let’s take a look at how to stream games on Facebook!

Getting Started

So the very first thing you’ll want to do is make a profile page on Facebook Gaming. This is pretty simple to do but it’s an important step as this will be the place your live stream is going to go through too!

Next up you’ll want to download some software to stream with. XSplit Broadcaster will not only allow you to easily stream to Facebook but will make your stream run smoother and look better!

Once you’ve downloaded XSplit Broadcaster you’ll be prompted to make an account and sign in. From there, you’re ready to create your scenes by adding sources to them. XSplit Broadcaster comes with a number of templates to make this process easier for you! The source you add can be anything from your webcam, graphics, alerts, and gameplay from a capture card or direct from your PC.

How to Stream Games on Facebook

Next up you’ll want to set up your Facebook output. This is a straightforward process, head to the Broadcast menu and select Facebook Live! From here, you will be prompted to log in and now you’ll be asked where you want to stream. There will be some options, the first is Timeline. This will stream your video directly to your personal timeline. In this instance, we’re looking to go to Facebook Gaming and the page you just created so you’ll want to select the public page.

You’ll also see some encoding settings which should be automatically selected for you based on the best settings for your computer but you can change these later if you need to. It’s worth keeping in mind that unless you’re part of the Facebook Level Up program you’ll only be able to stream as high as 720p and 30FPS.

From here, you’re basically ready to go live once you click Continue! Select the output you just made again from the Broadcast menu to go live. Next, you will be asked to input your stream details. From here you can either select a pre-made post you’ve already created on Facebook or create a new one directly in Broadcaster.

You can also use a similar method to stream to scheduled streams that you may have set up for your page, which you can find more information about here!

A neon arcade cabinet with the logo for Facebook Gaming is in a neon room, in this article you can learn how to stream games to Facebook.
Photo by Pete Pedroza on Unsplash

Adding some personality

So now you know how to stream games to Facebook, how about we look at leveling up your content a little? With XSplit Broadcaster it’s easy with some of our downloadable widgets! Want your comments to appear live on screen? Some new alerts? Want to see the reactions from viewers come up live on the screen? We’ve got you covered!

All you have to do is head to the Plugin Store which is available by going to the Extensions menu, selecting Add Extention, and selecting Find More Extensions. From here just search Facebook and you’ll find all of the things mentioned above and more!

Once they are installed you can find them in the Sources menu under Facebook widgets. You can find out more about our Facebook widgets here!

Top Online Tools for Entrepreneurs

Being an entrepreneur isn’t an easy path, but nothing is better than setting your own schedule and being in charge of your own destiny. The best part about it is in today’s world you don’t even have to leave your bedroom! So today we’re going to talk about online tools for entrepreneurs.

Meeting Management Tools for Entrepreneurs

So when you kick off your business, it’s going to be meetings. Tons and tons of meetings. And the worst thing you can do is double book meetings, especially if it’s a prospective client or potential investor.  It’s even worse to keep going back and forth on when a person is available to meet. So instead of trying to keep a running tally of meeting times you are available and converting time zones, you need something that helps you schedule these meetings

That’s why it’s helpful to have online meeting schedulers like calendly, which you can start with for free. Basically, set up your event type, designate the times you are available and send the link calendly creates to whoever you plan to meet with. They’ll select a time and you’re good to go!

A person sat in a coffee shop using online tools for entrepreneurs on their laptop which is on the table in front of them along with a cup of coffee.
Photo by Jenny Ueberberg on Unsplash

Online File Storage

Everything lives on the cloud these days. Unless it’s ultra-private/secret info, your files are going to be on some cloud storage system instead of on a thumb drive that can be easily lost.  Now while I know the default is Google Drive for many people simply for the number of services it offers, it may not always be the best choice. If media files are a core part of your operation, like videos, gifs, images, I’d strongly suggest using Dropbox.

I live in Singapore, which is like the top 3 in terms of internet speed in the world. Not to mention hosts tons of data servers and Google Drive is still painfully slow with loading video files or zipping multiple files for download. I’m not sure what sorcery Dropbox does, but files download instantly and playback almost immediately as well. However, if you just are focused on productivity, contracts, presentations, etc, then Google Drive is still the best ticket in town as far as online tools for entrepreneurs go.

Screen Capture

Things move fast and it’s important to get feedback on things quickly. It could be a mockup for a graphic to use in a presentation or showing the proposed UI for a website you are launching. That’s where XSplit Capture and Cloud come in.

You can quickly capture and record your screen with XSplit Capture, which will then upload to XSplit Cloud and give you a link that you can share with colleagues for comments. A pro tip for video is that you can add timestamps of your comments if you want to call out a specific part of the video for feedback.

Project Management Tools for Entrepreneurs

Once the work starts coming in, you’ll need to delegate tasks and keep track of important deliverables. If you’re using or interacting with a remote workforce, you can check out our video below on tools for managing your workforce, but one of the most important is having project management software.

Now there’s a variety of tools like Trello, meistertask and ClickUp. The most important part is that it’s a system you can understand and quickly access via web or mobile app. My personal preference is meistertask, but any type of Kanban board system is a good starting point for online tools for entrepreneurs.

Wire/Money Transfer

Continuing with remote work, if you’re working with remote staff, you need to pay them. Depending on where you are located, doing an international bank transfer, especially in different currencies can be quite challenging and expensive with local banks. In this case, Wise is a useful tool if you can access it. Wise allows you to set up a multi-currency account and allows you to transfer money between a variety of currencies all online.

It is important to check with your local banks though, for example, Singapore banks are pretty top tier with international money transfers.

Presentation

Likely every meeting you’ll be doing will have some form of presentation. You’ll be hoping from Zoom to Google Meets to Microsoft Teams. Each time figuring out how to share the right screen. You can make this process simpler with XSplit Presenter!

XSplit Presenter allows you to load your PowerPoint, pdf, or Google Slides then add various elements like videos, cameras, and web pages. Once you have everything set up, just add XSplit Presenter as your video camera source in your video chat software. No more sharing the wrong screen!

All these tools I’ve recommended are free to try. If you have any tools that have helped you in your business let us know in the comments below!

Why Virtual Events are Still Important in 2022

During the pandemic, a lot of in-person events went online. From meetings, conventions to concerts, people found ways to keep gatherings happening. Online events, we found out, actually have a number of advantages that in-person events can’t replicate! So, why are virtual events important? Let’s take a look at some of the successes and why we may want to continue this trend in the future!

What is an Online Event?

While Mark Zuckerberg may see us wearing headsets in his metaverse, as it stands right now most virtual events take place over a live stream. This can range from a private Zoom call, a YouTube live event anyone can watch, to a ticketed experience that is using a custom service.

One of the bigger events I’ve seen was the DC Fandome event. This was an almost four-hour event held to tease new films, tv-series, and comics from DC. One of the most successful elements of the show was the production levels. They clearly invested in making the event feel special to the audience. They had virtual sets and had hosts and some guests fully green-screened into the virtual arena they had created. Some of the guests were on a Zoom call but even then they had mostly made sure everyone had good cameras, microphones, and lighting. This event went out for free on their site but also over YouTube making it very easy for anyone to watch.

An example of a musician on a smaller scale would be the quarantine concerts by Devin Townsend. Playing a backing track he created in his home studio this ticketed event was inventive with its production (a camera on a rotating fan!) and fun to watch. As the years went on the production quality of these events grew. Examples like the Ocean Machine concert which included a drone for live footage or the Devolution series which was full green screened.

PAX, the gaming convention, also held great virtual events with many people handling their own production with PAX Online. This included panels of multiple guests discussing topics and putting on shows to esport events all under the same banner as the in-person events.

Why are Virtual Events Important?

A virtual event has a number of big advantages over an in-person event. First of all, and it’s probably the biggest, is inclusivity. Far more people are potentially able to attend an event they could watch in their living room than they could having to go somewhere. There is no maximum capacity, there isn’t a barrier to entry and anyone with an internet connection and a device to take part can join in the fun!

Secondly, you not only get a wider, more global audience but you also can attract more speakers as well! You can have people from different sides of the world discussing topics with each other! Many people have been held back from attending large events for distance and financial reasons, with a virtual event the barrier to entry is much lower.

Why are virtual events important? Giving people the ability to connect from home, as seen via this laptop displaying a multi person Zoom call with a coffee cup next to it on a table in a home setting demonstrates.
Photo by Chris Montgomery on Unsplash

So, why are virtual events important? Well, a bigger audience with a bigger reach can watch events put on by a more global cast of people. Ticketed virtual events are much more accepted now if you’re looking for a return on investment but when it comes to potential opportunities for engagement it doesn’t get much bigger than a virtual event! With the right equipment and software like XSplit Broadcaster, it’s easier than ever to produce these events. Even green-screen levels of production like we saw above have become more accessible for more and more people.

Now, this isn’t to say that a hybrid event isn’t something you should also consider, where you still have an in-person hub for your event. But, you should also consider running an online event beside it, broadcasting things like panels and such to a global audience.

What is the Future of Live Streaming?

There used to be a time when live streaming was something of a science or dark art, you needed the right equipment and right kind of knowledge to live stream. Now anyone can live stream from pretty much anything. A phone, potato PC, and game consoles all let you stream. Content is also broader, you even get streams of people sleeping! So where will live streaming be going in the years to come? Let’s hypothesize, dream, and hope about the future of live streaming!

8K and Beyond in the Future of Live Streaming

While not too many platforms support it, 4k and even 360 streaming have been a part of sites like YouTube. While the next logical step seems to be 8K streaming, I think that frame rate should be more of a focus for the future of live streaming. A number of flagship and mid-range phones support higher refresh rates, I mean it even appears on a lot of Apple’s latest devices. So high refresh rates aren’t something that would only be appreciated by gamers.

However, I feel what has delayed releasing this is the transcoding nightmare it would lead to. Not to mention the beast machines you’ll need to encode full HD 120 fps footage and beyond.

New Encoders

Speaking of encoding, X.264 and its derivatives will likely soon have to be put out to pasture for other video encoding methods that are more efficient at delivering high-quality video at lower bitrates. The current front runner seems to be AV1, which is open source and backed by major players in online video like Google, Amazon, Netflix, and more. Nvidia has included an AV1 decoder in its latest GPUs.

The next most popular is HEVC or H.265, however since this has licensing fees, it will likely take a backseat in the long run. The main hurdle at this point is there are no publicly available AV1 encoders, both software, and hardware-based. However once this changes and live streaming sites are able to ingest AV1 video, I imagine there will be a lot of opportunities for the people that will be using this technology as it will make encoding high frame rate video possible.

A person in a convention setting sat at a PC streaming Overwatch on a gaming rig, new encoders may be a part of the future of streaming and would help this situation.
Photo by Florian Olivo on Unsplash

Is Live Shopping the Future of Live Streaming?

Throughout most parts of Asia, this is already a well-developed practice, but I think in North America this is going to catch on, either as a meme or seriously. Think of a home shopping network like QVC, but on Twitch.

We’ve seen Amazon themselves do something like this before and a few more companies have caught on to the idea. I’m thinking the energy, creativity, and excitement a content creator can bring to something is only going to help companies with fun activations that we all get to watch! Win-win!

A person holding a phone which is displaying the TikTok logo which could be a part of the future of live streaming.
Photo by Solen Feyissa on Unsplash

TikTok

TikTok is the looming giant of all social media platforms and it feels like it’s basically just waiting to unleash the floodgates of its live streaming service. This year we’ve seen streamers jump between Facebook and YouTube, but I feel you’ll see someone be the pioneer and sign their TikTok deal. The nature of gaming clips, which is honestly the best part of Twitch, just works so well with their platform.

The question is can it solve the discovery problem that so many new streamers encounter? That will be something that if they can crack, may put them in as a potential front-runner.

Big Production Budgets

With the world, maybe, possibly, depends on what awful news comes out around the time this post releases, getting back to semi-normal and people can travel? I think we’ll see some serious production values on streams again now that streamers can go to physical events.

We’ve already seen the Twitch Ultimate Royale, the Botez sister’s travel stream. No longer are the scuffed webcam and scratchy microphones of remote streams going to be enough. We’re going to see the RED cameras, massive LED walls and drone shots make a comeback. Like seriously, give Sushi Ninja a budget and production team already! 

So these are just a few of the predictions I have for the future of live streaming, what about you? Let us know in the comments below!

How To Stream To Telegram From Your Desktop

Telegram is an encrypted, multi-platform messaging service that boasts enhanced security features. Recently, they have introduced live streaming which can not only be done from their mobile app but also from your desktop using programs like XSplit Broadcaster. Here, we’re going to discuss how to stream to Telegram easily from your desktop!

Telegram Desktop Streaming Setup

The first thing you’ll need to do is make sure you either have a group chat or channel set up as this will be where you’re streaming to. Also, it’s good to remember that you can only start a live stream using the Telegram app so make sure you have it to hand! Click on your group icon, click live stream then select live stream with. Finally, you just need to copy-paste the RTMP and Stream Key over to your PC.

To stream from your desktop you’re going to need a live streaming program, and you may be surprised to learn we recommend XSplit Broadcaster. Setting up your scenes, your camera and other sources is easier than ever with our streamlined setup process. We discussed that a little more in the video below.

Once you’re set up you’ll need to add a custom RTMP broadcast output. This is easily done by heading to the Broadcast menu, selecting the Custom RTMP output, and hitting the cog next to it. We discuss this in more detail here. This is the place you’ll need to enter the custom RTMP URL and Stream Key that we for from the app earlier.

For streaming settings, we recommend a bitrate of 4000 and 192kbps audio bitrate. You might also want to set your resolution to 1280×720 and 30fps as a good starting point. You can adjust these later if your internet connection and processor can handle it but these settings should get you live at a reasonable quality.

Start Streaming

Once you’ve set everything up head to the Broadcast menu and select your custom RTMP output. This is where things get a little different from a normal desktop stream. You’ll need to hit start streaming in the Telegram app as well for everything to go live. From here, you’re live, pal! Once you have finished your stream make sure you not only stop streaming in XSplit Broadcaster but in the Telegram app as well.

The stream itself is coming from the app and your desktop input is just a part of the stream. This means you can have multiple telegram streams live at once! Something to keep in mind when you’re planning future content!

An iPhone with various messaging apps including Telegram which you could stream to from telegram desktop streaming solutions like XSplit Broadcaster.
Photo by Adem AY on Unsplash

Troubleshooting

If you are having problems going live or your streams are disconnecting you may need to add an exe parameter in XSplit Broadcaster. To do this, right-click on the shortcut for XSplit Broadcaster and click Properties. In the target section outside the quotation marks paste this:

Skippoststartstreamportcheckoncustomrtmp

Then click ok, launch XSplit Broadcaster and start streaming as normal! If you have any questions, please don’t hesitate to leave them in the comments. Our support team is available 24/7 in live chat for any tech support here on the site!

Five Things to Improve Virtual Talk Shows

So you’ve started your own virtual talk show, maybe it’s bringing video to a podcast or you’ve decided to interview people in your industry. Now the first show is done, but perhaps you had some technical issues, bad frame rates, low-quality audio, and missing cues. So what can you or your guests do to improve your virtual talk shows?

Pre-Production is Key to Virtual Talk Shows

Pre-production is that thing we all have to learn how to do the hard way. This includes preparing scripts or runs of shows, doing research on guests, and designing the look of a show.

But perhaps the most important element is rehearsals. Aside from learning timings and transitions, you also need to make sure the remote guests have good connections. If your schedule permits, it’s always good to take time to ensure the connection is stable and help your guest figure out any technical issues that may arise. It’s also a good opportunity to get your host and guests to get to know each other a bit so that the conversation during the recording or stream goes a lot smoother.

Call Software for Virtual Talk Shows

While VOIP software like Zoom, Discord, Microsoft Teams have evolved quite a bit in response to more people working remotely, they still lack some of the fundamental tools and controls to make producing virtual talk shows seamless.

Vmix Call is a popular option, but if you have the time, VDO.Ninja is a free open-source alternative that offers all the customization you need. You can actually check out our extended VDO.Ninja tutorial below but some key tools are the ability to separate audio and video sources for your callers, a director’s video/audio channel to manage talent, and basically ALL the customization you’d ever need.

Tools for Remote Callers

Sometimes, remote guests will have problems with their setup. This can range from a noisy AC unit to a messy background, or a struggle to share their screen or presentation. Thankfully XSplit provides tools to improve and simplify this process.

First is XSplit VCam, this can help them with their background by blurring or replacing it. If they don’t even have a webcam, then they can use VCam with XSplit Connect: Webcam to turn their mobile phone into a camera. Then you can add VCam in XSplit Broadcaster. You can also screen capture in Broadcaster and add your google slides as well.

The key tool in XSplit Broadcaster is the virtual microphone. This outputs whatever audio your produce in Broadcaster to your video chat app. Some useful tools in XSplit Broadcaster add noise reduction to your microphone and VSTs to tweak your microphone like EQ or Limiters. Then you just set XSplit Broadcaster as your microphone in the video chat app.

Segments and Time Limits

While some people you can just listen to endlessly, it’s good to create segments or set time limits for certain topics. Certain topics you just run out of things to talk about and it’s good to move on to another topic to keep things fresh and interesting. You see a lot of sports shows where they’ll display that episode’s topics with a timer on how long they’ll be discussing that topic.

Now you don’t have to use that method, but if you’ve prepared a run of shows as mentioned earlier, your host can follow this and help move guests over to the next segment of the virtual talk show. Unless of course, the show you are producing is a free form talk show, then just let your guests rock for however long you like!

A person sat in front of a microphone talking in to a large microphone which is on a stand connected to a PC taking part in virtual talk shows.
Photo by Gregory Cole on Unsplash

Think About Post-Production

Finally, you need to always be producing with post-production and promotion in mind. While it would be great if the podcast or talk show could promote itself as the main content, we live in a world where hot takes, drama, and headlines are what is going to get eyeballs on stuff. So again it’s important to create segments within your show so whoever is editing will know where to look for clips on specific topics.

If you didn’t know XSplit Broadcaster can record multiple profiles and you can determine which scene to record to a particular profile. So if you were on a 3 shot, but one guest went on an extended monologue, if you had a scene recording that particular guest’s camera, you can focus on that recording and create a highlight out of that segment. The greatest chance you’re going to have for your content to be found is on social media, so make your podcast as TikTokable as possible.

The Benefits of Multistreaming

If you’re looking for new ways to grow your channel’s audience and reach this year, one thing to consider trying is multistreaming. This means that, instead of going live to just one channel on a single platform, you send your stream to multiple platforms at the same time. It can be done directly from inside XSplit Broadcaster, giving you an easy pathway to new potential viewers and subscribers. Read on for our guide on why and how to multistream.

Getting yourself out there

Before we discuss the benefits, you may be wondering exactly how to establish a multistream. Fortunately, it’s more simple than ever to get your channel live on more than one platform. You can use XSplit Broadcaster to set this up easily. In a matter of minutes, you’ll have connections to your channels such as Twitch, YouTube, Facebook, etc established.

Go to Broadcaster and create a new output from the dropdown ‘Broadcast’ menu. You’ll see the most notable streaming services listed here for quick and simple connections. If you’re using another streaming service, however, you can also go to ‘Find More Outputs’ to add the one that works for you. Once you’re all set up, you’ll just need to activate each of your outputs and you’ll be multistreaming in no time. If you don’t see an option for your platform of choice you may need to set up a custom RTMP.

A smartphone is on a desk with a keyboard behind it displaying the Twitch app, a place you could stream to with multistreaming.
Photo by Caspar Camille Rubin on Unsplash

More platforms can mean a bigger audience

You will likely be keen to maximize your content’s reach as much as possible, especially when starting out as a streamer. The bottom line is that the more platforms you’re on, the more potential viewers you will reach. It’s worth mentioning that if you are partnered with one platform, it’s generally against their partnership agreement to stream to another at the same time.

If not, the possibilities are huge. Let’s say you’ve been trying to make your way in the Twitch world, this platform has a daily user base of around 2.4 million for you to attempt to capture with your content. Also, you may not be aware that YouTube Gaming Live has an average daily viewership of about 640,000, and simply adding a YouTube stream to your broadcast would increase your potential exposure by another 27%. It is certainly worth looking closely at the stats and perhaps thinking about platforms you may not have considered previously.

Testing your content with multistreaming

Multistreaming is also very useful in helping you figure out where to focus your efforts as a content creator. While it may initially seem that all live streaming platforms are more or less the same, the demographics of each vary wildly. Perhaps you have considered trying to stream to a smaller platform such as Trovo but are unwilling to give up your set Twitch schedule? Not a problem. Just use XSplit Broadcaster to stream to both platforms simultaneously, and see what happens. If you’re concerned about bandwidth and want to stream to multiple channels at once, you could also make use of the Restream plugin through Broadcaster.

You’ll need to head over to Restream first, to set up an account (where you can choose between a free one or one of the paid premium accounts, depending on your needs). Once you’ve done this, you can open up Broadcaster and download the Restream plugin from the plugin store. After downloading it, you just need to select Restream as the output from the Broadcast menu.

Why not give multistreaming a try? It could help broaden your audience. Check out our guide to better streaming through storytelling for tips to jumpstart your channel’s growth.

Auto-Framing comes to XSplit VCam

With the latest release for our AI-based background removal and replacement app, XSplit VCam, we’ve bought auto-framing to the feature list! With auto-framing enabled, so long as you’re in the camera frame, VCam will make sure you’re in the center of the shot.

All you need to do is head to the settings, enable auto-framing and you’re ready! To download XSplit VCam simply sign up for an account, head to your dashboard, and download the program. VCam is available for both Windows and macOS and when combined with XSplit Connect: Webcam you can even use your Android or iOS smartphone as your webcam!

Essential Tools and Tips for Virtual Job Interviews

With more and more work being remote or a hybrid of office and remote, job interviews are being held remotely. When it comes to a virtual job interview you’re going to want to look your best and be easily heard so we put together some of the best virtual job interview tools available today!

Setting the scene for your virtual job interview

The most important thing is lighting, no camera looks good without lighting. So open a window, turn on the room lights, whatever you can do, but preferably you can have a dedicated video light. Good options are the Elgato Key Lights, which are designed to work with your desk, and the Aputure MC light, which are small, easy to mount, and controllable via an app.

Next is the camera. Now there are a lot of great webcams out there, but unless you have a big budget, the best camera you have is likely going to be your smartphone. You can use your smartphone as a webcam with XSplit Connect: Webcam on iOS or Android. All you need to do is connect your smartphone and computer to the same WiFi network or connect via USB. Then open up XSplit VCam and select your phone.

With XSplit VCam you can blur or replace your background if you’re working in a place that is a bit messy. You can use XSplit VCam as your camera in whatever video conferencing software will be used to host the interview like Zoom or Google Meet.

Two people looking at someone else with a laptop on the table as they take part in a virtual job interview.
Photo by Christina @ wocintechchat.com on Unsplash

Being Heard

Next, you need to be sure the interviewer can hear you and not what’s going on around you. While having an expensive podcast-style mic like the Shure SM7B is a good choice, it can be a bit distracting having a huge microphone in the frame, unless you are interviewing to be a radio host. 

So you may want to opt for a super-cardioid or shotgun microphone that you can place outside of the camera frame. Some good choices here are the Rode Videomic Go, Rode NTG series, or Shure VP83 series of microphones. We also recommend the Blue series of USB microphones like the Snowball and the Yeti for ease of use. Just plug them in and you have a quality-sounding microphone!

Now with the microphones not as close, you may get some background noise. With XSplit Broadcaster you can use the built-in noise removal. You can then use XSplit Broadcaster as your microphone source in your call software so that the noise removal effect will be applied as well. Just remember the closer the mic the better!

Note-taking and highlights

Likely you’ll be getting questions based on your resume, so it’s good to have that in front of you and give yourself notes on any parts of your resume that may raise questions, like a work gap or a specific skill set or training you have.

Also, be sure to do research about the company you are interviewing with. Being able to ask relevant questions about the work environment and describe what you can bring to that specific company will help you stand out from other candidates. Simply having a document open and going split-screen with your interview window will make the world of difference! Plus, you can note down any questions you may have as the interview goes along. It’s always important to ask questions, a job interview is as much for you as it is for the employer!