Top Online Tools for Entrepreneurs

Being an entrepreneur isn’t an easy path, but nothing is better than setting your own schedule and being in charge of your own destiny. The best part about it is in today’s world you don’t even have to leave your bedroom! So today we’re going to talk about online tools for entrepreneurs.

Meeting Management Tools for Entrepreneurs

So when you kick off your business, it’s going to be meetings. Tons and tons of meetings. And the worst thing you can do is double book meetings, especially if it’s a prospective client or potential investor.  It’s even worse to keep going back and forth on when a person is available to meet. So instead of trying to keep a running tally of meeting times you are available and converting time zones, you need something that helps you schedule these meetings

That’s why it’s helpful to have online meeting schedulers like calendly, which you can start with for free. Basically, set up your event type, designate the times you are available and send the link calendly creates to whoever you plan to meet with. They’ll select a time and you’re good to go!

A person sat in a coffee shop using online tools for entrepreneurs on their laptop which is on the table in front of them along with a cup of coffee.
Photo by Jenny Ueberberg on Unsplash

Online File Storage

Everything lives on the cloud these days. Unless it’s ultra-private/secret info, your files are going to be on some cloud storage system instead of on a thumb drive that can be easily lost.  Now while I know the default is Google Drive for many people simply for the number of services it offers, it may not always be the best choice. If media files are a core part of your operation, like videos, gifs, images, I’d strongly suggest using Dropbox.

I live in Singapore, which is like the top 3 in terms of internet speed in the world. Not to mention hosts tons of data servers and Google Drive is still painfully slow with loading video files or zipping multiple files for download. I’m not sure what sorcery Dropbox does, but files download instantly and playback almost immediately as well. However, if you just are focused on productivity, contracts, presentations, etc, then Google Drive is still the best ticket in town as far as online tools for entrepreneurs go.

Screen Capture

Things move fast and it’s important to get feedback on things quickly. It could be a mockup for a graphic to use in a presentation or showing the proposed UI for a website you are launching. That’s where XSplit Capture and Cloud come in.

You can quickly capture and record your screen with XSplit Capture, which will then upload to XSplit Cloud and give you a link that you can share with colleagues for comments. A pro tip for video is that you can add timestamps of your comments if you want to call out a specific part of the video for feedback.

Project Management Tools for Entrepreneurs

Once the work starts coming in, you’ll need to delegate tasks and keep track of important deliverables. If you’re using or interacting with a remote workforce, you can check out our video below on tools for managing your workforce, but one of the most important is having project management software.

Now there’s a variety of tools like Trello, meistertask and ClickUp. The most important part is that it’s a system you can understand and quickly access via web or mobile app. My personal preference is meistertask, but any type of Kanban board system is a good starting point for online tools for entrepreneurs.

Wire/Money Transfer

Continuing with remote work, if you’re working with remote staff, you need to pay them. Depending on where you are located, doing an international bank transfer, especially in different currencies can be quite challenging and expensive with local banks. In this case, Wise is a useful tool if you can access it. Wise allows you to set up a multi-currency account and allows you to transfer money between a variety of currencies all online.

It is important to check with your local banks though, for example, Singapore banks are pretty top tier with international money transfers.

Presentation

Likely every meeting you’ll be doing will have some form of presentation. You’ll be hoping from Zoom to Google Meets to Microsoft Teams. Each time figuring out how to share the right screen. You can make this process simpler with XSplit Presenter!

XSplit Presenter allows you to load your PowerPoint, pdf, or Google Slides then add various elements like videos, cameras, and web pages. Once you have everything set up, just add XSplit Presenter as your video camera source in your video chat software. No more sharing the wrong screen!

All these tools I’ve recommended are free to try. If you have any tools that have helped you in your business let us know in the comments below!

What is the Future of Live Streaming?

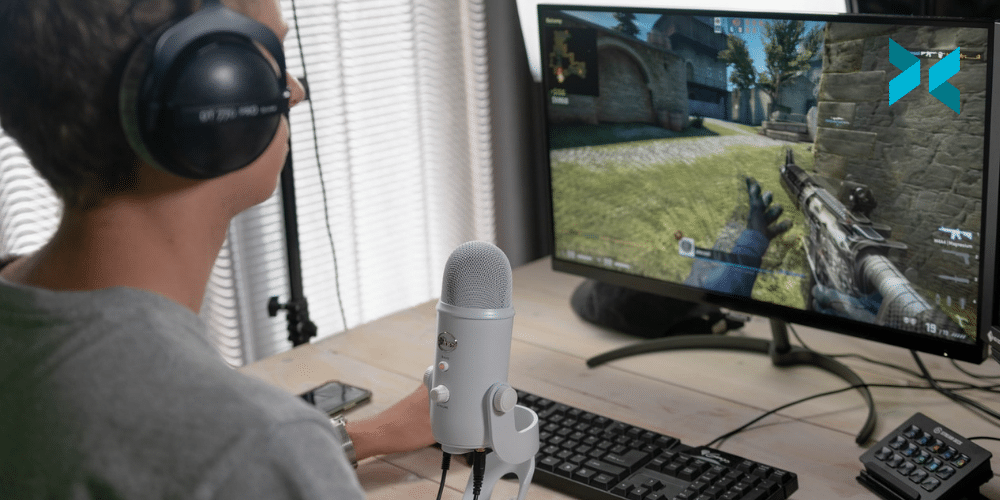
There used to be a time when live streaming was something of a science or dark art, you needed the right equipment and right kind of knowledge to live stream. Now anyone can live stream from pretty much anything. A phone, potato PC, and game consoles all let you stream. Content is also broader, you even get streams of people sleeping! So where will live streaming be going in the years to come? Let’s hypothesize, dream, and hope about the future of live streaming!

8K and Beyond in the Future of Live Streaming

While not too many platforms support it, 4k and even 360 streaming have been a part of sites like YouTube. While the next logical step seems to be 8K streaming, I think that frame rate should be more of a focus for the future of live streaming. A number of flagship and mid-range phones support higher refresh rates, I mean it even appears on a lot of Apple’s latest devices. So high refresh rates aren’t something that would only be appreciated by gamers.

However, I feel what has delayed releasing this is the transcoding nightmare it would lead to. Not to mention the beast machines you’ll need to encode full HD 120 fps footage and beyond.

New Encoders

Speaking of encoding, X.264 and its derivatives will likely soon have to be put out to pasture for other video encoding methods that are more efficient at delivering high-quality video at lower bitrates. The current front runner seems to be AV1, which is open source and backed by major players in online video like Google, Amazon, Netflix, and more. Nvidia has included an AV1 decoder in its latest GPUs.

The next most popular is HEVC or H.265, however since this has licensing fees, it will likely take a backseat in the long run. The main hurdle at this point is there are no publicly available AV1 encoders, both software, and hardware-based. However once this changes and live streaming sites are able to ingest AV1 video, I imagine there will be a lot of opportunities for the people that will be using this technology as it will make encoding high frame rate video possible.

A person in a convention setting sat at a PC streaming Overwatch on a gaming rig, new encoders may be a part of the future of streaming and would help this situation.
Photo by Florian Olivo on Unsplash

Is Live Shopping the Future of Live Streaming?

Throughout most parts of Asia, this is already a well-developed practice, but I think in North America this is going to catch on, either as a meme or seriously. Think of a home shopping network like QVC, but on Twitch.

We’ve seen Amazon themselves do something like this before and a few more companies have caught on to the idea. I’m thinking the energy, creativity, and excitement a content creator can bring to something is only going to help companies with fun activations that we all get to watch! Win-win!

A person holding a phone which is displaying the TikTok logo which could be a part of the future of live streaming.
Photo by Solen Feyissa on Unsplash

TikTok

TikTok is the looming giant of all social media platforms and it feels like it’s basically just waiting to unleash the floodgates of its live streaming service. This year we’ve seen streamers jump between Facebook and YouTube, but I feel you’ll see someone be the pioneer and sign their TikTok deal. The nature of gaming clips, which is honestly the best part of Twitch, just works so well with their platform.

The question is can it solve the discovery problem that so many new streamers encounter? That will be something that if they can crack, may put them in as a potential front-runner.

Big Production Budgets

With the world, maybe, possibly, depends on what awful news comes out around the time this post releases, getting back to semi-normal and people can travel? I think we’ll see some serious production values on streams again now that streamers can go to physical events.

We’ve already seen the Twitch Ultimate Royale, the Botez sister’s travel stream. No longer are the scuffed webcam and scratchy microphones of remote streams going to be enough. We’re going to see the RED cameras, massive LED walls and drone shots make a comeback. Like seriously, give Sushi Ninja a budget and production team already! 

So these are just a few of the predictions I have for the future of live streaming, what about you? Let us know in the comments below!
How To Stream To Telegram From Your Desktop

Telegram is an encrypted, multi-platform messaging service that boasts enhanced security features. Recently, they have introduced live streaming which can not only be done from their mobile app but also from your desktop using programs like XSplit Broadcaster. Here, we’re going to discuss how to stream to Telegram easily from your desktop!

Telegram Desktop Streaming Setup

The first thing you’ll need to do is make sure you either have a group chat or channel set up as this will be where you’re streaming to. Also, it’s good to remember that you can only start a live stream using the Telegram app so make sure you have it to hand! Click on your group icon, click live stream then select live stream with. Finally, you just need to copy-paste the RTMP and Stream Key over to your PC.

To stream from your desktop you’re going to need a live streaming program, and you may be surprised to learn we recommend XSplit Broadcaster. Setting up your scenes, your camera and other sources is easier than ever with our streamlined setup process. We discussed that a little more in the video below.

Once you’re set up you’ll need to add a custom RTMP broadcast output. This is easily done by heading to the Broadcast menu, selecting the Custom RTMP output, and hitting the cog next to it. We discuss this in more detail here. This is the place you’ll need to enter the custom RTMP URL and Stream Key that we for from the app earlier.

For streaming settings, we recommend a bitrate of 4000 and 192kbps audio bitrate. You might also want to set your resolution to 1280×720 and 30fps as a good starting point. You can adjust these later if your internet connection and processor can handle it but these settings should get you live at a reasonable quality.

Start Streaming

Once you’ve set everything up head to the Broadcast menu and select your custom RTMP output. This is where things get a little different from a normal desktop stream. You’ll need to hit start streaming in the Telegram app as well for everything to go live. From here, you’re live, pal! Once you have finished your stream make sure you not only stop streaming in XSplit Broadcaster but in the Telegram app as well.

The stream itself is coming from the app and your desktop input is just a part of the stream. This means you can have multiple telegram streams live at once! Something to keep in mind when you’re planning future content!

An iPhone with various messaging apps including Telegram which you could stream to from telegram desktop streaming solutions like XSplit Broadcaster.
Photo by Adem AY on Unsplash

Troubleshooting

If you are having problems going live or your streams are disconnecting you may need to add an exe parameter in XSplit Broadcaster. To do this, right-click on the shortcut for XSplit Broadcaster and click Properties. In the target section outside the quotation marks paste this:

Skippoststartstreamportcheckoncustomrtmp

Then click ok, launch XSplit Broadcaster and start streaming as normal! If you have any questions, please don’t hesitate to leave them in the comments. Our support team is available 24/7 in live chat for any tech support here on the site!

Five Things to Improve Virtual Talk Shows

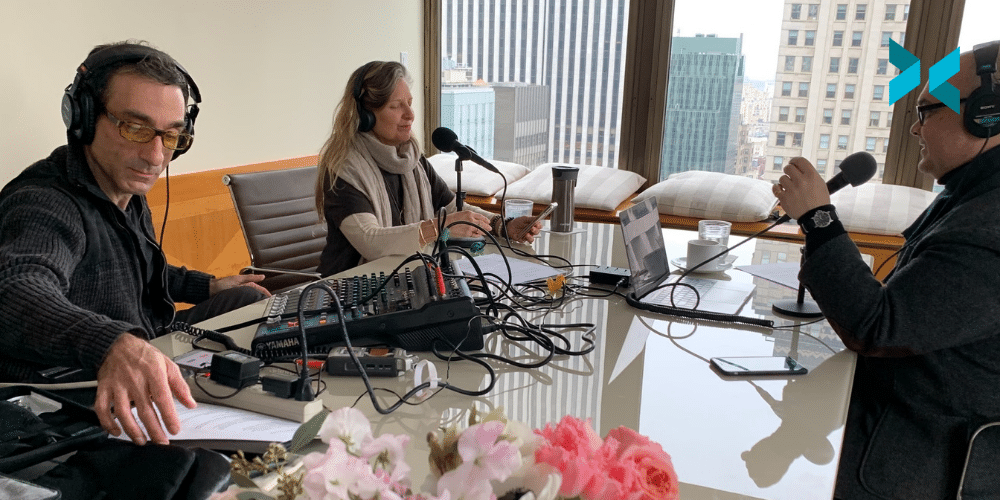
So you’ve started your own virtual talk show, maybe it’s bringing video to a podcast or you’ve decided to interview people in your industry. Now the first show is done, but perhaps you had some technical issues, bad frame rates, low-quality audio, and missing cues. So what can you or your guests do to improve your virtual talk shows?

Pre-Production is Key to Virtual Talk Shows

Pre-production is that thing we all have to learn how to do the hard way. This includes preparing scripts or runs of shows, doing research on guests, and designing the look of a show.

But perhaps the most important element is rehearsals. Aside from learning timings and transitions, you also need to make sure the remote guests have good connections. If your schedule permits, it’s always good to take time to ensure the connection is stable and help your guest figure out any technical issues that may arise. It’s also a good opportunity to get your host and guests to get to know each other a bit so that the conversation during the recording or stream goes a lot smoother.

Call Software for Virtual Talk Shows

While VOIP software like Zoom, Discord, Microsoft Teams have evolved quite a bit in response to more people working remotely, they still lack some of the fundamental tools and controls to make producing virtual talk shows seamless.

Vmix Call is a popular option, but if you have the time, VDO.Ninja is a free open-source alternative that offers all the customization you need. You can actually check out our extended VDO.Ninja tutorial below but some key tools are the ability to separate audio and video sources for your callers, a director’s video/audio channel to manage talent, and basically ALL the customization you’d ever need.

Tools for Remote Callers

Sometimes, remote guests will have problems with their setup. This can range from a noisy AC unit to a messy background, or a struggle to share their screen or presentation. Thankfully XSplit provides tools to improve and simplify this process.

First is XSplit VCam, this can help them with their background by blurring or replacing it. If they don’t even have a webcam, then they can use VCam with XSplit Connect: Webcam to turn their mobile phone into a camera. Then you can add VCam in XSplit Broadcaster. You can also screen capture in Broadcaster and add your google slides as well.

The key tool in XSplit Broadcaster is the virtual microphone. This outputs whatever audio your produce in Broadcaster to your video chat app. Some useful tools in XSplit Broadcaster add noise reduction to your microphone and VSTs to tweak your microphone like EQ or Limiters. Then you just set XSplit Broadcaster as your microphone in the video chat app.

Segments and Time Limits

While some people you can just listen to endlessly, it’s good to create segments or set time limits for certain topics. Certain topics you just run out of things to talk about and it’s good to move on to another topic to keep things fresh and interesting. You see a lot of sports shows where they’ll display that episode’s topics with a timer on how long they’ll be discussing that topic.

Now you don’t have to use that method, but if you’ve prepared a run of shows as mentioned earlier, your host can follow this and help move guests over to the next segment of the virtual talk show. Unless of course, the show you are producing is a free form talk show, then just let your guests rock for however long you like!

A person sat in front of a microphone talking in to a large microphone which is on a stand connected to a PC taking part in virtual talk shows.
Photo by Gregory Cole on Unsplash

Think About Post-Production

Finally, you need to always be producing with post-production and promotion in mind. While it would be great if the podcast or talk show could promote itself as the main content, we live in a world where hot takes, drama, and headlines are what is going to get eyeballs on stuff. So again it’s important to create segments within your show so whoever is editing will know where to look for clips on specific topics.

If you didn’t know XSplit Broadcaster can record multiple profiles and you can determine which scene to record to a particular profile. So if you were on a 3 shot, but one guest went on an extended monologue, if you had a scene recording that particular guest’s camera, you can focus on that recording and create a highlight out of that segment. The greatest chance you’re going to have for your content to be found is on social media, so make your podcast as TikTokable as possible.

Essential Tools and Tips for Virtual Job Interviews

With more and more work being remote or a hybrid of office and remote, job interviews are being held remotely. When it comes to a virtual job interview you’re going to want to look your best and be easily heard so we put together some of the best virtual job interview tools available today!

Setting the scene for your virtual job interview

The most important thing is lighting, no camera looks good without lighting. So open a window, turn on the room lights, whatever you can do, but preferably you can have a dedicated video light. Good options are the Elgato Key Lights, which are designed to work with your desk, and the Aputure MC light, which are small, easy to mount, and controllable via an app.

Next is the camera. Now there are a lot of great webcams out there, but unless you have a big budget, the best camera you have is likely going to be your smartphone. You can use your smartphone as a webcam with XSplit Connect: Webcam on iOS or Android. All you need to do is connect your smartphone and computer to the same WiFi network or connect via USB. Then open up XSplit VCam and select your phone.

With XSplit VCam you can blur or replace your background if you’re working in a place that is a bit messy. You can use XSplit VCam as your camera in whatever video conferencing software will be used to host the interview like Zoom or Google Meet.

Two people looking at someone else with a laptop on the table as they take part in a virtual job interview.
Photo by Christina @ wocintechchat.com on Unsplash

Being Heard

Next, you need to be sure the interviewer can hear you and not what’s going on around you. While having an expensive podcast-style mic like the Shure SM7B is a good choice, it can be a bit distracting having a huge microphone in the frame, unless you are interviewing to be a radio host. 

So you may want to opt for a super-cardioid or shotgun microphone that you can place outside of the camera frame. Some good choices here are the Rode Videomic Go, Rode NTG series, or Shure VP83 series of microphones. We also recommend the Blue series of USB microphones like the Snowball and the Yeti for ease of use. Just plug them in and you have a quality-sounding microphone!

Now with the microphones not as close, you may get some background noise. With XSplit Broadcaster you can use the built-in noise removal. You can then use XSplit Broadcaster as your microphone source in your call software so that the noise removal effect will be applied as well. Just remember the closer the mic the better!

Note-taking and highlights

Likely you’ll be getting questions based on your resume, so it’s good to have that in front of you and give yourself notes on any parts of your resume that may raise questions, like a work gap or a specific skill set or training you have.

Also, be sure to do research about the company you are interviewing with. Being able to ask relevant questions about the work environment and describe what you can bring to that specific company will help you stand out from other candidates. Simply having a document open and going split-screen with your interview window will make the world of difference! Plus, you can note down any questions you may have as the interview goes along. It’s always important to ask questions, a job interview is as much for you as it is for the employer!

How to Live Stream a DJ Set

On my daily browse of Twitch I stumbled across a DJ set that basically played all the dance hits from the 1990s through to the 2000s. It had special effects, background dancers, everything! Now, in the world of DMCA takedowns, streaming copyrighted music, something we have discussed before, isn’t really a good idea but if it’s DMCA safe? It can be a great way to connect with a new audience! Let’s take a look at how you can live stream DJ sets with a bit of production flair!

Setting up to stream a DJ set

At a very basic level, streaming a DJ set can be very simple. It’s likely you’re DJing old school with turntables and a mixer, or via software like Traktor or Serato DJ Pro. If it’s the former all you need to do is send an output from your mixer to an input on your PC. This can be your line input or a dedicated audio interface like the EVO4.

If you’re using software and the audio is coming from your PC, all you need to do is capture your system sound. XSplit Broadcaster does this automatically so out of the box you won’t need to change anything. However, if it’s not, just head to Settings, and Audio and select the correct audio. If you’re using software with a DJ controller, like a Pioneer DDJ, then all you need to do is see if it has an audio output you can capture like a traditional DJ system.

A digital set of DJ decks hooked up to a laptop is a good start with learning how to stream a DJ set
Photo by Gabriel Barletta on Unsplash

Visuals

Now you have your audio set up correctly to stream a DJ set, let’s take a look at setting up some visuals. A good start is for people to see your lovely face, so why not add a webcam? Or, if you’re not interested in having yourself on the screen you could point the camera at your mixing decks. No matter what, the best entry-level camera for streaming is the Logitech c920 series. They can mount on a monitor or you can use the ¼ threading mounting point to add it to a tripod.

If you’re using software, you could capture the software in XSplit Broadcaster as well as your webcam by adding it from either the Game Capture menu or, if it’s not showing up there, by using Smart Capture. You could even take a cue from lo-fi hip-hop beats to chill, max and relax to and put a looping video image or gif. These can be put directly into XSplit Broadcaster, for a video simply right click and set it to loop forever. With a gif, it will just run automatically. Simply resize it to fit the way you’d like and you’re good to go!

Taking streaming a DJ set to the next level

What is a DJ broadcast without some special effects? We need some air horns! With XSplit Broadcaster you can create a variety of special effects to help you stream a DJ set! We’ve actually made a hand video that I’ll link below which shows off some of the power effects systems that are built into Broadcaster.

It’s best to use effects in conjunction with macros so you can easily trigger them with a hotkey press or even automatically depending on the conditions you set. You can learn more about Macros here but basically, you can install the Macros plugin and set “if this, then Broadcaster should do that”. The “this” could be a button press and the “that” could be changed to a different camera, for example. We’d highly recommend checking out the Elgato Streamdeck as well. It works perfectly with Broadcaster and can trigger a whole bunch of things with a physical touchpad. This makes it much easier for you to hit production buttons while you’re DJing.

Broadcasting your DJ set

Now that you have your production setup, it’s time to stream! Broadcaster supports all the popular platforms like Twitch, YouTube, Facebook, all you need to do is login to your account. Some sites that don’t support direct login through Broadcaster will require that you use the Custom RTMP option. What you’ll need from the site is the RTMP URL and your stream key.

For your streaming settings, this will depend on your PC. For minimum requirements for a 720p 30fps stream, I recommend either a 4 core 7 series processor either AMD or Intel OR an NVIDIA RTX GPU. 
The most important setting though is your audio bitrate. Make sure to set this as high as possible to give your viewers the best audio quality possible. After you’ve configured your settings, just hit the stream button and go live!

As with all things, remember consistency is key, and make sure to let your community know when you are live! Let us know in the comments how you’ve got your DJ setup ready for streaming. What DJs do you watch already and what do they do that inspires you? Be sure to let us know! If you’ve enjoyed this guide, let us know as well so we can make more things like this for you!

How to Add Remote Guests to your Streams

If you’re producing a stream with guests, be that a podcast, running a tournament, or just putting on a show, doing this remotely has become the norm. This might seem simple on paper, load up Zoom or Discord and get streaming, working with remote talent actually brings in a unique set of challenges! So we’re going to discuss how to do it right with some tips I’ve developed over the years.

Using Discord to have Remote Guests on your Stream

My personal favorite for bringing in remote guests to a stream is Discord. It’s easy to use and if you have the budget, you can get really high audio quality by boosting your server. However, since you’re likely going to be having both yourself and guests in the same voice server you may run into issues adjusting audio levels.

Now one way to manage this is to have multiple PCs join the calls and capture the individual voices, but not everyone has that many computers laying around! For this, Discord actually has an audio mixer built into the call! Pretty handy for getting levels in right in a pinch.

Also in Discord, and generally any other call program (VOIP), you’ll want to disable things like noise reduction and any type of input limit, so both sides are getting the cleanest audio possible.

A streaming setup with a PC, dual monitors a camera and microphone which could be used to add remote guests to a stream.
Photo by ELLA DON on Unsplash

Working with Streamer Setups

A lot of time you’ll be working with guests who have their own live streaming setup. Now, while this might seem like the ideal scenario, the problem is if there’s an issue it’s going to be hard to troubleshoot because everyone has a different audio setup.

The most common problems adding a remote guest to your stream like this are echo and/or getting a loop from whatever audio you’re sending the guest. This is most prevalent with 2-pc setups or when the guest is using a mixing desk. For simplicity just ask the guest to only send you microphone audio rather than a loopback mix from their PC.

This may require reconfiguring their stream set up a bit, but this is why you definitely want to have a tech rehearsal with your guests before the event. Make sure you’re getting all your video and audio routed correctly on both ends, for you and the guests. 

A lot of streamers like to add audio effects and enhancements via VSTs to their live stream output. This won’t usually work in VOIP software unless they use software like XSplit Broadcaster to add VSTs directly to their audio output via its Virtual Microphone feature.

Finally, once you’re getting audio from your remote guest on your stream computer, you need to make sure it’s coming in at a manageable level. Most people who are streaming set their audio levels for a “final mix” which basically means at the highest level before clipping.

Now if you’re mixing this isn’t going to leave you with much headroom, so you’re going to want to see if the remote talent can lower the audio until you’re receiving at about 12-18 DB.

Giving your guests a preview scene

One of the most important things your guests need, especially if they are commentators on an event or it’s a visual show reacting to things, is a good preview scene. This is where they can see what is live, the different cameras, and perhaps a notepad with a run of show and general notes. There are two ways to do this!

The first is using the Virtual Camera output in XSplit Broadcaster. You can select whichever scene you wish to output, so just create and then pick the dedicated preview for your remote talent. Make sure to put this scene somewhere in your scene list where you won’t accidentally switch to it. Then just set the camera as the video input on your VOIP software.

Now usually this works just fine, but VOIP software will automatically adjust the bitrate to keep the video call stable, so if your remote talent is far away, they may receive a pixelated video. A workaround for this is using screen sharing. Make a project window for your preview scene and then use screen sharing in your VOIP software. Many times priority will be given to the screen share, which will give the highest video quality possible. Software like Discord will also let you set the quality of your screen sharing as well.

These are all things I have learned over years of hosting remote events so hopefully, this saves you a lot of time in trial and error! Be sure to let us know in the comments if you have your own tips that have helped get streams with guests going! Also, be sure to let us know in the comments what other topics you would like us to discuss in the future!

Is Multistreaming Worth It? Why You Should Multistream Your Content!

The definition of multistreaming has become a little bit elastic over the last couple of years. Traditionally, restreaming was a synonym for multistreaming to different platforms simultaneously but it has also come to mean a variation on rebroadcasting. Here, we will discuss the different types of restreaming, how to do it, and why you should multistream your content.

Multistreaming your content

You may or may not have heard of sites like restream.io, a service we have seamlessly integrated into XSplit Broadcaster, which will take in a single stream feed and then multistream it to multiple sites. This is handy if you’re working for a client or brand that wants to get their live stream to as many platforms as possible. Or, if you’re a new streamer looking to multistream your content by trying to figure out what platform works best for your audience or even where you can find an audience.

This also helps with encoding and bandwidth resources as it’s a single feed instead of requiring your encoding PC to do multiple encoding processes and the bitrate required for each encoding. XSplit Broadcaster can actually do multistreaming as well, but each channel you go live to will require an additional encoding process which is great if you have a more recent PC as it saves paying extra for another service.

A person sat in front of their mic with headphones on wondering if you should multistream your content.
Photo by Higor Hanschen on Unsplash

Rebroadcasting other content

The next type of multistreaming of your content has risen in popularity over the last couple of years which is rebroadcasting of content.  Basically, special events like E3 or press conferences give broadcasters permission to rebroadcast their content on their channel as long as they add their own commentary on top of the rebroadcast and usually follow some guidelines.

Many esports events will even offer clean feeds without original commentary for broadcasters to commentate over. Usually, there are two ways to add these feeds to your broadcast. The first method is the easiest and most straightforward, you just screen capture the original stream or you add the streaming site as a web source URL. This web source method is usually pretty useful if you have limited screen real estate. 

Now for taking in special feeds without the original commentary, usually you will be given an RTMP URL. This will have the RTMP stream source and a stream name or key. You can use the RTMP stream source in XSplit Broadcaster to receive this feed. Usually, this is a private URL, but sometimes you’ll be given an unlisted youtube stream that you can screen capture as well.

Why should you multistream?

So why should you multistream your content? Or why should you allow restreams of your content? If you’re going to rebroadcast, be sure you have approval, copyright strikes are something you don’t want to get on your channel. Now if you have permission, rebroadcasting is just good, easy content.

If your channel is focused on a certain industry, like gaming, or camera hardware, it’s highly likely that people follow your content for your opinions and thoughts on big industry events, and most platform’s algorithms reward posting videos with the latest stories and trending topics. 

Now for those producing the content, especially esports events, it’s a great practice to allow people to multistream your content. It’s a great way to open up access to new audiences if people restream your event in different languages since localization can become quite expensive. Just try to get the streamers to share their analytics after the broadcast to help with your post-event report. 

A streaming PC setup with speakers, a monitor, and moody lighting setup. Should you multistream your content?
Photo by Omar Prestwich on Unsplash

When it comes to multistreaming, as we mentioned it is a great way to find out where your content is going to get the most traction. It is worth mentioning, however, that a lot of sites like Twitch will have in any affiliate level contract that you are sometimes not allowed to do this. So, be sure to check before you sign up for anything. However, as we mentioned, if you’re just starting out, multistreaming your content is a great idea.

But to summarize, multi-streaming is great for client work and to find your audience as a streamer, and rebroadcasting is a great tool for growing the audience for your content or having a good source for your own content. Have you tried multistreaming? Did you get good results? Be sure to let us know in the comments section below!

How To Secure Your Privacy While Streaming to Twitch

Streaming is a fun way to meet new people and put yourself out there in the world, both literally and figuratively. But as you know, the internet isn’t always the safest place to be so it’s important to secure your privacy while streaming to sites like Twitch. As we’ve seen recently, especially with IRL streamers, they are subject to stream snipers and dangerous SWAT raids. So, we’re going to give some tips on maintaining your privacy online while you’re streaming.

So what things do you want to keep secure? Well, the most important thing is your location. Next are vital details, like your full name, birthday, email address, and phone number. People can use these details to hack into your various online accounts. Finally, you may want to keep certain accounts private, like your steam accounts, discord accounts, basically anything where someone could report your account and get it banned for illegitimate reasons.

Secure your Web Browser while Streaming to Twitch

If you’re doing a just chatting stream or watching some youtube videos, anything where you’d be showing a web browser on screen, be very careful. Many times, when you’ve signed in to your browser it will track your location data and show nearby restaurants when you search different terms, this is an easy way for people to find out your location.

Your address may also be auto-saved so it may pop up when you input some numbers your browser thinks is a text field. The best solution is to use private or incognito browsing on a separate browser. So if you’re always using Chrome, jump over to Edge or Firefox and don’t save any passwords there when you’re streaming. Also, be sure to turn off any location tracking or auto-fill to avoid revealing your location. Doing simple things like this can be key to securing your privacy while streaming to sites like Twitch.

A smartphone in a selfie stick pointing downwards it's important to secure your online privacy when IRL streaming to Twitch.
Photo by Steve Gale on Unsplash

IRL Stream Safety

If you think you’ll be IRL streaming, make sure to start your stream far away from where you live or are staying and end your stream before you are close to home. Also if you’re using a streaming backpack, add a stream delay to the cloud PC that’s running your streaming relay. 

Make sure to stream in public places if you anticipate that you might encounter stream snipers (people trying to find where you are can then track you down while you’re live). If you will be IRL streaming with others, be sure to let them know not to reveal any information about you or themselves, such as phone numbers, location, etc while you’re live or on social media.

Keeping Yourself Secure While Streaming Audio and Video

Always be aware when your webcam and microphone are on. If you’re ordering a pizza and leave your mic on, there’s your address given out on a stream. Fortunately, there are some handy tools in XSplit Broadcaster to help with this. For your microphone, you can enable a hotkey to toggle your microphone on and off.

For your webcam, use it with XSplit VCam. In XSplit VCam you can pause your camera feed and if you use the background replacement feature, once you’re out of frame, whatever you do in the background will be hidden, helping you secure your privacy while streaming to sites like Twitch.

Hide your screen to secure your privacy on Twitch!

Ideally, you never want to show your desktop on stream, and with XSplit Broadcaster just grabbing your gameplay source or Capture card alone is easy. If you’re using an intermission just chatting kind of scene, make sure it’s only your facecam with some graphics rather than just capturing your desktop so people see it when you quit out of a game

If you don’t like to switch scenes, set up a source you can toggle on and off with a macro that will cover your scene. This is mostly an issue for dual PC setups, but it’s good to take heed of this as well if you have to use desktop capture for a certain program or beta of a game that Broadcaster can’t capture yet but this is a rare instance.

A dual PC streaming setup with a microphone on a desk next to the monitor which can help you secure your privacy while streaming to Twitch.
Photo by Andre Tan on Unsplash

Disable Notifications While Streaming

Turning off as many notifications as possible is pretty important if you don’t want to have the first few lines of an email or text come up on screen while you’re streaming. This can also apply to other people’s privacy, for example, Steam will let you know when someone has come online and what they’re playing. This also applies to consoles where you may not want everyone watching to know the usernames of all of your friends that you’re playing with. This can honestly be a big part of the day-to-day when it comes to securing your privacy for streaming to sites like Twitch.

Most instances of this can be combated by going into the Steam or console settings but there are a lot of games that have a streamer mode now which can remove a lot of these issues. Speaking of streamer mode, Apps like Discord are great for having one of these where they can detect if a streaming app is open and hide personal or sensitive information in the app. 

Finally, make sure to check what your streaming account is connected to. If you’ve been using your Twitch account to login into various websites, it’s good to double-check those sites and revoke access from time to time, as sometimes they lapse in security and your data can be exposed.

As always, it’s not fun to read the fine print, but it’s important if you value your privacy and want to maintain an online presence. Secure your online privacy on sites like Twitch and it will be one less thing you need to think about when you next go live! We hope you found this article helpful and if there is anything else you would like us to discuss, the comments section below is the place to let us know!

The Best Features of YouTube Live Streaming: Should You Stream There?

As live streaming has gotten more sophisticated, from sub alerts to IRL backpacks to surreal visual experiences, so have the platforms that host the content. YouTube, despite being the biggest video platform in the world, has still been playing catchup with its live streaming features. It does however still offer some key advantages and features over its rivals. So we’re going to talk about the important features YouTube Live Streaming has, and how and when you should use them.

Monetization features on YouTube Live

First things first let’s get to the part everyone cares about, making money! In order to monetize your content on YouTube, you need to be a part of the YouTube partner program. You can find out what is required to join the YouTube partner program right here, but basically, you’ll need at least 1,000 subscribers and 4,000 watch hours in the last 12 months. Once you’ve gotten your partnership, then you have access to all sorts of monetization tools for your stream.

First is the standard pre-roll and mid-roll ads, all you need to do to make use of these is enable monetization for your stream. Next is memberships which are similar to Twitch subscriptions where members unlock special badges and emotes. You can also add perks like member-only videos and live streams. Just make sure you don’t offer things like raffles or other services that would violate their policies or you will get your membership access removed. 

Finally, there are super chats and super stickers. Super chats allow people to have their messages pinned to the top of the chat, the length they stay there will be determined by the amount they’ve contributed. Super stickers work in a similar fashion but are an animated image instead. Super chats, stickers, and memberships all work with web-based alert services like those built into Gamecaster so you can display customized alerts whenever your viewers activate these. 

To summarize, make sure your viewers don’t have ad-block on and give incentives for them to join as members and send in super chats or stickers. Maybe make goals like X super chat amount will unlock a special cosplay or a big enough super sticker and you’ll do a backflip, whatever you think will entertain your audience! We don’t advise doing a backflip unless you’re a trained backflip pro – Ed

A streaming setup, PC multiple monitors, lights on a desk with a keyboard and mouse which could be used to stream to find out the best features of YouTube Live
Photo by Roberto Nickson on Unsplash

Customizing your Streaming Setup

One of the best aspects of YouTube is the amount of customization you can do with your streaming setup. You can set up a static stream key and just go live with whatever content you wish to. This is great if you’ll be streaming consistently on your channel. One recommendation is to add a thumbnail that stands out, so people will click on your live stream from the YouTube home page. 

Now you can also schedule your live streams. This is handy if you’re an event organizer as people can see the scheduled stream on their YouYube feeds and enable reminders. You also can set your YouTube streams to private and give people access via email. They will, however, need to have YouTube accounts for the emails you send them to but these are pretty easy to set up. Next, let’s take a look at some of the features YouTube has for its live streams.

YouTube Live Streaming Tech Features

First is the stream latency setting. This will affect the latency from when you encode the stream to when the viewer sees it. It also affects some of the settings we’ll cover in a bit. For the highest video quality and stream stability, set it to normal, but if your stream requires more viewer interaction, set it to low or ultra-low.

Next is the auto start and stop feature. Now each YouTube live stream is its own distinct event or URL. Generally, when you start streaming with your live streaming software, you also have to start the stream on YouTube. Auto starts and stops mean this is done automatically, but you may not want to enable this because if you don’t end your YouTube live steam, you can still keep streaming to it! Yes, if for some reason your encoding has stopped, you can still stream to that same stream key, and as long as the event hasn’t ended, the stream will continue where it left off. 

Next is DVR, and it’s pretty much in the name, you can scrub between the last four hours of a stream. You can’t enable DVR for ultra-low latency streaming. You can enable 360 videos, just make sure this is enabled for your source as well in XSplit Broadcaster. You can also add additional delay to your stream which can be useful if you’re taking part in a tournament.

You can also add captions to your stream, this can either be the embedded captions in your stream, or you can send them to a specific URL. Some YouTube accounts will have access to automatic captions as well, but this will require normal latency streaming. Finally, ultra-low latency does not allow for streams above 1080p.

A minimal streaming setup using a gaming laptop on a desk connected to a monitor looking for the best YouTube live features.
Photo by Ahmed Sekmani on Unsplash

XSplit Broadcaster & YouTube

After you’ve configured your live stream, broadcasting is easy with XSplit Broadcaster. You could simply copy the stream key and RTMP URL to a custom RTMP output, however, XSplit has a more streamlined integration. Add a YouTube live output and then log in to your YouTube account, make sure to select the right channel if you have access to multiple YouTube pages.

Broadcaster will automatically configure your streaming settings depending on your resolution and frame rate. Once you go live a window will pop up, here you have the choice to go live to a new event or select the event you have already set up. Then just hit start! XSplit Broadcaster also has sources for alerts built-in for new members, super chats, subscribers, and a live chat display so it’s all there in one package!

Moderation features of YouTube Live

One thing that is important to know is the moderation tools you have available to you on YouTube Live. First, in the live control room, click edit and go to the customization tab. Here you can enable/disable chat and if you want the chat replay to appear on the archive. This basically means that you can decide if you want people to see a replay, as if it were live, of the chat window when people watch you VOD or not.

You can also limit messages to channel subscribers, you can enable a slow mode and set the interval in which people can send messages. Much like other streaming sites, you can add moderators for your chat, hide/ban users, blacklist words, and block links from appearing. 

Streaming to YouTube can be a bit more involved than something like Twitch, but the algorithm is more advanced which means getting people to see your content can be easier, even if the monetization options don’t have something as enticing as free subscriptions with Twitch Prime. It could more valuable for your brand to centralize your VOD and live streaming audiences into one channel, just as long as you don’t forget to spread your content to other social media platforms.

YouTube’s event-focused tools for scheduling and private access make it a very useful platform for event broadcasters for things like corporate events, webinars, product launches, and sporting events. This means that you could hold your all-hands meeting and host a private link, that is scheduled, that only people within your company can see!

Have you tried streaming on YouTube? What do you think of the experience? Let me know in the comments and let me know if this guide is helpful and you’d like similar guides for other platforms, the comment section below is the best place to do that!