Five Times a using a Smarphone Camera as a Webcam Saves the Day!

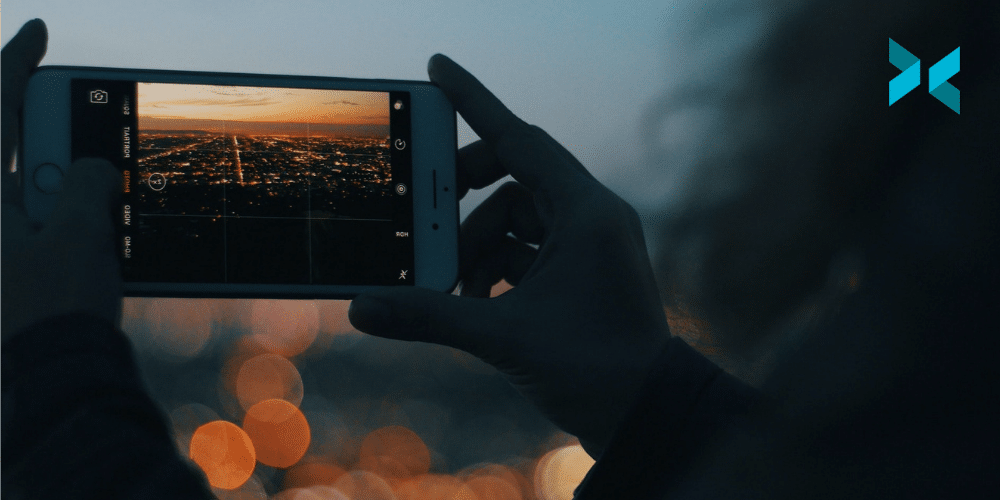
Getting a new webcam, or hooking up a mirrorless camera to your streaming setup is always exciting! But you know, you might already have the best camera upgrade you’ll need in your pocket already! Let’s discuss five times using your smartphone as your webcam can be more useful than a normal camera.

If you’re wondering how you can use your smartphone as your webcam, this is all powered by XSplit Connect: Webcam. It’s a free app on iOS or Android in the App Store, just install, open, and use XSplit VCam to connect to your cellphone’s camera. Just make sure you’re either connected to the same wifi network or via a USB cable.

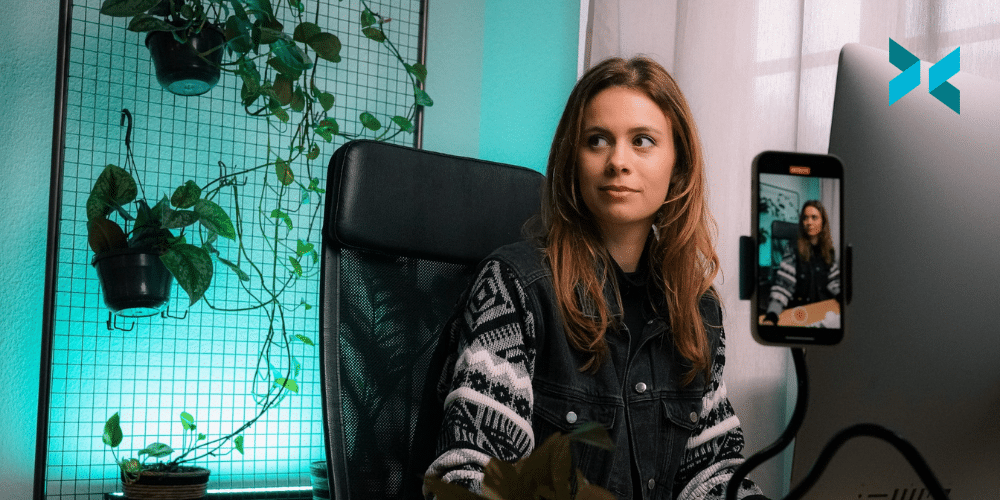
Use Your Smartphone as a Webcam when you’re out of the office.

Let’s be honest, most laptops come with a pretty bad webcam. Even a Macbook Pro is still using a 720p camera, (ever wonder why so many celebrities calling in to talk shows look like they’re using an ancient camera? Now you know.). You can add a bit more of a pro look by using the far superior camera built into your phone.

Oh and, if you’re supposed to be in the office? We’re using XSplit VCam anyway so let’s just change that background, nobody will be any the wiser! Unless you forget to mute and they call out your coffee order!

Someone taking a picture of their child at the beach using a smartphone as a webcam
Photo by Derek Thomson on Unsplash

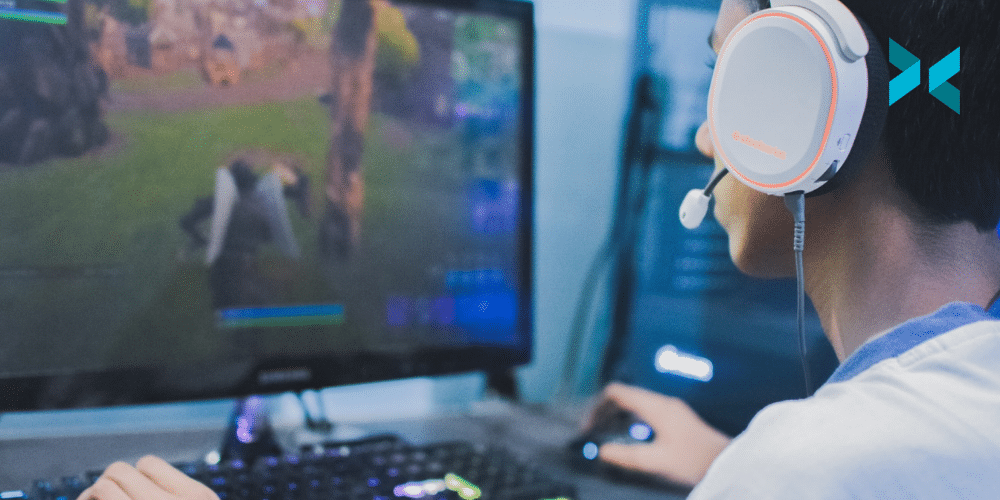
When you need to make sure you’re in-frame.

Most mirrorless cameras, the choice for a lot of big camera upgrades from a webcam, don’t have a built-in, flip-around monitor, and those that do tend to have very small, low-resolution ones. Also, if you’re checking that screen all the time, you’re going to be looking off-camera and not at the audience of people you’re talking to.

This is why using the selfie camera on your smartphone is perfect as not only do you get a bigger, higher resolution image you are always looking right back at your camera!

When you need to go underwater without wires.

Most flagship smartphones are IPX Water rated meaning that, if you wanted to you could use your phone underwater for certain shots. Or, you could just take a call poolside knowing that you don’t have to worry about wires or the camera getting destroyed the second a splash of water hits it. Do check what your IPX water rating is, though, not all ratings mean they can go underwater! – Ed

Going wireless is also honestly a big win for when you’re using a smartphone camera, using XSplit Connect: Webcam now means as long as you’re in Wi-Fi range your camera can connect to your computer!

An iPhone 12 Pro with multiple cameras would make a great smartphone as a webcam.
Photo by TheRegisti on Unsplash

You get multiple lenses in one.

Many modern cellphones have 3, 4, even 5 different cameras you can switch between. For normal videos you have your main camera, if you have a guest you can use your ultra-wide and for product videos, you can use the telephoto lens. You can switch between these lenses on the fly in the app, something that’s either impossible or not easy to do with a webcam!

Multiple Cameras with a smartphone webcam!

Are you going to be leading this month’s all-hands meeting? Are you a content creator who needs a second camera for your streams or videos? Use your smartphone! You can add your facecam and your smartphone via XSplit VCam into programs like XSplit Broadcaster with ease saving you buying a whole new camera to get that second shot. Really, just use your smartphone as a webcam!

Basically, with a smartphone, you’re always ready to work, whether it’s to create content or do a presentation. But we want to hear from you, how do you use your smartphone for productivity? Let us know in the comments and if there is anything else you’d like us to discuss, that’s the place to do it!

Work From Home Hacks to Make Your Life Easier with XSplit

Working from home, particularly in a creative industry, can mean that you end up with a lot of skills you need to develop fast! I know for me, one of the most glaring skills I’m missing is that I am not really savvy when it comes to Adobe Photoshop. However, I have been able to find tricks and work from home hacks to fill this gap using the products we have here at XSplit. So if you’ve taken on a new role in a creative industry or you’re feeling some imposter syndrome in your current job, here are some hacks I’ve come up with that may just help you with your job.

Work From Home Hacks for Screenshots

It may seem weird, but it always seems like screenshots are so inconvenient to take at times, right? One work from home hack I used to use involved XSplit Broadcaster. I’d simply capture the desktop and use the big Screenshot button at the top to capture anything we were trying to send a picture of.

We thought, however, that this could be even easier, which is why we’re developing XSplit Capture. It’s in closed beta at the moment but once it releases you’ll be able to easily select the area of your screen you want to capture, add annotations, highlights and then have that image upload directly to the cloud giving you an address you can share right away! This also works with video, and if you want to you can download these for later use or adding as an attachment. As The Economist noted, working from home continues to rise so making these sorts of tasks easier was a must for us!

A person sat at their desk using a laptop computer with a notepad, phone and glasses next to them looking for work from home hacks.
Photo by Corinne Kutz on Unsplash

Creating Mood Boards

If you need to put together some inspiration for yourself or a graphic designer on your team like a mood board or even mock up a graphic, XSplit Broadcaster is a great tool! I do a lot of freelance work broadcasting esports events, so I need to be able to give designers briefs on the assets I need to be produced and this work from home hack has been invaluable!

So what I do is lay out my various scenes using the color matte and text sources (easily added by clicking Add Source, General Widgets for Colour Matte and Add Source, Text for the Text Source) to show the designers different elements I’ll need in the broadcast and what they will do! I can even use the presets and source transitions to record how I’d like an animation to look! All of this I can then record in XSplit Broadcaster and send over as a video right away!

Work From Home Graphic Design Hacks

If you need something like a thumbnail or simple design in a pinch, you can always lay out your graphic in XSplit Broadcaster. You can use layering, color key (simply right-click on your image and head to the Color tab and selecting Color Key), and the source menu controls to hack together a graphic.

Broadcaster lets you set your resolution and then just use the screenshot tool to make the final asset. It’s a great way to make YouTube Thumbnails as we mentioned in a previous video. It’s honestly something I do all the time when it comes to creating a quick social graphic I can put together and export quickly just using assets I’ve been provided and the tools Broadcaster already has!

Timers, Clocks, and Countdowns

If you need a timer for a task, or just a countdown till your lunch break, you can the custom scripts feature in XSplit Broadcasters text source. Just enable custom scripts by right-clicking on the Text Source you’ve added and select the clock script, then select whichever function you like to use.

I personally like to use the standard clock feature when I’m running a show and need to give a timer to the host so they know to keep on schedule. But, there really are tons of work from home hacks you can achieve with XSplit software!

But I want to know from you! Which tools do you use to help your creative process? What was the last piece of software you learned to help you at your place of work? Let us know in the comment section below and if there’s anything else you feel we should discuss here, let us know there as well!

The Ultimate Macros Guide: Live Streaming Automation!

Automation makes life easier, so why not make your streaming life easier as well with macros! Live stream automation with macros means you can do all sorts of things! From your camera zooming in when you scream playing a horror game to triggering a timed scene change. So let’s discuss how macros and automation can make your streams easier and more powerful!

What are Macros?

Macros are an extension built into XSplit Broadcaster, if you don’t have macros installed, you can go into the plugins store (which can be found by going to the Tools menu and selecting Plugin Store), search for macros, and install it easily. The first time running macros you will need to give permissions so be sure to click OK. This is the first step to full live streaming automation!

Macros are basically scripts or a series of commands that are run when a basic condition is met. So the condition is when something happens, it can be on pressing a key when the audio is at a certain level, when a video stops playing at a specific time, there are really tons of possible event types and you can write your own custom scripts.

The Macro menus open in XSplit Broadcaster which makes live streaming automation possible.
An example of the Macros Plugin (remember to enable event listener!)

So when you set an event type, you can then select an action to happen. This could be switching to a scene, starting a stream, opening a projector, or event running another macro. You can have multiple actions happen after an event. You can even have multiple macros running simultaneously, which really means if you timed everything right you could add automation to almost all of your stream!

You can test your macros and they will only be active when the event listener is enabled. Now the possibilities are endless with macros, but I’d like to talk through some cool examples of how you can use them. For all the samples I show here, I’ll leave a link below each section to download the macros so you can import them into your own presentation and try them out.

A close up of a phone next to a gaming mouse and keyboard on a desk watching a live stream, adding live streaming automation could help you!
Photo by Caspar Camille Rubin on Unsplash

Automate Live Stream Commercial Breaks

So if you’re producing a live show, timing is everything, and live stream automation can help! You don’t want to miss a cue and cut back to talent too early or too late, so why not set a macro to automate your ad break? As Forbes said, streaming is presenting more opportunities for brands so getting this right could be important! If your ad break is running a series of videos in a playlist, it’s simple to automate this.

First set up your ad break scene. If you have a series of video and image ads, I recommend using your video editing software to stitch these together into a single file. Then in macros set up a macro for on key down. Then just set the key. Then set the action to switch to a scene, and select the scene with the ad break video. Enable the event listener and then set up another macro. This time the event is when a media source stops. Select your ad break video file then set the action to switch the scene to whichever scene you go to after an ad break.

You can add more macros to make this more complex like cutting to the ads intro video after a break or implementing custom stinger transitions.

Download this macro here

Making your camera zoom in on a loud noise is another great macro!

Starting a stream on time

If you need to start a stream at an exact time, regardless if you’re ready or not for a client, then this is a useful macro!

For the event, set the scheduled time and select the time your stream needs to start. Then set the switch to the scene and select a scene with a standby graphic that’s safe to start the stream with. Then set an action to start the stream. Make sure the event listener is on and you’re ready to go!

Download this macro here.

A person wearing an RGB gaming headset streaming on their gaming PC, adding live streaming automation could make their life easier.
Photo by Fredrick Tendong on Unsplash

Always stream and record

So one of the mistakes I always make when doing an event is not starting the recording when I start the stream. Depending on the format of your show, this can be an absolutely devastating error if you promised your client a high-quality archive or if your internet goes out and you want to keep capturing a live event for later upload.

So, you use macros to set a hotkey that will activate your stream and recording. This is especially useful if you’re planning to stream to many different platforms or record multiple scenes.

Download this macro here.

IRL Live Streaming Automation

A lot of IRL streamers actually relay the stream from their IRL backpack to a cloud PC running broadcasting software. This is to keep their stream live when they go into an area where their cell reception is cut off. This can also be managed by macros.

Set an event for when a stream source is online, this is the RTMP feed source you’ve added to your IRL backpack. Set the action to switch to the scene with the RTMP feed. Then set up a macro for when an RTMP source goes offline. Have it switch to a standby screen for whenever your stream feed re-connects.

This solution can also be used as a backup system for always keeping a stream online if you’re doing a project for a client, you would just need to set up an RTMP server to output an RTMP to this relay system.

Download these macros here.

There are really endless ways you can use macros for live stream automation, this is only a small sample of use cases. The possibilities are endless so play around with the extension and see what you come up with! What’s the most inventive use you’ve found for our macro system? Or if you’ve never used it before, what do you think this might be helpful for? Let us know in the comments below!

Where should you stream?

Back in the day streaming sites were their own niche, sites like justin.tv, livestream.com and ustream all specializing in different types of streaming content. Now every social media site has to have some form of live streaming functionality, but which site is the best place to stream your content? Also, quick disclaimer, we’re not going to say what is the best streaming site, because there isn’t one. It all depends on where your audience is, for you or for your client if you’re doing some corporate streaming work. This is also going to be focused on sites for western audiences, as viewers in Southeast Asia, or China have other sites where the viewership is centralized like Douyu TV or Bigo Live.

Where should you stream gaming content?

For gaming, Twitch still theoretically sits on top, as it was at the forefront of the gaming revolution when it comes to streaming. However, it still lags behind its competition in terms of discoverability. For brands, in terms of digital marketing, Twitch does have its own advertising sales team, but you need to contact them directly to get started.

If discoverability and digital marketing opportunities are important, traditional social media marketing sites like YouTube, Facebook, and Twitter have the advantage. The best options, in this case, are YouTube and Facebook, both of which have cultivated a large gaming audience and allow broadcasters to promote live streams to their existing fanbase created on their pages.

YouTube allows display ads to be run to promote live streams, Facebook does not allow direct boosting of live streams, but you can boost a post promoting the live stream and cross-post your live stream on pages that have given you permission.

Finally, there’s reporting to consider, and in this case, lord Google wins with absurdly detailed analytics reporting on all your content. Trust me, when it comes to growth knowing who your audience is and how they found you can be key!

A person sat looking in to a ring light in front of a microphone with a gaming headset on wondering where you should stream
Photo by Higor Hanschen on Unsplash

IRL/LifeCasting

Now if you’re lifecasting or streaming IRL content, it will really depend on where your audience is. The aforementioned sites like Facebook, YouTube, and Twitch all support just chatting content including things like talk shows and travel/vlogging which they have categories for. However, if your fans are on Instagram or Tiktok, things are a bit more limited.

In the video below we discussed how you can get set up to stream on Instagram, though it’s not quite as straightforward as you might hope. For now, TikTok only offers live streaming access to some accounts, however, it likely will soon roll out access to more accounts, and all you have to do is pull a stream key from the app and use XSplit’s custom RTMP to broadcast.

Influencer or Affiliate Sales content?

If you’re looking to be your own home shopping network, the traditional live streaming site of choice was Facebook, however, their pivot towards gaming means your content will be hard to find on the site outside your usual fans. One platform you may want to consider, depending on your region, is Amazon live.

Yes, Amazon.com has its own streaming service outside of Twitch and it’s purely focused on e-commerce. All you need to be is an Amazon store or affiliate and you can download their Amazon Live App which will allow you to generate a stream key to go live on their site via a custom RTMP.

The great thing about Amazon is you can set up a carousel of products on your live page that people can purchase from your store or you earn a commission via affiliate sales! You can even create promo codes for your products to share on stream to further influence sales. Now if you’re in other regions, such as Southeast Asia, many of the e-commerce platforms like Shopee have integrated live streaming in a similar manner on their site.

Someone using their phone to takle a selfie sat in front of a laptop wondering where they should stream.
Photo by Mateus Campos Felipe on Unsplash

Corporate Live Streaming

Now perhaps the audience is your client, be it a wedding, corporate event, or amateur sporting event. Usually, the client’s major concerns are reliability, ease of use, and security, and in this case, I believe YouTube is the best solution.

In terms of reliability, well you can’t beat YouTube, it works well everywhere and if your client anticipates viewers in areas with spotty internet connections, every stream is transcoded and you can even stream up to 4k while people watch you as low as 140p! For ease of use, well it’s YouTube, everyone should know how to watch a YouTube video and have an account. Finally, in terms of security, you can make your YouTube streams private and invite people via email.

If your YouTube account is a company account you can actually create events and enable them to be visible to only those within the organization, which saves time on adding potentially hundreds of emails. Now, of course, there are options like dacast and wowza which will give you white label solutions, password-protected streams, and embeddable players, but these get expensive. If you’d like to know about these solutions though, do leave a comment below.

Should I stream to everywhere at once?

If you’re still not quite sure where you want to stream, then stream to as many places as you want! XSplit Broadcaster supports multi-streaming, which means you can broadcast to as many platforms as you’d like, but you will need a license. You can find out how to set that up right here! The big advantage to this is you can pull from multiple places you have audiences at once and find where your best platform for live streaming is, catering your content more to one place over time. You may also find that you do well streaming in multiple places as is!

But I want to know from you! What sites do you use? And Where have you had to most success? What are some key features you need from a streaming site? Let me know in the comments and if there’s anything else you would like us to discuss, that’s the place to let us know as well!

How to Record Gameplay for TikTok to Promote Your Streams

Hello fellow TikTokkers! So you’ve decided to expand your social media empire to the realm of TikTok. It’s a great place for putting out day-to-day moments of your life, but what if you want to put out TikToks of your gameplay or short interviews, this isn’t so simple. So right here we’re going to take a look at how to record gameplay for TikTok and how you can quickly produce gaming-focused content!

Setup Your Gameplay for TikTok

We’ll be using XSplit Broadcaster for recording gameplay for TikTok so first let’s do some quick setup.

Tiktok videos are in a 9:16 resolution, so basically set your resolution in XSplit to 1080×1920 and frame rate to 29.97. This is easily done by clicking the dropdown menu in the top left of Broadcaster.

Next, let’s set up the recording settings. Click on the Record drop-down menu and click the cog next to it to open the recording settings. Set standard as the quality setting as with TikTok there is a file size limit on recordings. If you will be editing this gameplay recording for TikTok in a program like Adobe Premiere Pro make sure to enable multi-track audio and force constant frame rate.

An image for XSplit Broadcaster Recording settings showing you how to record gameplay for TikTok

Capturing Gameplay for TikTok

If you want to record your PC games for TikTok it’s easy, just add the game source to your scene and position it accordingly. You can do this by clicking Add Source > Game Capture if you’re capturing a PC game natively, or if you’re getting a second PC/Console through a capture card you can click Add Source > Devices > Video > [the name of your capture card]. You can also add your webcam and position it in the same menu!

Now if you want to fill up the video of the gameplay you recorded for TikTok, you can use a color matte to add a background and add text using the text source. This is easily done by clicking Add Source > General Widgets > Colour Matte and Add Source > Text.

Recording Interviews

If you’re planning to collaborate with other creators or do some short interviews, it’s easy to set this up as well. Just add your webcam, then use your video chat app of choice, and screen capture the call window. We’ve detailed how you can easily set this up before on the blog.

You can hold alt to crop the video so you can position it nicely to fit the video area. This is a really useful feature on any source in XSplit Broadcaster, the alt key on your keyboard will enable you to do this! You can even add filters to your face as well by right-clicking on the camera source > Effects > Filters!

Make sure to select your microphone in the audio settings menu (Tools > Settings > Audio) and use the audio mixer to set the levels for you and your guest properly. You can get to the Audio Mixer in the Tools menu as well! If you enabled multitrack audio, you can also adjust these levels in your video editor. This can be very helpful when you’re going to record gameplay for TikTok.

Someone holding a phone with the TikTok app opening, you can record gameplay for TikTok
Photo by Solen Feyissa on Unsplash

When your file is ready you can just upload it directly to your TikTok account via the web. I would say that you don’t need masterful editing, the important part is getting the content out there and keep improving as you go! As Forbes mentioned, TikTok is constantly seeing massive growth with one in six people in the US actively using the app in September 2020 so it’s a good time to get involved! With that being said, what’s your favorite gaming content on Tiktok? What social media sites do you feel have helped build your audience?

We’re interested in what you have to say in the comments about this one, be sure to let us know if this guide was useful and if you want more content like this about TikTok or anything we should be discussing here for that matter!

The Cheapest Live Streaming PC you can buy in 2021

This year crypto and the global chip shortage have dramatically inflated prices on PC components, specifically CPUs and GPUs. In fact, if you took a look at the video we published earlier this year about building a streaming PC, most of the builds we’ve looked at have doubled in price! These are the centerpieces of any new PC build and are especially important for determining the performance of your streaming PC. So what is an amazing streamer to do? Well, if you don’t mind some compromises, in this post we’re going to take a look at how you can snag yourself a cheap live streaming PC in 2021.

This is still a solid guide but these parts are more expensive than ever!

Criteria

One of the first things I’d like to point out is that no brands were involved in this, which is the case with all our content unless otherwise stated, the opinions here are purely subjective!Ed

Our goal is to find a cheap live streaming PC that can encode a decent quality 60fps 1080p stream, on the GPU side, it will mean we lean toward NVIDIA since NVENC is such a powerful encoding tool for gaming and event streamers. On the CPU side, it’s basically dead even between Intel and AMD, all that matters is whichever gives the most cores at the cheapest price. Also, the focus will be people using these machines as dedicated streaming PCs rather than your primary gaming machine, so keep that in mind.

A Geforce RTX 2080 graphics card which you could get as part of a cheap live streaming PC build.
Photo by Christian Wiediger on Unsplash

Custom Build

First up, this one is for all the diehard PC enthusiasts that only build their own machines. Now, if you’re planning to game and stream on the same PC, this isn’t going to be the build for you. You either have to eat the scalper’s tax to get a decent GPU or take a look at some of the laptop options we’ll discuss later on. But if you’re just building a cheap living streaming PC dedicated purely to encoding, then you have some choices.

Basically, you’re going for the CPU that will give you the best value. So, you’ll have to go back a couple of generations and go for a 10th Gen i7 or a 1st GEN AMD Threadripper, both of which clock in under $300 USD. Get the thread ripper if you’ll have a lot of capture card inputs and go for the i7 if it will just be your streaming PC. Both will allow encoding a solid 1080p stream.

I’ve linked some potential builds below, but you can make this even cheaper if you can use any spare parts you may have available.

PC 1 (AMD): https://pcpartpicker.com/list/pNgNt8
PC 2 (Intel): https://pcpartpicker.com/list/WqBYsX

Pre-built

If you’re going to want the latest and greatest components for your streaming PC, well you’re going to have to go to the land of pre-builds. These are the only options for getting access to the latest AMD and NVIDIA GPUS for reasonable prices. For some of the more boutique stores, you’re likely going to get the best prices from iBUYPOWER and Cyberpower, Linus Tech Tips actually did an amazing video where they go through the buying experience from different PC manufacturers.

Of the big boys like Dell, HP, Lenovo, Asus, etc it really depends on your region. I have to say that going back to Linus’ video, I would be inclined to give HP a try, especially their Omen series. They have 10th gen Intel PCs with 20 series GPUs that are great starting points for any game and event streamers looking for a cheap live streaming PC.

A gaming PC that could be a cheap live streaming PC is on a desk next to a monitor, keyboard, microphone and a gaming laptop.
Photo by Andre Tan on Unsplash

Laptops

Finally, chances are one of the best places you’ll find a deal on streaming PCs are laptops. Mainly because retailers constantly have to clear out supplies every year to make space for all the new toys that get announced at CES, Computex, and the like. So for a laptop, we’re primarily looking for two things, at least a 1660 GPU and thunderbolt ports.

MSI makes great gaming laptops with both, and it’s a thin and light laptop which means you’ll be able to take it with you to events or just keep it tucked away at home. The 1660 means you’ll have access to the best version of NVENC and the thunderbolt port means you can add an enclosure to install multiple capture cards.

Now if for some reason you need a gaming monster, Gigabyte’s aero line is usually a good bet, but with the 30 series cards one important thing to note is that the cards will have different wattages which will affect their performance, so be sure to check that if that is important to you for gaming.

Finally, there’s always a ton of refurbished laptops on the larger manufacturer’s sites, so be sure to check these sections as you can get an amazing deal on a like-new laptop.

We hope we have saved you a few bucks and got you up and streaming with this blog, but be sure to let us know the cheap live streaming setups you’ve made in the comments!

Stream Better: Improve your microphone tone for that professional sound!

When it comes to upgrading your streaming equipment, we’ve argued a few times that audio is the first thing to pay attention to. Clarity of voice to most viewers can be more important than the quality of a webcam. Once you have a decent mic, however, you might be wondering how you can get that deep, boomy, bassy-sounding microphone tone that you hear in podcasts, talk radio, and basically any spoken word on the internet. Content creators have been replicating it for a little while now so we’re going to take a look at how you can recreate this professional microphone sound.

Placement

The most important thing straight off the bat for a professional microphone sound is microphone placement. The closer the microphone is to your mouth, the better it will pick up your voice and not your room. Many microphones have what is known as the proximity effect, which means the closer the microphone is, the greater the amount of lower frequencies (bassy sounds) are picked up. Some microphones like the EV RE-20 actually have tech built in to limit this effect, but basically, if you want to sound like Barry White, you gotta get close to that mic.

One important thing to consider with placement is how you will mount your mic. Articulating arms are pretty common, but can get pricey. If you have desk space, a simple microphone stand is always a good option. Get one with a nice weighted base that can go on your desk, this will minimize the amount of noise made if you’re using a keyboard at the same time.

A content creator sat at a desk with headphones on talking in to a Shure microphone connected to a mic stand and a laptop for professional microphone sound.
Photo by Soundtrap on Unsplash

Type of microphone

As I mentioned, different microphones have their own unique purposes and you should pick the correct microphone for your use case rather than trying to get a microphone that can do everything. That being said, the gold standard mic is the Shure SM7B. Pretty much any podcast and most streamers these days are using this mic for professional microphone sound. It doesn’t pick up too much background noise and the proximity effect will give you those quiet storm vibes

If you don’t have the budget, the Shure MV7 is basically the cheaper version and functionally the same with the addition being a USB mic. Other devices that work well are the Rode Podcaster and the classic Shure SM58. Types of microphones for content creators is something we’ve discussed here before so be sure to check out this handy guide!

EQ and Compressor

Now you’ve got the right microphone and it’s placed in the perfect spot, but you’re just not getting the professional microphone sound that you want? Well, now it’s time to add some EQ to the mix. XSplit Broadcaster has DSP plugins built-in and one of them is the EQ. Basically, EQs lets you target and boost or lower certain frequencies. Now everyone’s voice is different which means you will have to experiment to find the right frequency, but generally speaking around the 100-200 range is what you want to boost if you want more bass or presence. If you’re looking for more clarity, try the 4000-6000 range as well.

Setting up the EQ in XSplit Broadcaster is simple, simply head to Tools and click Audio Effects, which will open up a host of settings you can tweak. Applying some compression can help achieve a certain tone as well. As we’ve said, all voices are different so feel free to experiment and find that tone you want!

Now one thing we omitted is hardware compressors and EQ. That’s a bit outside the scope of this article, but the most important part is to get the right mic and get it as close as possible. This will really be a big factor in getting that professional microphone sound. If hardware compressors are something you’d like us to discuss, however, do let us know in the comments below and we can get a post out about them!

Stream Better: Creating a narrative while streaming

In the early days of streaming, it was miraculous enough just to get a stream online and stable. Nowadays, streaming is accessible to everyone, you can use your smartphone, any PC, or even a console. Streaming is easier than ever and this means there are more people streaming than ever, so while having a technically sound stream used to be good enough to start building an audience, there’s more competition than ever. So how do you stand out in a crowded market? Well, one solution we’ll talk about, is building a narrative!

What is “building a narrative”?

Well, it’s just a fancy way of saying you need to build a story with your stream or a “narrative hook” which is a term used to describe the key point of interest in a story. And like all stories, there needs to be a beginning, middle, and end. And like most stories, there needs to be a hero, which is you the streamer, and a goal that you will achieve. So what are some examples of streams with a narrative?

One example is speed-running streams. The beginning is the speedrunner practicing their runs, the middle is attempting the runs and the end is achieving a new personal best or record. The overarching goal is to get the world record for that game. But speedrunning a game takes immense amounts of practice and what if you’re not a hardcore gamer or your content isn’t focused on gaming at all?

If you’re planning to do IRL streaming, it’s good to give your streams a purpose for that day. It can be useful to follow cues from vloggers who generally focus their videos on one aspect of their daily life. So, your IRL stream for that day can be about achieving a particular goal, such as cooking your first pizza, which means your 3 act structure is getting the ingredients, cooking the pizza, and eating the food.

This also helps engage viewers who may join your stream late, they can quickly catch up on what part of your adventure you are on. I feel this is why battle royale games have been so popular for streaming, each match basically tells a different story. The goal is to survive, the beginning is looting, the middle is surviving until the final circle and the end is if you win or not.

An IRL streamer using an expensive camera out on the streets connected to a backpack streaming setup is creating a narrative in order to get better at streaming.
Photo by KAL VISUALS on Unsplash

The Long Story

What we’ve discussed so far is basically for single streams. It can be quite hard to come up with creative ideas for each and every stream you do. So what you can do is create storylines that will last over a period of time. Fundraising works really well with this. Whether it’s for personal benefit or charity, having a fundraising goal is a great way to get people to watch and support you.

Subathons are a great example of this content. The goal is how long can the streamer keep broadcasting. Other forms of this content are long-form art projects, like woodworking or cosplay. It can also be achieving a goal, like in games with global rankings, it can be your race to be #1 in the rankings or trying to achieve the highest gamerscore possible on Xbox live. Maybe you have a backlog of games you wished you beat when you were a kid and couldn’t afford. Maybe you want to start a podcast revisiting the albums of your youth or old cartoons.

One important note is if you are planning long-form or serial content, make sure you do a good job archiving as well so new viewers can get up to speed quickly. One of my favorite pieces of long-form content was video game championship wrestling, which emulated WWE-style storylines with video game characters. The community built a whole wiki page around the federation so new and lapsed viewers could revisit and catch up on storylines.

This can also be a great way to approach playing a narrative game, for example, Chris here at XSplit once streamed LA Noire, which already has a narrative flowing through but added the idea that his character was “the backward detective”, which essentially meant walking/driving backward at all times. This made the journey of Cole Phelps, the Backwards Detective, all the more exciting as parts of the game were completed.

A streamer sat at a PC desk with a gaming headset on streaming themselves playing a game, using tips to get better at streaming.
Photo by Sean Do on Unsplash

The Never-Ending Story

Now I know I said every story has a beginning, middle, and end, but sometimes there doesn’t have to be an end. Sometimes there’s content that can just go on forever, and it’s more about the interactions the character has, rather than a storyline.

A good example of this is GTA RP, where the player develops the character and works on inserting them into a variety of situations and interactions with other role players. VR Chat works in the same manner as well. Create your avatar, explore some worlds and talk with other characters.

Also, something like a D&D stream (something we have discussed with Felicia Day and Tanya De Pass) can take this route where while you tell tales with beginnings, middles and ends the characters themselves can go from campaign to campaign. The audience gets to know them better and past events will always help shape future ones so it’s a great thing to consider if you want to build your narrative across streams.

Let the audience tell the story

Now the beauty of streaming is that it is interactive, unlike movies or novels, the audience can change the story and the onus is on the streamer to give the audience these tools. Some of these are staples of streaming, like sub-goals and donation rewards, if you haven’t set these up, then you should as you’re just tossing away potential income for your stream. All you need to do is add a web URL link as a source in XSplit Broadcaster. (Simply get the web URL from the service you’re using to get donations, set up alerts and ctrl+v that link into Broadcaster!)

Other things to do are adding lists of activities as a stream overlay or in your stream title. One good way to encourage engagement is to have a poll after you complete an activity to ask the audience what you will do next. Now you probably don’t want to make all aspects of your life a choose your own adventure type ordeal, but it’s going to give the viewers some type of influence into what they are watching.

Basically, you should always experiment with the format of your content. What have you found successful as a narrative device for your streams? Let us know in the comment section and if there’s anything else you would like us to discuss, that’s the place to do it!

After you Stream: What you should do after going live!

Alright, so you’ve just finished a marathon 8-hour streaming session, thanked your new subs or followers and now you’re offline. Job’s done, right? Well, it turns out, not quite yet. There are all sorts of things you could be doing to maximize the potential reach of your content after you stream, and we’re going to discuss them here!

Clips

This first one I’ve covered many times and I know I sound like a broken record at this point, but clips clips clips! Check if your viewers made clips, or go and make clips of any highlights from your stream to post on your socials (TikTok, Instagram, Twitter). If you want to take it to an extra level, try to have templates for each social media resolution in your editor of choice so you can just download the clips, drop them in and schedule the posts.

Not only does this give people a highlight but it gives them a bite-sized taste of what your streams are all about. Plus, there’s the chance a clip can get shared around the internet if something particularly crazy or exciting happens, something we have discussed over on our YouTube channel before.

Archiving

Places like Twitch, YouTube, and Facebook will keep videos automatically for you, but not all of them will keep them forever. Twitch, for example, will auto delete a past broadcast after a certain amount of time, the time frame is different depending on if you’re a standard user, an affiliate, or a partner. What you want to do is make a highlight of that stream. In the Video Producer section, you can choose to highlight a stream, meaning you can capture a certain section or in this instance, the whole stream! This will then keep that archived content on Twitch so people can watch while you’re offline.

If you have the resources to record while streaming, it’s a good practice to cut out the highlights while your memory is still fresh on what was good and what wasn’t. Remember if you record with multi-track audio (something easily done in XSplit Broadcaster) you can take out any sounds that you think might get you a copyright strike on other platforms.

It’s also a good time to take a thumbnail pick as well, remember to use your youtube face, something else we’ve discussed on our YouTube channel! 

Community Management

If you use Discord, Reddit, or any place where your community congregates, make sure to drop by and leave a few messages thanking people for tuning into the stream or just see what your community is talking about. This is a great way to gauge what people enjoyed and what they didn’t. While you shouldn’t change something you’re enjoying because a few people didn’t like it, if everyone in your community didn’t enjoy it, people you trust? Maybe it’s time to switch to another game.

Make sure to keep your community updated with what’s coming next as well. This can be as simple as posting when you’re going live or detailing the week in a tweet schedule and then posting that in an announcements section on your Discord. Update your stream titles for the next stream and schedule your social posts on when you’ll be live next.

Finally, check your DMs/socials/email as you never know when an opportunity to collaborate or do a sponsored stream might pop up!

A person is sat at a kitchen table making notes in a notebook, something you should do after you stream.
Photo by ConvertKit on Unsplash

Stats

If you’re on a platform that supports it, make sure to check your stats/analytics. Check where your viewers came from if your thumbnail had more clicks than usual. A good practice is to check after a couple of weeks how your channel is doing overall. So if your viewership is growing, check what time has the most viewers and what games you’re streaming that see the most viewership.

This part can seem a little creatively stifling, but if this is to be a career it’s better to make educated guesses on where to point your content than just go on gut feelings. Plus it can just be a good guide for you to try and replicate past success.

Take a break

Last, but probably most important, take a break. Go far away from your computer, take a walk, read a book, watch Nomadland, I mean it’s the best picture of the year. Do whatever you can to mentally separate yourself from work aka streaming. Everyone needs to disconnect for a bit, let the brain reset, and refresh themselves, otherwise, burnout will eventually happen. Some of us need more or less time, but be sure to take as much time as you need to feel recharged.

What’s your post-stream routine? How do you recharge the batteries after a lengthy stream? Do you make your own clips or does your community help? Be sure to let us know in the comments section and if there’s anything else you’d like us to discuss like this, that’s the place to tell us as well!

Getting Stream Sponsorship: The Stats That Matter!

Alright, so you’ve been on the grind for a few months or even years now. You’re starting to see consistent viewership on your content and you think that now is the time to start getting paid for your content. I think a lot of creators spend so much time honing their craft, that it’s a bit scary when you start talking to brands for stream sponsorship, especially beyond the usual product sponsorship or affiliate sales. So what do you need to do to prepare? Well, that’s what we’re going to talk about in this blog!

What is your reach?

First and foremost, it’s important to acknowledge what the sponsor is paying for. In all honesty, they’re not paying for your production quality or creativity. They’re paying for access to your audience, in the form of clicks and impressions, we’ll call this your “reach”. They want brand awareness, hopefully, a click, and especially a sale.

This is how camera review channels have bankrupted me because they make all the gear look so cool, that I just NEED to buy it. But now that you know this, you need to structure your content to accommodate. If you don’t have stream sponsorship or brand deals, you can still figure out what your reach is! Basically, any sponsor is going to ask you to tell your audience to go to a link or use a special promo code. This gives them a way of tracking your value to them as a partner by seeing how many people clicked the link or made a purchase.

However, there are ways you can gauge this yourself. Startup a Patreon, run a giveaway, or run discounts on your merch. Whatever you do, create a link or discount code that you can then track. This is how you’ll determine your reach. For example, let’s say you’re running a giveaway for some shirts you made, rather than have people sign up via a google form, use a tool like gleam.io to run the giveaway or put the link to the form behind a shortener like bit.ly. This way you get stats on how many people clicked your link and joined the giveaway.

Knowing this will let you know how much you’re worth as brands can spend tons of dollars daily on google ads just to get a click on their site to very broad audiences that may or may not be interested. You, however, can offer the sort of audience they want and you can quantify with numbers how many people will follow a link to a product you have posted before.

So let’s say a brand approaches you saying they want you to promote their toothbrush that costs 300 dollars and they’ll pay you with the toothbrush + 200 dollars. Now your channel is about oral hygiene and you did a giveaway that got 5000 sign-ups, well based on that I think you have a good leg to stand on to ask for a bit more as your reach is wider and more specific to the audience they are trying to reach!

A streamer is sat at a desk in front of a gaming laptop with their hoodie and headset on wondering how to get a stream sponsorship.
Photo by Fredrick Tendong on Unsplash

Know your audience

I’m sure you’ve seen people talking about TV ratings and target demographics like 18-35, income brackets, and the like, right? Knowing your audience, their purchasing power, and interests are going to be very important to selling yourself for stream sponsorship. I know a lot of people are here because they’re into streaming games and making that a career, but you have to face the reality of what a predominantly gaming audience will be willing to buy. They’re likely going to want to buy the games they want to play first and then whatever makes that gaming experience the most enjoyable. Maybe they’ll buy some merch affiliated with the game?

So if you’re a league of legends streamer and you see Target is selling LoL lunch boxes, that is the kind of collaboration that would be good for your audience. Now, if you do broader content, like reactions or reporting on news, then you’re going to have to use some other tools. First and foremost, especially if you’re on youtube, look at your analytics!

YouTube Analytics is amazing for finding your audience demographics. You can see the age range of your viewers, where they’re located, and where/how they found your content. This will at least give you a baseline of what kind of products your audience may be interested in. If your age demo is 18-24, maybe don’t go for a Werther’s Original sponsorship, unless that’s a thing on TikTok now.

If you need more insight into your audience, then you need to use the tried and true marketing tactic, the survey! Basically, you’ll just need to run a survey, where whoever answers gets a chance to win a prize and promote it in your content and all your channels. This is where you can find out valuable data about your users like what they might buy which can then, in turn, inform how you’ll approach sponsors.

A streaming desktop with an ultrawide monitor, a gaming keyboard and mouse, funko pops and a large moon desklamp, a nice setup is something you might want from a stream sponsor.
Photo by Javier Peñas on Unsplash

Partnerships, not Sponsorships

So your first few sponsored videos are likely going to be product reviews or promotions. But eventually, you’ll find a brand you’ll want to keep working with and this is where you try to form a partnership instead of just a sponsorship. How do you do this? Well, you need to provide a TPS report (this is an Office Space reference, for those of you born after 1999Ed), I mean a post-activation report.

Basically, after the promotional period, usually, a few days after the video releases, you’ll want to follow up with the sponsor with a short report on how you think it went. This will include stats from your analytics, samples of social media posts, snippets of audience responses, and your thoughts on what went well and didn’t with your stream sponsorship.

Basically think of it as another sales pitch as to why a brand should keep working with you. One important part of this process is to set reasonable KPIs (key performance indicators). This could be impressions, clicks, or even sales. Don’t promise the world and if you’ve been following the advice in this blog post, you should be able to get a good idea of what you can offer.

Now if you hit or exceed those KPIs, with a post-activation report or After action report (AAR) as it’s known in some circles, then you have a strong case to build an ongoing partnership with a brand.

Now, this is just the tip of the iceberg into the realm of selling out, or digital marketing as the pros call it. If you take away anything from this blog post, it’s to know your audience to know your worth. I wish I could say it’s as easy as having high production quality in your videos, but with these things, it’s more like having high engagement quality.

Do let us know, however, what you think? Have you had a stream sponsorship deal before? What was it like? Do you have any tips for reaching out to sponsors? Let us know in the comments below! And if there are any subjects like this you would like us to cover in the future, well, right there in the comments is the place to put it as well! Good luck out there!