Chris is the Communications & Content Editor here at XSplit. You may find him voicing tutorials, on stage at events around the world, or right here on xsplit.com. Find him at chrisslight.net
Here at XSplit, we’ve always been interested in how people use our apps, but beyond that, how people get their work done. From the apps and systems they use to how they focus on the task ahead. We used to love the side chats at trade shows and conventions with industry friends. Sitting down sharing stories, and discussing how we work. Since we’ve all been unable to go to shows in the last few years we wanted to take these conversations online and we thought they might be interesting to you. With that, this podcast with Eri Neeman was born!
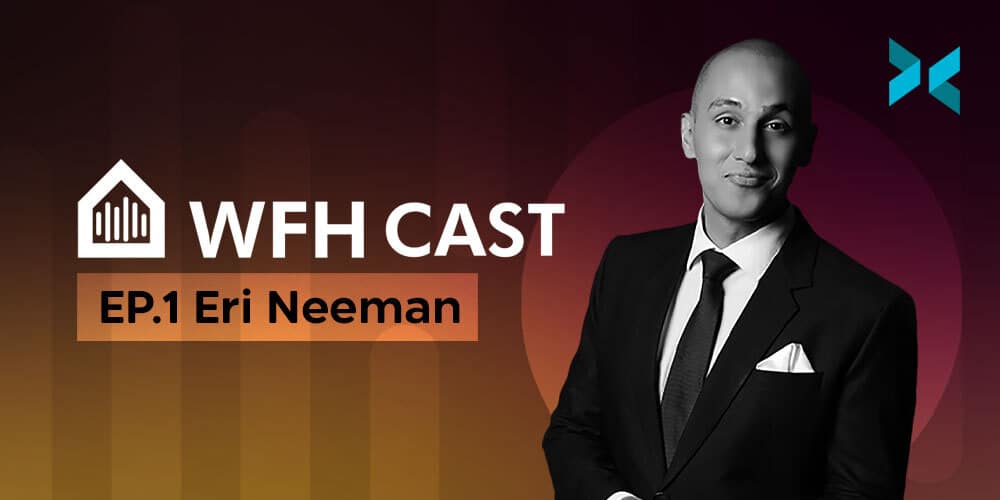
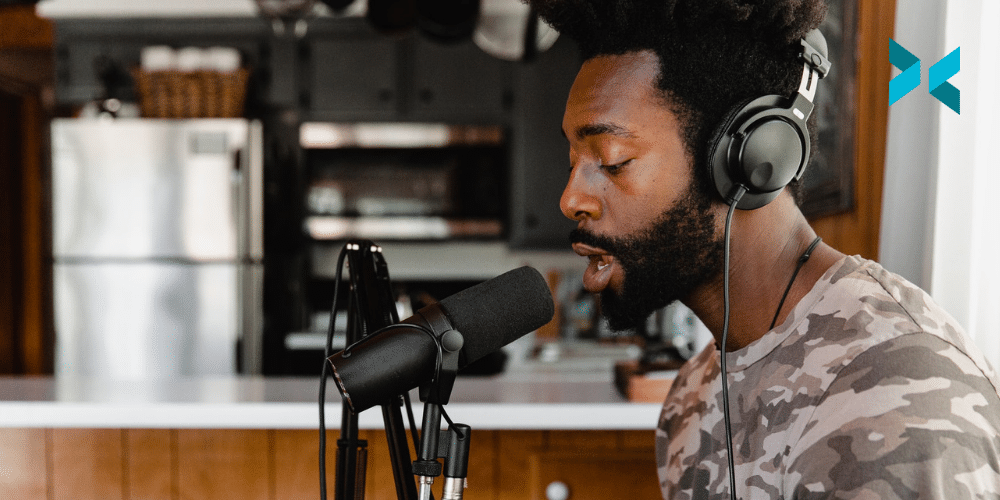
In our first episode, the content team, Louis Vigil and Chris Slight sat down to talk to Eri Neeman. Eri is a popular esports host from the Philippines who has hosted events such as the Manila Major and ESL One Katowice. We spoke with Eri Neeman on this podcast about how he shifted his business to working remotely. We also discussed some tips for others in a similar situation.
Eri Neeman Podcast Interview
The following is a brief excerpt from the show:
Chris Slight: So when the pandemic hit and everything started getting canceled, how did you pivot your work?
Eri Neeman: First of all, it was just kind of accepting that OK, this was the situation. This is it. I knew there was going to be no work. Like, your entire calendar, however many events I had, that was just wiped, right? And I kind of saw it as an opportunity to do things I’ve always wanted to do but never really had the time to do it. Because it was just meetings, hosting, meeting with clients, and that cycle would go on for a year and you’d rarely get breaks.
Eri, Louis, and Chris go on to discuss everything from Eri’s background in the industry. As well as the equipment they use, and advice for transitioning as a host to a work-from-home environment.
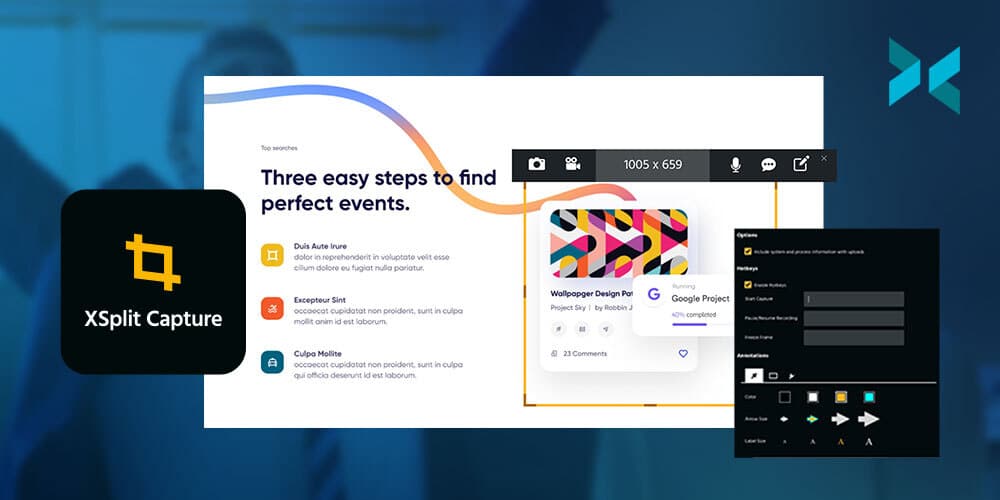
XSplit Capture, our latest addition to the XSplit Suite of apps is available now in open beta! Designed to be the ultimate application for sharing screenshots and videos quickly, XSplit Capture saves you time by making use of powerful and intuitive features!
Share Your Ideas Quickly
XSplit Capture is the ultimate screen capture program letting you grab the exact part of the screen you need to share and add annotations, arrows, and highlights! Video is just as simple, with the ability to add voice-over to whatever you’re recording.
Everything, In The Cloud
All of this is uploaded directly to the cloud, and a link is added to your clipboard for instant sharing in an email, social media, or anywhere! If you, or the person you send it to, need to download the file, that’s just one click away! Your team members can easily add comments to this page on XSplit Cloud, where all your captures will be stored for easy access privately by you.
To try XSplit Capture, currently only available on Windows but coming soon to macOS, simply sign up and download the program from your dashboard! If you have any questions, thoughts, or feedback, let us know here in the comments or reach out to us on socials!
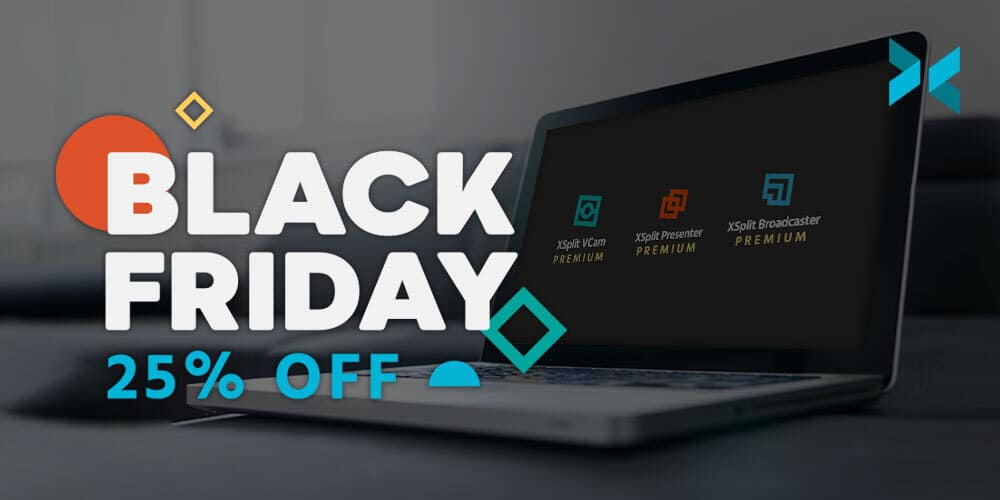
Black Friday is here and we have one of our biggest deals yet! 25% OFF all of our licenses, FOR LIFE! You can get access to our entire suite of apps, or just purchase a license for a specific program for the length of time you’re after! And yes, for life means for life. You will get 25% off every renewal if you’re paying monthly or even yearly!
This promotion is running from November 24th – November 30th so don’t miss out!
Getting this deal couldn’t be easier, first of all, head to the Buy Page here where you can select what kind of license you’d like to buy. Then, you’ll be prompted to create an account, and after that, it’s just a case of making the purchase using one of the promo codes listed below!
Nov 24th – 30th 2021 – BF25 Nov 29th – Dec 2nd 2021 – CM25
Remember, only one of these codes will work at a time. If you’re new to XSplit or just don’t know about our entire suite of apps, why don’t we look at what licenses we offer?
What Licenses Do We Have?
So, when it comes to our licenses, we have a few options. The best value is the XSplit Premium Bundle, which includes access to our entire suite of apps. So that includes XSplit VCam, Presenter, Broadcaster, Capture, Connect: Webcam, and anything else we release in the future! Not only that, but you will get early access to new apps and private beta access to upcoming apps!
After that, we have Premium Licenses for each app, that’s Broadcaster, VCam, and Presenter. Each of these unlocks the full potential of the app and you’ll also receive VIP support from our 24/7 live support team! This is something that is, of course, included with the Premium Bundle!
When it comes to duration, you can select a number of options from one month, which will renew automatically, all the way to a lifetime license. That’s right, if you’d rather not pay monthly you can simply pay once and never have to worry about it again! This option, of course, includes all updates going forward, VIP support, and all the same benefits you get from paying monthly.
As we mentioned, this deal is only on for a limited time so be sure not to miss out! And as ever, if you have any questions, we are available here in the comments or on our social channels!
So you’re making a video review or video essay for YouTube but being the content-savvy person you are, you’re going to stream at the same time. Wouldn’t it be nice if you could record gameplay footage while you stream without your camera and overlays in the recording? Well, it would be pretty surprising if I now didn’t explain how to do that, right? Let’s find out how!
Record raw gameplay footage while you stream with XSplit Broadcaster
One of the easiest ways to record gameplay footage while you stream is to use XSplit Broadcaster’s Recording Profiles. First things first we’re going to need to download, install, and set up XSplit Broadcaster. It’s pretty simple but here’s a link to our getting started videos. Here’s the super quick version though, sign up at XSplit.com then head to your dashboard, download Broadcaster, install, log in with the account you just set up with and let the wizard do its thing. Simple, right?
Next, we’re going to need to set up some scenes. First of all, we want to set up our streaming scenes. This is all personal preference of course but having a Starting Soon scene, the main scene, a BRB scene, and a “thanks for watching” scene are the minimum you’ll find useful for streaming
In your main scene you can add your camera, gameplay if that’s coming from the PC you’re on or a console through a capture card and you can add in a link to your overlays or alerts. Quick pro tip from an old Broadcaster pro, you can paste in any link by just hitting ctrl+V. This works for text and images as well so keep that tip in your back pocket!
Now, for our recording, we’re going to want to set up another scene. Call it recording and simply add in your game source. Make it full screen and you are done! Simple. The magic comes when we start using the recording profiles.
First, click record in the top menu, and in the drop-down menu press “set up a new recording output”. From here you can select the scene we just made for the raw gameplay footage in the drop-down menu labeled “Record Target”. I’d suggest setting the Codec to NVENC if you have a compatible NVIDIA graphics card, and setting your quality to Ultra High if you have the hard drive space. You’re recording this gameplay footage while you stream for a video after all, so why not make it look nice?
Getting the settings right
Be sure to bump up the audio quality to 192kbps so it all sounds crisp and be sure to have Force constant frame rate selected. This should be selected as standard but it never hurts to check! One box that won’t be ticked that you want to make sure is ticked is “Create multitrack recording of microphone and system audio”. This will, well, I mean, to quote an old British TV advert, it does what it says on the tin, right? It’s going to create multiple tracks of audio for the recording so, your microphone audio that is going out to the stream? When it comes time to edit your gameplay footage, you can just delete that!
Click “OK” and when you go live just select the new recording output we just set up and you are good to go! You’ll find the file in your recording folder, which if you can’t remember where that is you can click on File, my recordings, and right-click on the recording you just did, and select open file location!
Recording gameplay while you stream is easy, huh?
This feature has been incredibly useful for me a number of times, and back when I was creating more content or reviewing games this would have really come in useful! Recording gameplay footage while you stream and no longer needing to have a separate program running or a piece of separate hardware is great for content creators!
But what tips have you developed as a content creator that have made your life easier? Let us know in the comments below! We’re going to keep making more articles like this with tips to make your life easier so be sure to keep it locked on the XSplit Blog!
Setting the mood for your online Halloween party is essential, so having the right spooky webcam background can make all the difference! However, spending time trying to find the perfect image through search engines can be a bit of a chore! So, we’ve got a whole bunch here that should do the trick! Since our own program, XSplit VCam, can use videos and gifs as backgrounds, we have some extra spooky moving ones as well!
Here are some images from various horror movies that would make great scary backgrounds for your next call! From iconic images to more modern classics, we’ve got you covered!
The Exorcist (1973)The Blair Witch Project (1999)The Thing (1982)The Evil Dead (1981)Shaun of the Dead (2004)The Silence of the Lambs (1991)Stranger Things (2016) Sure it’s a TV show but this is an iconic image, right?
Spooky Horror Gifs
Pop these in the background of your next call, and you’re ready to go with a spooky background guaranteed to add atmosphere to your next call! Not every call platform can support gifs and videos as a virtual background, but if the program you’re using can (did we mention our own XSplit VCam can do this as well as videos from places like YouTube?), then these will be great!
The Shining (1980)Signs (2002)The Ring (2002)Halloween (2018)It (1990)Scream (1996)
We hope these spooky webcam backgrounds help you out with your next virtual Halloween party. Or, if you want to add a bit of the horror world to your next call! We don’t recommend showing up with one of these for your next check-in call with your boss, though! If you’re looking for some more webcam backgrounds that are less specific, we have a long list right here!
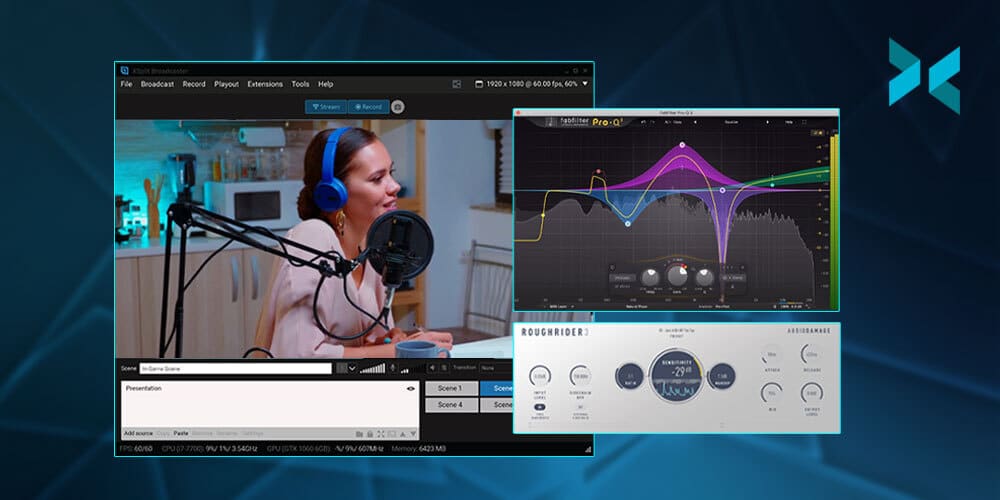
XSplit Broadcaster 4.2 is here and with it are some really big upgrades to how you stream!
VST3 Support – VST3.0 Effect Plugins can be used on your main microphone to add enhancements to the mics sound.
Virtual Microphone – Much like Virtual Camera, you can now use XSplit Broadcaster as a virtual mic! So whatever audio is coming from Broadcaster, you can send that to any calls/sources you’re in!
Low Power Mode – Save processing power when video devices are not actively being used by activating low power mode on that source.
10 Bit HDR Support – Capture games that output in HDR and Broadcaster will convert them to SDR for your broadcast. So, you can play your game in HDR but send the correct signal out to your stream!
No more Admin Permission pop up – XSplit Broadcaster won’t ask for admin permission when you open it.
There are a bunch of other features and improvements like new sample rates added to noise suppression, updates to the stream-only speaker device, a single login/signup button, and more! On top of this, we have a whole bunch of bug fixes which you can find in the full release notes here.
It’s also worth noting that for security reasons XSplit Broadcaster now only supports Windows 10 and beyond.
Finally, we would also like to say thank you to everyone who has been using XSplit Broadcaster 4.2 in PTR, which if you’re interested you can download the latest PTR version of XSplit Broadcaster and try out new features before they hit the main release.
We’re always updating and improving our apps based on what our customers want so if you have any comments, be sure to let us know either on our social channels or right here in the comments section! You can also request new features over on the Feature Upvote page!
The new XSplit Affiliate Program is here! We’ve taken the previous affiliate program and supercharged it, based on our current member’s feedback, with more opportunities to earn money with us and best of all, it’s open to absolutely everyone!
Benefits include:
You will get a personalized code of your choosing giving your audience 10% off any XSplit Premium subscription
For every purchase made using your code you will receive a 10% commission
You will get that 10% for each recurring purchase someone makes
All you need to do is head to https://xspl.it/affiliate and sign up! Once you’re accepted you will be able to set up your code and start earning with XSplit right away! You don’t need to have a big following, just sign up and you’re ready to go!
We look forward to welcoming you to the brand new XSplit Affiliate program! If you have any feedback or have any questions, you can reach out to us on our socialchannels!
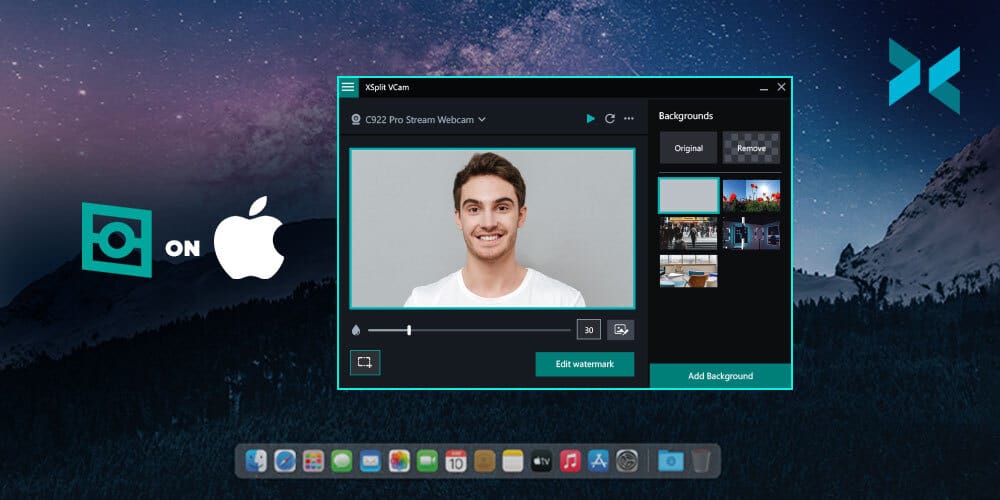
XSplit VCam is now available on Mac! Now you can use our AI-powered background removal and replacement program on macOS devices!
Getting started is easy, head over to the VCam landing page and download and install VCam. You can either log in with your XSplit account or create a new one if this is your first time using VCam. Clicking “skip login” will let you use VCam without logging in, however, this won’t be connected to your Premium account, and while can use all the features there will be a watermark.
Now you’re in, you can blur your original background, remove it completely or use a media source to replace it with VCam on Mac. You can even add blur to this replaced background if you wish! Find out more about setting up VCam on Mac in our getting started video.
We’ve been working on bringing VCam to Mac for some time now and this is only the beginning! Be sure to reach out if you have any comments or questions here in the comments section below, or on our social channels. If you’re having any problems, our customer support team is available 24/7 (just click the speech bubble in the bottom right-hand corner of your browser window on the support page) right here.
In the last year, we’ve seen a radical shift in the way we work together and here at XSplit and we thought, using the knowledge we’ve gained over the last ten years, that we could make the way we meet and present information better. We found that giving presentations with everything scattered over a number of windows, from our Google Slides, the webpage we wanted to show, and a YouTube video that demonstrates our point didn’t make things run smoothly. We were asking “can you see my screen?” way too often for our liking!
On top of that, we found having to choose between seeing our face as we gave a presentation, or seeing our slides, was removing either the information or the personal connection that can keep people engaged and connected with what we were saying.
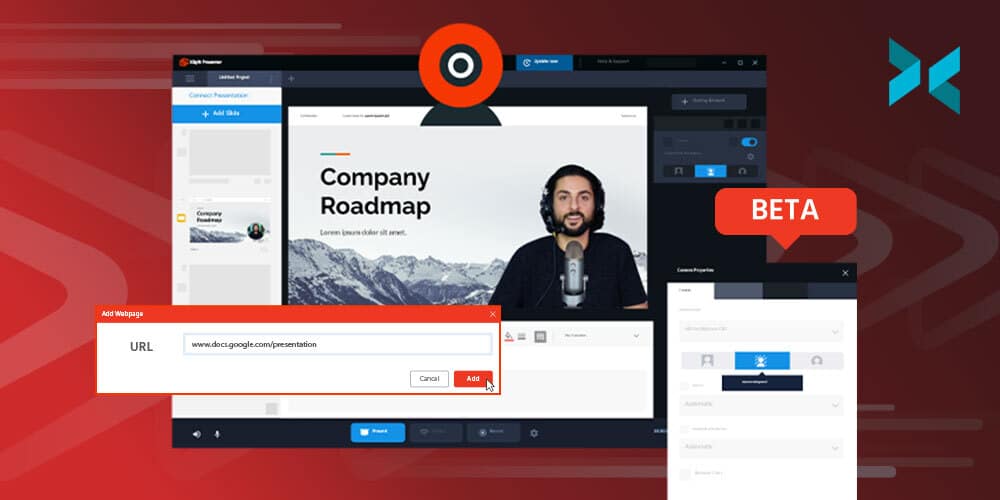
Introducing XSplit Presenter
This is where we got the inspiration for XSplit Presenter, letting you add personality, flair, and interactivity to your presentations, pitches, and meetings. What we wanted to do was pull all your sources into one, secure program and let you add videos, websites, and your webcam (of course, using our VCam background removal tech) all in one place.
Full Integration with services you already know and use
Something we knew we wanted was integration with the services we are already using, so you’ll find XSplit Presenter works with Google Slides, Microsoft Powerpoint, or even a PDF file! It also works as a virtual camera in all your favorite video call platforms like Zoom, Teams, and Skype, so no more worries about someone seeing a Messenger window pop up during your meetings as you choose what gets shared, not the share screen button!
Engage and Interact with your audience
Another thing we found we needed was the ability to address questions easily as they came up, so we built in real-time annotations and highlighting with our virtual pointer. Not only that, but you can easily pull in more sources, or interact with a webpage live inside the presentation so again, nobody needs to see your desktop and you don’t have to break the flow of the conversation. Want to show your product page? Just click on it!
Multiple speaker support
Giving a group presentation? Using NDI sources from software like Skype you can add multiple remote speakers and seamlessly transition to them as the presentation progresses, even integrating them into your slides like your own camera.
We’re going to be adding more and more features, including remote collaboration, so we’re excited to go on this journey with you! XSplit Presenter is available to download and try for free during the open beta period so download it and try it out for yourself today!
We’d also love to hear your feedback, you can reach us here in the comments, on our social channels @xsplit, or on our Discord server.
One thing not many people consider is how much work goes into even a “simple” live stream. If I just went live, with no preparation, even a stream an hour-long would be boring to the viewer. In my spare time, I help run a few streams with guests and co-hosts, so there’s a lot of moving parts to consider. If you just freestyle it you’re going to end up with either nothing to talk about or one boring stream. In this post, I’m going to go over what pre-stream work I put in to deliver the best stream for an audience (and myself!).
Basic Prep
First up, I’ll figure out the game we’re going to play this week and make sure both myself and my co-host have it and everything is installed and updated. Seriously, how many times have you gone to start a stream and the dreaded “40GB update” happens? (I’m looking at you, Call of Duty Warzone). Just as importantly, however, is to find out how multiplayer works. I’ve learned from experience that just launching into a game and assuming you can just easily add a second player in is only going to lead to problems. Sometimes you’ll need to play a single-player chapter first, or there’s just a long tutorial where you need to unlock something to even open up co-op or multiplayer. Always check this ideally the night before the stream!
Put aside some time with enough time around it to change games if it turns out the game doesn’t fit what you and your guest want. Or, for that matter, even if one of you doesn’t enjoy it, you should change it. Try the game out first! Unless you are giving first impressions for your audience going live and playing something that, turns out, you don’t enjoy isn’t going to be fun for anyone! Ideally, get yourself and your co-host to give it a quick playthrough if it’s something you’ve never played before and just get a feel for it. It might also be the case that it just doesn’t make a great game to stream, fun to play but maybe not to watch or it just takes away too much of your attention so you wouldn’t get to interact with the chat. Checking all of this off the list is important to do before you stream!
The next thing you’ll want to do is prep a running order. A running order is essentially a list of everything that’s going to happen in the stream when it’s going to happen as well as key information you don’t want to forget. If it’s a chill stream where you are alone, doing nothing at all but playing a game and reacting to the chat? You might not need this. However, if you have sponsors? Promo codes? Giveaways? All of this can go into a running order! These not only save you having to remember everything but they also give you talking points for when the chat gets a little quiet.
You might not even get to them as the conversation might just flow, but having a few points you can use to get going is useful. Now, if you’re streaming alone? This is really useful! Topics to get the conversation going, for me, mean I don’t miss anything I thought would be fun for that stream. You don’t need to script your live stream, which to be fair people do to great effect but for some streams what you really need are just talking points, for example…
E3 – Xbox – Halo Infinite
That would be enough to jog your memory and say “so did you see Xbox’s E3 showcase? Halo Infinite was a highlight for me!”. Honestly, a running order is key to getting a good live stream together!
One of the first things you’ll want to do is set your titles on your streaming platform of choice. I have myself a number of times gone live with the title and game of the last stream I did still being displayed.
Also, it’s a good idea to coordinate any social media posts you’re going to be doing. You can automate this if you like on a number of services like sprout social, which is useful if you have multiple social channels you’re sharing to. For me, I just want to post something on Twitter the day before with a simple “I’ll be live tomorrow!” style post, then a more expanded post about two hours before I’m due to go live letting people know what I’m playing, with who, at what time and where. Finally, once I have gone live I’ll reply to that tweet with a simple “We’re live!” and the address of the page I’m streaming to.
If you’re using XSplit Broadcaster you can click “Share your stream” once you go live, giving you the option to share it to multiple social platforms at once without opening up another tab. If you’re using an Elgato Stream Deck you can pre-write a simple tweet, and then hit the button once you’re live.
If you have a guest, agree on the time you’ll meet on a call before the stream starts. Always make time before the stream starts to check everything is working and ready to go for your guest! This also lets any new info come your way like “the servers are down” or “the guest can’t make it” and lets you pivot with time to spare before going live. Again, solo this is just as important. You don’t want to rush through the door, sit down and hit “go live” and find out nothing works! Giving yourself at least 15mins buffer time before you have said you’ll go live is essential if you can. It’s not always possible, for sure, but if you can, do!
Arrange everything on your monitor so you can see it and go live! Now, I’d advise having a starting soon screen set up in XSplit Broadcaster that can sit for 5/10mins. This is useful not only to let people trickle in but from the standpoint of a pre-stream check as you can open your stream on another device and just check sound and video are coming through with no issues.
Getting your stream prepped before you go live should always be an important part of your pre-stream routine but what does your pre-stream prep look like? Let us know in the comments below and if there’s anything else like this you’d like to see us talk about you can let us know there as well!