How To Start Streaming Games Today

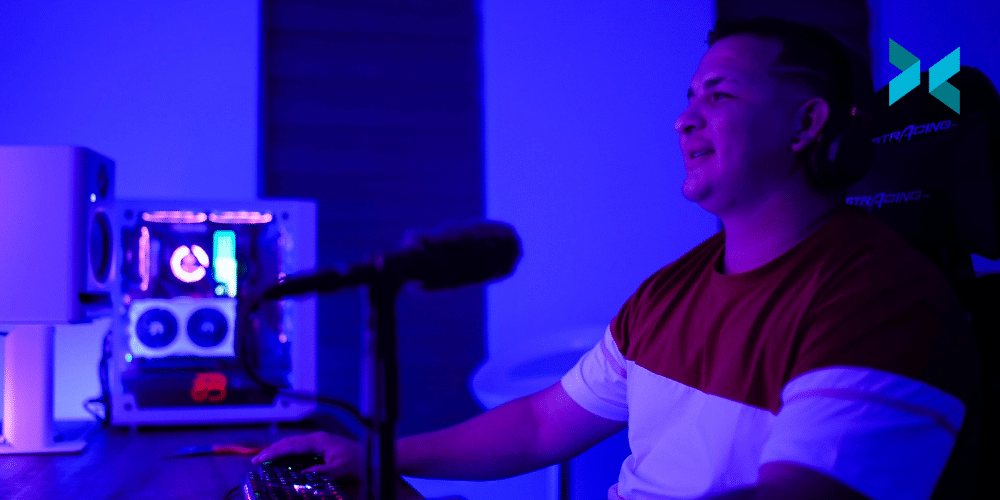
It’s never too late to jump on the streaming bandwagon, but to do so you’ll need a few basic things. This can include a webcam coupled with a microphone, a reliable internet connection, streaming software, and a PC to run it on. Let’s look through the options available so that you’re clued up on how to stream games quickly and without any fuss.

Do you need a webcam to stream games?

While you can stream games to Twitch without a webcam, putting a face to your name can boost your brand as a streamer. So you may want a quality webcam to help you achieve that. Logitech is perhaps one of the biggest names in the business, and both their StreamCam and C922 HD Pro models offer excellent picture quality even in low light.

You may not even need to buy a webcam if you already have an existing digital camera. Many manufacturers including Canon and Panasonic have made it possible to use DSLRs as webcams, which will give your streams a polished look. You could of course also use your mobile phone as a webcam. XSplit Connect: Webcam is a handy tool that lets you do this. All you need to do is download the XSplit Connect Mobile App, XSplit VCam for your PC, and you’re good to go in seconds.

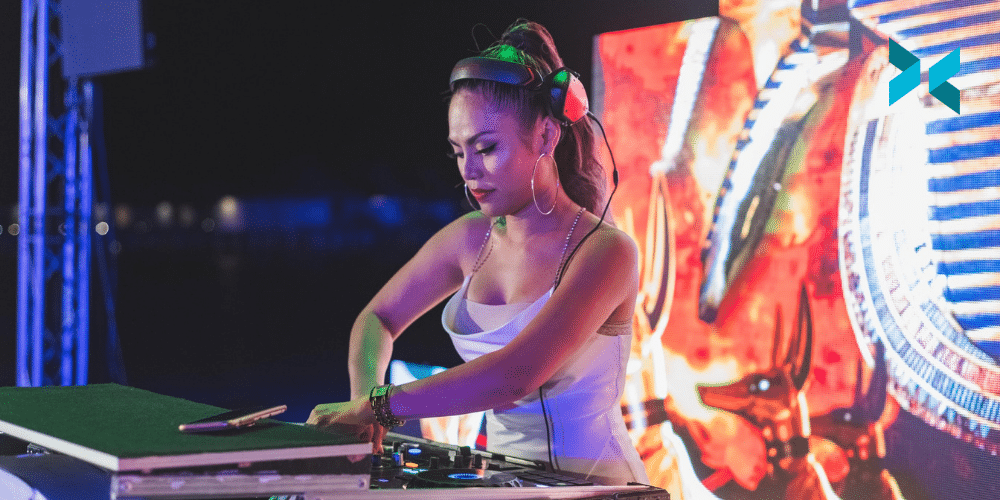
The other alternative is that you don’t actually need a webcam at all. There are plenty of streamers that connect with their audiences without showing their face. Lately, using a virtual avatar in place of your face is also becoming increasingly popular.

An image of a Logitech StreamCam sat on top of a PC monitor which we recommend as an option for how to stream games.
Photo by Emiliano Cicero on Unsplash

The importance of sound

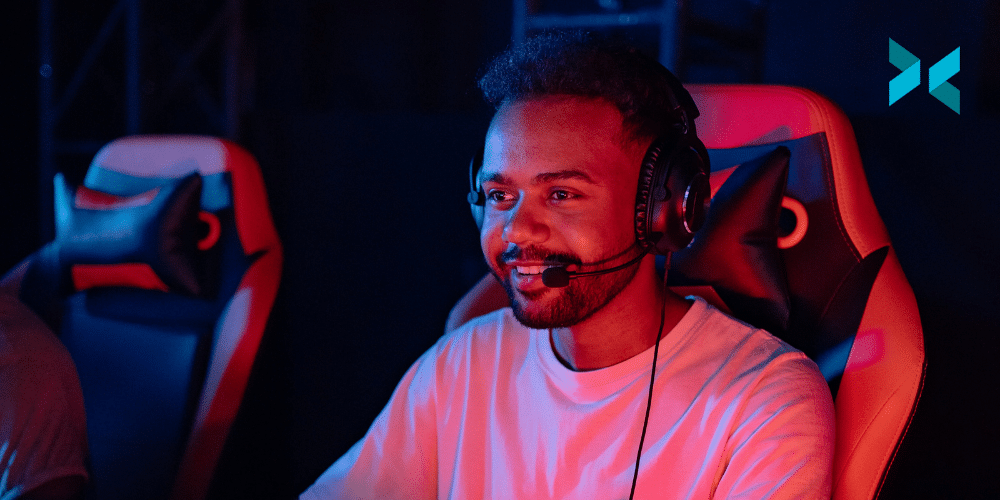
Regardless of what type of camera you use, your audience will want to hear your commentary as they follow your gameplay on screen. Often players will utilize the mic built into their gaming headsets. These are mostly designed for the chat within the game itself. For streaming, it’s preferable that you use a separate mic that offers higher sound quality. A headset is more likely to muffle your voice you don’t want viewers to be put off by bad audio and background noise!

USB microphones have risen in popularity largely due to podcasting, but these can also be used for streaming. The Blue Yeti X is one of the most widely used. If you’re keen to give your stream a bit more dazzle, check out the HyperX Quadcast S that comes complete with built-in lighting.

PC specs and internet speeds

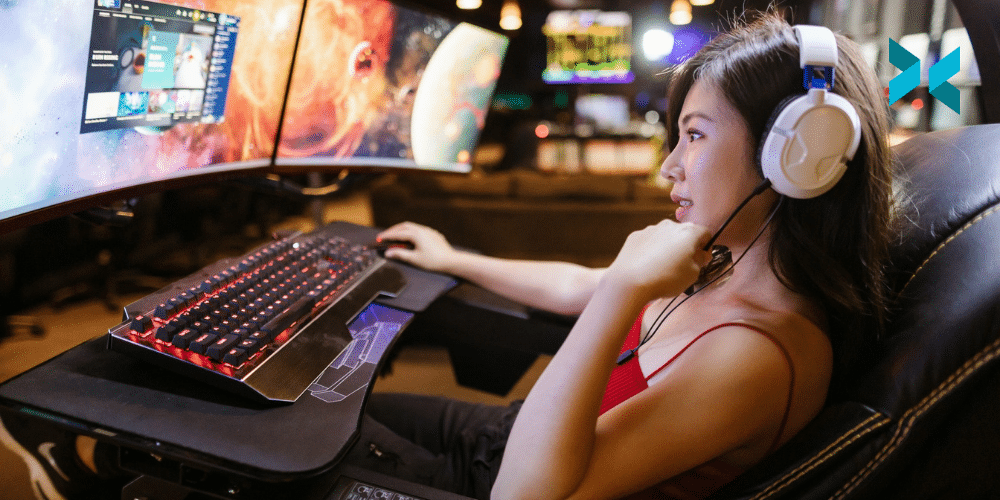
If you’re planning to stream games to places like Twitch, the first thing you should do is check out some hardware recommendations. Ideally, you’ll need a processor that can run at least 3.4Ghz with 8GB of RAM.

For streaming, a hard-wired internet connection is highly recommended. Also, finding a service provider that offers 7 to 11 Mbps upload speeds for consistent 720p streaming at 60fps. This will probably be one of the premium options and can depend on your location and supplier rather than your hardware.

A person using a gaming keyboard and mouse that have RGB lights learning how to stream games.
Photo by Axville on Unsplash

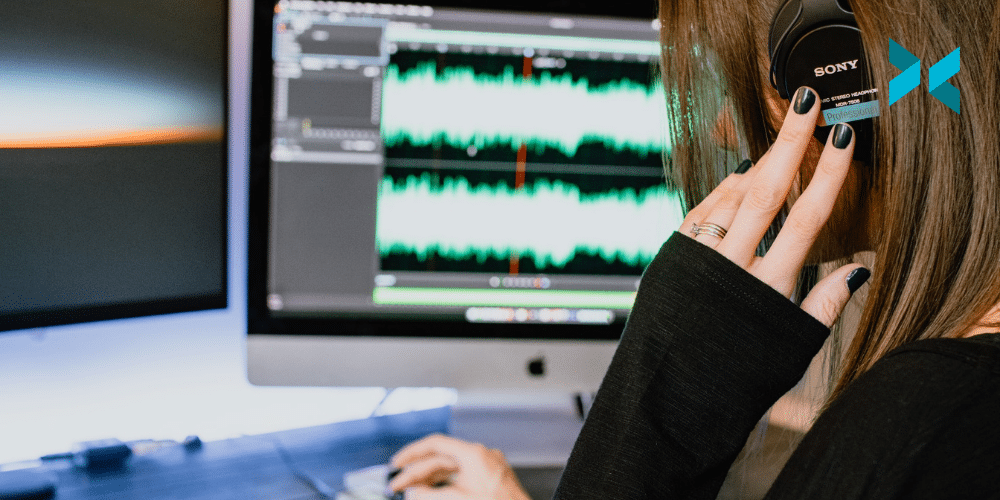
Which streaming software to use

You’ll be surprised to learn, we recommend XSplit Broadcaster! You can use it for free and it comes with stream integration for Twitch, as well as other streaming services like YouTube and Facebook. It has a Chroma key feature to remove backgrounds, scene transitions and even allows for source and extension plug-ins. This means that you can customize your steams and style them around your personality, gaming preference, or brand.

You can opt for the premium version that not only removes the watermarks that are embedded in the free version but opens up the possibilities of simultaneous broadcast, stream delay, and more audio options.

Streaming on PC VS Streaming on consoles

What if you want to learn how to stream games from a console instead of straight from a PC? There are a couple of options. The last-gen and current-gen consoles are able to stream natively from the console. However, with the PS4 or PS5, a standard webcam will not work. This means buying the official Sony camera, which can be expensive for a single-use camera.

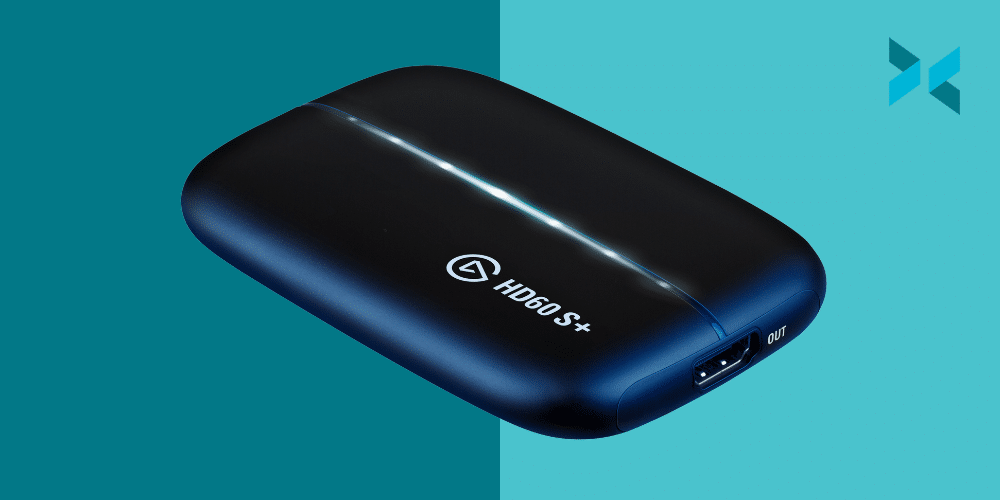
Alternatively, you can run the stream from a console through your PC using a capture card. Elgato has upgraded its HD60 S with the HD 60S+ to support the more recent consoles like the PS5 and Xbox Series X and Series X.

With these essentials, you should be able to stream games to Twitch in no time. Not only that, but this setup can be used to stream other content beyond video games, such as tabletop games, music, and even podcasts. Check out Things to stream: More Than Just Gaming to expand your streaming horizons.

The Best Capture Cards of 2022 for All Content Creators

If you’re looking to upgrade your streaming setup to a more professional camera or to bring console gameplay into your stream this year, you’re going to need a capture card. But with new products and technology upgrades hitting the market each year, choosing the right card can be tricky. Fortunately, in this blog, we’ve got our expert breakdown of the best capture cards of 2022 for a variety of streaming needs.

The best external capture cards for console gamers

A name you’re going to see show up a lot on this list is Elgato – and for good reason. They’ve been making cards since 1992 and are considered the top brand by most streamers. Their current model aimed to console streamers is the HD60 S, widely hailed as one of the most reliable 1080p 60fps (frames per second) game capture cards on the market.

Another card to check out for console streaming is AVerMedia’s Live Gamer Portable 2 PLUS. This is an excellent card with an easy setup and some interesting features, including an audio jack to capture console party chat directly from the game itself. It also tends to price out lower than the HD60 S.

A Nintendo Switch with Animal Crossing is being displayed, you would need the best capture cards to stream this game.
Photo by Branden Skeli on Unsplash

The best external capture cards for cameras

Elgato also makes a dongle-sized capture device called the Cam Link 4K. Cheaper than their HD60 S, it lacks the HDCP decryption chip required to pass through but can pass a camera signal at resolutions up to 4K at 30 fps (frames per second). The Cam Link uses the UVC or Universal Video Class driver, meaning that cameras plugged into the device will be compatible with nearly every app, allowing for stress-free integration into any streamer’s setup.

Also of note in this category is Blackmagic Design, a company that has for years created professional-grade studio equipment and cameras. Recently they’ve channeled that knowledge into a pocket-sized combination HDMI and SDI capture device, the Ultrastudio Recorder 3G. Combining impressive capture quality with a competitive price, this card should be on every streamer’s list to consider. But be aware that to get the most out of this device, you’ll need to have a USB-C input on your computer.

A person sat in front of a pc with headphones on and a microphone on a boom arm, they are smiling as they are streaming using the best capture cards.
Photo by ConvertKit on Unsplash

Why not both?

Many content creators will need to add both a camera input and gameplay capture as they level up their live streams. For those who do, we recommend checking out the first internal card on our list, the AVerMedia Live Gamer Duo. Combining two inputs with 1080p60 capture capability on a single PCI Express card, the Live Gamer Duo provides a reliable way to bring both the stream’s talent and gameplay together in full HD, all while providing 4K60 fps pass-through to your monitor. This means that even while streaming at a lower resolution, you’re still enjoying the game on your own monitor at max settings.

The best 4K capture cards

While you’re probably not currently streaming in 4K, you might want to be ready to flip that switch when the time comes. To do that, you’ll need a card that can not just display but actually capture your gameplay at the highest possible resolution.

Also from Elgato is the second internal card on our list, the 4K60 Pro. Taking full advantage of the blazing speed of an onboard PCIe slot, the 4K60 Pro provides steady reliability and incredible capture quality with almost no latency, even with HDR (high dynamic range) video at the highest resolutions. Because of the speed and processing power advantages, we highly recommend going with an internal card for 4K capture.

But if internal cards aren’t a fit for your setup? Meet the Elgato Game Capture 4K60 S+, an external card that can capture at resolutions up to 4K at 60 fps, and also supports HDR video. This card is about as future-proof as you can get at the moment and supports onboard recording to an SD card. It can be a little tricky to set up, however.

You don’t need to add physical inputs to get more cameras on your stream. XSplit Connect: Webcam lets you wirelessly integrate your phone’s camera within any software like XSplit Broadcaster – an inexpensive option to increase production value. Now your capture card is sorted, find your next upgrade in our guide to the top streaming upgrades.

What To Look For In An Affordable Gaming Keyboard In 2022

If you’re streaming games, your choice of keyboard can seem just as important as your PC specs. Keyboards not suited to gaming requirements can cause ghosting where your keystrokes don’t register. This can lead to frustration for players and those watching live streams. There is also a divide in people who like the ASMR qualities of a mechanical keyboard versus those who can’t stand it! However, a decent gaming keyboard doesn’t have to break the bank. Let’s have a look at which features you should prioritize when buying an affordable gaming keyboard.

Mechanical switches vs membrane affordable gaming keyboard

A cheap gaming keyboard will likely use keycaps that press down into a thin membrane layer to activate the circuit underneath. This means you can only register one keystroke at a time. On the other hand, mechanical keys have individual switches, which offer better feedback and a distinct click, but also mean you can enter several keystrokes in advance.

For streaming, however, having a noisy mechanical keyboard may not be the best solution. Logitech has solved this issue with the G413, an affordable gaming keyboard that comes with Romer-G switches, or the Corsair K68 with Cherry MX Red Switches (which are considered the quieter ones along with brown, the Cherry MX Silent, and black). Both offer the benefits of mechanical switches while also being quiet to the touch.

Programmable keys and macros

Keyboards that allow you to map certain functions to keys can be a literal game-changer, allowing you to pull off complex commands at the press of a button. Razer has made it easy to program thanks to its Synapse 3 software.

For an affordable gaming keyboard with programmable buttons, check out the Razer Cynosa V2 or its cheaper sibling, the Razer Cynosa Lite. Both allow you to map the functions and macros you need and then save different gaming profiles. This means you can switch between them depending on the game you’re playing. Synapse 3 also allows you to coordinate the color of the keys with the functions you have given them.

An affordable gaming keyboard close up with it's RGB lights on showing multiple colours, you can see a monitor stand in the background and a backlight.
Photo by Mateo on Unsplash

The benefits of backlighting in an affordable gaming keyboard

Keyboards with RGB backlighting not only look very attractive, but they can also be very useful. Even an affordable gaming keyboard, such as the SteelSeries Apex 3 or the Aukey KM-G12, allows for full customization with various lighting zones. This means you can split your keyboard up into sections depending on what game you are playing.

Depending on your streaming setup or if you are doing more video work than streaming games, your audience might be able to see your keyboard, so it adds a bit more style. As an added bonus, it makes them much easier to see if you’re playing in the dark.

Keyboard integration in your stream

Having an affordable keyboard with a backlight is one thing, but having it react to the game you’re playing can take your stream to the next level. Corsair is a premium brand, so the Corsair K60 comes in at the high end of the affordable gaming keyboard spectrum. It comes with per-key backlighting, meaning each key has its own programmable light.

These lights can be used in conjunction with Corsair’s software for key remapping and macro programming. However, the RGB lighting can also be integrated into the game thanks to Corsair’s iCUE technology. This means that the lights will change color to react to the action within the game. Logitech offers a similar software called Lightsync, which is available on the affordable G213 Prodigy keyboard.

There are many affordable gaming keyboards out there with some or all of the features you may prioritize. If you opt for one with RGB lighting, for example, you can make it react to streaming events. This not only makes your streams look more visual and professional but can also help indicate events if you have taken your eye off the action.

How To Livestream Your Local Sports Event

The last few years have seen a rise in the number of real-world teams using live video platforms such as Twitch and YouTube to bring local sports to their fans without the need for traditional TV deals. Streaming your local team’s matches live has all kinds of advantages from having highlights to share on social media and attracting new fans, to potential sponsorship deals. And the best news: getting started isn’t hard, and the XSplit team is here to walk you through how to livestream your local sports event.

Getting online from the field

It’s very unlikely you’ll be able to connect to a wired ethernet connection to livestream your local sports event. (the general recommendation you will find). Most recreational fields don’t come with built-in WiFi coverage. Even if you do have access, publicly available networks typically don’t provide the speed or stability required to stream successfully. It’s always worth testing though – connect your laptop to the network and run a basic network diagnostic such as Speedtest by Ookla to check it out. You’ll want to have between 4 and 6 Mbps (megabits per second) available on the upload side in order to successfully stream at 720p. This is a resolution we believe is a good trade-off in terms of quality and compression.

If you don’t have that, don’t worry, it’s not game over yet! 4G LTE connection speeds can run between 7 and 16 Mbps on the upload side, so using your phone or a personal hotspot to stream is a viable option.

Two people playing football on a green field in sunlight running for the ball which you could watch online if you learn how to livestream your local sports event.
Photo by Omar Ram on Unsplash

Your phone and laptop are a powerful pair

While it’s possible to stream directly to most live video platforms straight from your phone, this generally prevents you from adding valuable visual pieces to your sports team’s broadcast like a scoreboard, clock, or team names. It’s much better to connect your phone’s camera to your computer and use it as an input source within your live streaming software of choice. Connecting this way allows you to capture the action with your phone, but also add additional elements to your stream through XSplit Broadcaster like the ones mentioned earlier. XSplit actually has an app for seamlessly integrating your phone’s camera into your XSplit Broadcaster stream – XSplit Connect: Webcam.

Audio and commentary for your local sports event

Another great thing about running a stream through your computer is having high-quality, live commentary. You can plug a headset or microphone into the laptop from which you’re streaming and manage it as a separate audio input. If you’re looking to have more than one person on commentary, you could also use a small USB soundboard or audio interface. Something like the Scarlett 2i2 from Focusrite would work well, but make sure the headsets or mics you have can connect to it!

Whichever option you choose, remember that keeping that audio signal crisp and clear is important to your viewers. Test your levels beforehand – in XSplit Broadcaster, the meters are in the middle of the main screen just to the left of the microphone icon and right next to the scene title. Then, if you do need to adjust your levels up or down, this can be done easily by going to Tools on the menu bar and using the audio mixer.

Best camera to livestream local sports?

If you’ve outgrown your phone and laptop team-up, there are a number of options to upgrade your camera. But we’ve got you covered: before you buy an upgrade, check out the XSplit team’s Ultimate Camera Buying Guide for Content Creators.

Also, don’t forget that your new camera may not have the ability to connect wirelessly to your laptop and that your laptop likely doesn’t have a video input of its own either. You’ll need to return to a more traditional camera-to-streaming computer setup, likely using a micro HDMI cable to connect the camera to a video input adapter such as the Elgato HD60 S+. One last pro-tip on your live sports streaming setup: you’ll likely need longer cables than you would with a typical video gaming setup in order to give yourself more options for camera placement and movement.

How Can You Stream With Guests?

From time to time, you may want to run your stream with guests, perhaps because they’re keen to join you in a game or as part of a collaboration with other streamers. A lot of viewers get a lot out of their favorite streamers playing together. It’s also a great way to introduce your audience to creators you like! The good news is that, with the help of XSplit Broadcaster, it’s easier than ever to make them become a real part of the stream!

Where should their feed come from?

Since XSplit Broadcaster can capture any window on your computer, it doesn’t really matter what program you use to get their webcam feed to you. Your options include capturing a direct feed from using NDI on platforms like Zoom or Skype. You could also screen capture another platform such as Discord, Teams, or even a second Twitch stream if that’s more convenient for you.

However, we would strongly recommend going the NDI route as you can easily add each person’s call as an individual source. You can then easily move and resize without having to worry about the screen capture element. This is especially true with multiple guests where someone leaving and others joining. This can mean resizing everything again with a screen capture.

If you’re including your webcam feed or something else in the background, the quality is less important as their webcam will appear smaller on the final broadcast, but keeping the inputs at the highest possible quality does reduce the risk of visible compression artifacts on the finished video.

A person with an RGB gaming headset on, streaming a game on their monitor looking to stream with guests with a keyboard and Star Wars mug on their desk.
Photo by Sean Do on Unsplash

How to stream with guests

The simplest way to have two presenters in a single stream is to split the screen between them, using the direct feed from their camera. If there’s something in the background that the presenters are reacting to, such as a game or another video, then using a plain background along with XSplit Broadcaster‘s chroma key option can allow you to just cut out the head and shoulders of the presenters, and place them in the bottom corners of the video.

XSplit Broadcaster also allows you to crop the feeds manually, even using custom masks. This is useful if you’re capturing from another application and want to remove any window decoration or user interface from around the edges, or even with the chroma key to remove unwanted distractions, such as a doorframe or picture on the wall.

Keep it balanced

When running a stream from multiple sources, it’s important to balance things. Regardless of whether you opt for a voice-only stream or not, the most important factor here is the audio – if you have two presenters in different locations, it’s very easy for one of them to be set much higher than the other, and quite hard to notice this during a stream. Make sure you’ve tested this in advance by listening to the feed when both presenters are talking normally.

A voice stream in something like Discord is also very easy to set up, by the way. Simply make sure XSplit Broadcaster is capturing desktop audio and the call will easily come through. Discord even has a plugin that shows who is speaking on screen!

Similarly, with the video, you want to ensure that both presenters appear roughly the same size (unless you’re deliberately emphasizing one – and then it should be obvious) and you should make sure that the two camera feeds are a similar brightness and ideally a similar video quality. If one presenter is well lit and sharp and the other is gloomy and blurred, it makes it more obvious that you’re not together, and this again makes the stream feel of lower quality. 

Bringing guests into a stream can certainly be worthwhile. Why not check out these great tips we’ve put together on making your webcams look as good as possible to help give them the ultimate user experience?

How to Live Stream a DJ Set

On my daily browse of Twitch I stumbled across a DJ set that basically played all the dance hits from the 1990s through to the 2000s. It had special effects, background dancers, everything! Now, in the world of DMCA takedowns, streaming copyrighted music, something we have discussed before, isn’t really a good idea but if it’s DMCA safe? It can be a great way to connect with a new audience! Let’s take a look at how you can live stream DJ sets with a bit of production flair!

Setting up to stream a DJ set

At a very basic level, streaming a DJ set can be very simple. It’s likely you’re DJing old school with turntables and a mixer, or via software like Traktor or Serato DJ Pro. If it’s the former all you need to do is send an output from your mixer to an input on your PC. This can be your line input or a dedicated audio interface like the EVO4.

If you’re using software and the audio is coming from your PC, all you need to do is capture your system sound. XSplit Broadcaster does this automatically so out of the box you won’t need to change anything. However, if it’s not, just head to Settings, and Audio and select the correct audio. If you’re using software with a DJ controller, like a Pioneer DDJ, then all you need to do is see if it has an audio output you can capture like a traditional DJ system.

A digital set of DJ decks hooked up to a laptop is a good start with learning how to stream a DJ set
Photo by Gabriel Barletta on Unsplash

Visuals

Now you have your audio set up correctly to stream a DJ set, let’s take a look at setting up some visuals. A good start is for people to see your lovely face, so why not add a webcam? Or, if you’re not interested in having yourself on the screen you could point the camera at your mixing decks. No matter what, the best entry-level camera for streaming is the Logitech c920 series. They can mount on a monitor or you can use the ¼ threading mounting point to add it to a tripod.

If you’re using software, you could capture the software in XSplit Broadcaster as well as your webcam by adding it from either the Game Capture menu or, if it’s not showing up there, by using Smart Capture. You could even take a cue from lo-fi hip-hop beats to chill, max and relax to and put a looping video image or gif. These can be put directly into XSplit Broadcaster, for a video simply right click and set it to loop forever. With a gif, it will just run automatically. Simply resize it to fit the way you’d like and you’re good to go!

Taking streaming a DJ set to the next level

What is a DJ broadcast without some special effects? We need some air horns! With XSplit Broadcaster you can create a variety of special effects to help you stream a DJ set! We’ve actually made a hand video that I’ll link below which shows off some of the power effects systems that are built into Broadcaster.

It’s best to use effects in conjunction with macros so you can easily trigger them with a hotkey press or even automatically depending on the conditions you set. You can learn more about Macros here but basically, you can install the Macros plugin and set “if this, then Broadcaster should do that”. The “this” could be a button press and the “that” could be changed to a different camera, for example. We’d highly recommend checking out the Elgato Streamdeck as well. It works perfectly with Broadcaster and can trigger a whole bunch of things with a physical touchpad. This makes it much easier for you to hit production buttons while you’re DJing.

Broadcasting your DJ set

Now that you have your production setup, it’s time to stream! Broadcaster supports all the popular platforms like Twitch, YouTube, Facebook, all you need to do is login to your account. Some sites that don’t support direct login through Broadcaster will require that you use the Custom RTMP option. What you’ll need from the site is the RTMP URL and your stream key.

For your streaming settings, this will depend on your PC. For minimum requirements for a 720p 30fps stream, I recommend either a 4 core 7 series processor either AMD or Intel OR an NVIDIA RTX GPU. 
The most important setting though is your audio bitrate. Make sure to set this as high as possible to give your viewers the best audio quality possible. After you’ve configured your settings, just hit the stream button and go live!

As with all things, remember consistency is key, and make sure to let your community know when you are live! Let us know in the comments how you’ve got your DJ setup ready for streaming. What DJs do you watch already and what do they do that inspires you? Be sure to let us know! If you’ve enjoyed this guide, let us know as well so we can make more things like this for you!

How to Create and Stream a VTuber: A Step-by-Step Guide

The term “VTuber” or “Virtual YouTuber” was originally created in reference to the virtual online personality Kizuna AI in 2016. Until a couple of years ago, VTubers were limited to just a handful of accounts. Due to the complications involved in rendering and animating the character model in real-time. However, recent advances in cheap and well-designed motion capture software have made creating and using a virtual avatar while streaming accessible to almost anyone. Want to try it yourself? Here’s how to stream a VTuber!

How to stream a VTuber: Creating an avatar

Creating the 3D model that will represent you while you’re on stream is the first step to streaming a VTuber. For this guide, we’re going to use an online app called ReadyPlayerMe. This program lets you create a 3D model right in your web browser. It’s admittedly not the most powerful or detailed creation tool you can find, but it’s pretty good, very easy to use, and free.

You start your avatar by choosing a body type you want to model with. Next, upload a photo of yourself (or take one with your webcam) and customize it using the app, which lets you adjust things like skin color as well as hair color and length. You can also add some accessories if you wish, like glasses. Once you’re happy with how you look, click “Next” and download your avatar file somewhere where you can find it easily.

A person playing a game across three monitors with a gaming headset on facing the screens wondering how to stream a vtuber.
Photo by RODNAE Productions from Pexels

Converting your avatar for use

The next step is to get your avatar animated. We’re going to use a program called Animaze. This is the evolution of a program you may have heard of called FaceRig. Animaze is free to use on Steam, but it doesn’t natively support the model format that ReadyPlayerMe generates. So, we’ll have to run through a couple of quick steps to convert it.

Once you’ve downloaded and installed Animaze, you’ll find a program called “Animaze Editor” in the Tools section of your Steam library. You’ll need to run this program first, and use it to open the avatar you created by going to the Assets menu tab, clicking on “Import 3D Object” and selecting the file you downloaded from ReadyPlayerMe.

After a bit of loading time, you’ll see your avatar pop up on the main screen. You can use Animaze Editor to fine-tune your avatar, but if you’d rather just move on to the fun part, right-click on your avatar’s file name in the Hierarchy Panel on the left-hand side and select “Bundle”. Choose a folder to export to, and once you get the confirmation dialogue, open the main Animaze program from the Software section of your Steam library.

Get that model moving

Now it’s time to meet your virtual self! From the main Animaze screen, click the Avatars icon on the navigation bar on the left-hand side, and then choose “Imports” from the pop-out window. Then click the big plus button, and select the file you saved in the previous step. It ends in “.avatar” – be careful not to confuse it with ReadyPlayerMe file which ends with “.glb”.

After the import completes, you’ll see your virtual self on the main program screen. Make sure that the camera window (upper right by default) is showing your main camera. If it’s not, click the drop-down arrow to change it. Once you’ve got your avatar loaded and the right camera selected, just hit “Calibrate” and follow the directions to get your model moving more accurately with your actions.

A PC set up for streaming with two monitors, two lights and other streaming hardware on a desk with large speakers, this setup would be good to find out how to stream a vtuber.
Photo by Roberto Nickson from Pexels

How To Stream the VTuber

The final step is getting your VTuber into XSplit Broadcaster so you can go live with it and introduce your audience to the new you. Within Animaze, simply click the big button at the bottom of the screen labeled “Enable Virtual Camera”. Then switch back over to XSplit Broadcaster and use the Add Source menu to add the Animaze Virtual Camera, which can be found in the Devices section. You should see your VTuber pop right up on the screen, and you’re good to go. Note that if you’re planning to use a chroma key background for your avatar coming out of Animaze, you’ll need to activate the chroma key option on the Animaze Virtual Camera input within Broadcaster. For it to work properly right-click the input name and go to the “Color” tab of the menu for chroma options.

This guide showed just one of many possible ways to model a VTuber for use in your livestreams. Looking for other ways to invest in your stream? Check out our guide to the top streaming upgrades of 2021 for some great ideas.

Tips to Keep Your Twitch Channel Safe and Avoid DMCA Takedowns

It’s the email that every streamer dreads: the DMCA takedown notice. Remember, when it comes to copyright, Twitch has changed from a policy of muting audio to one of fully removing the offending clips. Repeat offenders run the risk of being banned completely, so streamers constantly need to be on their guard with the music and audio they’re allowing to go live on stream. Don’t worry though, we’ve got the tips and tools to help you avoid DMCA strikes on Twitch right here.

How to avoid a DMCA takedown on Twitch

After multiple massive, platform-wide DMCA headaches on Twitch in 2020 and 2021, it should be clear that you can’t use copyrighted music in your content. The most common way this has happened in the past is by listening to Spotify or some other music service during your livestream. But there are other ways that may not be as obvious for problematic audio to creep into your channel.

Got the football game on your tv in the background? If your mic picks it up, that’ll probably get flagged. Playing a trailer off YouTube that uses a pop song? A takedown notice could be headed your way. It’s important to keep your stream as clean as possible when it comes to audio. Come to mention it, if you need help getting your audio set up perfectly, we’ve got a guide for that too!

One person enjoying watching another stream a game on a PC, they both have gaming headsets on it would be useful to know how to avoid DMCA takedowns on Twitch
Photo by RODNAE Productions from Pexels

Will deleting clips and VODs protect your channel?

The DMCA rules on Twitch are in a constant state of flux. Early on, the platform would simply mute audio on VODs where it detected copyrighted music. There was no real way for live detection to happen. Technology and policies have both changed, however, and these days there is increasingly active live detection of copyright infringement. This is especially for TV and sports audio!

Twitch will remove or require the removal of any offending clips and VODs if flagged. It all adds up to potentially massive problems for streamers of all levels. Most importantly, the penalties for repeat offenders can still be very stringent, with permanent bans on the table. Really, the only thing to do is just be very diligent and make sure you’re sticking to music you have the rights to play.

So what can you safely play?

The good news is, there are a number of options out there that can provide music that’s safe for your channel to use. Gamecaster even has its own library of copyright-free music! Called Grooves, available for anyone to download and stream for free and use in their broadcasts. No registration or credit card is required, just click and go! There are more than 150 professionally produced tracks in a variety of genres that you can throw into your stream to set the mood without worrying about a DMCA claim ruining your day.

Music can be not only a great background to your content but sharing your favorite tracks with your community or other streamers can be a great way to connect further. Now that your channel is safe from the threat of DMCA strikes, learn how to secure the rest of your online life with our guide to protecting your privacy while streaming on Twitch.

The Twitch Affiliate Contract Explained

Every streamer on Twitch is out there shooting to get their channel to the level where they snag a Twitch Partnership invitation. That purple checkmark is a badge of honor for the content creators who work on the platform. But the first step to your streaming success is probably the Twitch Affiliate program. Today we’re going to help you understand a little bit about what the Twitch Affiliate contract looks like and what you can and can’t do with the program.

How is an Affiliate different from a Partner?

The Affiliate program exists to allow early-stage streamers who are serious about their careers to start earning money on Twitch. The differences between Affiliate and Partner are primarily in how much they earn. It’s probably easiest to think of the Affiliate program as the younger sibling of the Partner program. Affiliates can…

  • Receive payouts from viewers cheering bits on their channel
  • Earn commissions on paid and Prime subscriptions
  • Earn revenue on ads watched on their streams 
  • Earn commissions on games and merch sold through their channels
  • Activate channel points for viewers
  • Run polls directly through Twitch chat
  • Access five sub emotes

Partners get all of the above but also get custom Cheermotes, can access up to 60 emotes for subs, and earn ad revenue at a significantly higher rate than Affiliates.

A man standing in front of a bay of gaming PCs with his arms outstretched and a smile as he wears a gaming headset wondering about the twitch affiliate contract being explained.
Photo by RODNAE Productions from Pexels

What is ‘exclusivity’, and what does it mean for Affiliates?

The Twitch Affiliate contract has a clause that may be a little confusing, dealing with “exclusivity”. Essentially, it says that by becoming an Affiliate, you are giving up the right to go live on Twitch and another platform at the same time. That means Twitch has exclusive rights to your stream when you’re live. The important thing to understand, however, is that they only have exclusive rights to you when you’re live on Twitch. You’re free to end your Twitch stream then start a Facebook Gaming/YouTube multistream right after. You’re also allowed to embed your live Twitch stream on another site, such as your personal webpage, as many times as you like. Plus you can still upload any non-live content like VODs to other platforms as well.

It may seem a little limiting, but the tradeoff is being able to make money directly from your channel and start building towards Partner.

Twitch Affiliate requirements

Becoming an Affiliate does have some requirements, and technically there’s also an application process, but it’s more of a formality. Compare that to the Partner application, which, as most streamers know, is pretty heavily scrutinized. The Affiliate standards are:

  • you’ve reached 50 followers
  • you’ve streamed for eight hours total
  • you’ve streamed on seven different days in the previous month
  • you’ve averaged at least three viewers per stream

Once you’ve hit all of those milestones (it will track them on your dashboard in the ‘Road to Affiliate’ achievement) a button will appear on the page to let you apply to the Affiliate program. Just click that, wait a few days for a response, and you’ll be all set to start earning your keep as a professional streamer!

One big note we want to add is remember you still need to pay taxes, depending where you are located globally, on your Twitch earnings. So do keep this in mind!

It’s much easier to get on your streaming grind when you’re making a little money from your channel, and securing Twitch Affiliate is an important first step to becoming a Partner. Need help hitting those requirements? Check out our guide to finding your voice as a new streamer for ways to nudge that viewer count up.

Should You Put Your Content On Multiple Services?

It’s very tempting to reuse content by uploading the same footage to multiple sites, but is this actually a good idea? It feels sensible –⁠ after all, you’ve put all that effort into making your video or your stream. Why not try to show as many people as possible? There are definitely a few things to consider when it comes to multiplatform streaming, so let us take you through the options.

Different sites have different feels

The sort of content that viewers are looking for on different sites can vary. The greatest advantage of sites like Twitch is that it’s live and being able to interact with the streamer. People can then upload their VODs to places like YouTube. These polished videos are edited to show off the best bits, often with effects and overlays added. A live-stream viewer can sometimes treat a stream as background entertainment. Something that’s running on a secondary screen whilst they’re working on something else. But if someone is seeking out videos, they’re more likely to be concentrating on the show. They’re wanting a well-crafted story to follow –⁠ something which can hold their interest. So the content you upload to each site has to differ.

Then you have to consider social media channels, whether that’s Reddit, Facebook, Twitter, or TikTok. All of these require the audience’s attention to be grabbed very quickly and typically expect very short videos that don’t need much setup or explanation. A brief pause in their scrolling, rather than a real-time investment.

A person with a gaming headset on stood in front of a row of gaming PCs in a large room with two other people next to them, they are shrugging but smiling thinking about reusing content.
Photo by RODNAE Productions from Pexels

Is there a way to reuse content?

A number of very successful Youtube producers take footage from their Twitch streams and produce highlight videos. Turning anything from an evening to a month’s worth of streaming into a ten or twenty-minute best-of video. Twitch itself has the Clips feature, allowing short chunks of a stream to be saved as a highlight to show on your channel. Editing your footage to a fraction of its length by pulling out the best bits is a lot of work, but it’s very rewarding. It also shows your stream at its best, skipping over the mistakes and the grind and focussing on the highlights, the hilarity, and the moments of pure skill or luck.

Depending on the content of your stream or videos, it may be possible to pull out a short chunk for social media. However, you need something that grabs attention quickly and doesn’t require time to set the scene. A perfect sniper shot in Warzone or a big jump or crash in a racing game could work. But, showing off a machine in Minecraft or Factorio is might be less likely to grab people’s attention. But this can really depend, it’s best to use your judgment here. We’ve seen some amazing Minecraft machines blow up on Twitter!

How do I change my content to suit a different service?

There are many pieces of video editing software available with a variety of features –⁠ some come preinstalled on smartphones, but only allow you to trim the start and end of a clip. Others are very expensive but allow movie-quality effects to be created. Personally, I use Kdenlive which is free and reasonably powerful, allowing clips to be cut up, rearranged, and layered. It doesn’t touch actual image processing that might be used, for example, to remove a mustache from a character.

Some streams may be suitable for multiplatform streaming, allowing you to broadcast on more than one service with the same feed. A tool such as XSplit Broadcaster makes this very easy, streaming to wherever you want and allowing for eye-catching effects and transitions so you can switch between different sources, play pre-recorded clips, and more!

There are definitely ways to reuse content on different platforms, however, it does take some thought. You can’t just upload the same video to multiple platforms. But, with some careful editing and targetting your content to specific platforms, you can certainly make it fit.