Stream Better: Improve your microphone tone for that professional sound!

When it comes to upgrading your streaming equipment, we’ve argued a few times that audio is the first thing to pay attention to. Clarity of voice to most viewers can be more important than the quality of a webcam. Once you have a decent mic, however, you might be wondering how you can get that deep, boomy, bassy-sounding microphone tone that you hear in podcasts, talk radio, and basically any spoken word on the internet. Content creators have been replicating it for a little while now so we’re going to take a look at how you can recreate this professional microphone sound.

Placement

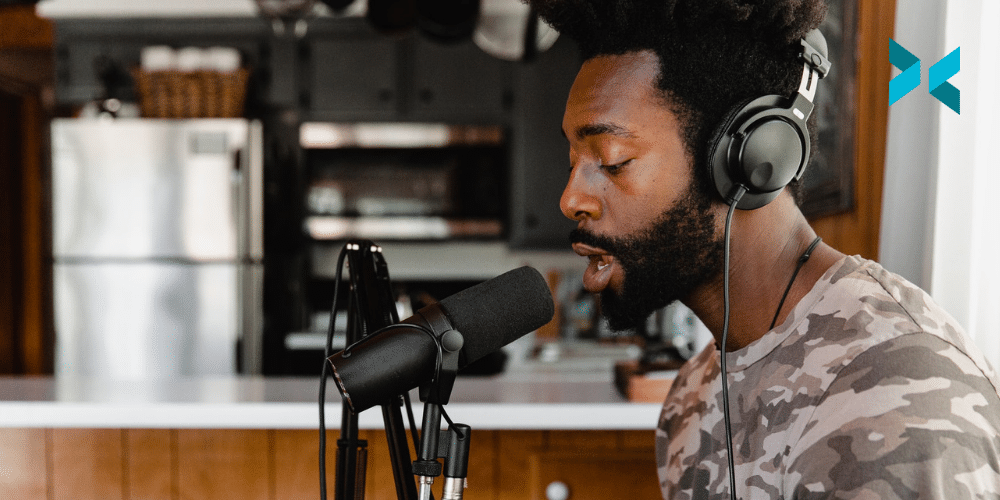
The most important thing straight off the bat for a professional microphone sound is microphone placement. The closer the microphone is to your mouth, the better it will pick up your voice and not your room. Many microphones have what is known as the proximity effect, which means the closer the microphone is, the greater the amount of lower frequencies (bassy sounds) are picked up. Some microphones like the EV RE-20 actually have tech built in to limit this effect, but basically, if you want to sound like Barry White, you gotta get close to that mic.

One important thing to consider with placement is how you will mount your mic. Articulating arms are pretty common, but can get pricey. If you have desk space, a simple microphone stand is always a good option. Get one with a nice weighted base that can go on your desk, this will minimize the amount of noise made if you’re using a keyboard at the same time.

A content creator sat at a desk with headphones on talking in to a Shure microphone connected to a mic stand and a laptop for professional microphone sound.
Photo by Soundtrap on Unsplash

Type of microphone

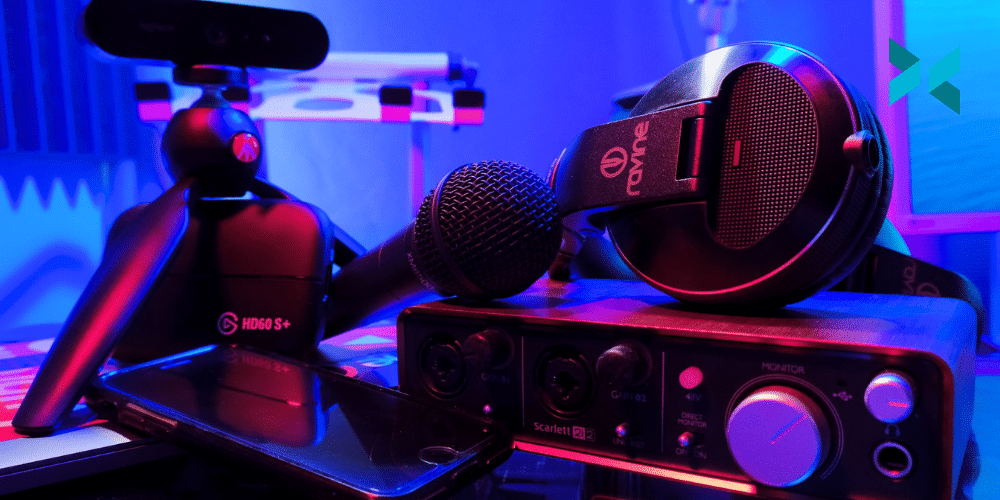
As I mentioned, different microphones have their own unique purposes and you should pick the correct microphone for your use case rather than trying to get a microphone that can do everything. That being said, the gold standard mic is the Shure SM7B. Pretty much any podcast and most streamers these days are using this mic for professional microphone sound. It doesn’t pick up too much background noise and the proximity effect will give you those quiet storm vibes

If you don’t have the budget, the Shure MV7 is basically the cheaper version and functionally the same with the addition being a USB mic. Other devices that work well are the Rode Podcaster and the classic Shure SM58. Types of microphones for content creators is something we’ve discussed here before so be sure to check out this handy guide!

EQ and Compressor

Now you’ve got the right microphone and it’s placed in the perfect spot, but you’re just not getting the professional microphone sound that you want? Well, now it’s time to add some EQ to the mix. XSplit Broadcaster has DSP plugins built-in and one of them is the EQ. Basically, EQs lets you target and boost or lower certain frequencies. Now everyone’s voice is different which means you will have to experiment to find the right frequency, but generally speaking around the 100-200 range is what you want to boost if you want more bass or presence. If you’re looking for more clarity, try the 4000-6000 range as well.

Setting up the EQ in XSplit Broadcaster is simple, simply head to Tools and click Audio Effects, which will open up a host of settings you can tweak. Applying some compression can help achieve a certain tone as well. As we’ve said, all voices are different so feel free to experiment and find that tone you want!

Now one thing we omitted is hardware compressors and EQ. That’s a bit outside the scope of this article, but the most important part is to get the right mic and get it as close as possible. This will really be a big factor in getting that professional microphone sound. If hardware compressors are something you’d like us to discuss, however, do let us know in the comments below and we can get a post out about them!

Stream Better: Creating a narrative while streaming

In the early days of streaming, it was miraculous enough just to get a stream online and stable. Nowadays, streaming is accessible to everyone, you can use your smartphone, any PC, or even a console. Streaming is easier than ever and this means there are more people streaming than ever, so while having a technically sound stream used to be good enough to start building an audience, there’s more competition than ever. So how do you stand out in a crowded market? Well, one solution we’ll talk about, is building a narrative!

What is “building a narrative”?

Well, it’s just a fancy way of saying you need to build a story with your stream or a “narrative hook” which is a term used to describe the key point of interest in a story. And like all stories, there needs to be a beginning, middle, and end. And like most stories, there needs to be a hero, which is you the streamer, and a goal that you will achieve. So what are some examples of streams with a narrative?

One example is speed-running streams. The beginning is the speedrunner practicing their runs, the middle is attempting the runs and the end is achieving a new personal best or record. The overarching goal is to get the world record for that game. But speedrunning a game takes immense amounts of practice and what if you’re not a hardcore gamer or your content isn’t focused on gaming at all?

If you’re planning to do IRL streaming, it’s good to give your streams a purpose for that day. It can be useful to follow cues from vloggers who generally focus their videos on one aspect of their daily life. So, your IRL stream for that day can be about achieving a particular goal, such as cooking your first pizza, which means your 3 act structure is getting the ingredients, cooking the pizza, and eating the food.

This also helps engage viewers who may join your stream late, they can quickly catch up on what part of your adventure you are on. I feel this is why battle royale games have been so popular for streaming, each match basically tells a different story. The goal is to survive, the beginning is looting, the middle is surviving until the final circle and the end is if you win or not.

An IRL streamer using an expensive camera out on the streets connected to a backpack streaming setup is creating a narrative in order to get better at streaming.
Photo by KAL VISUALS on Unsplash

The Long Story

What we’ve discussed so far is basically for single streams. It can be quite hard to come up with creative ideas for each and every stream you do. So what you can do is create storylines that will last over a period of time. Fundraising works really well with this. Whether it’s for personal benefit or charity, having a fundraising goal is a great way to get people to watch and support you.

Subathons are a great example of this content. The goal is how long can the streamer keep broadcasting. Other forms of this content are long-form art projects, like woodworking or cosplay. It can also be achieving a goal, like in games with global rankings, it can be your race to be #1 in the rankings or trying to achieve the highest gamerscore possible on Xbox live. Maybe you have a backlog of games you wished you beat when you were a kid and couldn’t afford. Maybe you want to start a podcast revisiting the albums of your youth or old cartoons.

One important note is if you are planning long-form or serial content, make sure you do a good job archiving as well so new viewers can get up to speed quickly. One of my favorite pieces of long-form content was video game championship wrestling, which emulated WWE-style storylines with video game characters. The community built a whole wiki page around the federation so new and lapsed viewers could revisit and catch up on storylines.

This can also be a great way to approach playing a narrative game, for example, Chris here at XSplit once streamed LA Noire, which already has a narrative flowing through but added the idea that his character was “the backward detective”, which essentially meant walking/driving backward at all times. This made the journey of Cole Phelps, the Backwards Detective, all the more exciting as parts of the game were completed.

A streamer sat at a PC desk with a gaming headset on streaming themselves playing a game, using tips to get better at streaming.
Photo by Sean Do on Unsplash

The Never-Ending Story

Now I know I said every story has a beginning, middle, and end, but sometimes there doesn’t have to be an end. Sometimes there’s content that can just go on forever, and it’s more about the interactions the character has, rather than a storyline.

A good example of this is GTA RP, where the player develops the character and works on inserting them into a variety of situations and interactions with other role players. VR Chat works in the same manner as well. Create your avatar, explore some worlds and talk with other characters.

Also, something like a D&D stream (something we have discussed with Felicia Day and Tanya De Pass) can take this route where while you tell tales with beginnings, middles and ends the characters themselves can go from campaign to campaign. The audience gets to know them better and past events will always help shape future ones so it’s a great thing to consider if you want to build your narrative across streams.

Let the audience tell the story

Now the beauty of streaming is that it is interactive, unlike movies or novels, the audience can change the story and the onus is on the streamer to give the audience these tools. Some of these are staples of streaming, like sub-goals and donation rewards, if you haven’t set these up, then you should as you’re just tossing away potential income for your stream. All you need to do is add a web URL link as a source in XSplit Broadcaster. (Simply get the web URL from the service you’re using to get donations, set up alerts and ctrl+v that link into Broadcaster!)

Other things to do are adding lists of activities as a stream overlay or in your stream title. One good way to encourage engagement is to have a poll after you complete an activity to ask the audience what you will do next. Now you probably don’t want to make all aspects of your life a choose your own adventure type ordeal, but it’s going to give the viewers some type of influence into what they are watching.

Basically, you should always experiment with the format of your content. What have you found successful as a narrative device for your streams? Let us know in the comment section and if there’s anything else you would like us to discuss, that’s the place to do it!

After you Stream: What you should do after going live!

Alright, so you’ve just finished a marathon 8-hour streaming session, thanked your new subs or followers and now you’re offline. Job’s done, right? Well, it turns out, not quite yet. There are all sorts of things you could be doing to maximize the potential reach of your content after you stream, and we’re going to discuss them here!

Clips

This first one I’ve covered many times and I know I sound like a broken record at this point, but clips clips clips! Check if your viewers made clips, or go and make clips of any highlights from your stream to post on your socials (TikTok, Instagram, Twitter). If you want to take it to an extra level, try to have templates for each social media resolution in your editor of choice so you can just download the clips, drop them in and schedule the posts.

Not only does this give people a highlight but it gives them a bite-sized taste of what your streams are all about. Plus, there’s the chance a clip can get shared around the internet if something particularly crazy or exciting happens, something we have discussed over on our YouTube channel before.

Archiving

Places like Twitch, YouTube, and Facebook will keep videos automatically for you, but not all of them will keep them forever. Twitch, for example, will auto delete a past broadcast after a certain amount of time, the time frame is different depending on if you’re a standard user, an affiliate, or a partner. What you want to do is make a highlight of that stream. In the Video Producer section, you can choose to highlight a stream, meaning you can capture a certain section or in this instance, the whole stream! This will then keep that archived content on Twitch so people can watch while you’re offline.

If you have the resources to record while streaming, it’s a good practice to cut out the highlights while your memory is still fresh on what was good and what wasn’t. Remember if you record with multi-track audio (something easily done in XSplit Broadcaster) you can take out any sounds that you think might get you a copyright strike on other platforms.

It’s also a good time to take a thumbnail pick as well, remember to use your youtube face, something else we’ve discussed on our YouTube channel! 

Community Management

If you use Discord, Reddit, or any place where your community congregates, make sure to drop by and leave a few messages thanking people for tuning into the stream or just see what your community is talking about. This is a great way to gauge what people enjoyed and what they didn’t. While you shouldn’t change something you’re enjoying because a few people didn’t like it, if everyone in your community didn’t enjoy it, people you trust? Maybe it’s time to switch to another game.

Make sure to keep your community updated with what’s coming next as well. This can be as simple as posting when you’re going live or detailing the week in a tweet schedule and then posting that in an announcements section on your Discord. Update your stream titles for the next stream and schedule your social posts on when you’ll be live next.

Finally, check your DMs/socials/email as you never know when an opportunity to collaborate or do a sponsored stream might pop up!

A person is sat at a kitchen table making notes in a notebook, something you should do after you stream.
Photo by ConvertKit on Unsplash

Stats

If you’re on a platform that supports it, make sure to check your stats/analytics. Check where your viewers came from if your thumbnail had more clicks than usual. A good practice is to check after a couple of weeks how your channel is doing overall. So if your viewership is growing, check what time has the most viewers and what games you’re streaming that see the most viewership.

This part can seem a little creatively stifling, but if this is to be a career it’s better to make educated guesses on where to point your content than just go on gut feelings. Plus it can just be a good guide for you to try and replicate past success.

Take a break

Last, but probably most important, take a break. Go far away from your computer, take a walk, read a book, watch Nomadland, I mean it’s the best picture of the year. Do whatever you can to mentally separate yourself from work aka streaming. Everyone needs to disconnect for a bit, let the brain reset, and refresh themselves, otherwise, burnout will eventually happen. Some of us need more or less time, but be sure to take as much time as you need to feel recharged.

What’s your post-stream routine? How do you recharge the batteries after a lengthy stream? Do you make your own clips or does your community help? Be sure to let us know in the comments section and if there’s anything else you’d like us to discuss like this, that’s the place to tell us as well!

Before you Stream: What you should be doing before you go live!

One thing not many people consider is how much work goes into even a “simple” live stream. If I just went live, with no preparation, even a stream an hour-long would be boring to the viewer. In my spare time, I help run a few streams with guests and co-hosts, so there’s a lot of moving parts to consider. If you just freestyle it you’re going to end up with either nothing to talk about or one boring stream. In this post, I’m going to go over what pre-stream work I put in to deliver the best stream for an audience (and myself!).

Basic Prep

First up, I’ll figure out the game we’re going to play this week and make sure both myself and my co-host have it and everything is installed and updated. Seriously, how many times have you gone to start a stream and the dreaded “40GB update” happens? (I’m looking at you, Call of Duty Warzone). Just as importantly, however, is to find out how multiplayer works. I’ve learned from experience that just launching into a game and assuming you can just easily add a second player in is only going to lead to problems. Sometimes you’ll need to play a single-player chapter first, or there’s just a long tutorial where you need to unlock something to even open up co-op or multiplayer. Always check this ideally the night before the stream!

Put aside some time with enough time around it to change games if it turns out the game doesn’t fit what you and your guest want. Or, for that matter, even if one of you doesn’t enjoy it, you should change it. Try the game out first! Unless you are giving first impressions for your audience going live and playing something that, turns out, you don’t enjoy isn’t going to be fun for anyone! Ideally, get yourself and your co-host to give it a quick playthrough if it’s something you’ve never played before and just get a feel for it. It might also be the case that it just doesn’t make a great game to stream, fun to play but maybe not to watch or it just takes away too much of your attention so you wouldn’t get to interact with the chat. Checking all of this off the list is important to do before you stream!

A gaming keyboard and mouse are being used by someone out of frame as they play a game, checking your game before you stream is important!
Photo by Axville on Unsplash

Running Order

The next thing you’ll want to do is prep a running order. A running order is essentially a list of everything that’s going to happen in the stream when it’s going to happen as well as key information you don’t want to forget. If it’s a chill stream where you are alone, doing nothing at all but playing a game and reacting to the chat? You might not need this. However, if you have sponsors? Promo codes? Giveaways? All of this can go into a running order! These not only save you having to remember everything but they also give you talking points for when the chat gets a little quiet.

You might not even get to them as the conversation might just flow, but having a few points you can use to get going is useful. Now, if you’re streaming alone? This is really useful! Topics to get the conversation going, for me, mean I don’t miss anything I thought would be fun for that stream. You don’t need to script your live stream, which to be fair people do to great effect but for some streams what you really need are just talking points, for example…

E3 – Xbox – Halo Infinite

That would be enough to jog your memory and say “so did you see Xbox’s E3 showcase? Halo Infinite was a highlight for me!”. Honestly, a running order is key to getting a good live stream together!

A person is sat in cenre frame with a ring light reflected in their glasses, their microphone is in front of them, checking your framing is important before you stream!
Photo by Higor Hanschen on Unsplash

Before you go live

One of the first things you’ll want to do is set your titles on your streaming platform of choice. I have myself a number of times gone live with the title and game of the last stream I did still being displayed.

Also, it’s a good idea to coordinate any social media posts you’re going to be doing. You can automate this if you like on a number of services like sprout social, which is useful if you have multiple social channels you’re sharing to. For me, I just want to post something on Twitter the day before with a simple “I’ll be live tomorrow!” style post, then a more expanded post about two hours before I’m due to go live letting people know what I’m playing, with who, at what time and where. Finally, once I have gone live I’ll reply to that tweet with a simple “We’re live!” and the address of the page I’m streaming to.

If you’re using XSplit Broadcaster you can click “Share your stream” once you go live, giving you the option to share it to multiple social platforms at once without opening up another tab. If you’re using an Elgato Stream Deck you can pre-write a simple tweet, and then hit the button once you’re live.

A desk with a streaming setup on it, keyboard, mouse, PS4 control pad, laptop, monitor, a microphone and a heaset, checking all your gear is important before you stream.
Photo by CTRL – A Meal Replacement on Unsplash

If you have a guest, agree on the time you’ll meet on a call before the stream starts. Always make time before the stream starts to check everything is working and ready to go for your guest! This also lets any new info come your way like “the servers are down” or “the guest can’t make it” and lets you pivot with time to spare before going live. Again, solo this is just as important. You don’t want to rush through the door, sit down and hit “go live” and find out nothing works! Giving yourself at least 15mins buffer time before you have said you’ll go live is essential if you can. It’s not always possible, for sure, but if you can, do!

Arrange everything on your monitor so you can see it and go live! Now, I’d advise having a starting soon screen set up in XSplit Broadcaster that can sit for 5/10mins. This is useful not only to let people trickle in but from the standpoint of a pre-stream check as you can open your stream on another device and just check sound and video are coming through with no issues.

Getting your stream prepped before you go live should always be an important part of your pre-stream routine but what does your pre-stream prep look like? Let us know in the comments below and if there’s anything else like this you’d like to see us talk about you can let us know there as well!

Getting Stream Sponsorship: The Stats That Matter!

Alright, so you’ve been on the grind for a few months or even years now. You’re starting to see consistent viewership on your content and you think that now is the time to start getting paid for your content. I think a lot of creators spend so much time honing their craft, that it’s a bit scary when you start talking to brands for stream sponsorship, especially beyond the usual product sponsorship or affiliate sales. So what do you need to do to prepare? Well, that’s what we’re going to talk about in this blog!

What is your reach?

First and foremost, it’s important to acknowledge what the sponsor is paying for. In all honesty, they’re not paying for your production quality or creativity. They’re paying for access to your audience, in the form of clicks and impressions, we’ll call this your “reach”. They want brand awareness, hopefully, a click, and especially a sale.

This is how camera review channels have bankrupted me because they make all the gear look so cool, that I just NEED to buy it. But now that you know this, you need to structure your content to accommodate. If you don’t have stream sponsorship or brand deals, you can still figure out what your reach is! Basically, any sponsor is going to ask you to tell your audience to go to a link or use a special promo code. This gives them a way of tracking your value to them as a partner by seeing how many people clicked the link or made a purchase.

However, there are ways you can gauge this yourself. Startup a Patreon, run a giveaway, or run discounts on your merch. Whatever you do, create a link or discount code that you can then track. This is how you’ll determine your reach. For example, let’s say you’re running a giveaway for some shirts you made, rather than have people sign up via a google form, use a tool like gleam.io to run the giveaway or put the link to the form behind a shortener like bit.ly. This way you get stats on how many people clicked your link and joined the giveaway.

Knowing this will let you know how much you’re worth as brands can spend tons of dollars daily on google ads just to get a click on their site to very broad audiences that may or may not be interested. You, however, can offer the sort of audience they want and you can quantify with numbers how many people will follow a link to a product you have posted before.

So let’s say a brand approaches you saying they want you to promote their toothbrush that costs 300 dollars and they’ll pay you with the toothbrush + 200 dollars. Now your channel is about oral hygiene and you did a giveaway that got 5000 sign-ups, well based on that I think you have a good leg to stand on to ask for a bit more as your reach is wider and more specific to the audience they are trying to reach!

A streamer is sat at a desk in front of a gaming laptop with their hoodie and headset on wondering how to get a stream sponsorship.
Photo by Fredrick Tendong on Unsplash

Know your audience

I’m sure you’ve seen people talking about TV ratings and target demographics like 18-35, income brackets, and the like, right? Knowing your audience, their purchasing power, and interests are going to be very important to selling yourself for stream sponsorship. I know a lot of people are here because they’re into streaming games and making that a career, but you have to face the reality of what a predominantly gaming audience will be willing to buy. They’re likely going to want to buy the games they want to play first and then whatever makes that gaming experience the most enjoyable. Maybe they’ll buy some merch affiliated with the game?

So if you’re a league of legends streamer and you see Target is selling LoL lunch boxes, that is the kind of collaboration that would be good for your audience. Now, if you do broader content, like reactions or reporting on news, then you’re going to have to use some other tools. First and foremost, especially if you’re on youtube, look at your analytics!

YouTube Analytics is amazing for finding your audience demographics. You can see the age range of your viewers, where they’re located, and where/how they found your content. This will at least give you a baseline of what kind of products your audience may be interested in. If your age demo is 18-24, maybe don’t go for a Werther’s Original sponsorship, unless that’s a thing on TikTok now.

If you need more insight into your audience, then you need to use the tried and true marketing tactic, the survey! Basically, you’ll just need to run a survey, where whoever answers gets a chance to win a prize and promote it in your content and all your channels. This is where you can find out valuable data about your users like what they might buy which can then, in turn, inform how you’ll approach sponsors.

A streaming desktop with an ultrawide monitor, a gaming keyboard and mouse, funko pops and a large moon desklamp, a nice setup is something you might want from a stream sponsor.
Photo by Javier Peñas on Unsplash

Partnerships, not Sponsorships

So your first few sponsored videos are likely going to be product reviews or promotions. But eventually, you’ll find a brand you’ll want to keep working with and this is where you try to form a partnership instead of just a sponsorship. How do you do this? Well, you need to provide a TPS report (this is an Office Space reference, for those of you born after 1999Ed), I mean a post-activation report.

Basically, after the promotional period, usually, a few days after the video releases, you’ll want to follow up with the sponsor with a short report on how you think it went. This will include stats from your analytics, samples of social media posts, snippets of audience responses, and your thoughts on what went well and didn’t with your stream sponsorship.

Basically think of it as another sales pitch as to why a brand should keep working with you. One important part of this process is to set reasonable KPIs (key performance indicators). This could be impressions, clicks, or even sales. Don’t promise the world and if you’ve been following the advice in this blog post, you should be able to get a good idea of what you can offer.

Now if you hit or exceed those KPIs, with a post-activation report or After action report (AAR) as it’s known in some circles, then you have a strong case to build an ongoing partnership with a brand.

Now, this is just the tip of the iceberg into the realm of selling out, or digital marketing as the pros call it. If you take away anything from this blog post, it’s to know your audience to know your worth. I wish I could say it’s as easy as having high production quality in your videos, but with these things, it’s more like having high engagement quality.

Do let us know, however, what you think? Have you had a stream sponsorship deal before? What was it like? Do you have any tips for reaching out to sponsors? Let us know in the comments below! And if there are any subjects like this you would like us to cover in the future, well, right there in the comments is the place to put it as well! Good luck out there!

The Beginner Streaming Setup: It doesn’t have to cost a lot!

As a streamer, you can easily fall into a trap of buying more and more gear. “I’ve got to stream with a high-end DSLR camera, right? Nobody will watch my stream if I don’t have a $1000 microphone, right?!” If you’ve seen any of our YouTube output lately you’ll know that I’ve got a fancy camera and a big microphone but to get streaming, did I need it? Did it make my streams any better? Spoilers, no, it did not. Let’s look at what you really need for a beginner streaming setup that isn’t going to cost you lots!

Do I need a PC?

You might think you 100% need a PC to get started streaming but honestly? You don’t have to. If you have a PlayStation or Xbox console you can get streaming from there to see if you enjoy it. It’s all built right into the system and if you have a headset already, you have a microphone. The PS5 even has a microphone built into the controller so if you’re one of the seven people who managed to get one, you’re already set!

The Xbox Series S|X lets you stream directly to Twitch using the Twitch app, you can even add overlays and alerts using Lightstream for a monthly fee directly from the console!

What a PC can bring to the party is getting more complicated with scenes, graphics, and easily adding upgrades to your camera, etc. So let’s say you have a fairly decent PC (we’ve got some minimum specs we recommend here), what do you need for a beginner streaming setup to get going?

A PlayStation 5 on a desk with its controller on top of it. Having a modern console is, in itself, a beginner streaming setup.
Photo by Kerde Severin on Unsplash

Software

If this is the first time you have ever streamed I’d recommend checking out Gamecaster, it’s an all-in-one app that lets you stream, make use of overlays, and other stuff for free with an insanely easy setup process. They even have a Discovery Platform that streamers and viewers alike can make use of to help grow their channel and find an audience.

When you’re looking to add more customization, XSplit Broadcaster, used to broadcast some of the world’s biggest gaming and esports events, is ready and waiting and you can try it all out for free! XSplit Broadcaster offers next-level features like multi-platform streaming, custom transitions, noise suppression, drag and drop media additions, high-end recording, and much more!

Camera

When it comes to cameras for content creation, something we’ve discussed before, you can spend a lot of money to achieve that perfect look. For a beginner streaming setup though? There are a few things you can look at. First of all, you could use a camera you probably already have, your smartphone camera!

With XSplit Connect: Webcam you can connect your iOS or Android smartphone easily to your PC via XSplit VCam and you’re good to go really! It also uses all the power of VCam to change, blur or completely remove your background! Smartphone cameras can be some of the easiest to use high-end cameras available so it’s worth checking out if you want a good shot with the equipment you may already have!

Or you could use a webcam, and everyone will tell you this but the first port of call should be the Logitech C922. There’s a reason this is the default camera for streamers, it’s relatively inexpensive and has great resolution options at 1080p or 60fps. Also, as a bonus, you’ll get a 3 Month XSplit Premium license!

Three iPhones shown next to eachother, standing veritcally so you can see their cameras. Using your phone as a camera is great beginner streaming setup!
Photo by Denis Cherkashin on Unsplash

Microphone

Now, if you’re using the Logitech C922, the microphone built into it is honestly pretty good. You can see some examples of how this sounds in the video version of this article linked below!

However, if you’re using your smartphone or just want to get an external microphone a great piece of gear for the beginner streaming setup is the Blue Snowball. Blue Microphones make, in my opinion, some of the best USB Microphones, and the Snowball is relatively inexpensive and sounds great for what it is!

Another option is your gaming headset if you’re using one with your PC already. That’ll work just fine for chat and talking to your audience, plus you’re probably going to have a headset on to hear the game anyway, right? So, if it has a microphone built into it it’s worth trying out!

Honestly, that’s really all you need to get going, particularly if you’re streaming PC games. Now, if you’re planning to stream console games you’re going to need a capture card, I’d recommend the Elgato HD60s which can do full 1080p and 60fps. However, we do discuss a free alternative in another video on our YouTube channel.

You can invest in other things over time, but as far as beginner streaming gear goes? You really don’t need to. Start small, see if you enjoy it and only buy more expensive things if you want to, not because you feel you have to!

Improve Your Viewership: Things You’re Forgetting About While Streaming

In the early days of streaming, it used to be enough to just get a stable stream up and running to attract viewers. Now you need to make a schedule, promote yourself on social media, create clips and highlights, and more. These are the things we want to talk about today, all those things you might be forgetting to do while you stream, things that could improve your viewership over time!

Creating clips

Unless you’ve been really disciplined with your phone, you know that everyone is gravitating towards short-form content these days. All the major streaming platforms have adopted a clipping or short clips type system. Why is this?

Well let’s be real, in any stream that is hours long, there’s a lot of dead air. So when you’re trying to improve your viewership, you probably don’t want to just tweet out the link and people come in when there’s nothing going on or you’re eating lunch, so it’s good to add clips to give people context about your stream.

Now clipping your stream while you are live is hard to do, but if you’ve grown an audience or have some good moderators, you can ask them to create clips of any moments they see. After the stream is over you can review these clips and make your own from the VOD. Some platforms will even let you download the clips so you can use them on your other social media accounts.

An Xbox One controller is being held in front of a wide monitor, gameplay could be one way to improve your viewership.

Get your social game right

Social media is a key to improving your viewership, and it’s not just posting the same clip across all the platforms and calling it a day. You need to be able to tailor your strategy to each platform and the various formats on the platforms. It’s not just a clickbaity tweet, but also making a story, fleet, or whatever form of content. Now while your phone makes this quick and easy to make, you can also use your streaming software to create this content.

We’ve made an assortment of videos for creating content for social media platforms, but the gist is, find out the resolution for the platform, set that up in your streaming software, and record some content to post on socials.

Some platforms unlock special tools when you reach a certain follower count, like being able to add links to Instagram stories, so be sure to take advantage of this as your reach grows. Take time to research how each platform’s discovery algorithm works, using things like hashtags, keywords, and descriptions to get those eyeballs you need in the beginning.

Get Up

Now depending on the kind of streaming, you’ll be doing, you may be sitting at your desk for hours on end. Now all the youngsters out there probably won’t worry about this too much, but for all us grown folk out there it’s important to get up and walk around for a few minutes every hour.  This might not be something to improve your viewership, but, it’s certainly something you’re potentially forgetting to do while you’re streaming!

Now if you have a smartwatch it probably already reminds you to get up. But if not you can use macros to help remind you. Basically, all you need to do is set up a break scene that triggers every hour as a reminder to stand up and walk around. You can find out how to use Macros in XSplit Broadcaster here.

It can be a fun activity to do with your chat. Get up and take a few IRL laps. Your doctor and back will appreciate it in the future.

A large gaming chair is sat at a desk with two monitors, a PC, a microphone, a webcam. On the wall behind it are pictures of esports players winning cups. A DSLR camera is on a tripod next to the desk. The desk, is a standing desk, don't forget to stretch when you're looking to improve your viewership!
Photo by ELLA DON on Unsplash

There’s always something to talk about

Talking is the name of the game with streaming. Unless the content is actually watching paint dry, you always need to be talking about something even if no one is there. What you’re selling is you at the end of the day and the content will help improve your viewership.

If you’re having problems talking after the first 30 mins or so of the stream, then try to help yourself with a bit of prep work. Try to visit Reddit, forums, socials, or wherever you get your news and take note of whatever interests you. Copy the links or write the article headline in notepad and take a look at it when you are running out of things to talk about.

Also, keep a big jug of water nearby as it’s hard to keep the energy up when you’re dehydrated.

Check your analytics

One last tip I think a lot of people overlook when looking to improve your viewership is checking their analytics! Data is everything.

Now some platforms have more robust analytics than others, but you should be able to check at least where your viewership is coming from. Is it coming externally from your social media posts? From your followers? Does certain content perform better than others? Do you get more viewers at specific times? This is all useful data you can pull to help inform what direction you can point your content towards, so do try to take a look at it at least once a week.

As you can see, just streaming isn’t as simple as it used to be. This may seem overwhelming, but as long as you’re having fun creating stuff, it isn’t too bad! Let us know in the comments below what your pre and post-stream rituals are when it comes to improving your viewership!

How to Improve Your Live Stream Quality and Avoid Dropped Frames!

I think one of the main challenges people encounter when they start streaming is the endless pursuit of stream quality. Now, stream quality can mean a few things. The quality of the content, the production quality, or the quality of the streaming feed itself. While the first two are very important, people aren’t going to stick around your stream if the video is pixelated and or lags every few seconds. So today we’re going to talk about stream quality or actually how to properly encode your stream to improve the quality of your live stream.

Encoders

What are encoders? Encoders basically take whatever you’ve put together in your streaming software, (gameplay, face cam, audio), and compress it to send it out to the internet. This compression part is what takes most of the work for XSplit Broadcaster and it’s a big factor in improving live stream quality. It is either done by your CPU via X264 and is called software encoding or your GPU via NVENC, VCE or Quicksync and is called hardware encoding.

For a long time, X264 was the absolute best at this encoding process, but now NVENC has established itself on newer NVIDIA RTX (and some GTX) GPUs it is able to go toe to toe with it. This is why in the PC Building guide (below), I recommended buying a GPU for encoding rather than an expensive CPU until you know, crypto mining ruined everything.

Resolution and Frame Rate

So you’re probably wondering, what makes the encoder work so hard? Well, the answer is the resolution and frame rate. The higher the resolution and the faster the frame rate means the encoder has to process more images at larger sizes, something that makes a difference when it comes to improving your live stream quality.

With X.264, you need to slow down the preset in order to maintain the image quality for higher resolutions and frame rates. In XSplit Broadcaster you’ll find these presets, very fast, faster, fast, medium, and slow by heading to…

Broadcast > Clicking the cog next to your stream output > Clicking the cog in the Video Encoding section > Encoder Preset

The problem is when you use these presets, CPU usage rises exponentially which will affect your gameplay drastically unless you’re using a 2 PC streaming setup or aren’t streaming gameplay at all.

Alternatively, on hardware encoders, there tend to be chips dedicated only to encoding, which will limit the amount they’ll affect things like your games’ frame rate. If you have to use your CPU for encoding, it’s recommended that you get a CPU with as many cores as possible (up to 32 cores) to try to achieve the slow preset for 1080p 60fps streaming.

The equivalent would be an NVIDIA GPU with the latest NVENC encoder found in the RTX series of GPUs, which will match X264’s medium preset or even outperform it in some instances. You can also use the older NVENC, VCE, and Quicksync for streaming, but you won’t be able to match the performance of the current NVENC or X264…. yet.

Multiple people sit infront of a long table, all of them on either side, side by side playing in a large scale gaming tournament. The producers of the stream are no doubt looking for a way to improve their live stream quality.
Photo by Stem List on Unsplash

Motion and Bitrate

No matter the encoder you choose, what has the biggest effect on improving your live stream quality is bitrate. Bitrate is basically the internet upload budget you set for the video and audio quality output. The higher the better. Thankfully audio doesn’t require too high of an audio bitrate, leaving most of your budget to video. Now, this is where motion comes into play.

The more motion on the screen, be it from the number of frames per second or just things happening on screen, like supers from a fighting game, or rapid movement from a first-person shooter, the more your video bitrate budget is spread thin. That’s why for games with a lot of motion it’s generally recommended to set your stream resolution and/or FPS lower.

Now your bitrate is determined by two factors, your available internet bandwidth, and the streaming platform. For streaming platforms like Twitch, Twitter, or Facebook they all limit the available bandwidth, usually around 6000 Kbps. Why do they do this? Well because the larger the amount of bandwidth used, the higher their bills are.

Your available bandwidth is determined by your internet connection. You can find this by doing a simple speed test. This can vary during high traffic periods, but generally when setting your bitrate try not to use more than 70% of your available bandwidth so that you won’t have issues with your online games. Also, be sure to connect your stream machine via a wired connection if you can as it can make a huge difference in improving your live stream quality!

The general rule is to set your bitrate as high as your internet connection and the streaming platform allows. If on a limited connection, try lowering your resolution and frame to accommodate for the lower bitrate.

A person photographed from side on with an RGB gaming headset streaming at an improved live stream quality on their PC with a large monitor in frame.
Photo by Sean Do on Unsplash

Lag, Stuttering, Frame Drops

Lag is an interesting term, especially when it comes to streaming, but generally, there are two types of lag that can happen with encoding. The first type of lag is experienced on the viewer’s end, this is where their stream stutters or lags, sometimes even go offline and back online as well. At your end as the streamer, you can see this problem as well as dropped frames. This usually happens for two reasons.

1) The bitrate was set too high. As mentioned before, do a speed check before setting your bitrate. Now you may have set this bitrate before and it was fine, but as I mentioned, sometimes ISPs have high traffic periods or there’s some network maintenance going on that will affect your overall bandwidth. The best solution is to lower the bandwidth of your stream. If this continues to be a problem, try getting in contact with your ISP.

2) The streaming server is having issues. Main sites like Twitch have dedicated streaming servers for different regions, but sometimes these have issues. The best solution is to go offline and change servers. If this is a recurring problem, do a bandwidth check to determine if the server you plan to stream to is stable before going live.

You can easily change servers on XSplit Broadcaster by going to…

Broadcast > Clicking the cog next to your stream output > under “Server” change Automatic (or whatever server you have selected) to the next closest server to your region.

For Twitch, for example, a good way to determine this is to check here which will list the servers closest to you in order.

A person viewed from behind with a gaming headset on playing Fornite they're probably looking for a way to improve live stream quality as well.
Photo by Priyam Raj on Unsplash

The next type of lag can sometimes be seen by the viewers but is usually felt or seen by the streamer if they are playing games. This is generally known as overloading your stream encoder. Basically, you are trying to encode video in a manner that your encoder can’t handle and is very common when encoding with x264. Basically, your PC is fighting for resources from the CPU, which causes frames to drop on stream and performance to be affected on programs running on the PC.

The best way to resolve this is by lowering the encoding settings as we discussed above, the main culprit is usually setting the X264 preset to higher. If that doesn’t resolve it, then lower the resolution and or frame rate.

So to wrap up, for good stream quality in terms of proper encoding, try to use hardware encoders. Know your internet and platform limitations. Lower settings if you’re having problems. We hope this helps you out but if there are any other topics you’d like us to discuss here just drop us a comment on this post!

How to Host A Live Talkshow or Podcast: Actionable Tips

Hosting a podcast or a live talk show is something I have a bit of experience with and honestly, the live element is probably the most exciting part for me! I’ve hosted TV shows, live stages, interviewed a bunch of people in a live environment, and been a part of a number of podcasts. With all this, I have developed some hosting tips and experience that I think will help make your life easier when it comes to doing it yourself!

Research!

This is probably one of the biggest elements a lot of people tend to skip and the thing that can make your life easier! The first thing I like to know if I have a guest is what are the key points they’re going to be discussing? By this, I mean what are you talking to them about. In my case, a lot of the time I was talking to game developers about a game that had either just come out or was set to be released so. So, key points there would be the name of the game, its release date, the platforms it’s releasing on, etc. There would also be other larger themes like a specific gameplay mechanic or theme they wish to highlight. Ideally, I’d find all this out long before the interview took place over emails with the person or a PR representative. Be sure to ask for this information, however, as it’s going to inform the run of show, something we’re going to discuss later in these hosting tips!

A person sat at their desk with headphones on and a microphone pointed at them on a boom arm. Hosting tips could be useful here!
Photo by ConvertKit on Unsplash

If the subject you’re going to be discussing is a piece of media, my hosting tip would be to make sure you consume that media! As I said, a lot of my guests were game developers so, ideally, make sure you play the game before you talk to the developer! Or you know, watch the film, listen to the album, read the book, etc. If you can’t, for whatever reason (it’s not released yet, it’s not even finished, etc) then be sure to tailor your interview to that and ask the appropriate questions based on your genre knowledge. Now, you won’t always have that depth of knowledge already on the subject you’re discussing but this is something you can research as well so you are at least grounded in the terminology you’re going to need to conduct your interview.

This, to me, is a key point because one of the two main jobs I believe you have as an interviewer is to inform the audience about the subject your interviewee is discussing. Most of the time, the person you are interviewing is perfectly capable of doing that themselves, but I believe when you’re dealing with a complicated subject it can be important for you to break down the answers people give. A classic example would be to say “So, you’re saying..” and quickly summarise what they’ve just said. I wouldn’t, however, do only that, try to say that and at least ask another question in relation to that, saving you from repeating the same point for those who did understand the answer given. Also, again, your own depth of knowledge is what is going to mean you knowing when something might be complicated and require that kind of explanation.

A person sits at a desk infront of a laptop and microphone with headphones on hosting a podcast after getting some hosting tips.
Photo by Soundtrap on Unsplash

Run of show

The run of show is one of the most important documents you can get and something I advise you make use of in these hosting tips! If you’re working with a producer, they may make this for you but if you’re pulling double duty you really should make one for yourself! The run of show is essentially a long list with some expanded details. Not only the interviewees’ name and social handles/websites want to go in there but so do the key points you’re going to want to hit. Another key thing you’ll want to have in here is timings.

So, for example, when I would host the Indie[dot]XSplit showcase stage at places like PAX we would have multiple guests on over the course of a day to discuss their different games. Everything would be timed out as we are only allowed in the convention center halls for a set time and the guests were also showing their games on other stages and at their own booths. Knowing how long your guest is booked to be there is important because you have to make sure everything sticks to these times, not only for your own show but as a courtesy to the guest. They don’t want to be late for everything they have to do that day because you let the interview run over.

One hosting tip that can be useful, if you’re working with a producer, is to have them display some of this information, as well as a clock, using XSplit Broadcasters projector mode. This is something we used to do for our shows, just a simple scene with this information on “finish at 14:30” and a clock so I can see how close to that time I am. This is then projected to a monitor which is being displayed in front of me on the stage! It saves having too much info in the form of notes and keeps you able to stay ahead of time. It’s also a great way for the producer to communicate anything to you live during an interview!

Two people sat across from eachother with microphones on a coffee table connected to a laptop as they sit on the floor. Hosting tips can help both people on a podcast!
Photo by Kate Oseen on Unsplash

Keep it positive and comfortable

So once you get to the day of your interview there are still a couple of hosting tips I can give you before you go live. Once your guest arrives, make sure you say hello to them and set the tone right from the start. You’re relaxed, positive and you know what’s going on and what’s going to be coming up in the interview. This is not only a professional courtesy but it will help someone who might be a little nervous getting interviewed in a live situation, possibly for the first time. Find out how they are doing, how the day is going, and double-check if there are any other key points than the ones you already have written down that they would like to make sure you hit in the interview.

Now when you get into the interview itself, you should introduce your guest so something to do before the interview is ask how to pronounce their name and what their pronouns are. You may think you know how to pronounce someone’s name, and you could well be right, but starting an interview off with the wrong name isn’t the best way to start. I’ve been guilty of saying a name wrong, I’ve even been guilty of the worse “introduce yourself”. This is, for you, easier, but for your interviewee, it’s putting them on the spot and not really giving them enough of a brief as to how much information they should be giving at that point. Always introduce the guest!

For me, keeping the tone conversational is the ideal way to go. I think an interview should feel a bit like a chat more than a prescribed set of questions going one after another. This, to me, means not holding yourself to where you think the interview should go, if everyone is having fun discussing something and it’s still serving the point of the interview, follow that! If something funny is said and your guests are having fun, stick with it! Don’t forget your key points, however, as you need to keep the conversation on track and hitting the key points we discussed earlier.

A person sat facing their desktop computer with a microphone and boom arm attached to the desk, hosting tips could help level up their podcast!
Photo by ConvertKit on Unsplash

Keep the conversation going.

If the conversation does take too far of a shift away from the key points you’re there to discuss it’s your job to steer the conversation back. Ideally, you want to find a way to do that with what they’re saying but honestly, sometimes you just need to change the subject. Keeping that shift fun is important and it takes some experience but you’d be doing your interviewee a disservice by not doing that. Remember, everything you say should, ideally, be in service to what you’re there to discuss. Leave room for people to speak! Unless you’re telling an anecdote to relax the person you’re interviewing or to let them know “fun times are cool!”, it’s not your time to shine, it’s theirs!

It’s easy to try and fill time with a funny thing you want to say or going off on tangents purely because you’re enjoying them, but do remember why the person you’re talking to is there. And, why you’re there, which is as I said before to inform the audience but the second part of that is to get the best of the person you are interviewing. I truly believe that a big part of what an interviewer is there to do is show the person they are interviewing in their best light and leave the viewer/listener with the best impression possible.

One final, bonus hosting tip, from me, would be to always watch the people who inspire you or admire you in the interviewing field. To me, Graham Norton is one of the best in the world so I will always watch his chat show and listen to his radio show to get a sense of how he does what he does. Figure out what it is you really like about how they are interviewing people and then how you can incorporate that into your own personal style. I wouldn’t say it’s a great idea to emulate them but this kind of knowledge can help define your own style.

Online Team Building Tournaments: How and Why You Should Run One!

Team building is more important than ever with many working from home or in isolation. If you’ve ever been thinking about something else to do besides a Zoom happy hour we’re going to discuss how to put together an online tournament for team building. First things first, let’s discuss some tournament basics. There are basically four types of tournaments; Swiss, Round Robin, Free for All, and Elimination so let’s take a look at each!

Types of Tournaments

Swiss is generally reserved for tournaments like Chess or card games where opponents of similar skills are matched up against each other each round. This is great if you’re planning to do an office league or playing, for example, poker, you can control how long the tournament will take by setting the number of rounds, however, you may not get a clear winner unless you have a certain amount of rounds. Also, this system isn’t ideal if you don’t have many entrants in your tournament.

Round Robin has every player entered play against each other. This is a great format if you think you’ll have a handful of players. If you think you’ll have more than eight entrants, one of the other formats would work best as the number of rounds and length of the tournament can add up quite quickly.

Free for All is a format that can vary, but basically, it is focused on the number of points earned per round and is great for battle-royale style games like Apex Legends or Fortnite.

Finally, there’s elimination-style, which is the tournament format most are likely familiar with. This is a bracket-style tournament with a single elimination, which means one loss and you’re out. You could however do a double-elimination style which has an upper and a lower bracket. Once you’ve decided which kind of tournament you want to host, it’s time to use some tournament management software for your online team-building event.

Fortnite being played on a Nintendo Switch would be great for online team building.
Photo by Erik Mclean on Unsplash

Tournament Management Software

For this article we’re going to be looking at Challonge and Discord, both are free and give you a bunch of tools to work with. For Challonge you just need to fill out a few fields like the tournament format, the game being played, and the date/time. Make sure you put in detailed rules and instructions on how to report scores to prevent issues popping up down the line. This is especially important if people are new to tournaments and will save you a lot of time later on if there is some sort of dispute. Seriously, setting your rules is an important step to keep everything fair and most importantly, fun!

With Challonge you can opt to create a signup page people can use to fill in their details, or enter in the participants manually later yourself. One important thing when creating a tournament signup page is to create a form to collect important registration information like in-game name, Discord number, and the participants’ email address.

Next, we recommend setting up a Discord server to facilitate setting up matches easily and for the people taking part to report their results. You’ll only need a general text chat for this and you can set up roles if you will have people helping you run the tournament. You can also set up voice channels for your contestants if they’re playing a team-based game and will need to communicate. This is also useful as you will be able to quickly dip into a team’s voice channel if you need to tell them something important during the online team-building tournament. Once you’ve configured everything simply create an invite to the server and send it out to the participants and they’ll be able to download the Discord client and get going!

Someone sat on a sofa, pictured form behind, holding two Xbox controllers in front of a big screen tv, a setup that would be fun for online team building!
Photo by Humphrey Muleba on Unsplash

Running the Online Team Building Tournament

Running the tournament itself is pretty straightforward! On tournament day make sure your participants have checked in, they can do this just by dropping a message in Discord. This is useful as both you and they will know they’re ready to go! Next, you need to generate the bracket, which can be easily created on Challonge like we discussed earlier and will easily map out each round until the final. Once you’ve done that it will generate a link that you can drop in the Discord general chat for everyone to see who they are up against! You participants can post screenshots of their match results inside Discord and you just need to sit back and process the results to advance the bracket.

Live Streaming

Playing with co-worders is fun and all, but it’s even better if everyone can watch along and root for their fellow co-workers! Live streaming a tournament is easy depending on the game. If you’re playing any games that have a lobby or spectator mode then all you need to do is host the match, use XSplit Broadcaster and stream the gameplay from your online team building event. You can even use a text source and color matte sources to add some players’ names and scores.

You can find out how to setup XSplit Broadcaster on our YouTube channel

If you have some co-workers willing to do some commentary, you can create a voice channel in Discord and let them spectate and commentate over the gameplay by using XSplit Broadcasters virtual camera as a video source in Discord. This is easily done by just setting your camera source in Discord to be XSplit Broadcaster when you’re setting up a video call to them.

Picking the Game

One subject we’ve danced around is what game you should pick for your tournament. Well, first you need to know what your co-workers like to play, although to be honest it can sometimes be hard to find fellow gamers in your company! If your co-workers don’t play too many games it’s good to pick team games or easier games to grasp quickly and get playing like Overwatch or Street Fighter. If you don’t think your co-workers have a gaming PC or console then it’s good to go for free to play games or mobile games like chess or PUBG. If you’re planning to stream the matches it’s best to pick a game that has a spectator mode built-in like DOTA 2 or Mobile Legends.

That’s about all you need to know to get started with hosting a tournament within your organization or friendship group! I do have one bonus tip, though! Be sure to structure your tournament in a way so you can finish the whole thing in about three to four hours. You can do this by limiting entrants or picking a format with a set number of rounds like Swiss. The main thing, however, is to have fun and you’ll not only make a fun time for the people in the online team-building tournament but you’ll put on a fun show for everyone watching on the live stream!